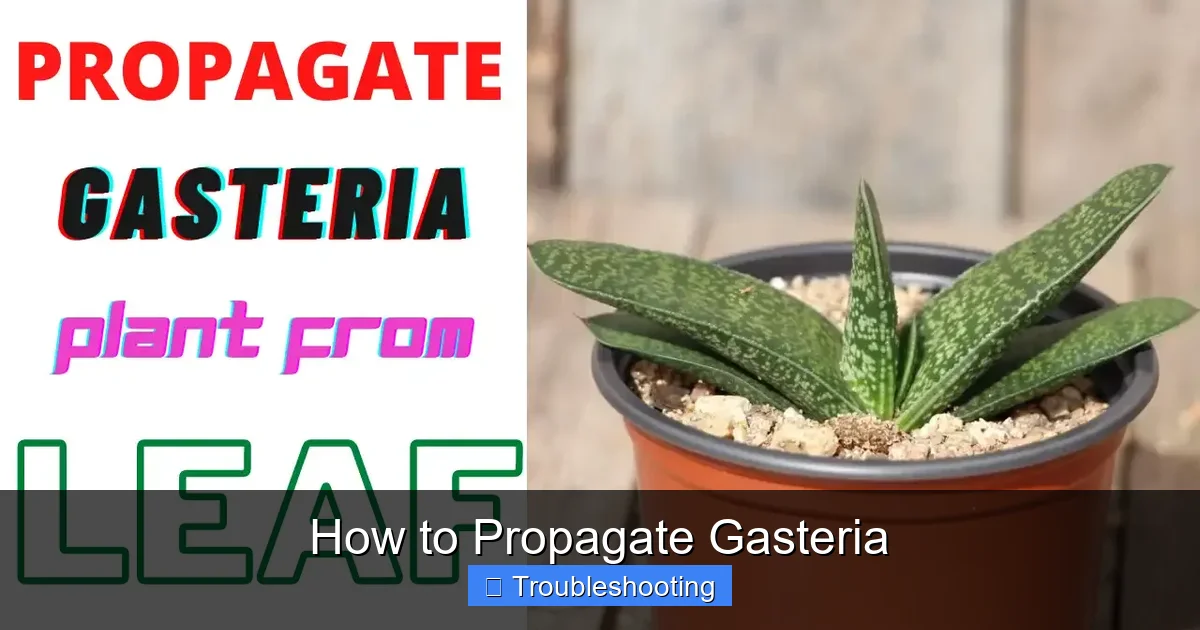
How to Propagate Gasteria
Gasteria propagation is simple and rewarding for any succulent lover. You can grow new plants from offsets, leaf cuttings, or seeds with high success rates. Follow our easy steps to expand your collection today.
Key Takeaways
- Offsets are easiest: Baby plants at the base root fastest and need minimal effort.
- Leaf cuttings work well: Healthy leaves form roots and new rosettes in a few weeks.
- Seeds take patience: Growing from seed is slow but lets you create unique hybrids.
- Callus before planting: Always let cut ends dry for a few days to prevent rot.
- Use gritty soil: A well-draining mix keeps roots healthy and stops fungal issues.
- Bright indirect light: New propagations need light but burn in harsh direct sun.
- Water sparingly: Mist lightly until roots establish then switch to soak-and-dry.
Quick Answers to Common Questions
Can you propagate Gasteria in water?
Yes you can root callused leaves or offsets in water. Suspend them so only the base touches. Change water weekly. Move to soil once roots are an inch long.
How long does Gasteria leaf propagation take?
Roots appear in three to four weeks. A visible baby rosette forms in eight to twelve weeks. Full independence takes four to six months.
Do you need rooting hormone for Gasteria?
No rooting hormone is not required. Gasteria roots readily on its own. Hormone can speed up the process slightly but is optional.
Why did my Gasteria leaf rot instead of root?
Rot usually happens when the cut end was not allowed to callus fully or when the soil stayed too wet. Always let cuts dry for several days and use gritty well-draining mix.
When is the best time to separate Gasteria pups?
Spring is ideal when the plant is actively growing. Pups should be at least one inch wide with several leaves and preferably some roots of their own.
📑 Table of Contents
- Introduction
- Understanding Gasteria Growth Habits
- Method One: Propagating From Offsets
- Method Two: Propagating From Leaf Cuttings
- Method Three: Growing From Seed
- Essential Tools And Materials
- Aftercare For New Propagations
- Troubleshooting Common Problems
- Advanced Tips For Higher Success
- Seasonal Propagation Calendar
- Creative Uses For Your New Plants
- Conclusion
Introduction
Gasteria plants are charming little succulents. They have thick tongue-shaped leaves. Many show pretty white spots or bands. They tolerate low light better than most succulents. This makes them perfect for indoor growing. If you own one you likely want more. The good news is learning how to propagate Gasteria is very easy. You do not need fancy tools. You do not need a greenhouse. A sunny windowsill and some patience work fine.
This guide covers every method. We start with the fastest way using offsets. Then we move to leaf cuttings. Finally we touch on growing from seed. Each section gives clear steps. We also share common mistakes to avoid. By the end you will feel confident multiplying your plants. Let us dig in and get your hands dirty.
Understanding Gasteria Growth Habits
Before you start it helps to know the plant. Gasteria grows in clumps. A mother plant sends out babies at her base. These babies are called offsets or pups. They share the root system at first. Over time they grow their own roots. This clumping habit is your best friend. It means the plant wants to multiply. You just help it along.
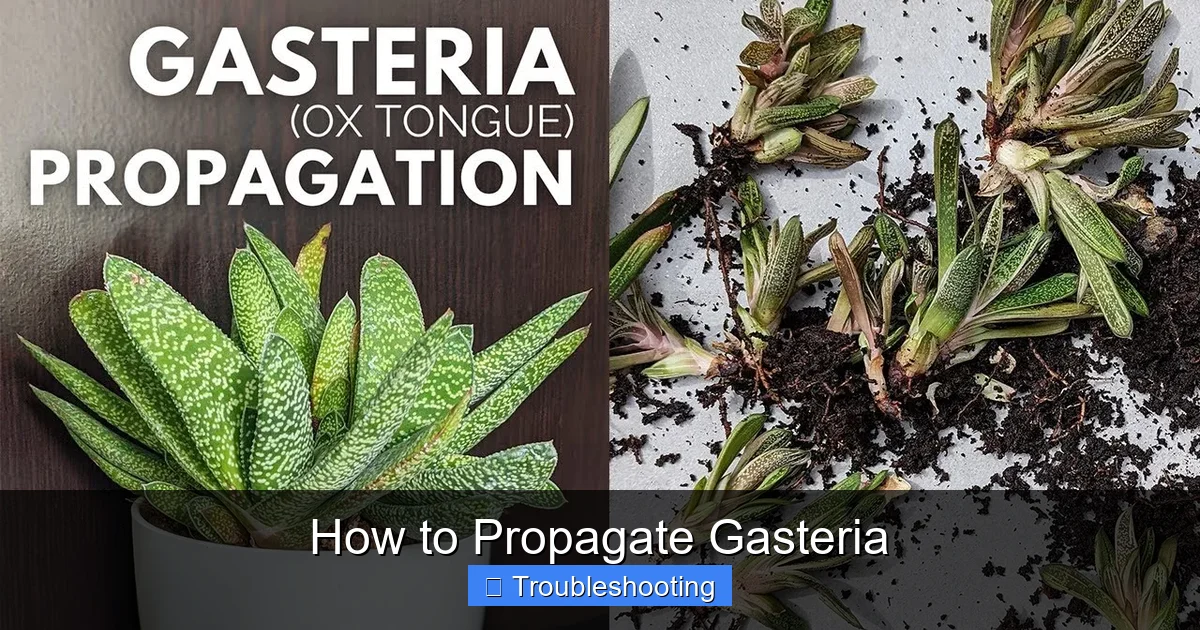
Visual guide about How to Propagate Gasteria
Image source: i.ytimg.com
Leaf Structure Matters
Gasteria leaves are thick and fleshy. They store water for dry times. This tissue makes leaf propagation possible. A single leaf holds enough energy to grow a whole new plant. The leaves are also fairly rigid. They snap off cleanly if you twist gently. Clean breaks heal faster than torn tissue. Keep this in mind when you harvest material.
Seasonal Timing
Spring and early summer are ideal. The plant is in active growth. Roots form quickly in warm soil. Light levels are increasing. Avoid propagating in deep winter. Growth slows down. Cuttings may sit idle for months. They can rot while waiting. If you must propagate in winter use a heat mat. Provide grow lights for twelve hours daily.
Method One: Propagating From Offsets
This is the most reliable method. It is also the fastest. The offset already has a head start. It may even have tiny roots. You basically separate and pot up. Success rates are near one hundred percent.
Step 1: Identify Ready Offsets
Look at the base of your plant. You will see small rosettes tucked against the mother. Good candidates are at least one inch wide. They should have several leaves. Tiny nubs without leaves are not ready. Wait until they look like mini versions of the adult.
Step 2: Remove the Clump
Gently unpot the whole plant. Shake off excess soil. You want to see the connection points. Use your fingers to tease roots apart. Do not pull hard. If roots are tangled use a clean knife. Cut the connecting tissue. Each offset should keep some roots if possible.
Step 3: Let Them Callus
Place offsets on a dry towel. Keep them in bright shade. Wait two to three days. The cut ends will form a dry seal. This seal blocks bacteria and fungus. Skipping this step invites rot. Patience here saves heartbreak later.
Step 4: Pot Up
Use small pots with drainage holes. Fill with gritty succulent mix. Make a shallow hole. Nestle the offset in. Barely cover any roots. Do not bury the leaves. Press soil gently to stabilize. Do not water yet.
Step 5: First Watering
Wait three more days. Then give a light drink. Water the soil not the leaves. Place in bright indirect light. New growth appears in two to four weeks. That signals roots have taken hold. Now you can treat it like a mature plant.
Method Two: Propagating From Leaf Cuttings
Leaf cuttings are fun and productive. One leaf yields one new plant. A healthy Gasteria has many leaves. You can make a whole tray of babies. This method takes longer than offsets. Expect roots in three weeks. A new rosette forms in eight to twelve weeks.
Choosing The Right Leaves
Pick plump firm leaves from the middle ranks. Lower old leaves may be tired. Upper young leaves are too small. Middle leaves have peak energy. Avoid leaves with spots, scars, or pests. Gently twist the leaf sideways. It should pop off clean at the base. A clean break is crucial. Leave no piece on the stem.
Callusing The Leaves
Lay leaves flat on a paper towel. Keep them indoors in bright shade. Do not put them on soil yet. Do not mist them. Wait four to seven days. The cut end turns tan and hard. This is the callus. It feels dry and slightly rough. Now the leaf is ready for soil.
Setting Up The Propagation Tray
Use a shallow tray. Fill with two inches of moist gritty mix. A blend of fifty percent pumice and fifty percent coco coir works well. Press the surface flat. Lay leaves on top. Do not bury them. Just rest them. The callused end should touch the mix. Space leaves an inch apart.
Care During Rooting
Place the tray in bright indirect light. A north window or filtered south window works. Keep temperatures between seventy and eighty degrees. Mist the soil surface every three days. Do not soak. The leaf uses its stored water. Roots seek moisture in the mix. Tiny pink or white roots appear first. Then a microscopic rosette forms at the leaf base.
Transitioning To Pots
Once the baby rosette has four leaves move it. The mother leaf will shrivel. That is normal. Gently lift the baby. Pot into its own small container. Use the same gritty mix. Water lightly. Gradually increase light exposure. In a few months you have a sturdy juvenile plant.
Method Three: Growing From Seed
Seed propagation is a long game. It takes one to three years for a decent specimen. But it is the only way to get new hybrids. It also lets you grow rare species. If you love surprises this path is for you.
Sourcing Fresh Seeds
Buy from reputable succulent seed sellers. Fresh seed germinates best. Seed older than one year drops in viability. Avoid mystery packets on big marketplaces. Look for harvest dates. Some growers hand-pollinate their plants. Those seeds offer known parentage.
Sowing Medium
Use a sterile fine mix. One part sifted coir one part fine pumice. Moisten until barely damp. No soggy spots. Fill a clear-lidded container. A salad box or zip bag works. Sprinkle seeds on top. Do not cover them. Gasteria seeds need light to germinate.
Germination Conditions
Seal the container. Place under grow lights or bright shade. Twelve hours of light daily. Temperature seventy-five to eighty degrees. Open the lid daily for five minutes. This prevents mold. Mist if the surface looks dry. Germination starts in ten days. It can continue for six weeks. Be patient.
Seedling Care
Tiny seedlings look like green dots. Keep humidity high for two months. Then gradually vent the lid. After three months remove the lid fully. Water by bottom soaking. Let the tray sit in water ten minutes. Drain well. Fertilize at quarter strength monthly. Transplant to individual pots at six months.
Essential Tools And Materials
You do not need much. Having the right items makes the job smooth. Here is a checklist.
Cutting Tools
A sharp clean knife or scalpel. Scissors work for leaves. Sterilize with rubbing alcohol between cuts. This stops disease spread. A clean break heals faster than a crush.
Containers
Small plastic pots two to three inches wide. Shallow trays for leaf cuttings. Clear lids or zip bags for seeds. All must have drainage holes. Reuse yogurt cups if you poke holes.
Growing Medium
Commercial cactus mix works but add extra grit. Aim for fifty percent inorganic material. Pumice, perlite, or coarse sand. This ensures instant drainage. Wet feet kill succulents fast.
Rooting Hormone Optional
Powdered rooting hormone speeds things up. Dip callused ends before planting. It is not required. Gasteria roots easily on its own. Use it if you want insurance.
Labels And Marker
Write the date and parent plant name. Use plastic tags and pencil. Fade-proof markers wash off. You will thank yourself in six months.
Aftercare For New Propagations
The first month is critical. Treat babies differently than adults. They have limited roots. They cannot handle drought or flood.
Light Requirements
Bright shade for week one. Morning sun is okay after roots show. No harsh afternoon sun. Etiolation means too little light. Red edges mean too much. Adjust gradually.
Watering Schedule
Mist every three days for leaf cuttings. Offsets get a light pour after one week. Seeds stay humid under lid. Never let soil bone dry for weeks. Never let it stay soggy. The soak-and-dry method starts once the plant is established.
Fertilizing Young Plants
Skip fertilizer for the first two months. The seed leaf or mother leaf feeds the baby. After that use diluted cactus fertilizer. One quarter strength once a month. Stop in fall.
Potting Up
Move to a slightly larger pot when roots fill the current one. Usually six to twelve months. Go up only one size. Too much soil stays wet too long.
Troubleshooting Common Problems
Even with care things go wrong. Here are fixes for the usual suspects.
Rotting Cuttings
Black mushy base means rot. Usually from watering too soon. Or no callus formed. Discard the cutting. Sterilize the tray. Start fresh with longer callus time.
Leaves Drying Up
Leaf shrivels before roots form. Air too dry or light too intense. Increase humidity with a loose bag. Move to shadier spot. Mist more often.
No Roots After Weeks
Cold temperatures slow roots. Use a heat mat. Check that the callus touched soil. Sometimes the leaf callused over too thick. Slice a tiny sliver off the end and re-callus.
Mold On Soil
White fuzz means too wet and stagnant air. Remove moldy top layer. Increase airflow. Cut back misting. Sprinkle cinnamon as natural fungicide.
Pests
Mealybugs love tender new growth. Check leaf axils weekly. Dab with alcohol on a cotton swab. For heavy infestation use neem oil spray. Isolate affected plants.
Advanced Tips For Higher Success
These tricks separate beginners from pros.
Use A Heat Mat
Bottom heat of seventy-five degrees doubles root speed. Especially helpful in winter. A simple reptile mat works fine.
Try Water Propagation
Suspend callused leaf over water. Roots grow down into the jar. Fun to watch. Transfer to soil once roots are an inch long. Change water weekly.
Make A Humidity Dome
Cut the bottom off a clear soda bottle. Place over a potted offset. Vent the cap. Creates a mini greenhouse. Remove once new growth appears.
Experiment With Leaf Sections
Cut a leaf into three inch segments. Let all cuts callus. Lay horizontally on soil. Each piece can form a plant. More babies per leaf.
Track Your Results
Keep a propagation journal. Note date, method, parent plant, and outcome. Patterns emerge. You learn what works in your conditions.
Seasonal Propagation Calendar
Timing affects success. Here is a rough guide.
Spring Prime Time
March through May. Offsets separate easily. Leaf cuttings root in three weeks. Seeds germinate fast. Do your bulk work now.
Summer Maintenance
June through August. Growth continues. Watch for heat stress. Shade propagations during heat waves. Water a bit more often.
Fall Slow Down
September through October. Still okay for offsets. Leaf cuttings take longer. Start seeds only with grow lights and heat.
Winter Rest
November through February. Best to wait. If you must propagate use artificial light and heat. Expect slow results.
Creative Uses For Your New Plants
Now you have a surplus. What next?
Gifts And Swaps
Pot up in cute cachepots. Give to friends. Trade at plant swaps. Gasteria makes a great starter succulent.
Dish Gardens
Combine several offsets in a shallow bowl. Add rocks and top dressing. Instant miniature landscape.
Hybridizing
Hand pollinate flowers. Collect seeds. Grow unique crosses. Name your own cultivars. It takes years but is deeply rewarding.
Sell Or Donate
Local nurseries may buy healthy starts. Fundraisers love plant sales. Check local regulations first.
Conclusion
You now know how to propagate Gasteria three ways. Offsets give instant gratification. Leaf cuttings multiply your stock. Seeds open a world of variety. Each method is straightforward. The keys are clean cuts, patient callusing, gritty soil, and restrained watering. Start with one offset this weekend. Watch it grow. Success builds confidence. Soon you will have a whole colony. Share the extras. Spread the succulent joy. Happy growing.
Frequently Asked Questions
How often should I water Gasteria cuttings?
Mist the soil lightly every three to four days until roots establish. Once the new plant shows growth switch to a thorough soak then let the soil dry completely before watering again.
Can I propagate Gasteria from a broken leaf?
Only if the leaf broke cleanly at the base with no tear. Ragged edges invite rot. Let the break callus for a week then place on gritty mix. Success rates are lower than with clean pulls.
What soil mix is best for Gasteria propagation?
Use a fifty-fifty blend of cactus soil and pumice or perlite. The mix must drain instantly. Wet soil kills cuttings faster than anything else.
Do Gasteria seedlings need fertilizer?
Not for the first two months. The seed leaves provide nutrients. After that apply a quarter-strength cactus fertilizer once a month during active growth.
How much light do Gasteria propagations need?
Bright indirect light is perfect. Direct sun burns tender new leaves. A north-facing window or a few feet back from a south window works well. Grow lights at twelve hours daily are great too.
Can I put multiple Gasteria offsets in one pot?
Yes you can plant several offsets together for a fuller look. Just ensure the pot has drainage and the soil is gritty. They will form a clump naturally over time.