Chives Soil Mix Recipe
Create the ideal chives soil mix recipe with our expert guide covering drainage, nutrients, and pH balance. Master container and garden growing for flavorful harvests all season long.
Growing chives is one of the most rewarding things you can do in your kitchen garden. These hardy perennials come back year after year. They give you fresh onion flavor for months. But here is the secret. The soil makes all the difference. A good chives soil mix recipe sets your plants up for success. It determines how big they get. It affects how long they produce. It even changes the flavor.
I have grown chives in all kinds of setups. Raised beds. Window boxes. Terracotta pots. Fabric grow bags. Even a repurposed wheelbarrow once. The plants that thrived shared one thing. They had the right soil from day one. The ones that struggled? Usually the soil was too heavy. Or too sandy. Or devoid of life. Let me walk you through everything I know about creating the perfect growing medium for these wonderful herbs.
Key Takeaways
- Well-draining soil is essential: Chives hate wet feet and need a mix that drains quickly while retaining some moisture.
- Target a pH of 6.0 to 7.0: Slightly acidic to neutral soil allows chives to absorb nutrients efficiently.
- Add organic matter for nutrition: Compost or aged manure provides slow-release nutrients for continuous harvests.
- Container mixes need extra drainage: Add perlite or coarse sand to prevent compaction in pots.
- Refresh soil annually: Top-dress with compost or repot to maintain soil structure and fertility.
- Avoid heavy clay soils: Amend garden clay with organic matter and grit to improve texture for chives.
- Test before you plant: A simple soil test saves guesswork and prevents nutrient imbalances.
Quick Answers to Common Questions
What is the best soil mix ratio for chives in containers?
Use two parts potting soil, one part compost, and one part perlite or coarse sand for optimal drainage and nutrition in containers.
Do chives need acidic or alkaline soil?
Chives prefer slightly acidic to neutral soil with a pH between 6.0 and 7.0 for best nutrient uptake and growth.
Can I use regular garden soil for potted chives?
No, garden soil compacts in containers and lacks proper drainage. Always use a lightweight potting mix designed for containers.
How often should I refresh the soil for perennial chives?
Top-dress with compost annually in spring and divide plants every three to four years with fresh soil mix.
What causes chives to turn yellow in good soil?
Yellowing usually indicates overwatering, poor drainage, or nutrient deficiency. Check moisture levels first, then consider a light feeding.
📑 Table of Contents
- Understanding What Chives Need From Soil
- Building Your Base Chives Soil Mix Recipe
- Adapting the Recipe for Containers
- Adapting the Recipe for Garden Beds
- Specialty Mixes for Specific Situations
- Maintaining Soil Health Over Time
- Troubleshooting Common Soil Problems
- Seasonal Adjustments to Your Mix
- Advanced Tips for Exceptional Results
- Budget-Friendly Mix Options
- Common Mistakes to Avoid
- Conclusion
Understanding What Chives Need From Soil
Chives belong to the allium family. They share DNA with onions, garlic, and leeks. But they have their own personality. Their root system is fibrous and shallow. Most roots sit in the top six to eight inches of soil. This means they need moisture near the surface. But they absolutely cannot sit in water. Wet roots rot fast.
The Goldilocks Zone for Moisture
Think of a wrung-out sponge. That is the moisture level chives love. Damp but not dripping. The soil should hold water long enough for roots to drink. Then excess must drain away within minutes. If you squeeze a handful and water streams out, it is too wet. If it crumbles to dust, it is too dry. You want it to hold its shape briefly then break apart with a gentle poke.
Nutrient Needs Are Modest But Steady
Chives are not heavy feeders like tomatoes. They do not need rich, nitrogen-loaded soil. Too much nitrogen gives you lush leaves but weak flavor. You want moderate fertility. A steady supply of balanced nutrients. Think slow release. Think organic. Compost is perfect. It feeds the soil life. The soil life feeds the plants. This cycle creates the complex flavors that make homegrown chives special.
pH Preferences Explained
Chives prefer slightly acidic to neutral soil. The sweet spot is 6.0 to 7.0 on the pH scale. Outside this range, nutrients lock up. Iron becomes unavailable in alkaline soil. Phosphorus locks up in acidic soil. The plants show stress. Yellowing leaves. Stunted growth. Poor flavor. A simple pH meter or test kit costs very little. It saves months of frustration.
Building Your Base Chives Soil Mix Recipe
Let us start with a master recipe. This works for most situations. You can tweak it based on what you have available. The ratios matter more than the exact ingredients.
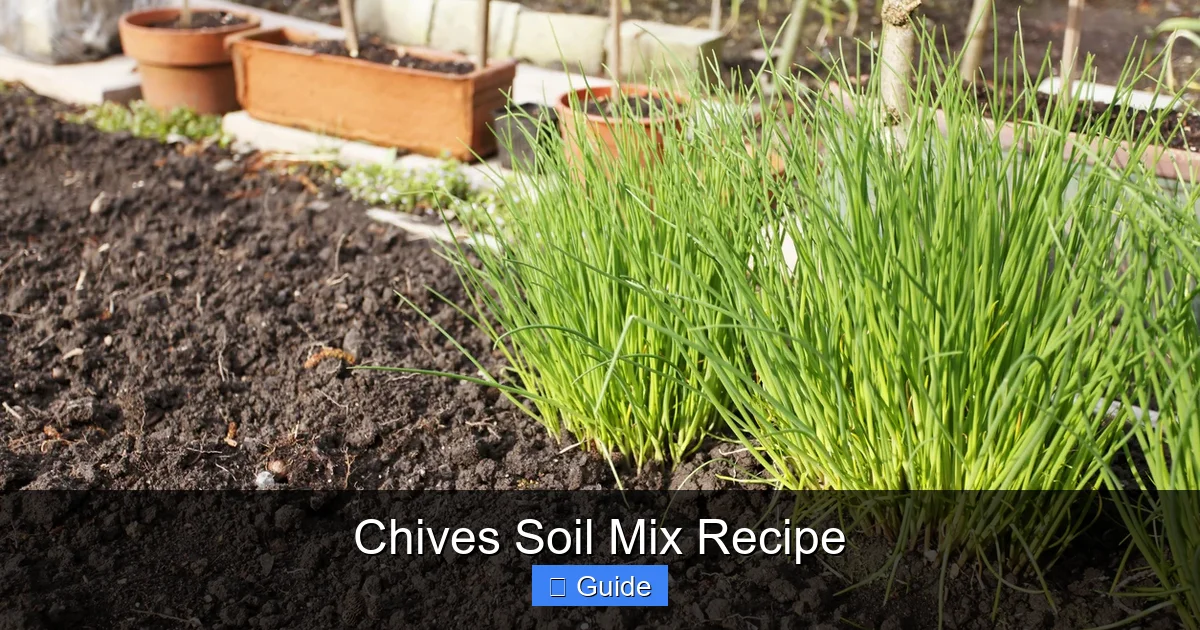
Visual guide about Chives Soil Mix Recipe
Image source: foodgardening.mequoda.com
The Classic Three-Part Mix
This is my go-to blend. It balances drainage, moisture retention, and nutrition. Mix these three components thoroughly:
- One part high-quality potting soil or garden loam: This provides structure and mineral content. Avoid cheap fillers full of bark chunks.
- One part compost: Homemade is best. Bagged works fine. Look for dark, crumbly, earthy-smelling material. No recognizable chunks.
- One part drainage amendment: Perlite, coarse sand, or fine pumice. This creates air pockets. Roots need oxygen as much as water.
That is it. Three equal parts. Mix in a wheelbarrow or on a tarp. Break up clumps. Remove sticks and stones. The result should feel light and fluffy. It should smell like a forest floor after rain.
Why Each Component Matters
The potting soil or loam gives body. It holds the recipe together. It provides trace minerals. Clay particles in loam hold nutrients. Sandy particles create drainage. Good potting soil balances both.
Compost is the engine. It feeds beneficial microbes. These microbes break down organic matter into plant-available nutrients. They also protect roots from pathogens. Compost improves soil structure over time. It creates aggregates. These are crumbs of soil held together by microbial glue. Aggregates create the perfect pore space for air and water.
The drainage amendment prevents compaction. Perlite is lightweight volcanic glass. It holds water on its surface but not inside. Coarse sand adds weight and stability. Pumice is porous rock that holds some moisture while draining fast. Any of these work. Choose based on availability and cost.
Adapting the Recipe for Containers
Containers create unique challenges. Soil in pots behaves differently than soil in the ground. It dries faster. It heats up more. It has limited volume. The chives soil mix recipe needs adjustments.
Increase Drainage for Pots
Change the ratio to two parts base mix, one part extra drainage. So if your base is three gallons, add one and a half gallons more perlite or pumice. This prevents the dreaded perched water table. That is when water sits at the bottom of the pot. Roots rot there first.
Also consider the pot material. Terracotta breathes. Plastic retains moisture. Fabric pots air-prune roots. Each changes how the mix performs. Terracotta needs slightly more moisture retention. Add a bit more compost or coconut coir. Plastic needs more drainage. Fabric pots dry fast. They benefit from a touch of vermiculite for water holding.
Add Slow-Release Fertilizer
Container nutrients leach with every watering. Mix in a balanced organic fertilizer at planting. Look for something like 4-4-4 or 5-5-5. Follow package rates. A tablespoon per gallon of soil mix is a good rule of thumb. This feeds steadily for three to four months. Then top-dress with compost or liquid feed.
Consider Water Retention Crystals
Hydrogels absorb hundreds of times their weight in water. They release it slowly as soil dries. A teaspoon per gallon of mix helps in hot climates. But do not overdo it. Too much creates a soggy gel layer. Roots hate that. Use sparingly.
Adapting the Recipe for Garden Beds
In-ground planting offers more forgiveness. The soil volume is huge. Temperature swings are moderated. But native soil varies wildly. You must assess and amend.
Test Your Native Soil First
Dig a hole twelve inches deep. Take a slice from the side. Send it to a lab or use a home kit. You need to know texture, pH, and nutrient levels. This tells you exactly what to add. Guessing wastes time and money.
Amending Clay Soil
Heavy clay holds nutrients well but drains poorly. Chives will rot in wet clay. The fix is organic matter. Lots of it. Spread three to four inches of compost over the bed. Work it in eight to twelve inches deep. Do this annually. Over years, clay transforms into rich loam. Add coarse sand or fine gravel if drainage is truly terrible. But organic matter is the real key.
Amending Sandy Soil
Sand drains instantly. Nutrients wash away. Chives starve. The fix is also organic matter. Compost acts like a sponge in sand. It holds water and nutrients. Add three to four inches and work it in. Consider adding clay-based soil conditioner. Some products contain bentonite. This permanently improves water holding capacity.
Raised Bed Blend
Raised beds let you build perfect soil from scratch. Use a 50-30-20 mix. Fifty percent topsoil or loam. Thirty percent compost. Twenty percent drainage material. This creates a deep, fertile root zone. Chives love the depth. Their roots explore freely. Yields increase dramatically.
Specialty Mixes for Specific Situations
Sometimes you need a custom blend. Here are recipes for common scenarios.
Seed Starting Mix
Chive seeds are tiny. They need fine texture. No chunky bits. Mix two parts screened compost, one part vermiculite, one part coconut coir. Screen the compost through quarter-inch hardware cloth. This removes sticks and clumps. The result is a fine, uniform medium. Seeds make good contact. Germination improves.
Window Box and Shallow Container Mix
Shallow containers dry fast. They heat up fast. Increase moisture retention. Use two parts potting soil, two parts compost, one part perlite, one part vermiculite. The vermiculite holds water like a sponge. The extra compost adds body. Mulch the surface with fine straw or shredded leaves. This cuts evaporation in half.
Hydroponic and Semi-Hydro Transition Mix
Moving chives to hydroponics? Start with a soilless blend. Equal parts coconut coir and perlite. Rinse both thoroughly first. Coconut coir often contains salts. Perlite creates dust. Wash until water runs clear. This mix supports roots during transition. It holds moisture without drowning. It provides zero nutrients. You control everything through solution.
Overwintering Container Mix
Chives in pots need winter protection in cold zones. The mix must not freeze solid. Increase drainage to prevent ice damage. Use one part potting soil, one part compost, two parts perlite or pumice. The extra air space allows expansion during freeze-thaw cycles. Move pots to an unheated garage. Water monthly. They survive and bounce back fast in spring.
Maintaining Soil Health Over Time
A chives soil mix recipe is not a one-time thing. Soil is alive. It changes. You must steward it. Healthy soil means healthy plants for years.
Annual Top-Dressing Ritual
Every spring, scrape away the top inch of soil. Replace with fresh compost. Work it in gently with a hand fork. Do not disturb roots deeply. This refreshes nutrients. It reintroduces beneficial microbes. It improves structure. It is the single best thing you can do for perennial herbs.
Mulching Matters
Bare soil loses moisture. It grows weeds. It bakes in sun. It erodes in rain. Apply one to two inches of organic mulch. Straw, shredded leaves, grass clippings, pine needles. Keep mulch off the crown. Wet mulch against stems causes rot. Mulch breaks down slowly. It becomes future compost. It feeds the soil food web.
Divide and Refresh
Chives clumps get crowded. Every three to four years, dig them up. Divide into smaller sections. This is the perfect moment to refresh soil. Remove old mix. Add new blend. Replant divisions. You get more plants. You get revitalized soil. Everyone wins.
Cover Crops for Garden Beds
In winter, plant a cover crop. Crimson clover, winter rye, hairy vetch. These protect soil from erosion. They feed microbes with root exudates. They fix nitrogen (legumes) or scavenge nutrients (grasses). Cut them down in spring. Leave roots to decompose. Top becomes mulch. This builds soil fertility for free.
Troubleshooting Common Soil Problems
Even with a good recipe, issues arise. Know the signs. Act fast.
Yellowing Lower Leaves
Usually nitrogen deficiency. Or waterlogged roots. Check moisture first. Stick your finger two inches deep. Wet? Stop watering. Improve drainage. Dry? Feed with liquid fish emulsion or compost tea. Yellow tips with green base often mean potassium shortage. Wood ash or kelp meal helps.
Stunted Growth and Purple Tints
Phosphorus deficiency. Common in cold soil. Or pH too high or low. Test pH. Adjust with sulfur (lower) or lime (raise). Bone meal or rock phosphate adds phosphorus slowly. Warm the soil with black plastic in early spring. This jump-starts microbial activity.
White Crust on Soil Surface
Salt buildup. From synthetic fertilizers or hard water. Flush the pot. Water until it runs freely from drainage holes. Repeat three times. Switch to organic fertilizers. They do not leave salts. Rainwater or filtered water prevents recurrence.
Fungus Gnats Flying Around
They love wet, organic-rich soil. Let the top inch dry completely between waterings. Add a half-inch layer of sand or diatomaceous earth on top. This breaks their lifecycle. Sticky traps catch adults. Beneficial nematodes kill larvae. Do not overwater. It is the root cause.
Soil Repels Water
Hydrophobic soil. Common with peat-heavy mixes that dried out completely. Water runs down sides. Roots get nothing. Submerge the pot in a bucket until bubbles stop. Or add a few drops of liquid soap to watering can. It breaks surface tension. Long term, add more compost and coir. Less peat.
Seasonal Adjustments to Your Mix
The best gardeners adapt. Seasons change. Soil needs change.
Spring Wake-Up
As soil warms, microbes activate. Nutrients become available. Top-dress with compost. Add a balanced organic fertilizer. This fuels the first flush of growth. Chives emerge early. They need fuel ready.
Summer Heat Management
Hot weather stresses shallow roots. Increase mulch to three inches. Consider adding more vermiculite to surface layer. It cools roots. Water deeply but less frequently. This encourages deeper rooting. Morning water only. Wet leaves at night invite disease.
Fall Preparation
Stop fertilizing six weeks before frost. You want tough growth, not tender new leaves. Apply a thick compost layer. This insulates roots. It feeds slowly all winter. In containers, move to protected spot. Group pots together. Insulate with straw bales or bubble wrap.
Winter Dormancy Care
Chives go dormant in cold. Soil life slows. Do not water unless bone dry. Do not feed. Let them rest. In mild winters, they may stay green. Light harvests are fine. But do not push growth. Spring comes soon enough.
Advanced Tips for Exceptional Results
Want to go beyond good? These pro moves make a difference.
Inoculate With Mycorrhizae
Mycorrhizal fungi partner with roots. They extend root reach tenfold. They access phosphorus especially well. Sprinkle inoculant on roots at planting. Or water in a soluble form. One treatment lasts the plant’s life. The fungi multiply. They protect against drought and disease.
Brew Compost Tea
Aerated compost tea multiplies beneficial microbes. Spray on leaves and soil monthly. It suppresses foliar diseases. It boosts soil life. Use quality compost. Bubble with air stone for twenty-four hours. Add a touch of molasses and kelp. Use immediately. It does not store.
Practice Chop-and-Drop
When harvesting chives, leave the cut stems on the soil. They decompose in place. This returns nutrients directly. It mimics nature. It saves compost. It builds organic matter. Just chop into small pieces. They disappear in weeks.
Rotate Even Perennials
After five to seven years, move chives to a new spot. Soil-borne diseases build up. Nutrient profiles shift. Pests establish. A fresh start in refreshed soil resets everything. The old bed gets a different crop. Rotation breaks cycles.
Budget-Friendly Mix Options
Great soil does not require expensive bags. Get creative.
DIY Compost Is Free Gold
Kitchen scraps. Yard waste. Coffee grounds. Eggshells. Leaves. A simple pile or bin makes premium compost in months. Turn occasionally. Keep moist. The result beats any bagged product. And it costs nothing but patience.
Source Local Materials
Municipal compost facilities often sell bulk for cheap. Tree services give away wood chips. Farms have aged manure. Construction sites may have clean fill sand. Ask around. Build relationships. Your soil improves. Waste stays local.
Repurpose Old Potting Soil
Do not toss used container mix. Solarize it in black bags in summer sun. Heat kills pathogens. Then amend with fresh compost and perlite. It becomes better than new. The old roots create channels. The microbial diversity is established. It is mature soil.
Common Mistakes to Avoid
Learn from others’ errors. Save yourself the heartache.
Using Garden Soil in Pots
Never dig up yard dirt for containers. It compacts into concrete. It brings weeds, pests, diseases. It lacks drainage. It lacks aeration. Always use a designed mix. The few dollars saved cost you the crop.
Over-Fertilizing
More is not better. Synthetic fertilizers burn roots. They kill soil life. They create salt buildup. They force weak, watery growth. Flavor suffers. Stick to organic. Feed the soil, not the plant. Slow and steady wins.
Ignoring pH
Blind planting leads to mysterious failures. Chives look fine then stall. Leaves yellow. Growth stops. A five-dollar pH meter prevents this. Test once a year. Adjust gradually. Sudden pH shifts shock plants.
Letting Soil Dry Completely
Peat and coir become hydrophobic. Rewetting is a battle. Roots die in the dry pockets. Recovery takes weeks. Set a schedule. Check daily in heat. Use mulch. Use self-watering spikes if you travel. Consistency is everything.
Planting Too Deep
Chives crowns must sit at soil level. Buried crowns rot. Exposed crowns dry out. Plant at the same depth they grew in the nursery pot. Firm soil gently around roots. Water to settle. Mulch away from center.
Conclusion
Creating the perfect chives soil mix recipe is not complicated. It is about balance. Drainage and moisture. Nutrition and restraint. Structure and life. Start with the classic three-part blend. Adapt for your containers or garden. Maintain it with compost and mulch. Troubleshoot early. Adjust seasonally. Your chives will reward you with years of abundant, flavorful harvests.
Remember that soil is a living ecosystem. Treat it with respect. Feed the microbes. Protect the structure. Avoid chemicals that sterilize. The health of your soil equals the health of your plants equals the health of your food. It is all connected. That handful of dark, fragrant mix? It holds more life than the surface of the planet. Nurture it. And enjoy every snip of those vibrant green blades.
Now you have the knowledge. You have the recipes. You have the troubleshooting guide. Get your hands dirty. Mix a batch. Plant some chives. Taste the difference that good soil makes. Your kitchen will thank you. Your taste buds will cheer. And those little perennial onions? They will thrive for years to come.
Frequently Asked Questions
Can I grow chives in pure compost?
Pure compost retains too much moisture and lacks structure for chives. It can lead to root rot. Always blend compost with drainage materials like perlite or sand and a base of loam or potting soil.
Is coconut coir better than peat moss for chives?
Coconut coir is more sustainable and rewets easier than peat moss. Both work well in a chives soil mix recipe, but coir has a more neutral pH and better longevity in the mix.
Do chives need fertilizer if I use compost in the mix?
Compost provides slow-release nutrients, but container chives benefit from supplemental feeding. Apply a balanced organic fertilizer at planting and liquid feed monthly during active growth.
Can I reuse last year’s chives potting soil?
Yes, rejuvenate old mix by solarizing in black bags for two weeks, then amend with 30% fresh compost and 10% new perlite. This restores nutrients and structure for another season.
What is the minimum container depth for chives?
Chives need at least six inches of soil depth for their fibrous roots. Eight to twelve inches is ideal for robust growth and less frequent watering.
Should I add sand to my chives soil mix?
Coarse builder’s sand improves drainage in heavy mixes. Avoid fine play sand as it compacts. Use one part coarse sand per three parts total mix for in-ground beds with clay soil.