Pothos Care for Nursery
Master pothos care for nursery environments with this complete guide. Discover optimal lighting, watering schedules, soil mixes, and propagation techniques that professional growers use. Grow lush, vibrant pothos plants that thrive in any nursery setting.
Welcome to your complete guide on pothos care for nursery success. Whether you are a seasoned grower or just starting your plant journey, this article covers everything you need to know. Pothos plants are among the most popular choices for nurseries worldwide. They are beautiful, adaptable, and incredibly forgiving. Let us dive into the details that will help you grow stunning specimens every time.
Understanding pothos care for nursery environments means mastering a few core principles. Light, water, soil, and nutrition all play vital roles. When you get these basics right, your plants reward you with rapid growth and vibrant leaves. This guide breaks down each element into simple, actionable steps. You will learn professional techniques that save time and prevent common mistakes.
Key Takeaways
- Bright indirect light is ideal: Pothos thrives in filtered light but adapts to lower light conditions in nursery settings.
- Water when top inch of soil is dry: Overwatering is the number one killer; let soil dry slightly between waterings.
- Well-draining soil prevents root rot: Use a mix of peat, perlite, and orchid bark for optimal drainage and aeration.
- Regular feeding boosts growth: Apply balanced liquid fertilizer monthly during growing season for nursery-quality foliage.
- Easy propagation from cuttings: Snip 4-6 inch stems below nodes and root in water or soil for new plants.
- Watch for common pests: Inspect regularly for mealybugs, spider mites, and scale; treat early with neem oil.
- Pruning encourages bushiness: Trim leggy vines to promote fuller growth and maintain attractive nursery displays.
Quick Answers to Common Questions
How often should I water pothos in a nursery setting?
Water when the top inch of soil feels dry. This typically means every 5-7 days in summer and every 10-14 days in winter, but always check soil moisture first rather than following a fixed schedule.
What is the best soil mix for nursery pothos production?
Use two parts peat moss or coconut coir, one part perlite, and one part fine orchid bark. Add worm castings for gentle nutrition. This provides excellent drainage while retaining even moisture.
Can pothos grow in low light nursery conditions?
Jade pothos tolerates low light best, but all varieties grow slower and lose variegation in dim conditions. Bright indirect light (10,000-20,000 lux) produces the highest quality plants for sale.
How do I propagate pothos for nursery scale production?
Take 4-6 inch stem cuttings below a node, remove the bottom leaf, dip in rooting hormone, and root in water or a 50/50 perlite-peat mix. Pot up when roots reach 1-2 inches long.
What fertilizer program works best for nursery pothos?
Apply balanced water-soluble fertilizer (20-10-20 or similar) at half strength every two weeks during spring through fall. Reduce to monthly at half strength in winter. Flush monthly with plain water.
📑 Table of Contents
- Understanding Pothos Varieties for Nursery Production
- Light Requirements for Optimal Nursery Growth
- Watering Strategies for Healthy Root Systems
- Soil Mixes and Container Selection
- Fertilization Programs for Nursery Production
- Propagation Techniques for Nursery Scale
- Pest and Disease Management
- Pruning and Training for Market-Ready Plants
- Environmental Control for Year-Round Production
- Marketing and Selling Your Nursery Pothos
- Troubleshooting Common Nursery Problems
- Conclusion
Understanding Pothos Varieties for Nursery Production
Before diving into care specifics, it helps to know your varieties. Different pothos cultivars have slightly different needs. Recognizing these differences allows you to group plants efficiently in your nursery. This saves space and simplifies your care routine.
Golden Pothos (Epipremnum aureum)
Golden pothos is the classic variety everyone recognizes. It features heart-shaped leaves splashed with yellow variegation. This is the most vigorous grower of the group. It tolerates the widest range of conditions. For nursery production, golden pothos is your reliable workhorse. It roots quickly and fills pots fast.
Marble Queen Pothos
Marble queen shows stunning white and green marbled foliage. It grows slower than golden pothos due to less chlorophyll. This variety needs brighter light to maintain its variegation. In low light, new leaves may revert to solid green. Nursery growers should place marble queen in the brightest indirect light available.
Neon Pothos
Neon pothos glows with bright chartreuse leaves. This variety adds a pop of color to any nursery display. It prefers medium to bright indirect light. In deep shade, the neon color fades to a duller green. Keep neon pothos away from harsh direct sun which can scorch the vibrant foliage.
Jade Pothos
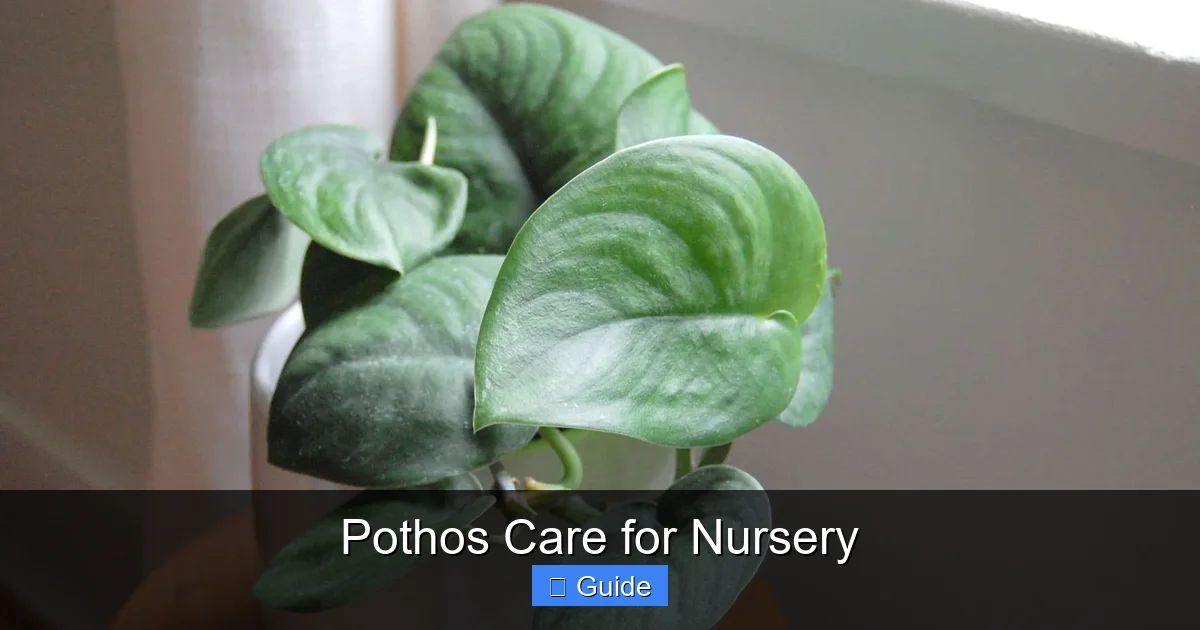
Jade pothos offers solid deep green leaves. It is the most shade-tolerant variety. This makes it perfect for lower-light nursery corners. Jade pothos grows steadily even in conditions that would slow other varieties. Use it to fill those tricky spots where other plants struggle.
Pearls and Jade Pothos
This patented variety features smaller leaves with white and gray-green variegation. It grows more compactly than other types. Pearls and jade is ideal for small pot production. Its slower growth means less frequent pruning. This variety commands premium prices in retail settings.
N’Joy Pothos
N’Joy shows distinct white patches on green leaves. The variegation pattern is more defined than marble queen. It stays relatively compact. N’Joy needs good light to keep its crisp variegation. Avoid over-fertilizing which can cause leaf burn on the white portions.
Light Requirements for Optimal Nursery Growth
Light drives everything in pothos care for nursery operations. It affects growth rate, leaf size, variegation, and overall plant health. Getting light right is the single most impactful factor you control.
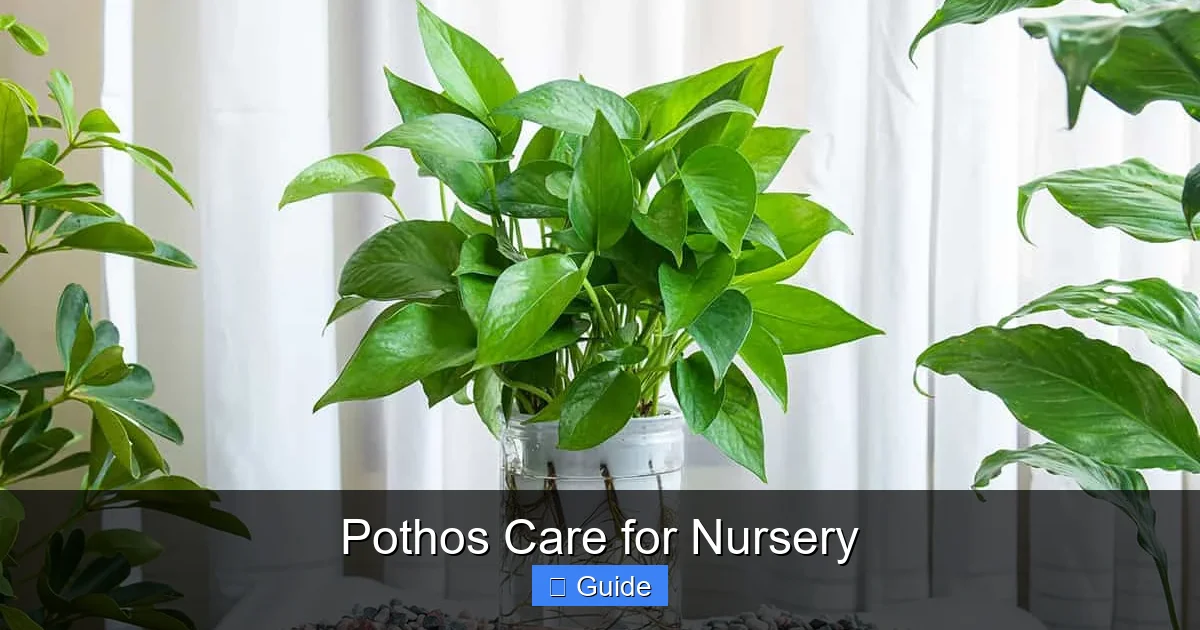
Visual guide about Pothos Care for Nursery
Image source: plantglossary.com
Ideal Light Levels
Bright indirect light is the sweet spot for most pothos varieties. Aim for 10,000 to 20,000 lux. This mimics the dappled forest floor light these plants evolved under. In a nursery, this means placing plants near east or north-facing windows. South or west windows work with sheer curtains or shade cloth.
Measuring Light in Your Nursery
Do not guess. Use a light meter or smartphone app. Take readings at plant level throughout the day. You will be surprised how much light levels drop just a few feet from a window. Map your nursery zones. Group plants by their light needs. This prevents stretching in low light and burning in high light.
Supplemental Lighting Options
Winter months or interior nursery areas often need supplemental light. LED grow lights are energy-efficient and run cool. Choose full-spectrum lights with a color temperature around 6500K. Position lights 12 to 18 inches above plants. Run them 12 to 14 hours daily. Use timers for consistency.
Signs of Light Problems
Learn to read your plants. Leggy growth with long internodes means insufficient light. Small, pale leaves also indicate low light. Variegated varieties losing their pattern need more light. Conversely, bleached or crispy leaf edges signal too much direct sun. Adjust placement gradually to avoid shock.
Seasonal Light Adjustments
Light intensity and duration change with seasons. In summer, you may need more shade cloth. In winter, remove shade and consider supplemental lighting. Rotate plants weekly for even growth. This prevents one-sided development common in nursery rows.
Light and Variegation Maintenance
Variegated pothos varieties are essentially chimeras. The white or yellow sections lack chlorophyll. They cannot photosynthesize. In low light, the plant compensates by producing more green tissue. This causes reversion. Maintain bright light to preserve those beautiful patterns your customers want.
Watering Strategies for Healthy Root Systems
Water management separates successful nurseries from struggling ones. Pothos prefers to dry slightly between waterings. Consistency matters more than frequency. Develop a system that works for your scale and stick to it.
The Finger Test Method
Forget calendar watering. Stick your finger into the soil up to the first knuckle. If it feels dry, water. If moist, wait. This simple technique works better than any schedule. It accounts for weather, pot size, and plant size automatically. Train all staff to use this method.
Water Quality Considerations
Pothos tolerates tap water but thrives on filtered or rainwater. Chlorine and fluoride can cause brown leaf tips over time. Hard water leaves mineral deposits on leaves and in soil. If using tap water, let it sit overnight to dissipate chlorine. Better yet, install a simple filtration system for your nursery.
Watering Techniques for Different Scales
Small nurseries can hand-water with a long-spout can. Water thoroughly until it drains from bottom holes. This ensures even moisture and flushes salts. Larger operations benefit from drip irrigation or ebb-and-flow systems. These deliver consistent moisture while keeping foliage dry. Dry leaves mean fewer fungal issues.
Seasonal Watering Adjustments
Plants drink more in active growth periods. Spring and summer may require watering every 5 to 7 days. Fall and winter slow growth dramatically. You might water only every 10 to 14 days. Always check soil first. Reduce watering frequency, not volume. When you water, water deeply.
Signs of Overwatering and Underwatering
Overwatered pothos shows yellowing lower leaves, mushy stems, and a sour soil smell. Roots turn brown and mushy. Underwatered plants have crispy brown leaf edges, curled leaves, and dry soil pulling away from pot edges. Both conditions stress plants and invite pests. Catch issues early with daily visual checks.
Humidity and Its Relationship to Watering
High humidity reduces transpiration. Plants in humid greenhouses need less frequent watering. Low humidity increases water demand. Group plants to create humidity microclimates. Use pebble trays or humidifiers in dry nursery areas. Monitor with hygrometers. Aim for 50 to 70 percent relative humidity.
Soil Mixes and Container Selection
The right growing medium is foundational to pothos care for nursery success. Soil must drain quickly yet retain enough moisture. It needs structure for root aeration. And it should support the plant physically as it grows.
Professional Pothos Soil Recipe
Mix two parts high-quality peat moss or coconut coir. Add one part perlite for drainage. Include one part fine orchid bark for structure and aeration. Mix in a handful of worm castings per gallon for gentle nutrition. This blend drains instantly yet holds moisture evenly. Roots love it.
Commercial Mix Modifications
If buying pre-made mix, choose a peat-based indoor potting soil. Avoid mixes with moisture-retaining crystals or heavy compost. Amend with 30 percent perlite by volume. Add orchid bark if available. This improves cheap mixes significantly. Test drainage by watering a pot. Water should flow through in seconds.
Pot Size and Material Choices
Start cuttings in 2 to 3 inch pots. Move to 4 inch, then 6 inch as they grow. Avoid over-potting. Large pots hold excess water causing root rot. Plastic pots are lightweight and retain moisture longer. Terra cotta breathes but dries faster. Choose based on your watering style and climate.
Drainage Essentials
Every pot needs drainage holes. No exceptions. Add a layer of coarse perlite or gravel at the bottom. This prevents soil from clogging holes. Elevate pots on benches or risers. Never let pots sit in standing water. Saucers are fine if emptied promptly after watering.
Repotting Schedule and Technique
Repot when roots circle the pot bottom or emerge from drainage holes. Spring is ideal timing. Gently loosen root ball. Place in new pot with fresh mix. Water thoroughly after repotting. Hold fertilizer for two weeks. Expect a brief pause in top growth while roots establish.
Soil Testing and Monitoring
Check soil pH annually. Pothos prefers slightly acidic soil, pH 6.0 to 6.5. Test EC (electrical conductivity) monthly during growing season. High EC indicates salt buildup from fertilizer. Flush with clear water if EC exceeds 2.0 mS/cm. Replace soil completely every 18 to 24 months for best results.
Fertilization Programs for Nursery Production
Feeding pothos correctly produces the lush, marketable plants customers expect. Too little fertilizer means slow, pale growth. Too much burns roots and damages foliage. A balanced, consistent program wins every time.
Choosing the Right Fertilizer
Use a complete water-soluble fertilizer with micronutrients. Look for a 3-1-2 or 2-1-2 ratio (like 20-10-20 or 20-20-20). Avoid high-phosphorus bloom boosters. Pothos is grown for foliage, not flowers. Calcium and magnesium are crucial. Check labels for these secondary nutrients.
Feeding Schedule by Season
Spring through early fall: fertilize every two weeks at half strength. Or weekly at quarter strength. Late fall through winter: reduce to monthly at half strength. Or stop entirely if growth stops completely. Always water with plain water between feedings to prevent salt buildup.
Foliar Feeding Benefits
Monthly foliar sprays with dilute fertilizer (quarter strength) boost leaf color and size. Spray early morning so leaves dry before night. Add a drop of surfactant for better coverage. Foliar feeding supplements but does not replace root feeding. Use both for premium results.
Organic Fertilizer Options
Fish emulsion, seaweed extract, and worm casting tea work well. They feed soil biology too. Apply every two weeks at label rates. Organic fertilizers release slowly. They rarely burn. Combine with occasional synthetic feed for immediate green-up when needed.
Monitoring Nutrient Status
Watch for deficiency signs. Nitrogen deficiency: older leaves yellow first. Iron deficiency: new leaves yellow with green veins. Magnesium deficiency: older leaf edges yellow between veins. Adjust program based on what you see. Tissue testing is available for large operations but visual diagnosis works for most.
Preventing Fertilizer Burn
Never fertilize dry soil. Water first, then fertilize. Never exceed label rates. Flush pots monthly with plain water. Use three times pot volume of water. This leaches accumulated salts. White crust on soil surface means salt buildup. Flush immediately and reduce fertilizer concentration.
Propagation Techniques for Nursery Scale
Propagation is where pothos care for nursery operations becomes profitable. One mother plant produces dozens of sellable plants. Master these techniques for consistent, high-quality results.
Stem Cutting Basics
Take 4 to 6 inch cuttings just below a node. Each cutting needs at least one node and two to three leaves. Remove the bottom leaf. The node is where roots emerge. Use clean, sharp scissors. Dip cut end in rooting hormone powder for faster, more uniform rooting.
Water Propagation Method
Place cuttings in clean water. Use clear containers to monitor roots. Change water every 3 to 4 days. Roots appear in 10 to 14 days. Pot up when roots are 1 to 2 inches long. Transition gradually to soil. Keep newly potted cuttings extra humid for first week.
Soil Propagation Method
Stick cuttings directly into moist propagation mix. Use 50/50 perlite and peat. Keep soil consistently moist but not soggy. Cover with humidity dome or plastic bag. Place in bright indirect light. Roots form in 2 to 3 weeks. Tug gently to check resistance.
Layering for Larger Plants
Pin a long vine down onto soil in an adjacent pot. Secure with a hairpin or stone. Keep contact point moist. Roots form at nodes in 3 to 4 weeks. Sever from mother plant once rooted. This produces larger, instant plants. Great for premium hanging baskets.
Managing Mother Plants
Maintain dedicated stock plants for cuttings. Grow them in 8 to 10 inch pots. Fertilize heavily. Prune regularly to encourage branching. Take cuttings from healthy, actively growing tips. Rotate which vines you harvest. Replace mother plants annually for vigor.
Sanitation and Disease Prevention
Clean tools between varieties. Use 10 percent bleach solution or alcohol. Discard any cutting with soft spots or discoloration. Use fresh propagation media each batch. Fungus gnats love damp propagation areas. Use yellow sticky traps and beneficial nematodes preventatively.
Pest and Disease Management
Even with perfect pothos care for nursery conditions, problems arise. Early detection and swift action protect your crop. Integrated pest management (IPM) keeps chemicals to a minimum.
Common Pests Identification
Mealybugs look like white cotton on stems and leaf undersides. Spider mites cause fine webbing and stippled leaves. Scale appears as brown bumps on stems. Fungus gnats fly around wet soil. Thrips leave silvery trails and black dots. Aphids cluster on new growth. Learn to spot all of these.
Scouting Protocols
Walk your nursery daily. Check leaf undersides, stem joints, and soil surface. Use a 10x hand lens. Flag problem plants with colored tape. Record findings in a log. Track patterns over time. Early detection saves entire crops. Make scouting a non-negotiable daily habit.
Cultural Controls First
Prevent problems before they start. Space plants for air circulation. Water at soil level, not overhead. Remove dead leaves promptly. Quarantine new arrivals for two weeks. Clean benches between crops. Healthy plants resist pests naturally. Stress invites infestation.
Biological Control Options
Release beneficial insects preventatively. Ladybugs and lacewings eat aphids and mealybugs. Predatory mites control spider mites. Nematodes target fungus gnat larvae. Parasitic wasps handle whiteflies. Order from reputable suppliers. Release according to instructions. Monitor effectiveness.
Chemical Controls When Needed
Neem oil works on most pothos pests. Spray weekly for three weeks. Insecticidal soap kills soft-bodied insects on contact. Horticultural oil smothers scale and mites. Rotate modes of action to prevent resistance. Always test on a few plants first. Follow label exactly. Phytotoxicity on pothos is rare but possible.
Disease Prevention and Treatment
Root rot (Pythium, Phytophthora) is the main disease. Caused by overwatering and poor drainage. Symptoms: wilting despite wet soil, black mushy roots. Discard severely affected plants. Treat early cases with hydrogen peroxide drench (1:4 ratio). Improve drainage immediately. Bacterial leaf spot shows water-soaked lesions. Remove affected leaves. Increase air flow. Copper fungicide helps severe cases.
Pruning and Training for Market-Ready Plants
Pruning transforms leggy vines into full, bushy specimens. This is a critical step in pothos care for nursery retail readiness. Customers want plants that look good immediately, not plants that need years to fill in.
When to Prune
Prune actively growing plants in spring through summer. Avoid heavy pruning in fall and winter. Light tip pinching can happen anytime. Prune after a flush of growth hardens off. This encourages branching from lower nodes. Schedule major pruning 4 to 6 weeks before target sale date.
Pruning Techniques
Cut just above a leaf node. New growth emerges from that node. Remove leggy, bare stems entirely. Cut back to 2 to 3 nodes from soil for rejuvenation. Pinch tips of young plants to encourage branching. Use clean, sharp pruners. Disinfect between plants.
Training Vines for Hanging Baskets
For hanging baskets, allow 3 to 5 main vines. Pinch tips when vines reach 6 inches. This forces lateral branches. Guide vines to spread evenly around pot. Use small stakes or clips temporarily. Rotate baskets weekly for even light exposure. Full, symmetrical baskets sell fastest.
Creating Totem and Pole Specimens
Insert coir or moss pole at planting time. Gently tie main vine to pole. Aerial roots will attach naturally. Mist pole regularly to encourage attachment. Pinch side shoots to maintain single trunk look. Or allow side shoots for fuller column. Pole specimens command premium prices.
Post-Pruning Care
Water well after pruning. Hold fertilizer for one week. Place in bright indirect light. Mist foliage daily for a few days. New growth emerges in 2 to 3 weeks. Apply fertilizer at half strength once new leaves appear. The plant will bush out beautifully.
Using Pruned Cuttings
Never waste pruned material. Every piece with a node is a potential new plant. Propagate as described earlier. This turns maintenance into inventory. Even tip cuttings with just two nodes root easily. Maximize every plant’s potential.
Environmental Control for Year-Round Production
Professional nurseries control environment, not just react to it. Consistent conditions mean predictable crops. This section covers the systems that make year-round pothos care for nursery production reliable.
Temperature Management
Pothos grows best at 70 to 85 degrees Fahrenheit days. Nights can drop to 60 degrees. Growth slows below 60. Damage occurs below 50. Heat stress starts above 90. Use ventilation, shade cloth, and heating systems to maintain range. Monitor with min/max thermometers in multiple zones.
Air Circulation Importance
Moving air prevents fungal diseases. It strengthens stems. It equalizes temperature and humidity. Use horizontal airflow fans running 24/7. Position to create gentle leaf movement. Avoid direct blasts on plants. Oscillating fans work for smaller spaces. Good airflow is cheap insurance.
Humidity Control Systems
Target 60 to 70 percent humidity. Use humidifiers in dry climates or winter. Dehumidifiers or ventilation in humid summers. Automated controllers maintain setpoints. Group plants with similar needs. Mist systems help propagation areas. Avoid prolonged leaf wetness which invites disease.
CO2 Enrichment Considerations
Supplemental CO2 (800 to 1000 ppm) boosts growth 20 to 30 percent. Only worthwhile in sealed, climate-controlled environments. Requires CO2 generator or tank system. Monitor with CO2 meter. Ventilate before entering. Cost-effective for large wholesale operations. Probably not for small retail nurseries.
Automation and Monitoring
Environmental controllers manage vents, fans, heaters, lights, and irrigation. Data loggers track conditions over time. Alerts notify you of problems remotely. Start simple. Add complexity as scale justifies. Even basic timers on lights and irrigation save labor and improve consistency.
Seasonal Transition Management
Spring: gradually increase water, fertilizer, and light. Remove winter shade cloth. Summer: maximum ventilation, shade cloth, frequent watering. Fall: reduce fertilizer, prepare heating systems. Winter: minimum water, no fertilizer, maximum light, heating ready. Smooth transitions prevent shock.
Marketing and Selling Your Nursery Pothos
Growing great plants is only half the battle. Presenting and selling them completes the cycle. These tips help your pothos care for nursery efforts translate into profit.
Grading and Quality Standards
Establish clear grades: Premium (full, symmetrical, no flaws), Standard (good form, minor imperfections), Economy (leggy, sparse, discounted). Be honest. Customers return for consistency. Cull ruthlessly. Better to compost a poor plant than damage your reputation.
Pot and Presentation Choices
Match pot to plant size and style. Neutral colors (white, gray, terracotta) let foliage shine. Ensure pots have drainage and saucers. Add decorative moss top-dressing for retail appeal. Include care tags with your branding. Professional presentation justifies higher prices.
Pricing Strategies
Know your costs: media, pot, label, labor, overhead, shrinkage. Wholesale typically 2x cost. Retail 3 to 4x cost. Premium varieties command 20 to 50 percent more. Larger sizes exponentially more valuable. A 6-inch pot sells for 3x a 4-inch, not 1.5x. Price for profit, not just volume.
Customer Education Materials
Provide simple care cards. Include light, water, and feeding basics. Add your contact info for questions. Happy customers become repeat customers. Offer workshops or demos. Build community around your nursery. Education reduces returns and builds loyalty.
Shipping and Transport Considerations
Water 24 hours before shipping. Not wet, not dry. Sleeve plants for protection. Use boxes with ventilation holes. Secure pots so they don’t shift. Include heat packs in winter, cold packs in summer. Ship early week to avoid weekend delays. Insure high-value shipments.
Troubleshooting Common Nursery Problems
Even experts face challenges. This quick-reference section helps you diagnose and fix the most frequent issues in pothos care for nursery settings.
Yellowing Leaves Diagnosis
Bottom leaves yellowing: natural aging or nitrogen deficiency. Top leaves yellowing: iron deficiency or root problems. Yellow with brown tips: fluoride toxicity or low humidity. Yellow patches: spider mite damage. Pattern matters. Check roots, check soil pH, check fertilizer program.
Leggy Growth Solutions
Increase light immediately. Prune hard to stimulate branching. Reduce nitrogen slightly. Increase spacing between plants. Rotate more frequently. Leggy plants result from low light, high nitrogen, or crowding. Fix the cause, then fix the symptom.
Brown Leaf Tips and Edges
Usually inconsistent watering or low humidity. Also caused by fertilizer salt buildup. Fluoride in water affects sensitive varieties. Trim brown tips with scissors at an angle. Fix underlying cause. Increase humidity. Flush soil. Switch to filtered water.
Sudden Wilting
Check soil immediately. Bone dry: water thoroughly. Soaking wet: root rot likely. Unpot and inspect roots. White firm roots: maybe heat stress or transplant shock. Brown mushy roots: rot. Treat or discard. Wilting is always urgent. Act fast.
Variegation Loss
Reversion to solid green means insufficient light. Move to brighter location. Prune reverted stems. They grow faster and will take over. Propagate only from well-variegated stems. Maintain high light for stock plants. Variegation is light-dependent.
Slow or Stunted Growth
Check roots first. Root-bound? Repot. Root rot? Treat. If roots healthy: check light, temperature, nutrition. Cold temperatures (below 60) stall growth. Low light reduces photosynthesis. Nutrient deficiency shows specific symptoms. Systematic checking finds the bottleneck.
Conclusion
Mastering pothos care for nursery production combines science, observation, and consistency. You now have a complete framework for growing exceptional plants. From variety selection to environmental control, each element builds on the others. Start with the basics. Perfect your watering. Dial in your light. Build your soil. Then layer on advanced techniques.
Remember that every nursery is unique. Your climate, scale, market, and goals shape how you apply these principles. Experiment thoughtfully. Keep records. Learn from both successes and failures. The most successful growers are curious observers who never stop refining their craft.
Pothos remains one of the most rewarding crops for any nursery. Its popularity ensures steady demand. Its forgiving nature allows learning without catastrophic losses. Its diversity offers something for every customer. Apply this guide diligently, and your pothos will be the benchmark others measure against.
Now get growing. Your next crop of beautiful, healthy pothos awaits.
Frequently Asked Questions
Why are my nursery pothos leaves turning yellow?
Yellow leaves usually indicate overwatering, underwatering, or nutrient deficiency. Check soil moisture first. If wet, reduce watering and improve drainage. If dry, water thoroughly. Apply balanced fertilizer if lower leaves yellow while soil moisture is correct.
How do I prevent root rot in nursery pothos?
Use well-draining soil with perlite and orchid bark. Ensure all pots have drainage holes. Water only when top inch of soil is dry. Never let pots sit in standing water. Maintain good air circulation and avoid overcrowding plants.
When should I repot nursery pothos plants?
Repot when roots circle the pot bottom or emerge from drainage holes. Spring is the ideal time. Choose a pot only 1-2 inches larger. Use fresh soil mix. Water thoroughly after repotting and withhold fertilizer for two weeks.
Can I grow different pothos varieties together in the same nursery area?
Yes, but group them by light needs. Golden, jade, and neon pothos tolerate similar conditions. Marble queen, pearls and jade, and N’Joy need brighter light to maintain variegation. Separate into appropriate light zones.
What pests commonly affect nursery pothos and how do I treat them?
Mealybugs, spider mites, scale, and fungus gnats are most common. Scout daily. Use neem oil or insecticidal soap for soft-bodied pests. Apply horticultural oil for scale. Control fungus gnats with beneficial nematodes and yellow sticky traps.
How do I make pothos plants bushier for retail sales?
Pinch or prune growing tips regularly during active growth (spring through summer). Cut just above a leaf node to force branching. Provide bright light and adequate spacing. Fertilize consistently. Start pruning 4-6 weeks before target sale date.