How to Use Vermiculite for Raspberry
Vermiculite is a game-changer for raspberry growers seeking better drainage, moisture retention, and root development. This lightweight mineral transforms heavy soils into ideal growing conditions for thriving raspberry canes. Follow our step-by-step guide to mix, apply, and maintain vermiculite for your best harvest yet.
If you have ever grown raspberries, you know they can be a bit picky. They want rich soil. They want good drainage. They hate wet feet. But they also dry out fast in summer heat. It feels like a balancing act. That is where vermiculite comes in. This lightweight mineral has been a secret weapon for commercial growers for decades. Now home gardeners are catching on. Using vermiculite for raspberry plants solves several problems at once. It lightens heavy clay. It holds water in sandy soil. It gives roots room to breathe. And it lasts for years without breaking down.
In this guide, we will walk through everything you need to know. We will cover what vermiculite actually is. We will explain why raspberries love it. You will learn exact mixing ratios for different situations. We will show you how to use it in ground beds, raised beds, and containers. You will get tips for planting new canes and refreshing established patches. We will also cover common mistakes to avoid. By the end, you will feel confident adding this amendment to your raspberry routine. Your canes will thank you with bigger yields and sweeter berries.
Key Takeaways
- Vermiculite improves soil structure: It creates air pockets in heavy clay soils while holding moisture in sandy soils, giving raspberry roots the perfect balance of water and oxygen.
- Use a 1:3 to 1:4 ratio: Mix one part vermiculite with three to four parts native soil or compost for optimal results in planting holes and raised beds.
- Ideal for container growing: Vermiculite prevents soil compaction in pots, making it essential for patio raspberry varieties and small-space gardening.
- Apply during planting or early spring: Incorporate vermiculite when establishing new canes or as a top-dressing for established plants before the growing season begins.
- Combine with organic matter: Pair vermiculite with compost, aged manure, or leaf mold to create a nutrient-rich, well-draining medium that feeds raspberries all season.
- Monitor pH levels: Vermiculite is neutral (pH 7.0), so test soil regularly and amend with sulfur if raspberries need more acidity (target pH 5.5-6.5).
- Reuse and refresh annually: Top-dress established beds with a thin layer each spring to maintain soil structure as organic matter breaks down over time.
Quick Answers to Common Questions
Can I use vermiculite alone for raspberries?
No, vermiculite alone lacks nutrients and structure. Always mix it with soil and compost at a 1:3 to 1:4 ratio for healthy raspberry growth.
How often should I add vermiculite to my raspberry bed?
Apply a half-inch layer annually in early spring as a top-dressing. The initial mixing at planting lasts for years, but annual refreshment maintains optimal soil structure.
Is vermiculite safe for organic raspberry growing?
Yes, horticultural grade vermiculite is OMRI-listed and approved for organic gardening. It contains no synthetic chemicals and is processed using only heat.
What is the difference between vermiculite and perlite for raspberries?
Vermiculite absorbs and holds moisture within its layers, while perlite only creates drainage. Raspberries prefer consistent moisture, making vermiculite the better choice.
Can vermiculite help with raspberry root rot?
Yes, vermiculite improves soil aeration and prevents waterlogging, which reduces the anaerobic conditions that cause Phytophthora root rot in raspberries.
📑 Table of Contents
- What Is Vermiculite and Why Does It Matter
- Why Raspberries Benefit from Vermiculite
- Choosing the Right Vermiculite Product
- How to Mix Vermiculite for Raspberry Plantings
- Planting and Care with Vermiculite-Amended Soil
- Common Mistakes and How to Avoid Them
- Seasonal Care Calendar for Vermiculite-Amended Beds
- Troubleshooting Common Issues
- Advanced Tips for Maximum Yields
- Environmental Impact and Sustainability
- Conclusion
What Is Vermiculite and Why Does It Matter
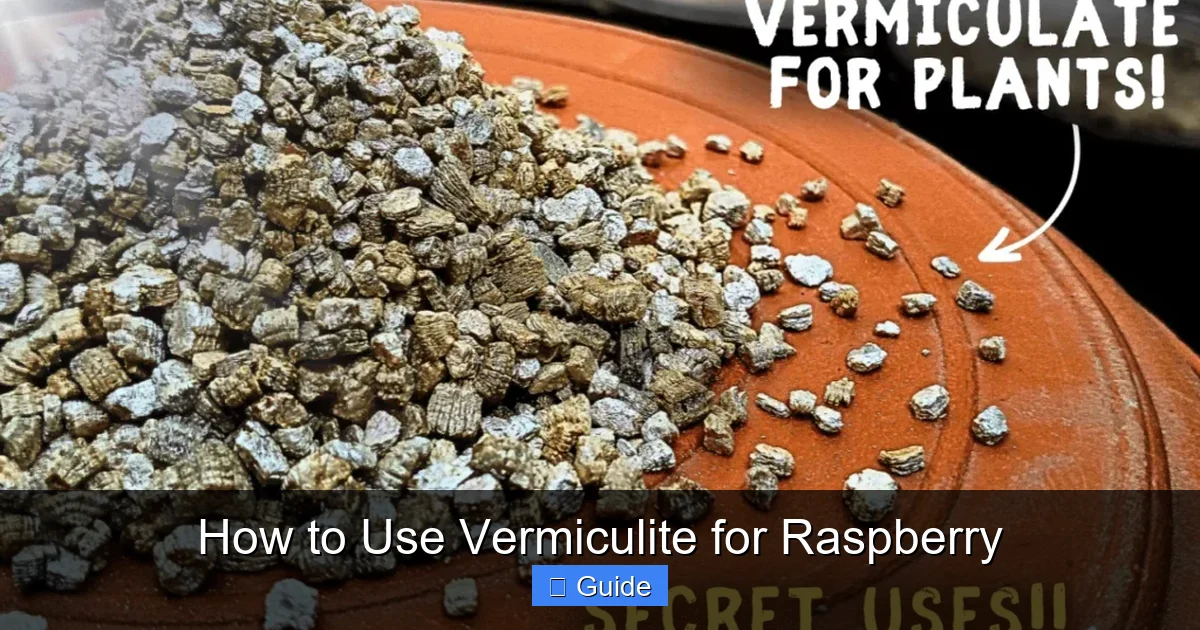
Vermiculite is a natural mineral. It belongs to a group of minerals that expand when heated. The raw material looks like mica or shiny flakes. When manufacturers heat it to high temperatures, it pops like popcorn. The result is a lightweight, accordion-shaped granule. These granules are sterile, odorless, and non-toxic. They do not rot, mold, or attract pests. The expanded pieces have a unique structure. Each particle contains many thin layers. These layers trap air and water. This gives vermiculite its superpower. It can hold three to four times its weight in water. At the same time, it creates air pockets in the soil.
The Science Behind the Granules
Let us look closer at those layers. Each vermiculite particle acts like a tiny sponge. The layers hold water molecules through capillary action. But they do not hold it too tight. Plant roots can pull water out when they need it. This is called plant-available water. At the same time, the spaces between particles stay open. Oxygen moves through these spaces. Roots need oxygen for respiration. Without it, they suffocate and rot. Vermiculite solves the classic dilemma. Gardeners often choose between water retention and drainage. This mineral gives you both. It holds moisture near roots. It lets excess water drain away. It keeps air in the root zone.
Grades and Sizes for Gardening
You will see different grades at the garden center. They are labeled by particle size. Fine grade looks like coarse sand. Medium grade looks like small pebbles. Coarse grade looks like large crumbs. For raspberries, medium grade is usually best. It balances water holding and aeration. Fine grade holds more water but less air. Coarse grade drains very fast but holds less moisture. Medium grade sits in the sweet spot. Some bags say “horticultural grade.” This means it has been screened for consistency. It is free of dust and debris. Always choose horticultural grade. Construction grade vermiculite may contain impurities. It is not meant for plant roots.
Vermiculite vs Perlite
Gardeners often confuse these two. They look similar. Both are lightweight white granules. Both improve soil. But they work differently. Perlite is volcanic glass. It pops like popcorn too. But perlite particles are closed bubbles. They do not absorb water inside. Water sits on the surface. Perlite creates excellent drainage. It creates excellent aeration. But it does not hold moisture well. Vermiculite absorbs water into its layers. It releases it slowly. For raspberries, this matters. Raspberries have shallow, fibrous roots. They dry out quickly. They need consistent moisture. Vermiculite provides that buffer. Perlite is better for cacti and succulents. Vermiculite is better for moisture-loving fruits like raspberries.
Why Raspberries Benefit from Vermiculite
Raspberries have specific needs. Understanding these needs explains why vermiculite works so well. Raspberry roots are shallow. Most roots sit in the top twelve to eighteen inches of soil. They spread wide rather than deep. This makes them vulnerable. The top soil layer dries out fastest. It also compacts easily from rain and foot traffic. Compacted soil has no air. Roots cannot push through it. Water runs off instead of soaking in. Vermiculite addresses every one of these issues.
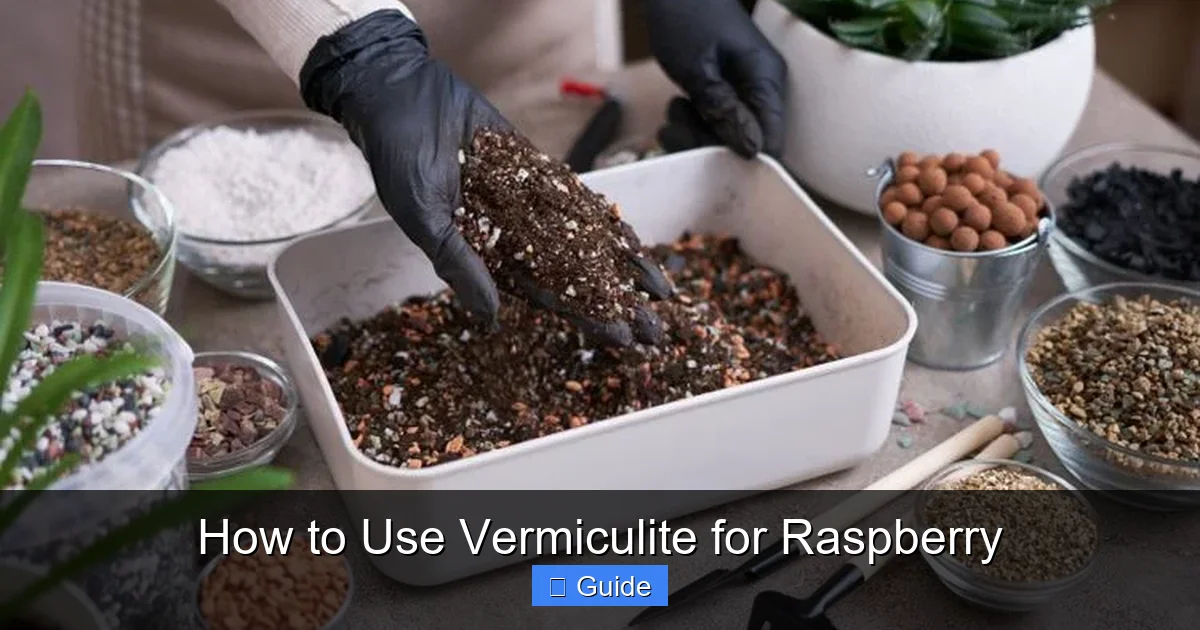
Visual guide about How to Use Vermiculite for Raspberry
Image source: realsimple.com
Moisture Management for Shallow Roots
Raspberries need one to two inches of water per week. During fruiting, they need even more. Sandy soils drain too fast. Water slips past the root zone before plants can drink. Clay soils hold water but then turn brick-hard when dry. Roots struggle to expand. Vermiculite in sandy soil acts like a reservoir. It catches water as it passes through. It releases it back to roots over days. In clay soil, vermiculite creates channels. Water penetrates deeper. Roots follow the moisture down. This builds a more resilient root system. A deeper root system handles drought better. It accesses nutrients other plants miss.
Preventing Root Rot and Disease
Raspberries are prone to root rot. Phytophthora and other pathogens love wet, anaerobic conditions. Heavy clay soils are the worst offenders. Water pools around roots. Oxygen disappears. Pathogens multiply. Vermiculite keeps soil pores open. Oxygen circulates. Beneficial microbes thrive. These microbes compete with pathogens. They create a healthier soil ecosystem. Well-aerated soil is your best defense against root diseases. Vermiculite for raspberry plantings is like insurance. It reduces the risk of losing canes to rot. This is especially valuable in wet springs or poorly drained sites.
Supporting Vigorous Cane Growth
New canes (primocanes) emerge each spring. They grow fast. They need loose soil to expand. Compacted soil stunts them. Weak canes produce fewer berries. They are more susceptible to wind damage. Vermiculite keeps soil friable. Friable means crumbly and easy to penetrate. Roots explore freely. They form more root hairs. More root hairs mean more nutrient uptake. The plant puts energy into strong canes. Strong canes hold more fruit. They stand up to weather. They produce larger, sweeter berries. The difference is visible by mid-summer. Canes in amended soil are thicker and taller. Leaves are darker green. Fruit clusters are longer.
Extending the Growing Season
Vermiculite moderates soil temperature. The air pockets act as insulation. In spring, soil warms faster. Roots become active earlier. You get earlier growth. In summer, soil stays cooler. Roots avoid heat stress. In fall, soil cools slower. Roots keep functioning longer. This extends the active growing window. For fall-bearing varieties, this is huge. More growing days mean more berries. For summer-bearing types, it means stronger canes for next year. The temperature buffering effect is subtle but real. It adds up over a full season.
Choosing the Right Vermiculite Product
Not all vermiculite is created equal. Quality varies by source and processing. Knowing what to look for saves money and frustration. The wrong product can introduce problems. The right product lasts for years.
Horticultural Grade Only
This is the most important rule. Buy horticultural grade vermiculite. It is processed for gardening. It is screened to uniform size. It is free of weed seeds. It is free of pathogens. It is free of chemical contaminants. Construction grade vermiculite is cheaper. It is used for insulation and fireproofing. It may contain asbestos traces from older deposits. Modern horticultural vermiculite comes from tested mines. It is certified asbestos-free. Do not take chances with your food garden. Spend the extra few dollars. Your health matters. Your plants matter.
Medium Grade for Best Results
As mentioned, medium grade hits the sweet spot. Particle size is typically two to four millimeters. You can feel the granules between your fingers. They are distinct but not huge. Fine grade (one to two millimeters) works for seed starting. It holds too much water for mature raspberries. Coarse grade (four to eight millimeters) works for hydroponics. It drains too fast for in-ground beds. If you can only find fine grade, use less of it. Mix at a 1:5 ratio instead of 1:3. If you only find coarse grade, mix it with compost. The compost fills gaps and holds moisture. Medium grade is ideal. Look for it first.
Bag Sizes and Storage
Vermiculite comes in various bag sizes. Small bags are two to four quarts. Medium bags are four to eight cubic feet. Large bags are fifty liters or more. For a few plants, a four-quart bag works. For a full row or raised bed, buy by the cubic foot. It compresses in the bag. A four-cubic-foot bag expands to about six cubic feet loose. Store unused vermiculite dry. Keep the bag sealed. Moisture does not hurt it. But wet bags are heavy and messy. Damp vermiculite can grow algae on the surface. It still works fine. Just let it dry before using. Vermiculite does not expire. It lasts indefinitely if kept clean.
Organic Certification Considerations
If you garden organically, check the label. Most horticultural vermiculite is OMRI listed. OMRI means Organic Materials Review Institute. It verifies the product meets organic standards. The mineral itself is natural. Processing uses heat only. No chemicals added. But some brands add wetting agents. Others may come from mines with questionable practices. OMRI listing gives peace of mind. It ensures no synthetic additives. It ensures responsible sourcing. If the bag does not say OMRI, check the manufacturer website. Many major brands list their certifications online.
How to Mix Vermiculite for Raspberry Plantings
Getting the mix right is crucial. Too little and you see no benefit. Too much and soil dries out too fast. The ratio depends on your native soil. It depends on your planting method. Let us break it down by situation.
In-Ground Planting Holes
Dig your planting hole first. Make it twice as wide as the root ball. Make it just as deep. This gives room for amended soil around the sides. Roots grow outward, not down. Set the native soil aside on a tarp. Now create your mix. For average loam soil, use one part vermiculite to three parts native soil. For heavy clay, use one part vermiculite to two parts native soil. For sandy soil, use one part vermiculite to four parts native soil. Add compost to every mix. Use one part compost to three parts soil-vermiculite blend. This feeds the plant. It adds microbes. It improves structure further. Mix thoroughly on the tarp. Break up clay clods. Distribute vermiculite evenly. Backfill the hole with this blend. Water well to settle.
Raised Bed Preparation
Raised beds give you total control. Start with a base mix. A classic raised bed recipe is one-third compost, one-third topsoil, one-third coarse sand or vermiculite. For raspberries, swap the sand for vermiculite. So: one-third compost, one-third topsoil, one-third vermiculite. This creates a light, rich, moisture-retentive bed. If your topsoil is heavy, increase vermiculite to forty percent. If your topsoil is sandy, reduce vermiculite to twenty percent. Mix on a tarp or in a wheelbarrow. Wet the mix slightly. It reduces dust. It helps ingredients bind. Fill the bed. Water thoroughly. Let it settle for a week before planting. Top off if needed.
Container Growing Mix
Containers need the lightest mix. Garden soil is too heavy. It compacts in pots. Use a soilless mix with vermiculite. A good container recipe: forty percent peat moss or coconut coir. Thirty percent compost. Twenty percent vermiculite. Ten percent perlite. The peat or coir holds water. The compost feeds. The vermiculite buffers moisture. The perlite ensures drainage. This mix stays fluffy all season. It will not turn to concrete. For large containers (fifteen gallons plus), you can increase vermiculite to twenty-five percent. Larger pots dry out slower. More vermiculite extends watering intervals. Always use pots with drainage holes. Add a layer of gravel at the bottom. This prevents the mix from washing out.
Top-Dressing Established Plants
You can add vermiculite to existing plantings. Do this in early spring. Before new growth starts. Rake back mulch gently. Spread a half-inch layer of vermiculite around canes. Keep it six inches from the crown. Work it into the top two inches of soil. Use a hand cultivator. Be careful not to damage shallow roots. Water well after. Replace mulch. This refreshes the root zone. It adds aeration where it matters most. Do this annually for best results. Over time, you build a vermiculite-enriched layer. Roots concentrate there. The effect compounds each year.
Trench Method for Row Plantings
For long rows, the trench method saves time. Dig a trench eighteen inches wide. Twelve inches deep. Pile soil alongside. Mix vermiculite and compost into the piled soil. Use the ratios above for your soil type. Refill the trench with amended soil. Mound it slightly. It will settle. Plant canes along the center. This creates a continuous improved zone. Roots run the length of the row. They find consistent conditions everywhere. This is ideal for commercial-scale or large home patches. It ensures uniform growth. Every plant gets the same advantage.
Planting and Care with Vermiculite-Amended Soil
Once your soil is ready, planting technique matters. Vermiculite changes how soil behaves. Watering, fertilizing, and mulching need slight adjustments. These tweaks maximize the benefits.
Planting Depth and Technique
Plant raspberries at the same depth they grew in the nursery. Look for the soil line on the cane. Do not bury the crown. The crown is where roots meet stems. Buried crowns rot. In vermiculite-amended soil, the mix settles more. Water the hole before planting. Let it drain. Place the plant. Backfill gently. Firm soil with your hands. Do not stomp. Stomping destroys the air pockets you created. Water again after planting. This settles soil around roots. It eliminates air gaps. Add a two-inch mulch layer. Keep mulch off the crown.
Watering Adjustments
Vermiculite holds more water. You will water less often. But water deeply when you do. Check soil moisture before watering. Stick your finger two inches deep. If it feels moist, wait. If dry, water thoroughly. Soak the root zone. Shallow watering encourages shallow roots. Deep watering encourages deep roots. In hot weather, check daily. Container plants need daily checks. In-ground plants need checks every two to three days. Mulch reduces evaporation. It extends time between waterings. Drip irrigation works beautifully. It delivers water slowly. Vermiculite absorbs it efficiently. No runoff. No waste.
Fertilizing in Vermiculite Soil
Vermiculite has cation exchange capacity. This means it holds nutrients. It grabs positively charged ions. Potassium, calcium, magnesium, ammonium. It releases them to roots slowly. This reduces leaching. Nutrients stay in the root zone longer. You can fertilize less often. Use organic fertilizers. They feed soil life. Soil life makes nutrients available. Apply compost in spring. Use a balanced organic fertilizer at bloom. Avoid high nitrogen late in season. It promotes soft growth. Soft growth winter-kills. Vermiculite helps retain the nutrients you apply. It makes your fertilizer investment go further.
Mulching Strategies
Mulch is essential for raspberries. It conserves moisture. It suppresses weeds. It keeps roots cool. It breaks down into organic matter. With vermiculite, mulch works even better. The vermiculite holds moisture under the mulch. The mulch prevents that moisture from evaporating. Use straw, wood chips, or shredded leaves. Apply three to four inches deep. Replenish as it breaks down. Keep mulch away from canes. Wet mulch against bark causes rot. In spring, pull mulch back slightly. Let soil warm faster. Replace it after danger of frost passes.
Pruning and Cane Management
Vermiculite does not change pruning. But healthier plants need more pruning. Vigorous canes produce more laterals. More laterals mean more fruit. They also mean more crowding. Thin canes to six to eight per linear foot. Remove weak, damaged, or diseased canes. Cut spent floricanes after harvest. For fall-bearing types, mow all canes in late winter. Or prune for two crops. Leave strong primocanes for fall crop. Remove them after fall harvest. Good air flow prevents disease. Vermiculite helps roots. Pruning helps shoots. Do both for best results.
Common Mistakes and How to Avoid Them
Even experienced gardeners make mistakes with vermiculite. Learning from others saves you time and money. Here are the most common pitfalls.
Using Too Much Vermiculite
More is not better. Pure vermiculite holds too much water. It stays soggy. Roots rot. It also lacks nutrients. Plants starve. It has no structure. Canes fall over. Stick to the ratios. One part vermiculite to three or four parts soil. If in doubt, use less. You can always add more later. Top-dressing is safer than over-mixing initially. Watch your plants. They will tell you. Yellow leaves can mean too wet. Wilting can mean too dry. Adjust watering first. Then adjust mix next season.
Skipping Compost
Vermiculite is a physical amendment. It improves structure. It does not provide nutrition. Raspberries are heavy feeders. They need nitrogen, phosphorus, potassium. They need micronutrients. Compost provides these. It also provides microbes. Microbes unlock nutrients. They protect roots. Always combine vermiculite with compost. At least twenty percent compost by volume. More is better. If you only add vermiculite, you create a nice sponge. But a sponge with no food grows nothing. Feed the soil. The soil feeds the plant.
Using Construction Grade
We covered this. But it bears repeating. Construction grade is not for gardens. It may contain asbestos. It may contain heavy metals. It is not screened for consistency. Dust levels are high. Breathing it is dangerous. Handling it without a mask is risky. Horticultural grade costs more for a reason. It is tested. It is safe. It is consistent. Protect yourself. Protect your family. Protect your soil. Buy the right product.
Not Wetting Before Mixing
Dry vermiculite is dusty. The dust irritates lungs. It irritates eyes. It floats everywhere. It coats your clothes. Wet it first. Lightly mist the bag contents. Or pour some into a bucket. Spray with a hose. Mix while damp. It stays put. It blends better. It is safer to handle. Wear a dust mask anyway. Wear glasses. Wear gloves. Good habits prevent problems. Once wet, vermiculite is pleasant to work with. It is light. It mixes easily. It feels like fluffy soil.
Ignoring pH Changes
Vermiculite is neutral. pH seven. Raspberries like acidic soil. pH five point five to six point five. If your soil is already neutral or alkaline, vermiculite will not help. It may raise pH slightly over time. Test your soil before planting. Test annually. If pH is too high, add elemental sulfur. Follow test recommendations. Pine needle mulch helps lower pH slowly. Peat moss in the mix helps. Monitor pH. It affects nutrient availability. Iron deficiency shows as yellow leaves with green veins. This happens in high pH soil. Vermiculite does not cause it. But it does not fix it either.
Forgetting to Refresh
Vermiculite lasts a long time. But organic matter breaks down. Compost disappears in a year or two. Soil settles. Compaction returns. Top-dress annually. Add compost. Add a thin vermiculite layer. Work it in gently. This maintains the structure. It maintains the fertility. It is easier than starting over. A little effort each spring pays off. Your raspberry patch stays productive for decades. Neglect leads to decline. Renewal keeps it thriving.
Seasonal Care Calendar for Vermiculite-Amended Beds
Let us put it all together in a year-round plan. This calendar assumes established plants. Adjust for your climate zone. The principles remain the same.
Late Winter (February-March)
Prune canes. Remove dead wood. Thin to proper spacing. Rake back old mulch. Check soil pH. Apply sulfur if needed. Top-dress with half-inch vermiculite. Work into top two inches. Add one inch compost. Replace mulch. Apply dormant oil spray if pests were an issue. Clean up debris. Burn or trash diseased material. Do not compost it.
Early Spring (April-May)
Watch for new growth. Fertilize with balanced organic fertilizer. Water if dry. Vermiculite soil warms faster. Growth starts earlier. Protect from late frost with row cover if needed. Weed gently. Shallow roots are near surface. Hand pull only. Do not cultivate deeply. Monitor for aphids. Spray with water or insecticidal soap. Mulch after soil warms fully.
Summer (June-August)
Harvest daily. Pick ripe berries. This prevents rot. It encourages more production. Water deeply twice weekly. More in heat waves. Check moisture with finger test. Side-dress with compost at first harvest. This fuels second flush. Remove spent floricanes after harvest. Thin new primocanes. Tie canes to trellis. Watch for spider mites. Spray undersides of leaves with water. Harvest fall crop on everbearing types.
Fall (September-November)
Stop fertilizing. Let plants harden off. Water until ground freezes. Moist soil insulates roots. Apply winter mulch after hard freeze. Four to six inches straw. Protect from rodents with hardware cloth. Clean trellis. Repair broken wires. Plan next year’s expansions. Order new varieties. Prepare new beds now. Amend with vermiculite and compost. Let settle over winter.
Winter (December-January)
Rest. Read catalogs. Dream of berries. Check mulch after storms. Replenish if blown away. Brush heavy snow off canes. Prevent breakage. Enjoy preserves from summer harvest. Plan crop rotation if moving beds. Research new techniques. Vermiculite for raspberry success is a long game. Each year builds on the last.
Troubleshooting Common Issues
Even with perfect preparation, issues arise. Here is how to diagnose and fix them in vermiculite-amended soil.
Yellowing Leaves (Chlorosis)
Yellow leaves with green veins mean iron deficiency. High pH is the usual cause. Test soil. Apply chelated iron for quick fix. Apply sulfur for long-term fix. Yellow lower leaves only means nitrogen deficiency. Apply blood meal or fish emulsion. Water in well. Vermiculite holds the nutrients in root zone.
Wilting Despite Moist Soil
This suggests root rot. Dig gently near a cane. Check roots. Brown, mushy roots are dead. White, firm roots are alive. If rot is present, improve drainage. Add more vermiculite. Reduce watering. Apply beneficial microbes (mycorrhizae). Remove severely affected canes. Do not replant in same spot.
Small, Crumbly Berries
This indicates water stress during fruit development. Or poor pollination. Check moisture daily during fruiting. Vermiculite helps but cannot fix total neglect. Ensure bees have access. Plant pollinator flowers nearby. Avoid pesticides during bloom. Thin canes for better air flow. Better air flow means better pollination.
Weak, Spindly Canes
Too much shade. Or too much nitrogen. Or overcrowding. Raspberries need full sun. Six to eight hours minimum. Reduce nitrogen fertilizer. Thin canes aggressively. Vermiculite cannot fix shade. Move plants if needed. Fall is best time to transplant.
Soil Crusting and Poor Water Penetration
Vermiculite prevents this. If you see it, vermiculite has settled too deep. Or organic matter is depleted. Top-dress with fresh vermiculite and compost. Use a cultivator to break crust. Water slowly. Mulch immediately. Prevent recurrence with annual refresh.
Advanced Tips for Maximum Yields
Ready to level up? These advanced techniques push production further. They build on the vermiculite foundation.
Double-Digging with Vermiculite
For new beds, double-dig. Dig a trench one spade deep. Set soil aside. Loosen the next spade depth with a fork. Mix vermiculite into this subsoil. Return topsoil mixed with vermiculite and compost. This creates twenty-four inches of improved soil. Roots go deep. Drought resilience skyrockets. Yields increase twenty to thirty percent. It is hard work once. It pays for decades.
Vermiculite in Drip Irrigation Zones
Place drip tape under mulch. Cover with soil. The vermiculite around emitters spreads water laterally. It creates a wide wet zone. Roots colonize the whole zone. Not just a narrow column. This uses water more efficiently. It grows larger root systems. Space emitters twelve inches apart. Run cycles long enough to wet the zone fully. Check with a soil probe.
Mycorrhizal Inoculation
Add mycorrhizal fungi at planting. Sprinkle on roots. Mix into planting hole. These fungi partner with roots. They extend reach hundredfold. They access phosphorus especially. They improve drought tolerance. They protect against pathogens. Vermiculite provides ideal habitat. The air pockets hold fungal hyphae. The moisture keeps them alive. This symbiosis is natural. We just give it a boost.
Cover Cropping Between Rows
Plant clover or vetch between rows. Cut and drop as mulch. Roots add organic matter. Legumes fix nitrogen. Living roots feed soil life. Mow before seed set. Leave clippings. They break down into compost. Vermiculite holds the moisture for cover crop establishment. The system feeds itself. Less fertilizer needed. Healthier soil each year.
Trellis Systems for Air Flow
V-trellis or T-trellis. Keep canes upright. Separate floricanes from primocanes. Sun reaches all leaves. Air moves through. Disease pressure drops. Harvest is easier. Yields increase. Vermiculite grows strong canes. Trellis displays them. Together they maximize light capture. More light equals more sugar. More sugar equals sweeter berries.
Environmental Impact and Sustainability
Gardening choices matter. Let us look at vermiculite through a sustainability lens.
Mining and Processing
Vermiculite is mined open-pit. This disturbs land. Reputable companies reclaim mines. They restore habitat. They manage runoff. Processing uses heat. Natural gas or electricity. Energy input is moderate. Compared to peat moss, vermiculite is more sustainable. Peat takes thousands of years to form. Harvesting destroys bogs. Bogs store massive carbon. Vermiculite is abundant. It does not deplete rare ecosystems. Choose brands with environmental policies. Ask suppliers about sourcing.
Longevity Reduces Waste
Vermiculite does not decompose. One application lasts years. Peat breaks down in one to two years. Coir breaks down in three to five. Perlite lasts but mines volcanic glass. Vermiculite’s durability means less mining over time. Less packaging. Less transport. Less labor. A single bag serves for a decade. This is a strong sustainability argument. Invest once. Benefit long-term.
Water Conservation
Vermiculite reduces water use. It holds moisture. It reduces frequency. It reduces volume. In drought-prone areas, this matters. Every gallon saved counts. Mulch plus vermiculite cuts water needs by thirty percent or more. Healthy plants need less water per pound of fruit. This is efficient agriculture. Home scale or farm scale, the principle holds.
Soil Carbon Building
Vermiculite helps build soil carbon. How? By supporting plant growth. More roots mean more root exudates. More exudates feed microbes. Microbes create stable carbon compounds. Vermiculite protects these compounds. Its layers shelter organic matter. It slows oxidation. Over years, soil organic matter increases. Carbon is sequestered. Your garden becomes a carbon sink. This fights climate change in a small way. Every garden adds up.
Conclusion
We have covered a lot of ground. Vermiculite for raspberry growing is a powerful tool. It solves the drainage versus moisture dilemma. It creates the loose, airy soil raspberries crave. It holds nutrients. It buffers temperature. It lasts for years. The key points are simple. Use horticultural grade. Choose medium particle size. Mix at one part vermiculite to three or four parts soil. Always add compost. Water deeply but less often. Mulch generously. Top-dress annually. Test pH. Avoid construction grade. Do not overdo it.
Your raspberry patch will respond. Canes will grow taller. Leaves will be greener. Berries will be larger. Yields will increase. The work you do today pays off for seasons. Vermiculite is not magic. But it is close. It transforms difficult soil into prime raspberry ground. It makes good soil great. Whether you have heavy clay, sandy loam, or containers, it helps. Start with one bed. See the difference. Then expand. Your future self will thank you. Your taste buds will thank you. There is nothing like a bowl of sun-warmed raspberries from your own garden. Sweet. Juicy. Perfect. That is the reward. Happy growing.
Frequently Asked Questions
How much vermiculite do I need for a 4×8 raised bed for raspberries?
For a 4×8 foot raised bed 12 inches deep, you need approximately 32 cubic feet of total mix. Using a 1:1:1 ratio of compost, topsoil, and vermiculite, purchase 10-11 cubic feet of vermiculite (about three 4-cubic-foot bags).
When is the best time to add vermiculite to established raspberry plants?
Early spring before new growth emerges is ideal. Rake back mulch, spread a half-inch layer around canes, gently work into the top two inches of soil, water well, and replace mulch.
Does vermiculite change soil pH for raspberries?
Vermiculite is pH neutral (7.0) and does not significantly alter soil pH. Raspberries prefer acidic soil (5.5-6.5), so test annually and amend with sulfur if pH rises too high.
Can I start raspberry cuttings in pure vermiculite?
Yes, moist vermiculite makes an excellent rooting medium for raspberry cuttings. It provides consistent moisture and aeration. Transplant rooted cuttings into a soil-compost-vermiculite mix.
Will vermiculite blow away in windy conditions?
Once wetted and mixed into soil, vermiculite stays in place. When applying dry, lightly mist the surface after spreading. Mulch immediately to prevent any displacement.
How long does vermiculite last in raspberry beds?
Vermiculite does not decompose and remains effective for 10+ years. However, annual top-dressing with fresh vermiculite and compost maintains peak soil structure as organic matter breaks down.