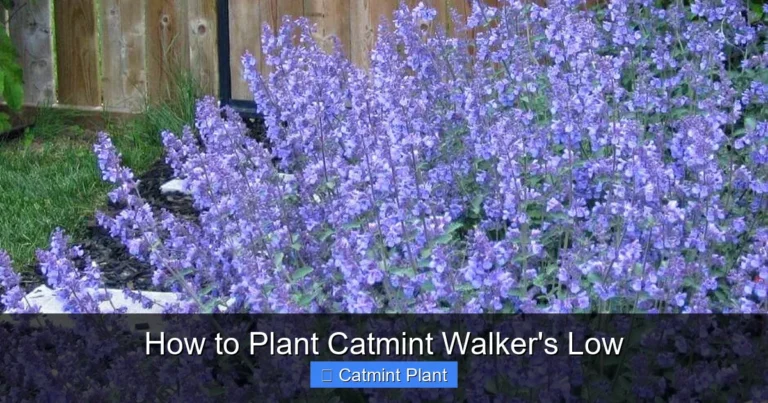
Walkers Low Catmint Planting Tips
Walkers Low catmint (Nepeta x faassenii ‘Walkers Low’) is a hardy, drought-tolerant perennial that delivers months of lavender-blue flowers with minimal care. This guide covers everything from ideal planting times and soil preparation to pruning techniques that encourage repeat blooming. Follow these proven tips to enjoy a pollinator-friendly, deer-resistant border plant that thrives in zones 3-8.
Key Takeaways
- Plant in full sun: Walkers Low catmint needs at least six hours of direct sunlight daily for the best flower production and compact growth.
- Well-draining soil is essential: This perennial hates wet feet; amend heavy clay with compost or grit to prevent root rot.
- Space plants 18-24 inches apart: Proper spacing allows air circulation, reduces disease risk, and lets each plant reach its full mounding shape.
- Shear after first bloom: Cutting plants back by half in midsummer triggers a fresh flush of flowers and keeps the mound tidy.
- Water deeply but infrequently: Once established, catmint is drought-tolerant; overwatering leads to floppy stems and fewer blooms.
- Divide every 3-4 years: Spring division rejuvenates crowded clumps and gives you free plants for other garden spots.
- Deer and rabbit resistant: The aromatic foliage naturally repels browsing animals, making it a reliable choice for unfenced gardens.
Quick Answers to Common Questions
When is the best time to plant Walkers Low catmint?
Spring after the last frost or early fall at least six weeks before the ground freezes are the ideal planting times for strong root establishment.
How much sun does Walkers Low catmint need?
This perennial thrives in full sun, requiring at least six hours of direct sunlight daily for optimal flowering and compact growth.
Should I fertilize my catmint regularly?
No, catmint prefers lean soil. A light application of compost in spring is sufficient; excess fertilizer causes floppy stems and fewer flowers.
How do I get a second bloom from my catmint?
Shear the entire plant back by half after the first flush of flowers fades in midsummer. This stimulates fresh growth and a heavy rebloom.
Is Walkers Low catmint deer resistant?
Yes, the aromatic foliage naturally repels deer and rabbits, making it an excellent choice for gardens with browsing pressure.
📑 Table of Contents
- Why Walkers Low Catmint Deserves a Spot in Your Garden
- Choosing the Perfect Location
- When and How to Plant
- Watering and Feeding for Strong Growth
- Pruning and Maintenance for Continuous Blooms
- Dividing and Propagating
- Design Ideas and Companion Plants
- Troubleshooting Common Issues
- Seasonal Care Calendar
- Conclusion
Why Walkers Low Catmint Deserves a Spot in Your Garden
If you have ever wandered through a sunny border in early summer and noticed clouds of soft lavender-blue flowers buzzing with bees, chances are you were admiring Walkers Low catmint. This perennial has earned its reputation as a garden workhorse for good reason. It blooms for months, asks for very little, and brings a relaxed, cottage-garden charm that fits almost any design style. Whether you are a seasoned gardener or just starting out, learning the best Walkers Low catmint planting tips will set you up for years of easy color.
Unlike some perennials that demand constant coddling, this plant thrives on neglect once it settles in. It handles heat, humidity, and dry spells without missing a beat. The aromatic gray-green foliage forms a neat mound that stays attractive even when the flowers take a break. And because deer and rabbits tend to avoid it, you can plant it with confidence in areas where browsing animals are a problem. In the next sections, we will walk through everything you need to know to get your catmint off to a strong start and keep it performing year after year.
Choosing the Perfect Location
Sunlight Requirements
Walkers Low catmint is a sun lover through and through. For the strongest stems, the most flowers, and the best fragrance, give it a spot that receives at least six hours of direct sun each day. Eight hours is even better. In regions with scorching afternoon heat, a little light shade during the hottest part of the day can help prevent the foliage from looking a bit tired by late summer, but too much shade leads to leggy growth and fewer blooms. If you are unsure how much sun a bed gets, spend a day tracking the light patterns before you plant.
Soil Conditions and Drainage
Good drainage is the single most important soil factor for this plant. Catmint originates from dry, rocky slopes in the Mediterranean region, so it has zero tolerance for soggy roots. Heavy clay soil that stays wet after rain will quickly cause root rot. If your garden soil is dense, amend it generously with coarse sand, fine gravel, or compost to open up the texture. A slightly alkaline to neutral pH between 6.5 and 7.5 is ideal, but the plant adapts to a range of conditions as long as water moves through quickly. A simple test: dig a hole about twelve inches deep, fill it with water, and see how long it takes to drain. If it is still there after an hour, you need to improve drainage before planting.
Spacing for Airflow and Impact
Walkers Low catmint grows into a billowing mound roughly 24 to 30 inches tall and wide. Space plants 18 to 24 inches apart on center. This spacing allows each plant to develop its natural shape without crowding its neighbors. Good air circulation around the foliage reduces the risk of fungal issues like powdery mildew, especially in humid climates. If you are planting a drift or massing for a bold color block, you can space them a little closer, around 15 inches, but plan to divide them sooner to prevent overcrowding.
When and How to Plant
Best Planting Times
Spring and early fall are the two sweet spots for planting Walkers Low catmint. In spring, wait until the soil has warmed and all danger of hard frost has passed. This gives the roots plenty of time to establish before the heat of summer arrives. Fall planting works well in zones 5 and warmer, provided you get the plants in the ground at least six weeks before the ground freezes. The cooler temperatures and typically reliable rainfall help roots settle in with less stress. Avoid planting in the heat of midsummer unless you can commit to diligent watering during the establishment period.
Step-by-Step Planting Guide
Start by watering the nursery pot thoroughly an hour before planting. This ensures the root ball is moist and less prone to shock. Dig a hole twice as wide as the pot and just as deep. Loosen the soil at the bottom and sides of the hole with a fork to encourage roots to penetrate outward. If your soil is poor, mix in a handful of compost or well-rotted manure with the backfill soil, but avoid heavy fertilization at planting time. Too much nitrogen produces lush foliage at the expense of flowers.
Gently slide the plant out of its pot. If the roots are circling the bottom, tease them apart with your fingers or make a few vertical slices with a knife to encourage outward growth. Place the plant in the hole so the top of the root ball sits level with the surrounding soil. Planting too deep can smother the crown; planting too high leaves roots exposed. Backfill with the amended soil, firming gently with your hands to eliminate air pockets. Water deeply to settle the soil around the roots. Apply a two-inch layer of shredded bark, straw, or pine needles as mulch, keeping it a few inches away from the crown to prevent rot.
Watering and Feeding for Strong Growth
Establishment Watering
During the first growing season, consistent moisture is key. Water deeply once or twice a week, depending on rainfall and temperature. The goal is to keep the root zone evenly moist but not soggy. A good rule of thumb: stick your finger two inches into the soil near the plant. If it feels dry at that depth, it is time to water. Avoid frequent light sprinklings, which encourage shallow roots. Deep watering trains roots to chase moisture downward, making the plant more resilient during dry spells later on.
Long-Term Watering Strategy
Once established, usually by the end of the first season, Walkers Low catmint becomes remarkably drought-tolerant. In most climates, natural rainfall is sufficient except during extended heat waves or drought. If the foliage starts to look wilted in the morning (not just afternoon heat stress), give it a good soak. Overwatering established plants is a common mistake that leads to floppy stems, reduced flowering, and increased susceptibility to root diseases. When in doubt, err on the dry side.
Fertilizing: Less Is More
Catmint is not a heavy feeder. In fact, rich soil and excessive fertilizer produce weak, sprawling growth that flops open in the center. If your soil is reasonably fertile, a single application of compost around the base in early spring is all the nutrition the plant needs. If you must fertilize, use a balanced, slow-release organic fertilizer at half the recommended rate. Avoid high-nitrogen lawn fertilizers anywhere near your catmint. The plant’s natural preference for lean soil is one of the reasons it is so low-maintenance.
Pruning and Maintenance for Continuous Blooms
The Chelsea Chop and Midsummer Shear
One of the most valuable Walkers Low catmint planting tips involves timing your pruning for maximum flower power. After the first big flush of bloom fades in early to midsummer, the plant can look a bit ragged. This is the perfect moment for a hard shear. Using hedge shears or sharp pruners, cut the entire mound back by about half, shaping it into a neat dome. This “Chelsea Chop” technique, named for the Chelsea Flower Show timing in late May, stimulates fresh basal growth and a second heavy bloom cycle that can last well into fall. Do not be timid. The plant recovers quickly and looks much tidier for the rest of the season.
Deadheading for Extended Bloom
If you prefer a lighter touch, you can deadhead individual spent flower spikes instead of shearing the whole plant. Snip each faded stem back to a set of leaves or a visible bud. This encourages side shoots to develop and bloom. Deadheading is more time-consuming but preserves the plant’s natural shape if you dislike the sheared look. Either method works; the key is removing spent flowers before they set seed, which signals the plant to keep producing blooms.
Fall and Spring Cleanup
In late fall, after the foliage has died back from hard frosts, you can cut the stems down to a few inches above the ground. Alternatively, leave the dried foliage in place until early spring. The dead stems provide a bit of winter insulation for the crown and add texture to the winter garden. They also mark the plant’s location so you do not accidentally dig it up during early spring planting. In spring, cut back the old growth to the ground as soon as you see new green shoots emerging at the base. This clears the way for fresh growth and removes any overwintering pests or disease spores.
Dividing and Propagating
When to Divide
Walkers Low catmint benefits from division every three to four years. Over time, the center of the clump can become woody and less productive, with fewer flowers and a hollow, donut-shaped appearance. Spring is the ideal time to divide, just as new growth begins to emerge. The plant is full of energy, and the cool, moist conditions help divisions establish quickly. Fall division is a second option in mild climates, but spring is safer in zones 3 and 4 where winter heaving can push unestablished divisions out of the ground.
How to Divide Successfully
Water the plant deeply the day before dividing. Dig up the entire clump with a spade or fork, taking care to get as much of the root system as possible. Shake or wash off excess soil so you can see the root structure. Using a sharp knife, spade, or even an old pruning saw, cut the clump into sections. Each division should have a healthy portion of roots and several vigorous shoots. Discard the woody, unproductive center. Replant the divisions immediately at the same depth they were growing, water well, and mulch. Keep them consistently moist for the first few weeks until new growth indicates they have rooted.
Other Propagation Methods
While division is the fastest way to get mature plants, you can also propagate Walkers Low catmint from softwood cuttings taken in late spring or early summer. Snip four- to six-inch stems from non-flowering shoots, strip the lower leaves, dip the cut end in rooting hormone, and stick them in a pot of moist perlite or sand. Cover with a plastic bag to maintain humidity and place in bright, indirect light. Roots usually form in three to four weeks. Seed propagation is possible but not recommended for this cultivar, as it may not come true from seed and seedlings can be variable.
Design Ideas and Companion Plants
Classic Pairings
The soft lavender-blue flowers of Walkers Low catmint play beautifully with a wide range of colors. For a classic cottage garden look, pair it with roses. The catmint’s mounding habit hides the bare legs of rose bushes, and its bloom time overlaps perfectly with the first big rose flush. The combination of pink or red roses and blue catmint is timeless. Other stellar companions include salvia, penstemon, coreopsis, and echinacea. The vertical spikes of salvia contrast nicely with catmint’s horizontal mounds.
Foliage Contrasts
Do not overlook foliage combinations. The gray-green, slightly fuzzy leaves of catmint look striking next to deep purple foliage like Heuchera ‘Palace Purple’ or the chartreuse leaves of Hakonechloa macra ‘Aureola’. Silver-leaved plants like artemisia or lamb’s ears create a sophisticated monochromatic scheme. For a bold, modern look, plant catmint in drifts alongside ornamental grasses such as Panicum virgatum ‘Shenandoah’ or Calamagrostis x acutiflora ‘Karl Foerster’. The grass provides vertical structure and winter interest while the catmint fills the base with color.
Edging and Pathway Plantings
Because it stays relatively low and neat, especially after a midsummer shear, Walkers Low catmint makes an excellent edging plant along paths and driveways. It softens hard edges and releases its minty fragrance when brushed against. Plant it in a single row spaced 18 inches apart for a defined border, or let it spill informally over a low stone wall. It also works well in rock gardens and on slopes where its drought tolerance and spreading habit help prevent erosion.
Troubleshooting Common Issues
Floppy or Open Centers
If your catmint flops open in the middle, exposing woody stems, the usual culprits are too much shade, too much water, too much fertilizer, or simply age. The fix is straightforward: move it to a sunnier spot, cut back on watering and feeding, or divide and replant the vigorous outer portions. A timely midsummer shear also prevents the plant from getting too tall and top-heavy before the stems harden off.
Powdery Mildew
In humid climates or crowded plantings, powdery mildew can coat the leaves with a white, dusty film. While rarely fatal, it weakens the plant and looks unsightly. Prevention is the best strategy: ensure adequate spacing for airflow, water at the base rather than overhead, and choose a location with good morning sun to dry dew quickly. If mildew appears, remove badly affected leaves and treat with a horticultural oil or a homemade spray of one tablespoon baking soda plus one teaspoon horticultural oil per gallon of water. The midsummer shear also helps by removing infected foliage and promoting fresh, clean growth.
Root Rot
Yellowing leaves, wilting despite moist soil, and a general decline often point to root rot caused by poorly draining soil. If caught early, you may be able to save the plant by digging it up, trimming away blackened, mushy roots, and replanting in a raised bed or amended soil with better drainage. Prevention through proper site selection and soil preparation is far easier than treatment.
Pests: Rare but Possible
Catmint is notably pest-resistant. Aphids occasionally cluster on tender new growth in spring. A strong blast of water or a spray of insecticidal soap handles them easily. Spider mites can appear in hot, dry weather, causing stippled leaves. Increase humidity with regular overhead watering (in the morning so leaves dry quickly) and apply neem oil if needed. Deer and rabbits almost never browse catmint, making it a reliable choice for unfenced gardens.
Seasonal Care Calendar
Early Spring (March-April)
Cut back last year’s dead stems to the ground. Apply a thin layer of compost around the base. If the clump is overcrowded or the center is woody, this is the time to divide. Water new divisions well.
Late Spring (May-June)
Watch for the first flower buds. If you want a slightly shorter, bushier plant with delayed bloom, you can pinch back the stems by a third in late May (the Chelsea Chop). This is optional but useful in rich soils where plants get leggy.
Early Summer (June-July)
Enjoy the first major bloom flush. Deadhead spent spikes if you have time, or wait for the big shear. Monitor for aphids on new growth.
Midsummer (July-August)
After the first bloom fades, shear the entire plant back by half. Water deeply after shearing to support regrowth. This triggers the second bloom cycle.
Late Summer to Fall (August-October)
Enjoy the rebloom. Reduce watering as temperatures cool. Stop fertilizing. In zones 3-4, apply a light winter mulch of straw or evergreen boughs after the ground freezes to prevent heaving.
Winter (November-February)
Leave dried foliage in place for winter interest and crown protection. In late winter, before new growth starts, cut back to the ground if you did not do it in fall.
Conclusion
Walkers Low catmint is one of those rare plants that delivers maximum impact for minimum effort. By following these Walkers Low catmint planting tips, you give your plants the best possible start: a sunny, well-drained site, proper spacing, thoughtful watering during establishment, and strategic pruning to keep the blooms coming. The rewards are months of color, a constant hum of pollinators, and a garden that looks professionally designed with a fraction of the work.
Whether you tuck a single plant into a mixed border, line a pathway with a fragrant hedge, or create a sweeping drift alongside roses and grasses, this perennial earns its keep. It asks so little and gives so much. So grab your trowel, pick a sunny spot, and plant some Walkers Low catmint this season. Your garden, and the bees, will thank you.
Frequently Asked Questions
Can Walkers Low catmint grow in partial shade?
It can tolerate light shade, especially in hot climates, but flowering will be reduced and stems may become leggy. Full sun is strongly recommended for the best performance.
How often should I water established catmint plants?
Once established, catmint is drought-tolerant and typically needs watering only during prolonged dry spells. Overwatering leads to weak growth and root problems.
Why is my catmint flopping open in the center?
Flopping is usually caused by too much shade, overwatering, excessive fertilizer, or an aging clump that needs division. A midsummer shear helps prevent this issue.
When should I divide my Walkers Low catmint?
Divide every three to four years in early spring when new growth emerges. Discard the woody center and replant the vigorous outer sections.
Does Walkers Low catmint spread aggressively?
It forms a clump that slowly expands but does not run or self-sow aggressively like some other mint family members. It is well-behaved in the garden.
Can I grow Walkers Low catmint in containers?
Yes, it performs well in large containers with excellent drainage. Use a gritty potting mix, water when the top inch of soil is dry, and shear after flowering to maintain shape.