Trans Planting Coral Bellos
Transplanting coral bells is best done in early spring or fall when temperatures are mild. With proper site preparation, gentle handling of the root ball, and consistent moisture after moving, your heuchera will establish quickly and reward you with vibrant foliage for years to come.
If you have grown coral bells for any length of time, you know these plants bring incredible color and texture to shady garden spots. Their ruffled leaves in shades of purple, caramel, lime green, and near-black make them standout performers. But there comes a time when every gardener needs to move them. Maybe they have outgrown their space. Maybe you are redesigning a bed. Or maybe you just bought a new variety and want to give it the perfect home. Whatever the reason, trans planting coral bellos is a straightforward task when you follow a few key steps.
I have moved dozens of heuchera plants over the years. Some were divisions from established clumps. Others were nursery pots ready for the ground. A few were mature specimens that needed rescuing from construction zones. Each move taught me something new about what these plants need to settle in quickly. The good news is that coral bells are remarkably forgiving. With the right timing and a little care, they bounce back fast and keep on performing.
Key Takeaways
- Timing matters most: Early spring or early fall gives coral bells the best chance to establish before extreme temperatures arrive.
- Choose the right location: Partial shade with morning sun and afternoon protection creates ideal growing conditions for most varieties.
- Prepare soil thoroughly: Amend planting holes with compost and ensure excellent drainage to prevent crown rot.
- Handle roots gently: Keep the root ball intact and plant at the same depth to minimize transplant shock.
- Water consistently after moving: Provide regular moisture for the first 4-6 weeks while new roots develop.
- Mulch properly: Apply 2-3 inches of organic mulch keeping it away from the crown to retain moisture and regulate soil temperature.
- Divide when transplanting: Mature clumps can be divided during transplanting to create new plants and rejuvenate older specimens.
Quick Answers to Common Questions
When is the absolute best time to transplant coral bells?
Early spring after the last hard freeze but before summer heat, or early fall with 4-6 weeks before ground freeze.
How deep should I plant coral bells when transplanting?
Plant at the same depth they were growing previously, with the crown at or slightly above soil level.
How often should I water newly transplanted coral bells?
Water daily for the first two weeks, then every other day for weeks 3-4, then twice weekly until established.
Can I divide coral bells when I transplant them?
Yes, dividing during transplant is ideal. Each division needs 3-5 healthy shoots and a good root portion.
What type of mulch is best for coral bells after transplanting?
Shredded bark, leaf mold, pine straw, or compost applied 2-3 inches deep in a donut shape away from the crown.
📑 Table of Contents
Understanding Coral Bells Before You Move Them
What Makes Heuchera Unique
Coral bells belong to the genus Heuchera. They are native to North America and grow naturally in woodland settings, rocky slopes, and alpine meadows. This tells you a lot about what they like. They want well-drained soil. They want protection from harsh afternoon sun. And they want consistent moisture without sitting in water.
The plants form mounded clumps from a central crown. The crown sits at or just above soil level. This is a critical detail. Bury the crown too deep and you invite rot. Plant it too high and the roots dry out. When you understand this growth habit, the transplant process makes much more sense.
Root Structure and Growth Habits
Heuchera roots are fibrous and relatively shallow. They spread horizontally more than vertically. A mature plant might have a root mass 12-18 inches wide but only 6-8 inches deep. This shallow root system means they dry out faster than deep-rooted perennials. It also means they are easier to dig up intact than plants with taproots.
Most varieties are evergreen or semi-evergreen in mild climates. In cold regions, the foliage may die back but the crown survives underground. New growth emerges from the crown in spring. This growth pattern affects when you should transplant. You want to move them when they are actively growing but not under heat stress.
Popular Varieties and Their Needs
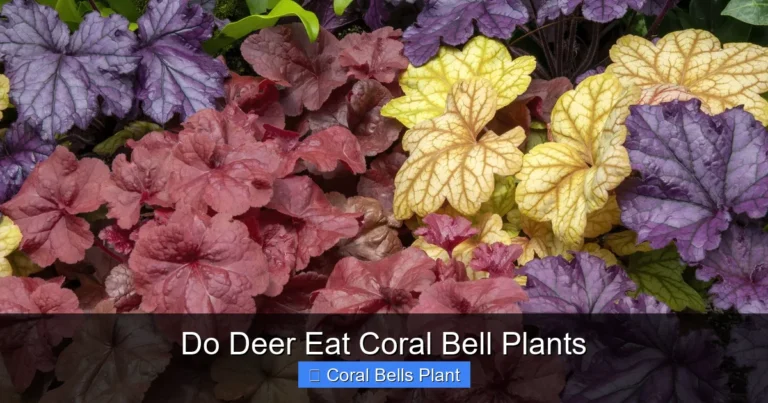
There are hundreds of heuchera cultivars. Some handle more sun than others. Dark-leaved varieties like ‘Palace Purple’ and ‘Obsidian’ tolerate more light. Light-colored varieties like ‘Lime Rickey’ and ‘Caramel’ need more shade to prevent leaf scorch. The villosa hybrids handle heat and humidity better than the sanguinea types. Knowing your specific variety helps you choose the best new location.
Choosing the Perfect Time to Transplant
Spring Transplanting Advantages
Early spring is my favorite time for trans planting coral bellos. The soil is warming up but not hot. Rain is usually plentiful. The plants are waking up and ready to grow new roots. You can see exactly where the crown sits before full leaf expansion. And the plants have a full growing season to establish before winter.

Visual guide about Trans Planting Coral Bellos
Image source: res.klook.com
Aim for that window after the last hard freeze but before temperatures consistently hit the 80s. In most zones, this is March through April. The plants will put energy into root growth before pushing lots of new foliage. This root-first approach builds a stronger plant.
Fall Transplanting Benefits
Early fall is the second-best window. September through early October works well in most areas. The soil is still warm from summer, which encourages rapid root growth. Cooler air temperatures reduce water stress. Fall rains often provide natural irrigation. And the plants get a head start for spring.
The key is timing. You need 4-6 weeks before the ground freezes for roots to establish. In zone 5, that means transplanting by early October. In zone 7, you can push to late October. Mulch heavily after fall transplanting to prevent frost heaving.
Times to Avoid
Summer transplanting is risky. Heat stress combined with root disturbance often leads to failure. If you must move plants in summer, do it on a cool, cloudy day. Provide shade cloth. Water daily. Expect some dieback. Winter transplanting is impossible in frozen ground. In mild climates, you can move them in winter but growth will not resume until spring.
Preparing the New Planting Site
Evaluating Light Conditions
Walk your garden at different times of day. Note where morning sun hits and where afternoon shade falls. Most coral bells want 4-6 hours of morning sun or dappled light all day. Full shade reduces flowering and can make colors less vibrant. Full afternoon sun in hot climates burns the foliage.
If you are moving a specific variety, research its light tolerance. The villosa hybrids like ‘Autumn Bride’ handle more sun. The micrantha types prefer more shade. When in doubt, err toward more shade. You can always limb up a tree later to increase light.
Soil Preparation Steps
Coral bells demand excellent drainage. Heavy clay kills them faster than anything else. If you have clay, amend heavily. Dig a hole twice as wide as the root ball and just as deep. Mix the native soil with compost at a 50-50 ratio. Add coarse sand or fine gravel if drainage is really poor. A handful of perlite in the planting hole helps too.
Test your soil pH if you can. Heuchera prefers slightly acidic to neutral soil, 6.0-7.0. If your soil is very alkaline, add elemental sulfur or peat moss to the planting mix. If very acidic, add a little garden lime. Most garden soils fall in the acceptable range without amendment.
Spacing and Layout Considerations
Space plants 12-18 inches apart depending on mature size. Check the plant tag for specific variety spread. Plant in odd-numbered groups for naturalistic drifts. Consider the viewing angle. Place lighter colors where they catch light. Use darker varieties as anchors or background plants.
If you are dividing a large clump, each division needs its own prepared hole. Have all holes ready before you start digging up the parent plant. Exposed roots dry out in minutes. Work quickly once the plant is out of the ground.
Step-by-Step Transplant Process
Tools and Materials You Need
Gather everything before you start. You need a sharp spade or garden fork. A tarp or wheelbarrow for transporting. Compost for backfill. Mulch for after planting. A watering can or hose with gentle spray nozzle. Garden gloves. Pruning shears for any damaged roots. A trowel for fine adjustments. Optional but helpful: root stimulator solution and shade cloth.
Digging Up the Plant
Water the plant thoroughly the day before moving. Moist soil holds together better. Start digging 6-8 inches out from the crown. Work your way around the plant in a circle. Go down 8-10 inches. Slide the spade under the root ball. Lift gently. If the plant is large, you may need to rock it back and forth to sever deep roots.
Place the plant on your tarp immediately. Do not shake off soil. The goal is to keep the root ball intact. If soil falls away, that is okay, but minimize it. For very large clumps, you can divide now. Use two forks back-to-back to pry the crown apart. Or cut with a sharp knife. Each division needs 3-5 healthy shoots and a good root portion.
Planting in the New Location
Set the plant in the prepared hole. Check the depth. The crown should sit at the same level it was growing before. Slightly high is better than too deep. Backfill with your amended soil. Firm gently with your hands. Do not stomp. You want soil contact without compaction.
Create a shallow basin around the plant to hold water. Water thoroughly until the soil settles. Add more soil if settling exposes roots. The final soil level should match the original crown level. Apply 2-3 inches of mulch in a donut shape. Keep mulch 2 inches away from the crown.
Dividing During Transplant
Mature clumps benefit from division every 3-4 years. The center often becomes woody and less vigorous. Spring is ideal for division. Fall works too. Each division should have several rosettes and healthy roots. Replant divisions immediately. They establish faster than you might expect.
Discard the woody center. Replant the vigorous outer sections. This rejuvenates the plant and gives you free plants for elsewhere. A single large clump can yield 4-6 nice divisions. Share with friends or fill gaps in your garden.
Critical Aftercare for Transplant Success
Watering Schedule
Water is the single most important factor after trans planting coral bellos. The first two weeks are critical. Water daily if no rain. Week 3-4, water every other day. Week 5-6, water twice a week. After that, treat as established. Check soil moisture with your finger. It should be damp 2 inches down.
Water at the base, not over the foliage. Wet leaves encourage fungal issues. Morning watering is best. It lets foliage dry before evening. Use a gentle stream. A hard blast displaces soil and exposes roots. Soaker hoses or drip irrigation work beautifully for new transplants.
Mulching Techniques
Mulch does three things. It conserves moisture. It moderates soil temperature. It suppresses weeds. Use shredded bark, leaf mold, pine straw, or compost. Avoid heavy wood chips that can mat and repel water. Keep the crown clear. Mulch touching the crown holds moisture against it and causes rot.
Replenish mulch as it breaks down. In fall, add an extra inch for winter protection. In spring, pull mulch back slightly as new growth emerges. This prevents crown rot during wet spring weather. The donut shape is non-negotiable. Think volcano bad, donut good.
Monitoring for Stress Signs
Some wilting the first few days is normal. The roots are adjusting. Persistent wilting after watering signals a problem. Check for soil that is too wet or too dry. Yellowing lower leaves often mean overwatering. Crispy leaf edges usually mean underwatering or too much sun.
Watch for new growth at the crown. This is the best sign of success. It may take 2-3 weeks to appear. Do not fertilize for the first month. The plant needs to focus on roots, not foliage. After 4-6 weeks, apply a light feeding of balanced organic fertilizer.
Protecting from Extreme Weather
If a heat wave hits new transplants, provide temporary shade. Shade cloth, an old sheet, or even a lawn chair draped with fabric works. Remove during cooler hours. If a hard freeze threatens fall transplants, cover with frost cloth or evergreen boughs. Do not use plastic directly on plants.
Wind can dry out new transplants fast. A temporary windbreak helps. Stake burlap on the windward side. Remove once established. In winter, ensure mulch is in place before ground freezes. Frost heaving pushes shallow-rooted plants out of the ground. If you see exposed roots in spring, gently press them back and mulch.
Common Problems and Solutions
Crown Rot Prevention and Treatment
Crown rot is the number one killer of coral bells. It happens when the crown stays wet. Symptoms include mushy crown, foul smell, and leaves pulling away easily. Prevention is everything. Plant high. Ensure drainage. Mulch correctly. Water at the base.
If you catch it early, you might save the plant. Dig it up. Cut away all rotted tissue with a sterile knife. Dust with cinnamon or sulfur as a natural fungicide. Replant in fresh, well-drained soil. Water sparingly. Often the plant is a loss. Prevention beats cure every time.
Transplant Shock Symptoms
Transplant shock shows as wilting, leaf drop, and stalled growth. The plant looks unhappy but alive. This is normal for 1-2 weeks. Keep watering consistently. Do not fertilize. Provide shade if sunny. Most plants recover fully. If decline continues past 3 weeks, check for root issues or planting depth problems.
Pest Issues After Moving
Stressed plants attract pests. Watch for vine weevils. The adults notch leaf edges. The larvae eat roots. Beneficial nematodes control larvae. Slugs and snails love the tender new growth. Use iron phosphate bait or beer traps. Deer and rabbits may browse. Repellents or fencing help.
Fungal Diseases
Powdery mildew appears as white dust on leaves. It thrives in humid, crowded conditions. Improve air circulation. Water at soil level. Remove affected leaves. Rust shows as orange pustules on leaf undersides. Same treatment. Good spacing and airflow prevent most fungal issues.
Special Situations and Advanced Tips
Moving Container-Grown Plants
Nursery pots need special handling. Water thoroughly before removing. Squeeze the pot sides to loosen. Tip and slide out. Do not pull by the stems. Loosen circling roots gently. If severely rootbound, make 4 vertical cuts 1/2 inch deep around the root ball. This encourages outward growth.
Plant at the same depth as in the pot. The potting mix is different from your garden soil. Water extra well at planting to bridge the interface. Container plants often have more fertilizer in their mix. They may push foliage faster than roots. Watch watering closely.
Rescuing Plants from Construction
Sometimes you have to move plants at the wrong time. If construction forces a summer move, dig with the largest root ball possible. Wrap in burlap. Move to a shaded holding bed or large pots. Water daily. Cut back foliage by half to reduce water loss. Expect a rough year but most survive.
Fall rescue moves are easier. The plants are heading toward dormancy. Dig, move, plant, mulch heavily. They will surprise you in spring. I have moved plants in November in zone 6 and had them thrive. The key is getting them in the ground before it freezes solid.
Creating Heuchera Combinations
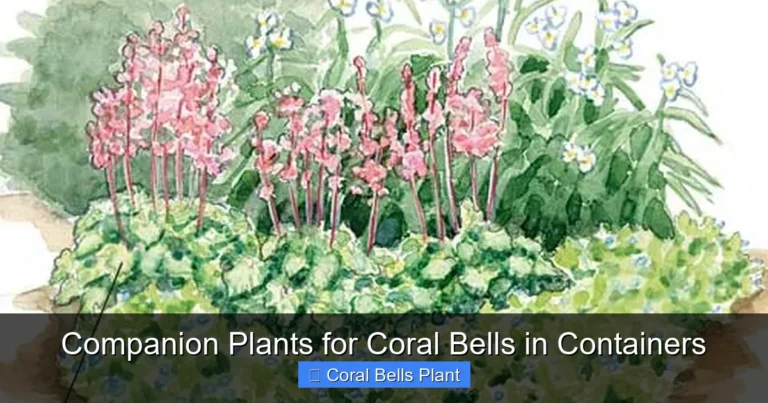
Transplanting is the perfect time to design combinations. Pair contrasting colors. ‘Caramel’ with ‘Plum Pudding’. ‘Lime Rickey’ with ‘Obsidian’. Mix leaf textures. Ruffled with smooth. Large leaves with small. Add companions. Ferns, hostas, astilbe, and foamflower all love the same conditions.
Consider seasonal interest. Some varieties color up in cold weather. ‘Berry Smoothie’ turns intense pink in fall. ‘Midnight Rose’ shows pink spots in spring. Plan for succession. Early bulbs bloom before heuchera fills in. Late perennials take over when heuchera fades.
Long-Term Maintenance After Transplant
Once established, coral bells are low maintenance. Remove winter-damaged leaves in early spring. Cut flower stalks after bloom if you prefer foliage focus. Or leave for seed and wildlife. Divide every 3-4 years as centers get woody. Top-dress with compost annually.
Watch for heaving in freeze-thaw cycles. Press crowns back gently. Add mulch. In very cold zones, a layer of evergreen boughs after ground freezes prevents heaving. Remove in early spring. That is basically it. These plants ask for little and give so much.
Conclusion
Moving coral bells does not have to be intimidating. The keys are simple. Pick the right time. Prepare the site well. Handle roots gently. Plant at the correct depth. Water religiously for the first month. Mulch properly. That is the entire formula for success.
I have seen gardeners stress over this task. They worry about killing a favorite plant. But heuchera wants to live. It wants to grow. Given half a chance, it will reward you with years of colorful foliage and delicate flower spikes. The plant you move today becomes the anchor of a beautiful shade garden tomorrow.
So grab your spade. Pick a cool morning. Prepare that new spot with care. Your coral bells are ready for their new home. And you are ready to give them the best start possible. Happy transplanting.
Frequently Asked Questions
How long does it take for transplanted coral bells to establish?
Most coral bells show new growth within 2-3 weeks and are considered established after 6-8 weeks of consistent care. Full maturity takes a full growing season.
Can I transplant coral bells in summer if I have to?
Summer transplanting is possible but risky. Do it on a cool, cloudy day, provide shade cloth, water daily, and expect some dieback. Fall or spring is strongly preferred.
Why are my transplanted coral bells wilting even though I water them?
Wilting despite wet soil usually indicates crown rot from planting too deep or poor drainage. Check the crown – it should be at soil level, not buried. Reduce watering and improve drainage if possible.
Should I fertilize coral bells right after transplanting?
No, wait 4-6 weeks before fertilizing. New transplants need to focus energy on root development, not foliage growth. Early fertilizer can burn tender new roots.
How do I know if my coral bells need dividing?
Divide when the center of the clump becomes woody and bare, flowering decreases, or the plant outgrows its space. This typically happens every 3-4 years.
What companion plants work well with transplanted coral bells?
Ferns, hostas, astilbe, foamflower (Tiarella), Japanese forest grass, and spring bulbs all thrive in the same partial shade, well-drained conditions that coral bells prefer.