Planting Coral Bells
Planting coral bells is rewarding and straightforward when you follow the right steps. These shade-loving perennials offer stunning foliage colors and delicate flowers that brighten any garden bed.
Key Takeaways
- Choose the right location: Coral bells thrive in partial shade with morning sun and afternoon protection.
- Prepare well-draining soil: Amend heavy clay or sandy soil with organic matter for optimal root health.
- Plant at the correct depth: Keep the crown at soil level to prevent rot and encourage healthy growth.
- Space plants properly: Allow 12 to 18 inches between plants for good air circulation.
- Water consistently after planting: Keep soil evenly moist but not soggy during the first growing season.
- Mulch to retain moisture: Apply a light layer of organic mulch around plants, avoiding the crown.
- Divide every few years: Rejuvenate crowded clumps in spring or fall to maintain vigor.
Quick Answers to Common Questions
When is the best time to plant coral bells?
Spring and early fall are ideal for planting coral bells. Spring gives roots time to establish before summer heat. Fall works in zones 6 and warmer if planted 6 weeks before ground freeze.
How deep should I plant coral bells?
Plant coral bells with the crown at soil level. The crown is where stems meet roots. Planting too deep causes crown rot. Planting too high exposes roots to air.
Do coral bells need full sun or shade?
Coral bells prefer partial shade with 4 to 6 hours of morning sun. Afternoon sun can scorch leaves, especially in hot climates. Full shade works for green varieties but reduces color intensity.
How often should I water newly planted coral bells?
Water deeply 2 to 3 times per week during the first growing season. Check soil moisture by feeling the top inch. Water when dry. Avoid frequent shallow watering.
When should I divide my coral bells?
Divide coral bells every 3 to 4 years in spring or early fall. Signs include woody bare centers, reduced vigor, and fewer flowers. Discard the woody center and replant healthy divisions.
📑 Table of Contents
- Why Gardeners Love Planting Coral Bells
- Understanding Coral Bells Before You Plant
- Choosing the Perfect Spot for Planting Coral Bells
- Step-by-Step Guide to Planting Coral Bells
- Care After Planting Coral Bells
- Dividing and Transplanting Established Plants
- Design Ideas for Planting Coral Bells
- Popular Coral Bells Varieties to Consider
- Common Mistakes When Planting Coral Bells
- Seasonal Care Calendar for Coral Bells
- Conclusion
Why Gardeners Love Planting Coral Bells
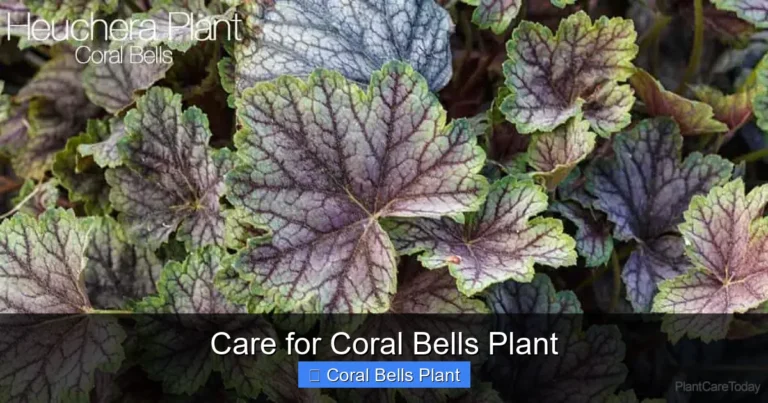
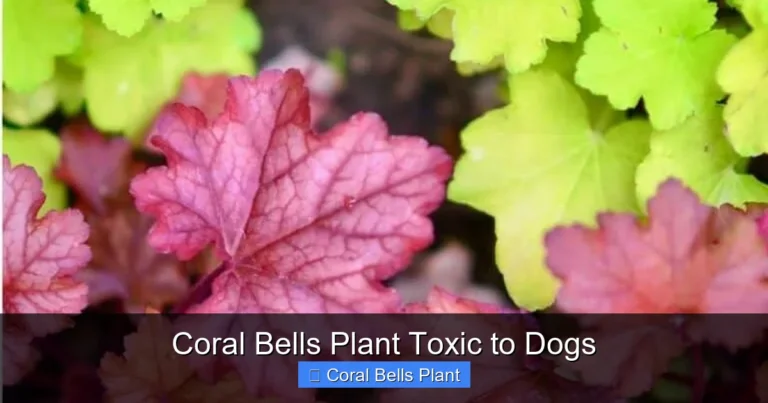
If you want a plant that delivers color all season with minimal fuss, coral bells should be at the top of your list. These charming perennials, botanically known as Heuchera, have exploded in popularity over the past two decades. Plant breeders have introduced hundreds of varieties with foliage in shades of purple, caramel, lime green, silver, and near-black. The leaves often feature striking veining or ruffled edges that add texture to shade gardens.
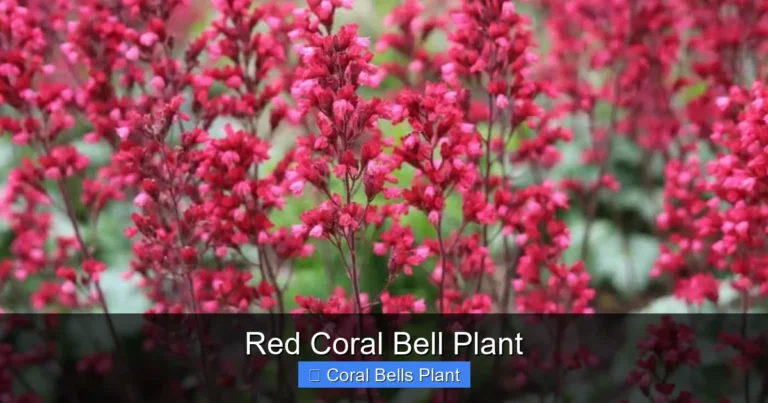
Beyond their good looks, coral bells are tough plants. They handle heat, humidity, and cold better than many gardeners expect. Once established, they tolerate dry spells and bounce back from neglect. Deer and rabbits usually leave them alone. The delicate flower spikes that rise above the foliage in late spring attract hummingbirds and pollinators. Whether you tuck them along a woodland path, mass them under trees, or feature them in containers, coral bells earn their keep.
Understanding Coral Bells Before You Plant
What Are Coral Bells?
Coral bells belong to the Saxifragaceae family and are native to North America. The species Heuchera sanguinea, with its bright coral-red flowers, gave the group its common name. Modern hybrids come from crossing several species, resulting in plants grown primarily for foliage rather than flowers. Most varieties form neat mounds 8 to 18 inches tall and wide. Some cultivars spread slowly by underground stems, making them useful as ground covers.
Hardiness and Climate Considerations
Most coral bells are hardy in USDA zones 4 through 9. A few varieties push into zone 3 with winter protection. In hot climates, afternoon shade is essential. The colorful foliage can scorch in intense sun, especially on lighter-colored varieties like lime green or yellow. Dark-leaved types handle more sun but still appreciate a break from midday heat. If you garden in the Deep South, look for heat-tolerant selections bred for southern conditions.
Growth Habit and Seasonal Interest
Coral bells are evergreen to semi-evergreen in mild winters. In colder zones, foliage may die back but returns fresh in spring. The main show runs from spring through fall. Flower spikes appear in late spring to early summer, rising 12 to 30 inches above the mound. Blooms are small, bell-shaped, and come in white, pink, or red. While pretty, the flowers are secondary to the foliage display. Many gardeners remove spent flower stems to keep the focus on leaves.
Choosing the Perfect Spot for Planting Coral Bells
Light Requirements
Partial shade is the sweet spot for most coral bells. Aim for 4 to 6 hours of morning sun or dappled light throughout the day. Morning sun intensifies leaf color, especially on purple and red varieties. Afternoon sun in summer can bleach or burn leaves. Full shade works for green-leaved types but may reduce color intensity and flowering. If you must plant in more sun, choose heat-tolerant cultivars and provide consistent moisture.
Soil Conditions
Well-draining soil is non-negotiable. Coral bells hate wet feet. Crown rot sets in quickly in heavy, soggy soil. The ideal soil is rich, humusy, and slightly acidic to neutral (pH 6.0 to 7.0). If your soil is heavy clay, amend it generously with compost, leaf mold, or aged manure. Sandy soil benefits from the same additions to improve water retention. A soil test before planting coral bells helps you adjust pH and fertility accurately.
Air Circulation and Spacing
Good air flow prevents fungal diseases like powdery mildew and rust. Space plants 12 to 18 inches apart, depending on mature size. Larger varieties need more room. Avoid crowding them against walls, fences, or dense shrubs. If planting in containers, use one plant per 12-inch pot or combine with other shallow-rooted companions that share similar needs.
Step-by-Step Guide to Planting Coral Bells
When to Plant
Spring and early fall are the best times for planting coral bells. Spring planting gives roots time to establish before summer heat. Fall planting works well in zones 6 and warmer, provided you plant at least 6 weeks before the ground freezes. Avoid planting during hot, dry spells. If you must plant in summer, choose a cloudy day and water diligently.
Preparing the Planting Hole
Dig a hole twice as wide as the root ball and just as deep. Loosen the soil at the bottom and sides so roots can penetrate easily. Mix the excavated soil with compost at a 1:1 ratio. If your soil is very poor, you can use a 1:1:1 mix of native soil, compost, and coarse sand or fine bark for drainage. Do not add fertilizer to the planting hole. It can burn tender roots.
Removing the Plant from Its Container
Water the plant thoroughly an hour before planting. This reduces transplant shock and helps the root ball hold together. Gently squeeze the pot sides to loosen the root ball. Tip the pot on its side and slide the plant out. If roots are circling the bottom, tease them apart with your fingers. Make a few vertical cuts in the root ball if it is severely root-bound. This encourages outward growth.
Setting the Plant at the Right Depth
This is the most critical step in planting coral bells. The crown—where stems meet roots—must sit at or slightly above soil level. Planting too deep leads to crown rot. Planting too high exposes roots to drying air. Place the plant in the hole and check the depth. Adjust by adding or removing soil mix underneath. The top of the root ball should be level with the surrounding ground.
Backfilling and Watering In
Fill the hole halfway with your soil mix. Firm gently with your hands to eliminate air pockets. Water to settle the soil. Finish backfilling to the original soil line. Create a shallow basin around the plant to hold water. Water thoroughly until the soil is moist to the depth of the root ball. This first watering is crucial for good root-to-soil contact.
Mulching After Planting
Apply a 1 to 2 inch layer of organic mulch around the plant. Shredded bark, leaf mold, pine straw, or compost all work well. Keep mulch away from the crown. A mulch-free ring of 2 to 3 inches around the base prevents moisture buildup that causes rot. Mulch conserves moisture, suppresses weeds, and moderates soil temperature.
Care After Planting Coral Bells
Watering During Establishment
Newly planted coral bells need consistent moisture for the first growing season. Water deeply when the top inch of soil feels dry. This usually means watering 2 to 3 times per week in spring, more often in hot weather. Avoid frequent shallow watering, which encourages surface roots. Soak the root zone thoroughly each time. A soaker hose or drip irrigation delivers water efficiently without wetting foliage.
Fertilizing for Healthy Growth
Coral bells are light feeders. Too much fertilizer produces lush, weak growth prone to disease. In spring, apply a balanced slow-release fertilizer (10-10-10 or similar) at half the recommended rate. Alternatively, top-dress with an inch of compost around each plant. This feeds slowly and improves soil structure. Skip fertilizing after midsummer. Late growth may not harden off before winter.
Deadheading and Pruning
Remove spent flower stems at the base after blooming. This tidies the plant and may encourage a light rebloom. In late winter or early spring, cut back any tattered or winter-damaged leaves to the ground. New growth emerges from the crown. Do not cut into the woody crown itself. If the center of an older plant becomes woody and bare, it is time to divide.
Managing Pests and Diseases
Coral bells are relatively trouble-free. The main issues are fungal diseases in humid, poorly ventilated conditions. Powdery mildew appears as white powder on leaves. Rust shows as orange pustules on leaf undersides. Prevent both by spacing plants properly, watering at soil level, and removing affected leaves promptly. Fungicides labeled for ornamentals can treat severe cases. Root weevils sometimes notch leaf edges. Beneficial nematodes applied to soil control larvae.
Dividing and Transplanting Established Plants
When to Divide
Divide coral bells every 3 to 4 years in spring or early fall. Signs it is time include a woody, bare center, reduced vigor, or fewer flowers. Spring division lets plants recover before summer. Fall division works in mild climates. Water the plant well the day before dividing.
How to Divide
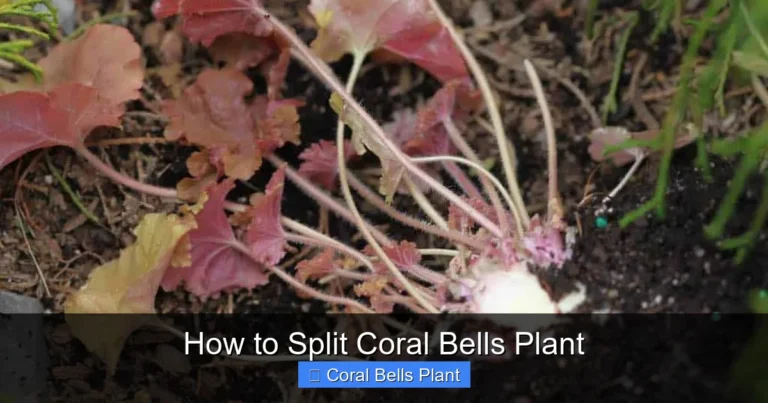
Dig up the entire clump with a garden fork, keeping as many roots as possible. Shake off excess soil. Pull or cut the clump into sections, each with several healthy shoots and roots. Discard the woody center. Replant divisions immediately at the same depth they grew before. Water well and mulch. Keep soil consistently moist until new growth appears.
Transplanting Mature Plants
If you need to move an established plant, follow the same steps as dividing but keep the root ball intact. Dig a wide circle around the plant to preserve roots. Transplant in cool, cloudy weather. Prepare the new hole before digging up the plant to minimize root exposure. Water deeply after transplanting and provide temporary shade if the weather turns warm.
Design Ideas for Planting Coral Bells
Companion Plants for Shade Gardens
Coral bells play well with many shade-loving perennials. Pair them with hostas for bold texture contrast. Ferns add airy foliage that complements the mounded habit. Astilbe brings feathery plumes in early summer. Heucherella, a cross between coral bells and foamflower, offers similar care needs with different leaf shapes. Spring bulbs like daffodils and snowdrops bloom before coral bells leaf out fully.
Container Combinations
Coral bells shine in containers. Their compact size and colorful foliage provide season-long interest. Use a high-quality potting mix with good drainage. Combine with trailing plants like creeping jenny or sweet potato vine. Add upright elements like coleus or caladium for height. In mixed containers, position coral bells at the front or edge where their foliage can be appreciated up close.
Mass Plantings and Ground Covers
For dramatic impact, plant coral bells in drifts of 5, 7, or more of the same variety. Space them 12 inches apart for a continuous carpet of color. This works especially well on slopes or under deciduous trees where grass struggles. Choose spreading varieties like ‘Caramel’ or ‘Citronelle’ for faster coverage. Mulch between plants until they fill in.
Rock Gardens and Edging
Compact varieties excel in rock gardens and along pathways. Their neat habit stays tidy without flopping. Plant them where you can appreciate the foliage detail up close. They soften hard edges of stone walls and pavers. Ensure excellent drainage in rock garden settings. A gritty soil mix mimics their native rocky habitats.
Popular Coral Bells Varieties to Consider
Purple and Red Foliage
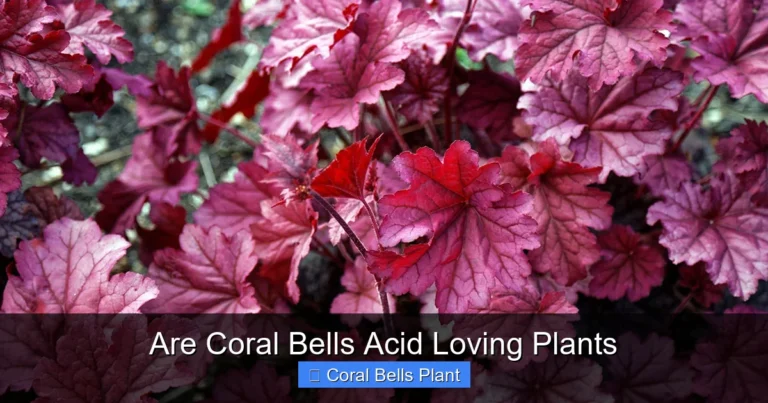
‘Palace Purple’ started the modern coral bells craze. Its maple-like leaves emerge bronze-purple and deepen with age. ‘Obsidian’ offers near-black, glossy leaves that hold color in sun. ‘Fire Alarm’ has bright red spring foliage that matures to deep burgundy. ‘Forever Purple’ keeps its intense color all season without fading.
Caramel, Amber, and Orange Tones
‘Caramel’ is a standout with large, fuzzy leaves in warm peachy-amber. It tolerates more heat and humidity than many. ‘Georgia Peach’ shows peachy-orange leaves with a silver overlay. ‘Marmalade’ features ruffled, amber-to-olive leaves with pink undersides. These warm tones glow in dappled light.
Lime Green and Yellow Varieties
‘Lime Rickey’ has ruffled, chartreuse leaves that brighten dark corners. ‘Citronelle’ offers large, electric yellow leaves on a vigorous plant. ‘Electric Lime’ stays lime green all season. These light-colored varieties need more shade to prevent scorching. They pair beautifully with blue hostas and purple heucheras.
Silver and Veined Selections
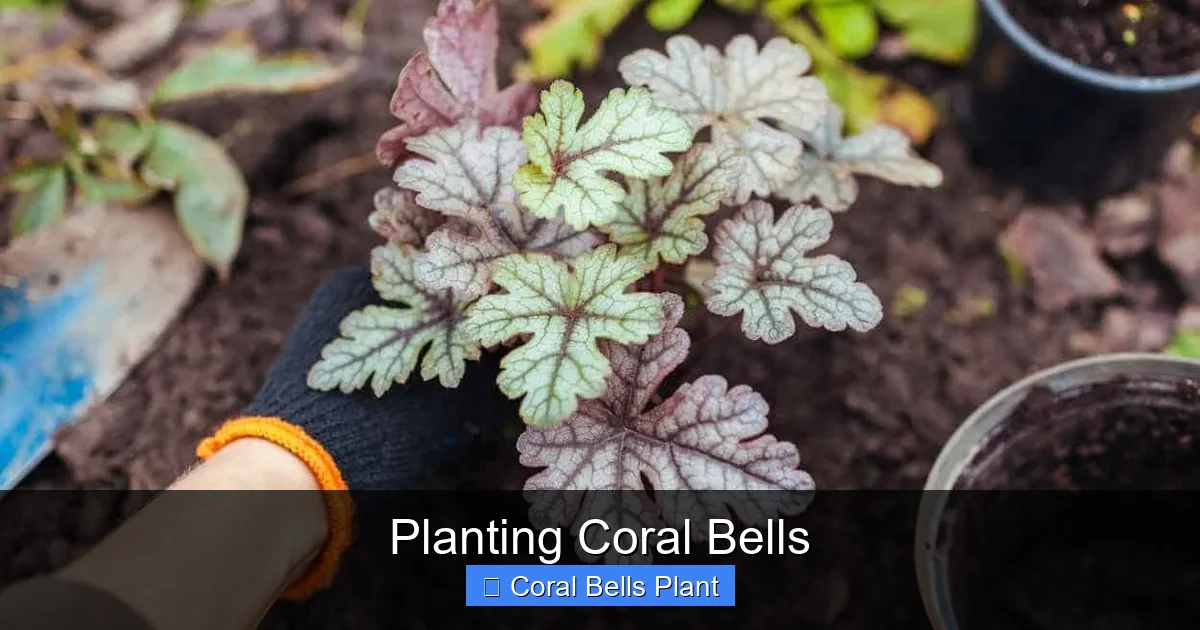
‘Silver Scrolls’ displays metallic silver leaves with dark purple veins. ‘Plum Pudding’ has plum-purple leaves with silver overlay. ‘Berry Smoothie’ shows rose-pink leaves with silver highlights. The veining adds depth and interest, especially when backlit by morning sun.
Common Mistakes When Planting Coral Bells
Planting Too Deep
This is the number one killer of coral bells. The crown must stay at soil level. Even an inch too deep invites crown rot. Check depth after watering, as soil may settle. If the plant sinks, gently lift and add soil underneath.
Overwatering or Poor Drainage
Coral bells need moisture but not soggy soil. Heavy clay without amendment holds too much water. Planting in low spots where water collects causes root rot. If drainage is poor, consider raised beds or containers.
Too Much Sun in Hot Climates
Afternoon sun in zones 7 and up can fry coral bells, especially light-leaved types. If leaves develop brown, crispy edges, the plant is getting too much sun. Move it to a shadier spot or provide a shade cloth during peak hours.
Neglecting to Divide
Old, undivided clumps become woody and unproductive. The center dies out, leaving a ring of growth. Divide every few years to keep plants vigorous and attractive. It also gives you free plants to expand your garden or share.
Using Heavy Mulch Against the Crown
Mulch volcanoes kill coral bells. Keep mulch pulled back from the base. Wet mulch against the crown creates a perfect environment for rot pathogens. A 2-inch mulch-free zone is essential.
Seasonal Care Calendar for Coral Bells
Spring
Clean up winter-damaged foliage. Apply slow-release fertilizer or compost top-dressing. Divide crowded clumps. Plant new coral bells. Water consistently as new growth emerges. Watch for slugs on tender leaves.
Summer
Deadhead spent flower stems. Water deeply during dry spells. Monitor for powdery mildew in humid weather. Remove any diseased leaves promptly. Enjoy the foliage show!
Fall
Plant or divide in early fall (zones 6+). Stop fertilizing. Reduce watering as temperatures cool. Apply a light mulch layer after the ground freezes in cold zones. Do not cut back foliage—it protects the crown.
Winter
In zones 4-5, provide winter protection with evergreen boughs or straw after the ground freezes. This prevents freeze-thaw cycles that heave plants. In milder zones, coral bells stay evergreen. Brush off heavy snow to prevent leaf damage.
Conclusion
Planting coral bells rewards you with years of colorful, low-maintenance beauty. These versatile perennials adapt to containers, rock gardens, woodland edges, and formal borders. Success comes down to a few fundamentals: choose a spot with morning sun and afternoon shade, prepare well-draining soil rich in organic matter, plant at the correct depth with the crown at soil level, and water consistently during establishment. Avoid the common pitfalls of deep planting, poor drainage, and excessive mulch against the crown.
With hundreds of varieties available, you can create stunning foliage combinations that evolve through the seasons. Divide plants every few years to maintain vigor and multiply your collection. Whether you are a novice gardener or a seasoned plant collector, coral bells deserve a place in your landscape. Their resilience, diversity, and year-round appeal make them one of the most satisfying perennials to grow. Start with a few varieties this season, and you will soon understand why gardeners everywhere have fallen for these charming North American natives.
Frequently Asked Questions
Can coral bells grow in full sun?
Some dark-leaved varieties tolerate more sun, but most coral bells prefer partial shade. In hot climates, afternoon sun will scorch the foliage. Provide consistent moisture if planting in sunnier spots.
Why are my coral bells dying in the center?
A dead center usually means the plant needs division. Over time, the crown becomes woody and stops producing new growth. Divide the plant in spring or fall, discarding the woody center and replanting healthy outer sections.
Do coral bells come back every year?
Yes, coral bells are perennial plants that return each year. They are hardy in USDA zones 4-9. In colder zones, they may die back to the ground but resprout from the crown in spring.
What soil do coral bells like best?
Coral bells thrive in rich, well-draining soil with a pH of 6.0 to 7.0. Amend heavy clay or sandy soil with compost or leaf mold. Good drainage is essential to prevent crown and root rot.
Should I cut back coral bells in the fall?
Do not cut back coral bells in fall. The foliage protects the crown through winter. Remove damaged leaves in early spring before new growth emerges. In mild climates, plants stay evergreen year-round.
Can I grow coral bells in containers?
Yes, coral bells grow well in containers. Use a pot at least 12 inches wide with drainage holes. Fill with quality potting mix. Water more frequently than in-ground plants. Repot or divide every 2-3 years.