How to Trim Catmint Plant
Trimming catmint keeps the plant compact, encourages fresh growth, and extends the blooming season. Follow these easy steps to cut back stems at the right time and enjoy a tidy, fragrant garden.
How to Trim Catmint Plant
Catmint is a hardy herb. It grows fast. It produces lavender flowers. Many gardeners love it. Trimming keeps it neat. It also boosts blooms. This guide shows you how to trim catmint plant step by step.
You will learn the best time to cut. You will learn the tools you need. You will learn the exact cuts to make. You will also learn aftercare tips. Follow each step for a healthy plant.
Let us start with the basics. Then we move to detailed steps. You will feel confident trimming your catmint.
Key Takeaways
- Trim in early spring: Cut back dead stems before new growth starts.
- Use clean sharp shears: Prevent disease and make clean cuts.
- Remove one third of growth: Keeps plant shape and promotes bushier habit.
- Water after trimming: Helps the plant recover quickly.
- Mulch around base: Retains moisture and suppresses weeds.
- Enjoy the clippings: Use them for tea, cat toys, or compost.
Quick Answers to Common Questions
When is the best time to trim catmint?
Early spring before new growth starts is the ideal time for a major trim.
How much of the plant can I cut back at once?
Never remove more than one third of the total growth in a single session.
What tools do I need for trimming catmint?
Sharp bypass pruning shears, gloves, disinfectant, a bucket or tarp, and a watering can.
Can I use the clippings for anything?
Yes, dried catmint makes great herbal tea, cat toys, compost, potpourri, and a natural insect repellent.
What should I do after trimming catmint?
Water deeply, mulch, apply a light balanced fertilizer, and monitor for new growth and pests.
📑 Table of Contents
When to Trim Catmint Plant
Timing matters for catmint. The best time is early spring. New growth appears then. Cutting then removes winter damage. It also shapes the plant for the season.
Early Spring Trim
Watch for green buds. When you see them, it is time. Cut back dead stems to the base. Leave about six inches of healthy stem. This encourages fresh shoots. Learn how to trim catmint plant in early spring for best results.
Mid Summer Light Trim
After the first bloom, you can do a light trim. Remove spent flowers. Cut just above a leaf node. This promotes a second flush of flowers. A quick how to trim catmint plant tip: snip only the faded blooms.
Fall Clean Up
In late fall, cut back any dead foliage. This prevents disease over winter. Do not cut into the woody base. Leave a short stub for protection. Remember the rule: never remove more than one third of the plant at once. This keeps the plant strong.
Signs Your Catmint Needs Trimming
Look for leggy stems. Look for yellow leaves. Look for fewer flowers. These signs mean it is time to trim. Regular checks help you catch problems early.
Seasonal Calendar Overview
Spring: major cut back. Summer: light deadhead. Fall: remove dead wood. Winter: leave alone. Follow this calendar for a tidy catmint all year.
Tools You Need for Trimming Catmint
Good tools make the job easy. They also protect the plant. Here are the essential items.
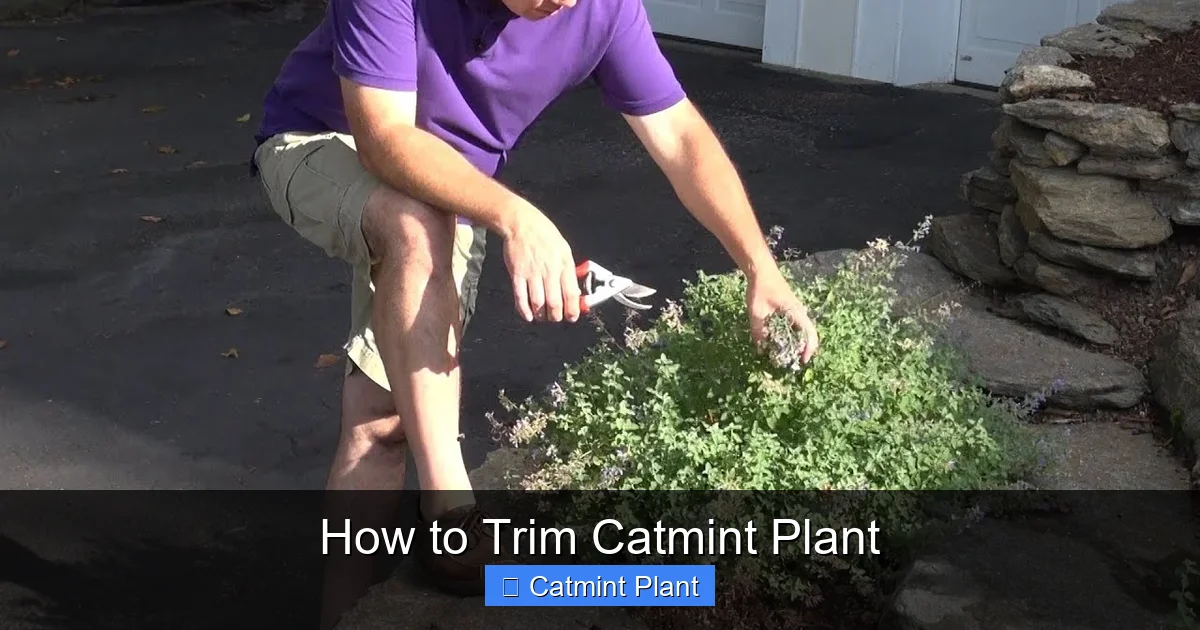
Visual guide about How to Trim Catmint Plant
Image source: i.ytimg.com
Pruning Shears
Choose bypass shears. They give a clean cut. Sharp blades reduce tearing. Clean them before each use. Sharp shears are key for how to trim catmint plant safely.
Gloves
Wear garden gloves. They protect your hands from sap. They also give a better grip. Gloves keep your hands clean.
Disinfectant
Use rubbing alcohol or a bleach solution. Wipe blades between cuts. This stops disease spread. Clean tools mean healthy cuts.
Bucket or Tarp
Collect clippings as you work. A bucket keeps the area tidy. A tarp can be laid under the plant. Easy cleanup saves time.
Watering Can
Have water ready. Water the plant right after trimming. This reduces stress. A quick drink helps recovery.
Optional Tools
Loppers for thick stems. Hand saw for woody bases. Use only when needed. Most catmint trims need only shears.
Gather all tools before you start. This saves time and keeps the workflow smooth.
How to Trim Catmint Plant Step by Step
Follow these steps for a successful trim. Each step is simple. Take your time.
Inspect the Plant
Walk around the plant. Look for dead stems. Look for crossing branches. Note areas that are too dense. A quick visual check guides your cuts.
Remove Dead Stems
Cut dead stems at the base. Use clean shears. Make a straight cut. Do not leave stubs. Removing dead wood opens space for new growth.
Shape the Plant
Trim the outer stems to create a rounded shape. Cut just above a leaf node. This encourages branching. A neat shape looks great in the garden.
Thin Overcrowded Areas
Remove some inner stems. This improves air flow. It also lets light reach the center. Thinning prevents fungal problems.
Cut Back Spent Flowers
Snip off faded blooms. Cut just above the next set of leaves. This triggers new buds. Deadheading extends the bloom season.
Clean Up
Gather all clippings. Place them in your bucket. Dispose of diseased material. Compost healthy clippings. A clean bed reduces pests.
Post Trim Watering
Water the plant well after you finish. This helps the cuts heal. Keep soil moist for a few days. Consistent moisture speeds recovery.
Common Mistakes to Avoid When Trimming Catmint
Even experienced gardeners make errors. Avoid these common pitfalls.
Cutting Too Much
Removing more than one third shocks the plant. It may not recover. Stick to the one third rule. Over pruning weakens the root system.
Trimming at the Wrong Time
Cutting in late fall can expose the crown to frost. Cutting in mid summer heat can stress the plant. Follow the seasonal guide. Timing is everything for how to trim catmint plant correctly.
Using Dull Tools
Dull blades crush stems. Crushed tissue invites disease. Sharpen shears before each session. Sharp tools make clean cuts.
Leaving Stubs
Stubs die back and become entry points for pests. Always cut close to a node or the base. No stubs means fewer problems.
Ignoring Clean Up
Leaving clippings on the ground can harbor fungi. Remove all debris promptly. Clean beds stay healthy.
Over Fertilizing After Trim
Too much fertilizer burns new shoots. Use a balanced slow release feed. Follow label rates. Moderate feeding supports steady growth.
By avoiding these mistakes you keep your catmint healthy and blooming.
Aftercare Tips for Trimmed Catmint
Proper aftercare speeds recovery. It also sets the stage for more flowers.
Watering
Water deeply after trimming. Keep soil moist but not soggy. Check the top inch of soil daily. Consistent moisture helps new shoots.
Mulching
Apply a two inch layer of organic mulch. Straw, shredded leaves, or bark work well. Mulch conserves moisture. It also suppresses weeds.
Fertilizing
Use a balanced slow release fertilizer. Apply in early spring. Avoid high nitrogen late in the season. Light feeding encourages blooms.
Monitoring
Watch for new growth within two weeks. Look for pests like aphids. Treat early if needed. Early action prevents outbreaks.
Staking
Tall varieties may need support. Use a soft tie and a stake. This prevents flopping. Staking keeps the plant upright.
Pest Prevention
Spray neem oil if you see insects. Keep the area free of debris. Healthy plants resist pests better. Prevention is easier than cure.
Consistent care yields a lush, fragrant catmint display all season.
Creative Uses for Trimmed Catmint
Don’t throw away the clippings. They have many uses.
Herbal Tea
Dry the leaves and flowers. Steep a teaspoon in hot water. Enjoy a calming minty tea. Fresh tea from your garden is a treat.
Cat Toys
Stuff dried catmint into a small fabric pouch. Cats love the scent. It provides enrichment. Homemade toys save money.
Compost
Add healthy clippings to your compost pile. They break down quickly. They add nutrients to the mix. Compost enriches future beds.
Potpourri
Mix dried catmint with lavender and rose petals. Place in a bowl for a fresh aroma. Natural scent freshens any room.
Garden Border
Use fresh stems as a temporary border. They look pretty and deter some pests. A living border adds charm.
Natural Insect Repellent
Crush fresh leaves and rub on skin. The scent repels mosquitoes. A handy trick for outdoor evenings.
These ideas turn trimming waste into useful products.
Conclusion
Trimming catmint is simple when you know the steps. Start with the right timing. Use clean sharp tools. Follow the step by step guide. Avoid common mistakes. Give the plant good aftercare. Enjoy the many uses of the clippings. Your catmint will reward you with abundant blooms and a tidy shape. Happy gardening.
Frequently Asked Questions
How often should I trim catmint during the growing season?
Trim once in early spring for shape, then deadhead spent blooms in mid‑summer, and clean up dead foliage in fall.
Will trimming catmint encourage more flowers?
Yes, removing spent blooms and thinning crowded stems stimulates new bud formation and a longer bloom period.
Can I trim catmint in winter?
It is best to avoid heavy cuts in winter; only remove clearly dead wood if necessary.
What if my catmint becomes woody at the base?
Cut back to just above the woody crown in early spring, leaving a few inches of green stem to regrow.
Is catmint invasive after trimming?
Trimming actually controls spread; regular cuts keep the plant compact and prevent it from overtaking nearby beds.
Can I propagate catmint from the trimmings?
Yes, take 4‑inch stem cuttings, remove lower leaves, and root them in moist soil or water for new plants.