How to Repot Plants as a Beginner
Repotting doesn’t have to be scary. This beginner-friendly guide walks you through every step of how to repot plants as a beginner, from spotting root-bound signs to choosing the right pot and soil. Master the basics and give your green friends the fresh start they deserve.
Key Takeaways
- Watch for root-bound signs: Roots circling the pot or growing from drainage holes mean it is time to repot.
- Pick a pot one to two inches larger: A pot that is too big holds excess water and causes root rot.
- Use fresh, well-draining potting mix: Garden soil compacts in containers and suffocates roots.
- Water before and after repotting: Moist soil reduces transplant shock and helps roots settle.
- Handle roots gently: Loosen tight roots but avoid tearing them to encourage healthy growth.
- Skip fertilizer for four to six weeks: Fresh soil has nutrients; early feeding can burn tender roots.
- Place in bright indirect light: Direct sun stresses a newly repotted plant while it recovers.
Quick Answers to Common Questions
How often should I repot my houseplants?
Most houseplants need repotting every 12 to 18 months. Fast growers may need it yearly. Slow growers like snake plants can go 2 to 3 years. Check for root bound signs rather than following a strict calendar.
Can I repot in winter?
It is best to repot in spring or early summer when plants are actively growing. Winter repotting slows recovery. Only repot in winter if the plant is severely root bound or has root rot.
Should I break up the root ball when repotting?
Yes, gently tease apart circling roots. Make a few vertical cuts if the root ball is a solid mass. This encourages roots to grow outward into fresh soil instead of continuing to circle.
What if my plant wilts after repotting?
Some wilting is normal transplant shock. Keep the plant in bright indirect light, maintain even moisture, and do not fertilize. Most plants recover in 2 to 3 weeks. Do not overwater to fix wilting.
Do I need to add rocks at the bottom for drainage?
No. Rocks create a perched water table that keeps soil wetter longer. Use a coffee filter or mesh over the hole instead. A well draining potting mix is all the drainage you need.
📑 Table of Contents
- Why Learning How to Repot Plants as a Beginner Matters
- Signs Your Plant Is Begging for a New Pot
- Choosing the Right Pot and Soil for Success
- Essential Tools and Materials Checklist
- Step by Step Guide to Repotting Day
- Aftercare: The First Few Weeks Matter Most
- Common Mistakes and How to Avoid Them
- Special Cases: Succulents, Orchids, and Large Plants
- Conclusion: You Are Ready to Repot
Why Learning How to Repot Plants as a Beginner Matters
Every plant parent reaches a moment when their green buddy outgrows its home. The roots get cramped. The soil gets tired. Growth slows down. That is when knowing how to repot plants as a beginner becomes a game changer. It is not just about moving a plant to a bigger pot. It is about giving fresh nutrients, better drainage, and room to breathe. A successful repot can turn a struggling plant into a thriving centerpiece.
Many beginners feel nervous. They worry about damaging roots or picking the wrong soil. The good news is that plants are resilient. With a little knowledge and a gentle touch, you can master this skill in one afternoon. This guide breaks down the whole process into simple, friendly steps. You will learn when to repot, what tools you need, how to choose the right pot and soil, and exactly what to do on repotting day. By the end, you will feel confident tackling any plant in your collection.
Signs Your Plant Is Begging for a New Pot
Roots Are Escaping the Drainage Holes
One of the clearest signals is roots poking out of the bottom holes. This means the root system has filled every inch of available space. The plant is literally reaching for more room. If you see white or brown tips peeking out, it is time to act.
Visual guide about How to Repot Plants as a Beginner
Image source: thespruce.com
Water Runs Straight Through
When you water, does it pour out the bottom almost instantly? That happens when roots have displaced most of the soil. There is nothing left to hold moisture. The plant drinks fast and dries out fast. This is a classic cry for help.
Growth Has Stalled or Slowed
Healthy plants push new leaves regularly in growing season. If yours has not put out a new leaf in months despite good light and water, the roots may be strangled. Cramped roots cannot take up nutrients efficiently. The plant survives but does not thrive.
The Plant Is Top Heavy or Tips Over
A large plant in a tiny pot becomes unstable. The root ball acts like a small anchor for a big sail. If a gentle breeze or a curious pet knocks it over, the pot is too small. Repotting adds weight and stability.
Soil Looks Depleted or Crusty
Old potting mix breaks down over time. It turns into a dense, dusty mass that repels water. You might see a white crust of mineral salts on the surface. Fresh soil restores structure and fertility.
It Has Been Over a Year
Even without obvious signs, most houseplants benefit from fresh soil every twelve to eighteen months. Fast growers like pothos or spider plants may need it yearly. Slow growers like snake plants can go longer. Mark your calendar as a gentle reminder.
Choosing the Right Pot and Soil for Success
Pot Size Matters More Than You Think
The golden rule is to go up only one or two inches in diameter. A small plant in a huge pot drowns in wet soil. The roots cannot drink all that water fast enough. Root rot sets in quickly. Stick to a modest upgrade. Your plant will thank you.
Drainage Holes Are Non Negotiable
Never use a pot without drainage holes for a beginner repot. Decorative cachepots are fine as outer sleeves, but the inner pot must drain. Standing water at the bottom creates an anaerobic zone where roots rot. If you fall in love with a holeless pot, drill holes yourself or use it as a cachepot.
Material Choices: Terracotta, Plastic, Ceramic
Terracotta is porous. It wicks moisture away and lets air reach roots. Great for succulents, cacti, and anyone who overwater. Plastic retains moisture longer. It is lightweight and cheap. Good for thirsty tropicals. Glazed ceramic sits in the middle. It holds moisture better than terracotta but breathes more than plastic. Pick based on your watering habits.
Potting Mix vs Garden Soil
Never use garden soil in pots. It compacts into concrete, suffocating roots. It also brings weeds, pests, and diseases indoors. Buy a quality potting mix labeled for your plant type. General indoor mix works for most tropicals. Cactus and succulent mix has extra sand or perlite for drainage. Orchid mix is mostly bark. Match the mix to the plant.
Amendments for Extra Drainage
You can customize any mix. Add perlite or pumice for aeration. Add orchid bark for chunkiness. Add worm castings for gentle nutrition. A good starter recipe is two parts potting mix, one part perlite, one part orchid bark. This airy blend works for a huge range of houseplants.
Essential Tools and Materials Checklist
The Basics You Already Have
Gather a tarp or old sheet to catch mess. A trowel or large spoon for scooping soil. Pruning shears or scissors for trimming roots. A chopstick or pencil for settling soil. Gloves if you prefer clean hands. A watering can with a narrow spout. That is it. No fancy gadgets required.
Helpful Extras
A soil scoop makes filling pots faster. A root hook or fork helps tease apart tight roots. A moisture meter takes guesswork out of watering later. A label maker or masking tape and marker for naming pots. A spray bottle for misting leaves after the move. These are nice to have but not essential.
Sanitize Everything
Wash your pot with hot soapy water. Rinse well. If reusing an old pot, soak it in one part bleach to nine parts water for ten minutes. Rinse again. Clean tools with rubbing alcohol. This prevents transferring pests or pathogens to the fresh start.
Step by Step Guide to Repotting Day
Water the Plant First
Water your plant thoroughly one day before repotting. Moist soil holds the root ball together. It slides out easier. Dry soil crumbles and tears roots. Wet soil makes a heavy mess. Aim for evenly moist, not soggy.
Prepare the New Pot
Place a coffee filter or piece of mesh over the drainage hole. This keeps soil in while letting water out. Add a layer of fresh potting mix to the bottom. The top of the root ball should sit about an inch below the rim. Adjust the base layer until the height looks right.
Remove the Plant Gently
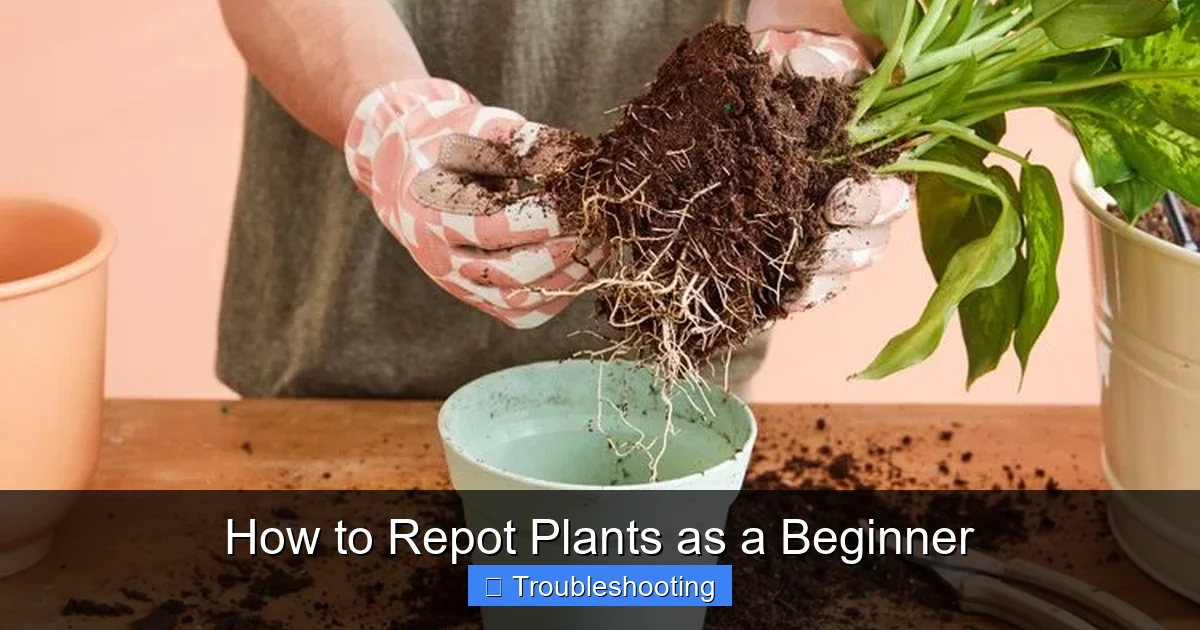
Turn the pot sideways. Hold the plant at the base of the stem. Tap the pot bottom firmly. Squeeze a plastic pot to loosen the edges. The plant should slide out. If stuck, run a knife around the inside edge. Never yank by the leaves or stem.
Inspect and Loosen the Roots
Look at the root ball. Healthy roots are white or light tan and firm. Brown, mushy, or smelly roots are rot. Trim those away with clean shears. If roots circle tightly, gently tease them apart with fingers. Make a few vertical cuts in the bottom if extremely bound. This encourages outward growth.
Position and Fill
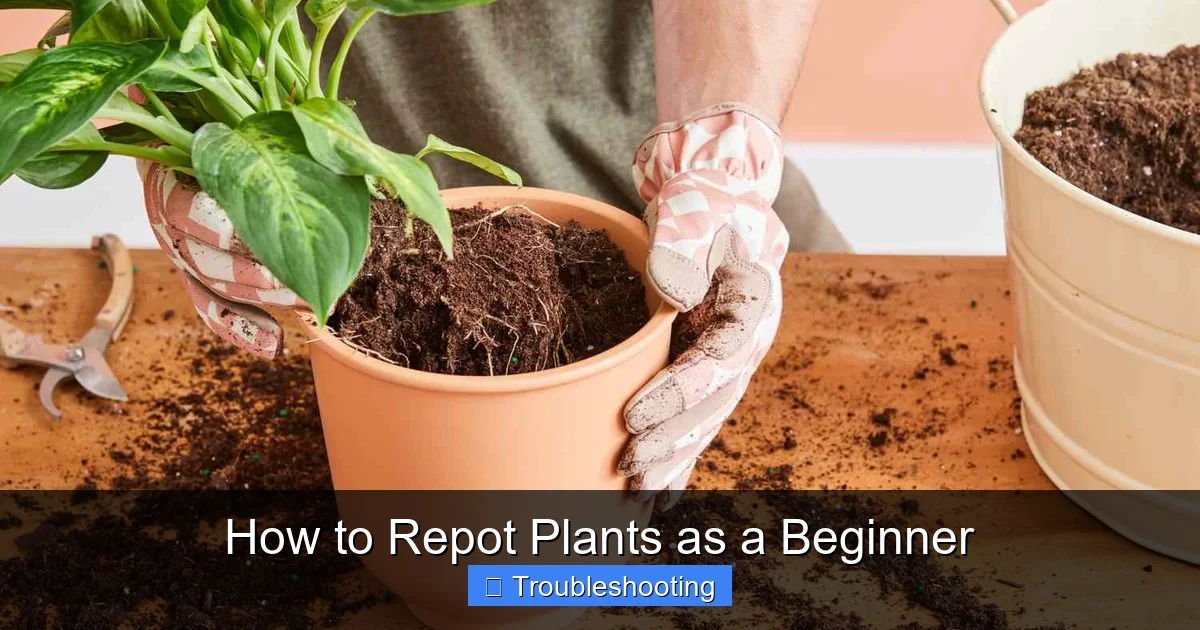
Set the plant in the new pot. Center it. Check the height again. Fill around the sides with fresh mix. Use your chopstick to poke soil into gaps. Tap the pot on the table to settle. Add more mix until level with the original soil line. Do not bury the stem deeper than before.
Water Thoroughly
Water until it runs freely from the bottom. This settles soil and eliminates air pockets. If the soil level drops, top it off. Let the pot drain completely. Empty the saucer. The first watering is the most important one.
Aftercare: The First Few Weeks Matter Most
Hold Off on Fertilizer
Fresh potting mix contains slow release nutrients. Adding fertilizer now can burn tender new roots. Wait four to six weeks. Then resume your normal feeding schedule at half strength for the first dose.
Light and Location
Keep the plant in bright indirect light. Avoid direct sun for a week or two. The plant is stressed. Intense light increases water demand while roots are recovering. A slightly shadier spot reduces transpiration pressure.
Watering Rhythm
Check soil moisture before watering again. Stick your finger in two inches. If dry, water. If moist, wait. The new soil mix may dry faster or slower than the old one. Do not rely on the old schedule. Observe and adjust.
Watch for Transplant Shock
Some leaf yellowing or drooping is normal. The plant is reallocating energy to root repair. Do not panic. Do not overwater to compensate. Keep conditions stable. Most plants bounce back in two to three weeks.
Hold Off on Pruning
Do not trim healthy foliage right after repotting. Leaves make food for root recovery. Only remove leaves that are fully yellow or brown. Wait until you see new growth before shaping the plant.
Common Mistakes and How to Avoid Them
Jumping Pot Sizes Too Fast
We covered this but it bears repeating. A monstera in a four inch pot does not need a twelve inch pot. It needs a six inch pot. Gradual upgrades prevent waterlogging. Think of it like buying shoes for a growing child. One size up at a time.
Using Garden Soil or Cheap Fill Dirt
This is the number one killer of repotted plants. Garden soil lacks perlite, vermiculite, or bark. It turns to mud then brick. Roots suffocate. Spend a few extra dollars on quality mix. It is insurance for your plant.
Planting Too Deep
Burying the stem invites rot. The soil line on the stem should stay exactly where it was. If the plant sits too low, lift it and add more base mix. If too high, remove some base mix. Get this right before filling sides.
Packing Soil Too Tight
Roots need air pockets. Compacted soil pushes air out. Use the chopstick method. Poke gently. Tap the pot. Let gravity do the work. Do not press down with your hands like packing a suitcase.
Watering on a Schedule Instead of Need
The day after repotting, the soil is wet. Three days later it might still be wet. Do not water just because it is Tuesday. Check the soil. Overwatering a recovering plant is the fastest way to lose it.
Repotting a Stressed or Sick Plant
If your plant has pests, disease, or severe underwatering damage, fix that first. Repotting adds stress. A weak plant may not survive the double whammy. Stabilize health, then repot in a few weeks.
Special Cases: Succulents, Orchids, and Large Plants
Succulents and Cacti
Use gritty, fast draining mix. Wait three to five days after repotting before first water. This lets any damaged roots callus over. Wet roots on succulents rot fast. Terracotta pots are ideal here.
Orchids
Orchids need bark mix, not soil. Repot when bark breaks down, usually every one to two years. Clear plastic pots let you see root health. Soak bark before use. Trim dead roots. Water sparingly after.
Large Floor Plants
For plants too heavy to lift, do a soil refresh instead. Remove the top two to three inches of old soil. Replace with fresh mix. This gives a nutrient boost without the backbreaking move. Do a full repot only when absolutely necessary.
Conclusion: You Are Ready to Repot
You now know how to repot plants as a beginner from start to finish. You can spot the signs. You can pick the right pot and soil. You have the tools. You know the steps. You understand aftercare. You know the pitfalls to avoid. That is a complete toolkit.
Your first repot might feel clumsy. That is okay. Every plant parent has knocked over a pot or spilled soil on the carpet. The plants forgive us. They want to grow. Give them fresh soil, a little more room, and a drink of water. Then step back and watch them take off. There is no better feeling than seeing a new leaf unfurl on a plant you just repotted with your own hands. Happy growing.
Frequently Asked Questions
How do I know if my plant is root bound?
Look for roots growing out of drainage holes, water running straight through the pot, slowed growth, or a plant that dries out very quickly. You can also gently slide the plant out to check if roots circle the bottom.
What size pot should I choose for repotting?
Choose a pot 1 to 2 inches larger in diameter than the current pot. Going too large causes excess soil to stay wet, leading to root rot. A modest size increase gives roots room without drowning them.
Can I reuse old potting soil when repotting?
It is best to use fresh potting mix. Old soil loses structure, nutrients, and may harbor pests or diseases. If you must reuse, sterilize it in the oven at 180°F for 30 minutes and amend with fresh perlite and compost.
Should I water immediately after repotting?
Yes, water thoroughly after repotting until water drains from the bottom. This settles the soil around roots and eliminates air pockets. Let the pot drain completely and empty the saucer afterward.
How long does transplant shock last?
Most plants show signs of transplant shock like drooping or yellowing leaves for 2 to 3 weeks. Keep conditions stable with bright indirect light and proper watering. Avoid fertilizing until new growth appears.
Can I repot a flowering plant?
It is best to wait until after flowering finishes. Repotting stresses the plant and may cause bud drop. If the plant is severely root bound, repot carefully and expect some flower loss as the plant redirects energy to root recovery.