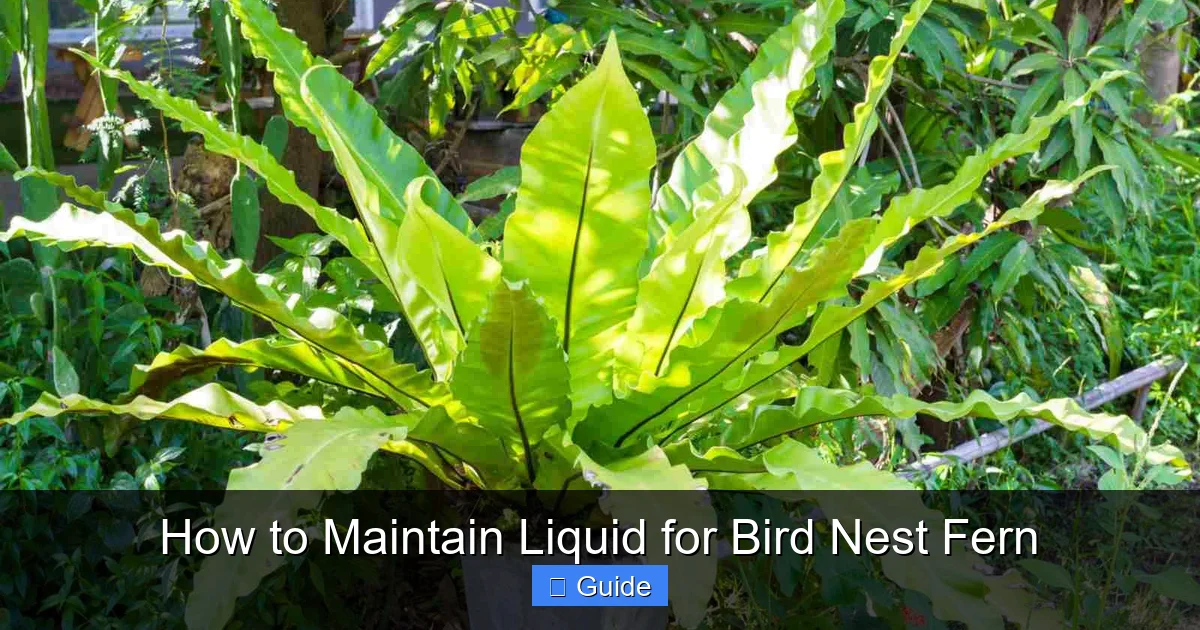
How to Maintain Liquid for Bird Nest Fern
Master the art of watering your bird nest fern with our complete guide. Discover the perfect moisture balance, humidity tricks, and watering schedule to keep your fern lush and healthy year-round.
Key Takeaways
- Water when the top inch of soil feels dry: Check moisture with your finger before adding more liquid to prevent root rot.
- Use room temperature filtered water: Cold or chlorinated water can shock the delicate roots of your fern.
- Maintain 50-70% humidity: Bird nest ferns thrive in moist air, so use a humidifier or pebble tray for best results.
- Water at the soil level, not the crown: Pouring water into the center nest can cause crown rot and fungal issues.
- Adjust watering with the seasons: Reduce frequency in winter when growth slows and increase during active growing months.
- Ensure proper drainage: Always use pots with drainage holes and well-draining soil to prevent standing water.
- Watch for warning signs: Yellow leaves mean overwatering while crispy edges signal underwatering or low humidity.
Quick Answers to Common Questions
How often should I water my bird nest fern?
Water when the top inch of soil feels dry. Typically every 5-7 days in summer and every 10-14 days in winter, but always check with your finger first.
Can I use tap water for my bird nest fern?
Yes, but let it sit overnight to evaporate chlorine, or use a filter. Room temperature filtered or rainwater is ideal for sensitive ferns.
Why are my bird nest fern’s leaves turning yellow?
Yellow leaves usually indicate overwatering. Check soil moisture and drainage. Reduce watering frequency and ensure the pot isn’t sitting in standing water.
Should I mist my bird nest fern daily?
Misting helps briefly but doesn’t replace proper humidity. Use a humidifier or pebble tray for consistent 50-70% humidity instead of relying on daily misting.
Is it okay to pour water into the center of the fern?
No. Water sitting in the crown causes crown rot. Always water at the soil level around the base of the plant, keeping the central rosette dry.
📑 Table of Contents
- Introduction
- Understanding Your Bird Nest Fern’s Natural Habitat
- Choosing the Right Water for Your Fern
- Mastering the Watering Schedule
- Perfecting Your Watering Technique
- Humidity: The Invisible Liquid Factor
- Soil and Drainage: The Foundation of Liquid Management
- Troubleshooting Common Liquid-Related Problems
- Advanced Tips for Thriving Ferns
- Seasonal Care Calendar
- Common Myths About Bird Nest Fern Watering
- Conclusion
Introduction
Bird nest ferns are stunning tropical plants that bring a touch of the rainforest into your home. Their bright green, wavy fronds unfurl from a central rosette that looks just like a bird’s nest. But keeping these beauties happy comes down to one critical skill. You need to know how to maintain liquid for bird nest fern properly. Get the watering right, and your fern will reward you with lush, vibrant growth for years.
Many plant parents struggle with these ferns. They water too much or too little. They mist the leaves but ignore the roots. They use cold tap water straight from the faucet. Each mistake stresses the plant. The good news? Once you understand the basics, maintaining the right moisture balance becomes second nature. This guide covers everything you need to know about watering, humidity, and liquid care for your bird nest fern.
Understanding Your Bird Nest Fern’s Natural Habitat
To master how to maintain liquid for bird nest fern, you first need to know where these plants come from. Bird nest ferns (Asplenium nidus) grow as epiphytes in tropical rainforests across Southeast Asia, Australia, and the Pacific Islands. They attach themselves to tree trunks and branches high in the canopy. Their roots grab onto bark rather than digging into soil.
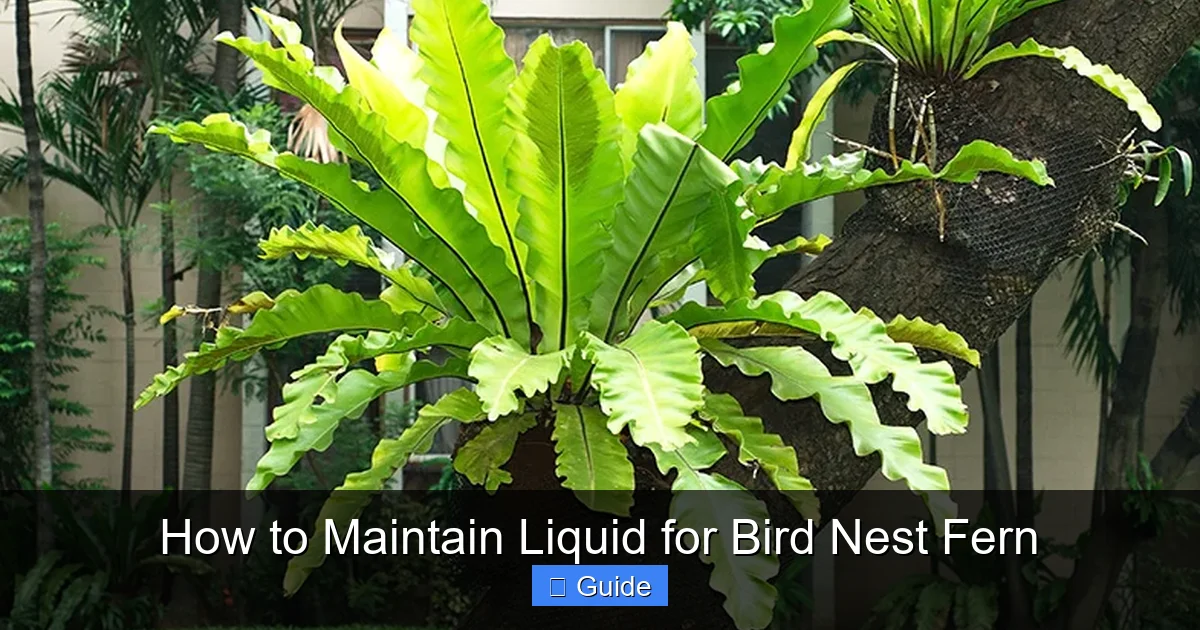
Visual guide about How to Maintain Liquid for Bird Nest Fern
Image source: gardenbeast.com
What This Means for Watering
In their natural home, these ferns get frequent rain showers. But the water drains away quickly. The roots never sit in soggy conditions. The air stays humid and warm. Temperatures rarely drop below 60°F. This tells us three key things. First, the roots need air as much as they need water. Second, humidity matters just as much as soil moisture. Third, cold water shocks the system.
The Crown Structure Matters
That central rosette isn’t just for looks. In nature, it catches falling leaves and debris. This creates a natural compost that feeds the plant. But it also catches rainwater. The plant evolved to absorb moisture through its fronds and the organic matter in its crown. However, standing water in the crown leads to rot. This is why watering technique matters so much.
Choosing the Right Water for Your Fern
Not all water is created equal. The type of liquid you use affects your fern’s health more than you might think. Let’s break down your options.
Tap Water Considerations
Most of us use tap water. It’s convenient and free. But tap water often contains chlorine, fluoride, and dissolved minerals. These can build up in the soil over time. Chlorine especially harms beneficial soil microbes. If you must use tap water, let it sit out overnight. This allows chlorine to evaporate. Better yet, run it through a simple carbon filter first.
Filtered and Distilled Water
Filtered water removes most chemicals while keeping some minerals. This is a great middle ground. Distilled water has zero minerals. It’s pure H2O. Some growers swear by it. Others say the lack of minerals starves the plant over time. If you use distilled water, you’ll need to fertilize more regularly to replace missing nutrients.
Rainwater: The Gold Standard
Rainwater is what these ferns get in nature. It’s slightly acidic, which they love. It contains nitrogen from the atmosphere. It’s free of chlorine and excess minerals. If you can collect rainwater, your bird nest fern will thrive. Just make sure your collection system is clean. Avoid water that runs off treated roofs or through gutters with debris.
Water Temperature Matters
This is a detail many people miss. Tropical plants hate cold water. It shocks their roots. Always use room temperature water. Aim for 68-72°F. In winter, let your watering can sit in the room for an hour before using. Your fern will thank you with steady growth instead of sulking.
Mastering the Watering Schedule
There’s no universal schedule for how to maintain liquid for bird nest fern. Your specific conditions determine frequency. But you can learn to read the signs.
The Finger Test: Your Best Tool
Forget calendar schedules. Use your finger. Push it into the soil up to your first knuckle. That’s about one inch deep. If the soil feels dry at your fingertip, it’s time to water. If it feels moist, wait another day. Check every morning until you learn your plant’s rhythm. Most indoor bird nest ferns need water every 5-7 days in summer. In winter, it might be every 10-14 days.
Weight Test for Hanging Baskets
If your fern hangs in a basket, lifting it tells you everything. A well-watered pot feels heavy. A dry pot feels surprisingly light. Learn the weight difference. This works especially well for mounted ferns or those in moss balls where finger testing is tricky.
Visual Cues from the Fronds
The leaves communicate clearly. Glossy, firm, upright fronds mean happy hydration. Drooping, dull fronds signal thirst. But wait. Yellowing lower fronds often mean too much water. Crispy brown edges on multiple fronds point to underwatering or low humidity. Learn to distinguish these signals.
Seasonal Adjustments
Your watering schedule must change with the seasons. Spring and summer bring active growth. The plant drinks more. Light levels are higher. Temperatures are warmer. Increase frequency. Fall and winter slow everything down. Growth pauses. Light decreases. The plant uses less water. Cut back significantly. Overwatering in winter is the number one killer of bird nest ferns.
Perfecting Your Watering Technique
How you apply water matters as much as when and what water you use. Technique prevents problems before they start.
Water the Soil, Not the Crown
This is the golden rule. Pour water directly onto the soil surface. Work your way around the pot evenly. Avoid the central rosette entirely. Water sitting in the crown invites crown rot. This fungal disease can kill a mature fern in weeks. If water accidentally gets in the crown, gently tilt the pot to drain it. Or use a turkey baster to suck out excess.
Bottom Watering Method
Many fern enthusiasts prefer bottom watering. Place the pot in a tray of water. Let the soil wick moisture up through the drainage holes. After 15-20 minutes, remove the pot and let it drain thoroughly. This ensures even moisture distribution. It keeps the crown dry. It encourages deep root growth. Just don’t leave the pot sitting in water longer than 30 minutes.
Thorough vs. Frequent Light Watering
Always water thoroughly. When you water from the top, keep going until water flows from the drainage holes. This flushes accumulated salts. It ensures the entire root ball gets moist. Light, frequent sprinklings create shallow roots. They also leave dry pockets in the soil. Deep, less frequent watering builds stronger plants.
Morning Watering Is Best
Water in the morning whenever possible. This gives any splashed moisture on fronds time to evaporate. Wet leaves overnight encourage fungal spores. Morning watering also aligns with the plant’s natural metabolic rhythm. The roots absorb water most actively during daylight hours.
Humidity: The Invisible Liquid Factor
When we talk about how to maintain liquid for bird nest fern, humidity is half the equation. These ferns absorb significant moisture through their fronds. Low humidity stresses them even with perfect soil watering.
Target Humidity Range
Aim for 50-70% relative humidity. Most homes sit around 30-40%. Winter heating drops it even lower. You’ll almost certainly need to supplement. A hygrometer costs $10 and takes the guesswork out. Place it near your plant, not across the room.
Pebble Tray Method
Fill a shallow tray with pebbles. Add water to just below the pebble tops. Set your pot on the pebbles, not in the water. As water evaporates, it creates a humidity bubble around your plant. Refill as needed. Clean the tray monthly to prevent algae and mosquitoes.
Humidifier Options
A room humidifier is the most effective solution. Choose cool mist for safety. Run it during the day. Aim for the 50-70% range. Clean it weekly to prevent mold. Place it a few feet from the plant, not blowing directly on it. This benefits all your tropical plants at once.
Grouping Plants Together
Plants release moisture through transpiration. Group several tropical plants together. They create a microclimate of higher humidity. Just ensure air still circulates. Crowding without airflow invites pests and disease. Leave a few inches between pots.
Misting: Helpful or Harmful?
Misting is controversial. It briefly raises humidity. But it can promote fungal issues if water sits on fronds. If you mist, do it in the morning. Use a fine spray. Don’t soak the leaves. Never mist as a substitute for proper humidity. It’s a supplement, not a solution.
Bathroom and Kitchen Placement
These rooms naturally have higher humidity. A bright bathroom window is ideal. Kitchen counters near sinks work well too. Just ensure adequate light. No amount of humidity compensates for darkness.
Soil and Drainage: The Foundation of Liquid Management
You can water perfectly, but the wrong soil ruins everything. The growing medium controls how liquid moves through the root zone.
Ideal Soil Mix
Bird nest ferns need a chunky, well-draining mix. Standard potting soil holds too much water. Create your own blend. Start with two parts orchid bark. Add one part peat moss or coco coir. Mix in one part perlite or pumice. A handful of horticultural charcoal keeps it fresh. This mimics the bark and debris they grow on in nature.
Pot Selection Matters
Always use pots with drainage holes. No exceptions. Terra cotta breathes, pulling excess moisture from the soil. Plastic retains water longer. Choose based on your watering habits. If you overwater, terra cotta forgives you. If you underwater, plastic buys time. The pot should be just slightly larger than the root ball. Huge pots hold too much wet soil.
Repotting and Liquid Management
Repot every 2-3 years in spring. Fresh mix restores drainage. Old mix breaks down and compacts. Compacted soil stays wet too long. When repotting, gently loosen the root ball. Trim any black, mushy roots. These are already rotted. Use the same soil recipe. Water lightly after repotting. Then wait for the finger test to say go.
Mounted Ferns: Special Considerations
Some growers mount bird nest ferns on wood plaques or in moss balls. This mimics nature beautifully. But watering changes completely. Soak the entire mount in a basin of water for 10-15 minutes. Let it drip dry before rehanging. Do this when the moss feels dry and crisp. Mounted ferns dry faster than potted ones. Check them more often.
Troubleshooting Common Liquid-Related Problems
Even with good intentions, issues arise. Here’s how to diagnose and fix the most common problems.
Yellowing Fronds
Yellow leaves usually mean overwatering. Check the soil. Is it soggy? Does the pot smell musty? Stop watering. Improve airflow. Consider repotting into fresh, drier mix. Remove fully yellow fronds at the base. They won’t recover. If only tips are yellow, it might be fertilizer burn or low humidity instead.
Brown Crispy Edges
This screams low humidity or underwatering. Check both. Increase humidity first. It’s usually the culprit. Trim the brown edges with clean scissors. Cut at an angle to mimic natural shape. Don’t cut into green tissue. The plant wastes energy sealing cut wounds.
Crown Rot: The Silent Killer
Black, mushy center. Foul smell. Fronds pull out easily. This is crown rot. It’s usually fatal. If caught extremely early, you might save it. Remove all rotted tissue. Dust with cinnamon (natural fungicide). Repot in fresh, sterile mix. Keep barely moist. Pray. Prevention is infinitely better. Never let water sit in the crown.
Root Rot
Similar to crown rot but underground. The plant wilts despite wet soil. Roots are brown/black and mushy. Healthy roots are white/cream and firm. Unpot the plant. Wash all soil away. Trim every rotten root. Repot in fresh mix. Water with diluted hydrogen peroxide (1 tsp 3% per cup water) once. Then baby it.
Mineral Buildup
White crust on soil surface. Brown leaf tips despite good care. This is salt/mineral accumulation. Flush the soil monthly. Run water through for 2-3 minutes. Let drain completely. Use filtered water going forward. Repot annually if your water is very hard.
Advanced Tips for Thriving Ferns
Once you master the basics, these pro tips take your fern from surviving to spectacular.
Fertilizing Without Burning
Liquid fertilizer is easiest to control. Use a balanced formula at quarter strength. Apply monthly during growing season. Always water with plain water first. Then apply fertilizer solution. Never fertilize dry soil. It burns roots. Skip winter entirely. Flush the soil every third feeding to prevent buildup.
Water Quality Testing
If you’re serious, test your water. A simple TDS meter shows dissolved solids. Under 100 ppm is excellent. 100-200 is good. Over 300 needs filtration. pH strips matter too. Aim for 5.5-6.5. Adjust with a few drops of vinegar (lower) or baking soda (raise) if needed. Most municipal water is fine once dechlorinated.
Vacation Watering Strategies
Going away? Don’t rely on friends who overwater. Use watering spikes with wine bottles. Test them a week before leaving. Or move the fern to a bathtub with a few inches of water and a towel. The humidity keeps it happy for weeks. Group plants together. They create a humid microclimate that sustains them longer.
Propagation and Water Needs
Bird nest ferns don’t divide easily. They grow from spores or tissue culture. If you try spores, humidity must stay near 100%. Use a clear plastic container. Bottom heat helps. Keep the medium constantly moist but not flooded. This is advanced territory. Most hobbyists buy new plants.
Seasonal Care Calendar
Here’s a quick reference for how to maintain liquid for bird nest fern throughout the year.
Spring (March-May)
Growth resumes. Increase watering frequency. Start monthly fertilizing. Check humidity as heating turns off. Repot if needed. Watch for new fronds unfurling. They’re fragile. Don’t touch them.
Summer (June-August)
Peak growth. Water most frequently. Highest humidity needs. May need daily checks in heat. Fertilize monthly. Move outdoors to shade if climate allows. Acclimate slowly. Bring in before nights drop below 55°F.
Fall (September-November)
Growth slows. Gradually reduce watering. Stop fertilizing by October. Heating systems start. Humidity drops. Start humidifier. Check for pests moving indoors. Clean fronds with damp cloth.
Winter (December-February)
Dormant period. Water minimally. Maybe every 2-3 weeks. Run humidifier daily. No fertilizer. Keep away from heating vents. Cold windowsills can chill roots. Move slightly back if needed. Bright light still essential.
Common Myths About Bird Nest Fern Watering
Let’s bust some persistent myths that lead to dead ferns.
Myth: They Love Wet Feet
False. They love humid air and moist (not wet) soil. Soggy soil suffocates roots. The “swamp plant” label is wrong. They’re epiphytes. Their roots grip bark in airy conditions.
Myth: Daily Misting Replaces Humidity
False. Misting raises humidity for minutes. A humidifier or pebble tray works for hours. Misting wet leaves invite fungus. It’s a treat, not a strategy.
Myth: Ice Cubes Are Good for Slow Watering
False. Tropical plants hate cold. Ice shocks roots. It melts unevenly. Use room temperature water. Always.
Myth: Yellow Leaves Mean More Water
False. Yellow usually means too much water. Or old age. Or nutrient deficiency. Check soil first. Don’t assume.
Myth: They Don’t Need Drainage
Dangerously false. No drainage equals root rot. Every pot needs holes. Cache pots are fine if you remove the inner pot to water and drain.
Conclusion
Learning how to maintain liquid for bird nest fern transforms your relationship with this plant. You stop guessing and start reading signals. The finger test becomes a morning ritual. The humidifier hum becomes background music. You notice the subtle sheen of a happy frond. You catch the slight droop before it becomes crispy.
Remember the core principles. Water when the top inch dries. Use room temperature, filtered water. Never wet the crown. Maintain 50-70% humidity. Provide chunky, draining soil. Adjust with the seasons. Watch for yellow (too wet) and crispy (too dry). Everything else is refinement.
Your bird nest fern wants to thrive. It’s evolved for millions of years to succeed in specific conditions. Recreate those conditions, and it will reward you with architectural fronds that unfurl like green scrolls. Each new frond is a thank you note written in chlorophyll. Happy growing.
Frequently Asked Questions
What type of water is best for bird nest ferns?
Rainwater is ideal, followed by filtered or distilled water at room temperature. If using tap water, let it sit 24 hours to dissipate chlorine. Avoid softened water due to sodium content.
How do I know if my bird nest fern needs water?
Insert your finger one inch into the soil. If dry at your fingertip, water thoroughly. Also check pot weight and frond appearance. Drooping, dull fronds indicate thirst.
Can bird nest ferns recover from overwatering?
Yes, if caught early. Stop watering, improve airflow, and consider repotting in fresh, well-draining mix. Remove yellowed fronds. Severe root rot may be fatal.
What humidity level do bird nest ferns need?
Bird nest ferns thrive at 50-70% relative humidity. Most homes need supplemental humidity from humidifiers, pebble trays, or plant grouping, especially in winter.
Should I bottom water or top water my bird nest fern?
Both work well. Bottom watering keeps the crown dry and encourages deep roots. Top watering flushes salts. Either method works if you avoid the central rosette.
Why are the tips of my bird nest fern turning brown?
Brown tips usually indicate low humidity, underwatering, or mineral buildup from tap water. Increase humidity, check watering consistency, and flush soil monthly.