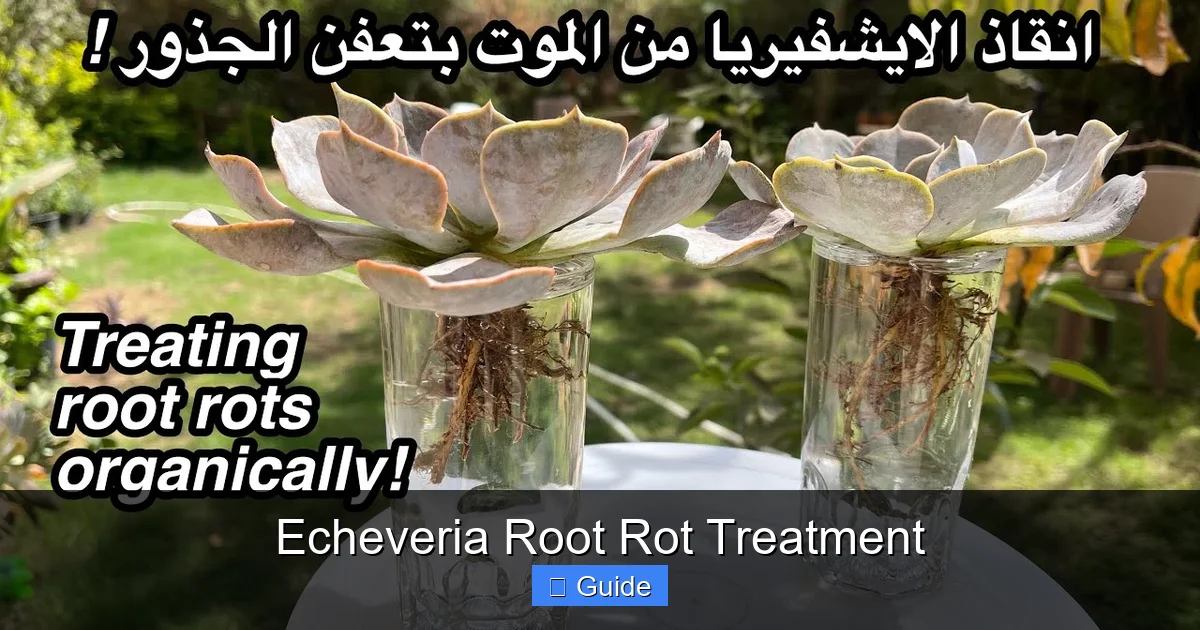
Echeveria Root Rot Treatment
Echeveria root rot is a fatal fungal disease caused by overwatering and poor drainage, but early detection can save your plant. This guide covers every symptom, treatment step, and prevention strategy you need to keep your echeverias thriving.
Key Takeaways
- Root rot starts at the roots: The first signs appear underground before spreading to leaves and stems.
- Overwatering is the main cause: Soggy soil creates the perfect environment for fungal pathogens to thrive.
- Early detection saves plants: Yellowing lower leaves, mushy stems, and foul soil odor are key warning signs.
- Surgery is often required: You must remove all rotted tissue and treat healthy parts with fungicide or cinnamon.
- Proper soil prevents recurrence: Use gritty, fast-draining mix with 50 to 70 percent inorganic material.
- Water only when dry: The soak-and-dry method mimics natural desert conditions echeverias prefer.
- Propagation is your backup plan: Healthy leaves or stem cuttings can grow new plants if the mother plant fails.
Quick Answers to Common Questions
Can an echeveria recover from root rot on its own?
No, an echeveria cannot recover from root rot without intervention. The fungi continue spreading until all tissue is destroyed. You must remove rotted parts and repot in fresh dry soil.
How long does it take for an echeveria to root after rot treatment?
New roots typically appear in two to four weeks after repotting a treated echeveria. Warmer temperatures and bright light speed up the process. Do not water until roots form.
Is cinnamon really effective for treating root rot?
Yes, cinnamon contains cinnamaldehyde which has antifungal properties. It works well as a natural wound sealant on cut surfaces. Dust all cuts generously before callusing.
Should I water my echeveria immediately after repotting for root rot?
No, wait five to seven days after repotting before the first water. This allows cut surfaces to fully callus and any remaining fungal spores to die off in the dry environment.
Can I reuse the soil from a pot that had root rot?
Never reuse soil from a rotted plant. It contains fungal spores that will infect the next plant. Discard old soil, sterilize the pot with bleach solution, and use fresh gritty mix.
📑 Table of Contents
Understanding Echeveria Root Rot
If you grow echeverias, you know these rosette-shaped succulents are stunning. They come in colors from powder blue to deep purple. But they have one weakness. Their roots hate sitting in water. When soil stays wet too long, fungi attack. This is echeveria root rot. It kills fast. Many growers lose plants before they realize what happened.
Root rot is not a single disease. Several fungi cause it. Pythium, Phytophthora, and Rhizoctonia are the main culprits. They live in soil naturally. They wait for the right conditions. Wet, anaerobic soil wakes them up. Then they swarm the roots. They destroy the tissue that moves water and nutrients. The plant starves and drowns at the same time.
Echeverias evolved in semi-desert regions of Mexico and Central America. They grow on rocky cliffs. Rain comes fast and drains instantly. Their roots need air. They store water in leaves. They do not need constant moisture. When we treat them like tropical plants, we create the perfect storm for rot.
Spotting the Early Warning Signs
What Healthy Roots Look Like
Before you can spot rot, know what healthy looks like. Healthy echeveria roots are firm. They are white or pale tan. They smell like fresh earth. They hold the soil ball together when you unpot the plant. New root tips are bright white and fuzzy.
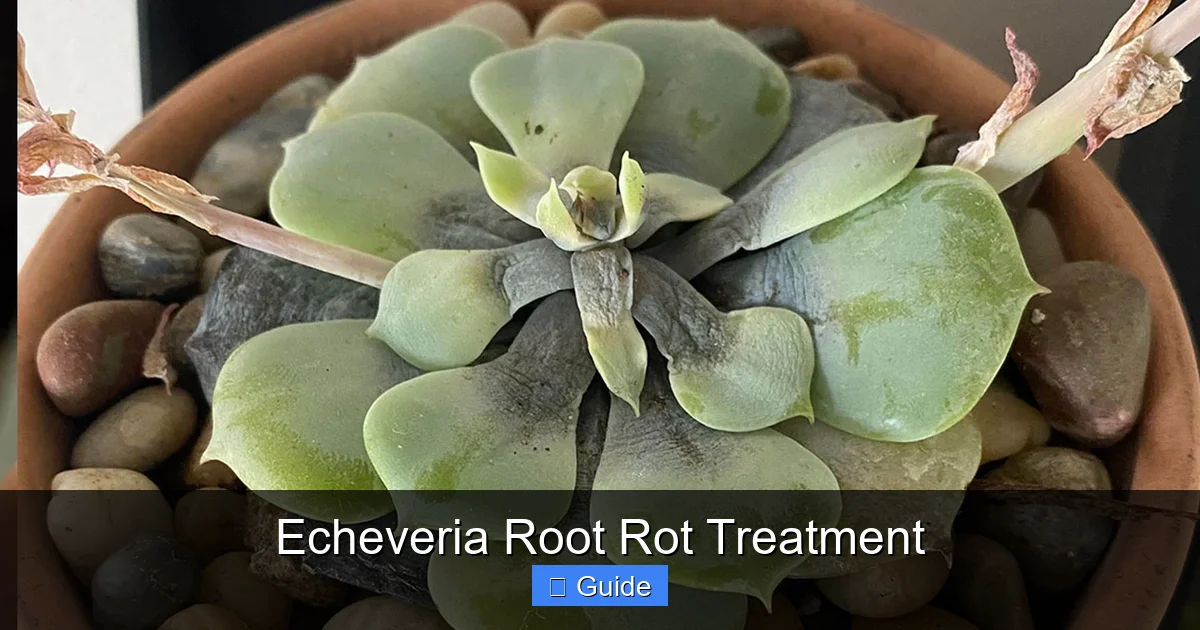
Visual guide about Echeveria Root Rot Treatment
Image source: essentialhouseplants.com
First Aboveground Clues
The plant talks to you. Lower leaves turn yellow first. They feel soft, not crisp. They may turn translucent. This is not normal aging. Normal aging makes leaves dry and papery. Rot makes them mushy. The rosette may lean. The stem feels loose in the pot. Gently wiggle the plant. If it moves independently of the soil, roots are gone.
The Smell Test
Smell the soil. Healthy soil smells earthy. Rotted soil smells sour. It smells like a swamp. It smells like old potatoes. That odor is bacterial and fungal waste. If you smell it, rot is advanced.
Advanced Symptoms
Black or brown mushy spots appear on the stem. The crown turns black. Leaves fall off with a touch. The center of the rosette collapses. At this stage, saving the mother plant is unlikely. But you can still propagate healthy leaves.
Why Echeverias Get Root Rot
Overwatering Frequency
This is the number one killer. Watering on a schedule ignores the plant’s needs. Echeverias need the soil to dry completely. Then stay dry for a few days. In summer, this might be every seven to ten days. In winter, it could be three to four weeks. Watering weekly year-round guarantees rot.
Poor Drainage Soil
Standard potting soil holds water. It contains peat moss and compost. These break down into fine particles. They compact. Air pockets disappear. Roots suffocate. Fungi move in. You need a gritty mix. Think perlite, pumice, coarse sand, and small bark chips. Organic matter should be thirty percent or less.
Pots Without Drainage Holes
Decorative pots without holes are death traps. Water pools at the bottom. The soil above stays saturated. Even a layer of gravel does not fix this. It creates a perched water table. The soil stays wetter longer. Always use pots with holes. Cache pots are fine if you remove the inner pot to water.
Wrong Pot Size
Large pots hold too much soil. The small root system cannot drink it all. The soil stays wet. Choose a pot just one inch wider than the root ball. Terra cotta is best. It breathes. It wicks moisture away. Plastic and glazed ceramic trap water.
High Humidity and Low Light
Echeverias need bright light. Low light slows growth. Slow growth means less water uptake. Soil stays wet. High humidity reduces transpiration. The plant cannot release water vapor. These conditions mimic a fungal incubator. Give your plants six hours of direct sun or strong grow lights.
Cold Temperatures
Cold wet soil is a killer. Fungi thrive in cool damp conditions. Echeverias go dormant in winter. They need almost no water. Watering in cold weather is a death sentence. Keep them above fifty degrees Fahrenheit. Keep them dry.
Step-by-Step Echeveria Root Rot Treatment
Gather Your Supplies
Before you start, get everything ready. You need clean scissors or a sharp knife. Sterilize with rubbing alcohol or flame. You need fresh dry succulent soil. You need a clean pot with drainage. You need ground cinnamon or sulfur powder. You need hydrogen peroxide three percent. You need a small brush. You need gloves. Work on a clean surface covered with newspaper.
Unpot and Assess
Remove the plant from its pot. Squeeze the pot sides to loosen soil. Tip it out gently. Do not pull the plant by the leaves. Shake off loose soil. Rinse roots under lukewarm running water. This reveals the true damage. Healthy roots are firm and white. Rotted roots are brown, black, or mushy. They slide off the core like wet socks.
Remove All Rotted Tissue
This is surgery. Cut away every bit of rot. Cut into healthy tissue by half an inch. If the stem is black inside, keep cutting up. You may end up with just a rosette and no stem. That is okay. Echeverias root from the stem base. If the crown is rotted, the plant is gone. Save healthy leaves for propagation.
Treat the Cuts
Dust all cut surfaces with cinnamon. Cinnamon is a natural fungicide. It seals wounds. Sulfur powder works too. Do not use rooting hormone on fresh cuts. It can trap moisture. Let the plant callus. Place it on dry paper towel in bright indirect light. Good air flow is essential. Wait three to seven days. The cuts must be dry and hard.
Optional Hydrogen Peroxide Dip
Some growers dip the callused base in diluted peroxide. Mix one part three percent peroxide with four parts water. Dip for thirty seconds. This kills lingering spores. Let dry completely before potting. This step is optional but helpful for severe cases.
Repot in Fresh Dry Soil
Use your gritty mix. Do not water yet. Place the plant on top of the soil. Do not bury the leaves. The stem base should touch the soil. Use chopsticks or small stakes to hold it upright if needed. Roots will grow down into the soil. Wait five to seven days before the first water.
First Water and Aftercare
Water thoroughly until it drains out. Then do not water again until the soil is bone dry. Check with a wooden skewer. Insert it to the bottom. If it comes out clean and dry, water. If damp, wait. Keep in bright indirect light for two weeks. Then gradually increase sun exposure. Watch for new growth. That means roots are working.
Propagating From a Rotted Plant
When to Propagate Instead
If the stem is mushy all the way up, the mother plant is done. If the crown is black and collapsing, stop. Do not waste time. Focus on saving the genetics. Healthy leaves make perfect clones.
Leaf Propagation Steps
Gently twist healthy leaves off the stem. Pull sideways. A clean break leaves the meristem intact. That is the pink nub at the leaf base. If the leaf tears, it will not root. Lay leaves on dry succulent soil. Do not bury them. Do not water. Place in bright indirect light. In two to four weeks, pink roots appear. Then a tiny rosette forms. Mist lightly once roots show. Pot up when the mother leaf shrivels.
Stem Cutting Propagation
If you have a healthy stem section above the rot, cut it. Let it callus five to seven days. Plant in dry gritty soil. Stake it. Wait two weeks. Water sparingly. These root faster than leaves. They keep the mature rosette shape.
Beheading a Leggy Rosette
Sometimes rot strikes a stretched plant. The stem is long and bare. Cut the rosette off with an inch of stem. Remove lower leaves to expose stem. Callus. Root as a stem cutting. The old base may pup new rosettes if roots survive. Two plants for the price of one.
Building the Perfect Prevention Routine
The Ideal Soil Recipe
Make your own mix. It is cheaper and better. Combine two parts pumice or perlite. One part coarse sand. One part small pine bark fines. One part coconut coir or quality potting soil. Sift out dust. Dust clogs air pores. The mix should feel gritty. Water should pour through in seconds.
Mastering the Soak and Dry Method
Water deeply. Let it drain. Wait. Check the soil, not the calendar. Stick a chopstick deep. If it comes out dry, water. If cool or damp, wait. In winter, extend the dry period. The plant is resting. Wrinkled lower leaves mean thirst. Plump firm leaves mean full. Learn to read the leaves.
Seasonal Adjustments
Spring and fall are growth seasons. Water more often. Summer heat may induce dormancy. Water less in extreme heat. Winter is full dormancy. Water barely enough to keep roots alive. Once a month or less. Know your climate. Adjust accordingly.
Pot Selection and Placement
Terra cotta pots are the gold standard. They breathe. They show moisture darkening on the outside. Size matters. One inch wider than the root ball. Elevate pots on feet or gravel trays. Air flow under the pot helps drainage. Space plants apart. Crowding traps humidity.
Light and Air Flow
Six hours direct sun minimum. South window is best. Grow lights work if strong enough. Use a fan on low for indoor plants. Air movement dries soil surface. It strengthens stems. It discourages fungal spores from settling.
Top Dressing Benefits
Cover soil with half inch of pumice or chicken grit. This keeps leaves off wet soil. It prevents perlite floating. It looks clean. It deters fungus gnats. It slows evaporation just enough. It is a small step with big impact.
Common Mistakes That Lead to Rot
Misting Instead of Watering
Misting wets leaves but not roots. Echeverias absorb water through roots. Wet leaves invite fungal leaf spot. Misting creates humidity. It does not hydrate the plant. Always water the soil thoroughly.
Using Saucers Without Emptying
Saucers catch water. That is their job. But if you leave water in them, the soil wicks it back up. The bottom roots never dry. Empty saucers thirty minutes after watering. Better yet, water in the sink and let drain fully.
Grouping With Thirsty Plants
Planting echeverias with ferns or tropicals is a disaster. They need opposite care. The fern gets watered. The echeveria rots. Keep succulents with succulents. Group by water needs.
Ignoring Dormancy
Echeverias slow down in winter. Some stop growing entirely. Continuing summer watering schedule kills them. Respect the rest period. Cool temperatures plus wet soil equals rot.
Fertilizing Stressed Plants
Fertilizer burns damaged roots. It forces growth the plant cannot support. Never fertilize a plant with root rot. Wait until it is fully recovered and showing new growth. Then use quarter strength succulent fertilizer.
Advanced Tips for Difficult Cases
Using Systemic Fungicides
For valuable specimens, systemic fungicides can help. Products with mefenoxam or fosetyl-al move inside the plant. They protect from within. Follow label rates exactly. These are not a substitute for cultural fixes. They are a bridge while you correct conditions.
Beneficial Microbes
Mycorrhizal fungi and beneficial bacteria compete with pathogens. Products like Great White or Plant Success add these allies. They colonize roots. They improve nutrient uptake. They create a living shield. Use at repotting for best colonization.
Bottom Watering Technique
Place the pot in a tray of water. Let soil wick moisture up. Remove when top is damp. This keeps the crown dry. It encourages deep roots. It prevents water sitting in leaf axils. Do not leave pots soaking. Thirty minutes max.
Quarantine New Plants
New plants can bring pests and pathogens. Isolate for two weeks. Inspect roots if possible. Treat preventatively with cinnamon dusting. This protects your collection. One infected plant can spread spores to neighbors.
Monitoring With Technology
Soil moisture meters help beginners. They are not perfect but give a baseline. Bluetooth sensors track trends. Time-lapse cameras show subtle changes. A kitchen scale weighs pots dry and wet. Data removes guesswork.
Conclusion
Echeveria root rot is scary but beatable. The key is knowledge and speed. Know the signs. Act fast. Cut clean. Dry well. Pot right. Water wise. Most of all, prevent it. The best treatment is never needing one. Your echeverias want to thrive. They evolved to survive harsh conditions. Give them what they need. Gritty soil. Bright light. Deep drinks between long droughts. Respect their nature does the rest. You will be rewarded with geometric rosettes in colors that look painted. Happy growing.
Frequently Asked Questions
What does the beginning of root rot look like on echeveria?
Early root rot shows as yellowing lower leaves that feel soft and translucent rather than crisp. The stem may feel loose in the pot, and the soil emits a sour, swampy odor. Healthy roots are firm and white, while early rotted roots turn brown and mushy.
How often should I water echeveria to prevent root rot?
Water echeveria only when the soil is completely dry, typically every 7-10 days in summer and every 3-4 weeks in winter. Use the soak-and-dry method: water thoroughly until it drains out, then wait until a wooden skewer inserted to the bottom comes out completely dry.
Can you save an echeveria with no roots left?
Yes, you can save a rootless echeveria by treating it as a stem cutting. Remove all rotted tissue, let the cut end callus for 5-7 days, then place on dry gritty soil. New roots will emerge from the stem base in 2-4 weeks if kept in bright indirect light.
What is the best soil mix to prevent echeveria root rot?
The best mix contains 50-70% inorganic material like pumice, perlite, or coarse sand, with only 30-50% organic matter. A good recipe is 2 parts pumice, 1 part coarse sand, 1 part pine bark fines, and 1 part coconut coir. Sift out all fine dust particles.
Does hydrogen peroxide kill root rot on succulents?
Diluted 3% hydrogen peroxide (1 part peroxide to 4 parts water) can kill fungal spores on roots when used as a brief 30-second dip after removing rotted tissue. However, it is not a cure-all and must be combined with proper cultural changes to prevent recurrence.
Why do my echeveria leaves keep falling off after repotting?
Leaf drop after repotting usually indicates transplant shock or remaining root damage. Ensure you waited 5-7 days before first water, the soil is very gritty, and the plant is in bright indirect light. Do not fertilize. The plant will stabilize once new roots establish in 2-3 weeks.