Coral Bells Planting Guide
Coral bells (Heuchera) are versatile perennials prized for their colorful foliage and delicate flowers. This comprehensive guide covers everything from choosing the right variety and preparing soil to planting techniques, ongoing care, and troubleshooting common problems. Follow these expert tips to enjoy vibrant, low-maintenance coral bells in your garden for years to come.
If you want a plant that delivers knockout foliage color from spring through fall with barely any fuss, coral bells should be at the top of your list. These charming perennials have exploded in popularity over the last couple decades, and for good reason. Plant breeders have gone wild creating varieties in shades you would not believe. Think deep purple, bright chartreuse, caramel orange, silver, near-black, and everything in between. Some even change color through the seasons.
I remember the first time I planted coral bells in my own garden. I picked up a few ‘Palace Purple’ plants at a local nursery, tucked them into a shady spot under a maple tree, and pretty much forgot about them. The next spring, they came back bigger and better. The deep purple leaves looked amazing against the green ferns nearby. That was it. I was hooked. Now I have at least a dozen different varieties scattered through my beds. They are the reliable friends of the shade garden. They show up, look great, and do not ask for much in return.
Key Takeaways
- Choose the right variety: Select coral bells suited to your climate zone and desired foliage color for best results.
- Plant in well-draining soil: Amend heavy clay or sandy soil with organic matter to prevent root rot and promote healthy growth.
- Provide proper light: Most varieties prefer partial shade, though some tolerate full sun in cooler climates or full shade with reduced color intensity.
- Water consistently: Keep soil evenly moist but not soggy, especially during the first growing season and hot summer months.
- Divide every 3-4 years: Regular division prevents center die-out, rejuvenates plants, and gives you free plants for other garden areas.
- Mulch for protection: Apply 2-3 inches of organic mulch to retain moisture, regulate soil temperature, and prevent winter heaving.
- Watch for pests: Monitor for vine weevils, foliar nematodes, and fungal diseases, treating early for best control.
Quick Answers to Common Questions
When is the best time to plant coral bells?
Spring and fall are the best times to plant coral bells. Spring gives them a full growing season to establish, while fall planting allows root growth in warm soil before winter. Plant at least 6 weeks before the ground freezes in fall.
How much sun do coral bells need?
Most coral bells prefer partial shade with morning sun and afternoon shade. Dark-leaved varieties tolerate more sun (4-6 hours) while light-colored varieties need more shade. In hot climates, afternoon shade is essential for all types.
How often should I water coral bells?
Water new plants 2-3 times per week for the first growing season. Established plants need weekly watering during dry spells. Keep soil evenly moist but not soggy. Container plants may need daily watering in summer.
Why are my coral bells dying in the center?
Center die-out is natural as coral bells age. The woody crown stops producing leaves. Fix this by dividing the plant every 3-4 years in spring or fall, discarding the dead center and replanting the healthy outer sections.
Can coral bells grow in full shade?
Yes, coral bells grow in full shade but foliage color may be less intense and flowering reduced. Green and silver varieties perform best in deep shade. Avoid planting dark varieties in full shade or they may become leggy and dull.
📑 Table of Contents
- Getting to Know Coral Bells
- Choosing the Perfect Planting Location
- When and How to Plant Coral Bells
- Essential Care for Thriving Coral Bells
- Growing Coral Bells in Containers
- Troubleshooting Common Problems
- Seasonal Care Calendar
- Propagating Coral Bells
- Designing with Coral Bells
- Advanced Tips from Experienced Growers
- Conclusion
Getting to Know Coral Bells
What Are Coral Bells?
Coral bells, botanically known as Heuchera, are herbaceous perennials native to North America. They belong to the Saxifragaceae family, which includes other garden favorites like foamflower (Tiarella) and astilbe. The common name comes from the tiny, bell-shaped flowers that bloom on tall, wiry stems above the foliage in late spring to early summer. These flowers are usually pink, red, or white and attract hummingbirds and pollinators.
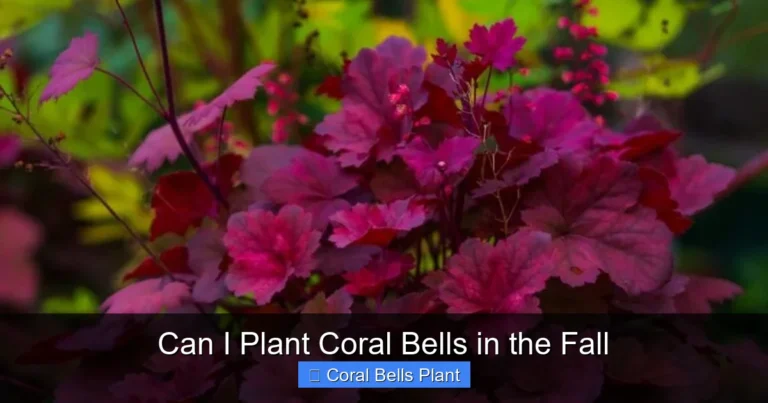
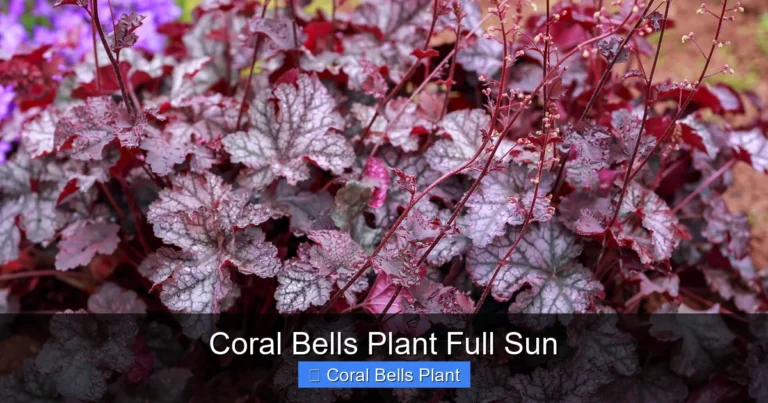
But let us be honest. Most gardeners grow coral bells for the leaves, not the flowers. The foliage forms a neat mound that stays attractive all season. Leaves can be rounded, lobed, ruffled, or deeply cut. Colors range from lime green to deep burgundy, with many varieties showing dramatic veining, silver overlays, or contrasting undersides. Some cultivars even sport different colors on new growth versus mature leaves.
Popular Coral Bells Varieties
With hundreds of named cultivars on the market, choosing can feel overwhelming. Here are some standout varieties that have proven themselves in gardens across the country:
- ‘Palace Purple’: The classic that started the modern coral bells craze. Large, maple-shaped leaves in deep bronze-purple. White flowers in early summer. Very reliable.
- ‘Caramel’: Stunning amber-to-caramel foliage that holds color well in heat and humidity. Pink flowers. A top performer in Southern gardens.
- ‘Obsidian’: Near-black, glossy leaves that keep their intense color all season. One of the darkest varieties available. White flowers.
- ‘Lime Rickey’: Bright chartreuse-lime foliage that lights up shady spots. Ruffled leaves add texture. White flowers.
- ‘Berry Smoothie’: Large, rose-pink leaves with a metallic sheen. Color deepens in cooler weather. Pink flowers.
- ‘Electric Plum’: Deep purple-black leaves with shocking electric pink veins. A real conversation starter. White flowers.
- ‘Forever Purple’: Ultra-glossy, deep purple leaves that do not fade. Vigorous grower. Purple-pink flowers.
- ‘Delta Dawn’: Large, round leaves in gold with red centers. Color shifts through seasons. White flowers.
Understanding Hardiness Zones
Most coral bells are hardy in USDA zones 4 through 9, though this varies by cultivar. Some newer hybrids push the boundaries. ‘Northern Exposure’ series varieties handle zone 3 winters. Heat-tolerant selections like ‘Caramel’ and ‘Georgia Peach’ perform well in zone 9 and even zone 10 with afternoon shade. Always check the plant tag for specific zone ratings before buying.
If you garden in a borderline zone, you can improve winter survival by planting in a protected spot, applying extra mulch after the ground freezes, and ensuring excellent drainage. Wet winter soil kills more coral bells than cold temperatures alone.
Choosing the Perfect Planting Location
Light Requirements
Light needs vary significantly among coral bells varieties. This is probably the most important factor in getting great results. As a general rule, darker-leaved varieties (purples, blacks, deep reds) tolerate more sun than lighter-leaved ones (chartreuse, yellow, silver). But there are exceptions.
In northern climates (zones 4-6), many coral bells handle full sun if they get consistent moisture. The intense color develops best with some direct light. In southern zones (7-9), afternoon shade is essential for almost all varieties. Full sun in hot climates leads to scorched, bleached foliage and stressed plants.
Here is a quick guide by foliage color:
- Dark purple, black, deep red: 4-6 hours sun (morning sun ideal), tolerates more in cool climates
- Silver, pewter, metallic: Part shade to full shade, avoid hot afternoon sun
- Chartreuse, lime, yellow: Part shade to full shade, burns easily in direct sun
- Caramel, amber, peach, orange: Part shade best, some sun intensifies color but risks burn
- Green, variegated: Most adaptable, part shade ideal
If you are not sure, start with morning sun and afternoon shade. This works for the vast majority of coral bells. Watch your plants. If leaves look washed out or develop brown crispy edges, they are getting too much light. If stems stretch and color is dull, they may want more sun.
Soil Conditions
Coral bells are not terribly fussy about soil type, but they have one non-negotiable requirement: excellent drainage. They absolutely will not tolerate wet feet, especially in winter. Heavy clay soil that stays soggy is a death sentence. Sandy soil works fine if you amend it for moisture retention.
The ideal soil is rich, humusy, and well-draining with a slightly acidic to neutral pH (6.0-7.0). If your soil is heavy clay, mix in compost, leaf mold, or aged bark fines at a 50/50 ratio when planting. For sandy soil, add compost and peat moss to hold moisture. A soil test is worth doing if you are planting a large area. It tells you exactly what amendments you need.
One trick I learned from a nursery grower: plant coral bells slightly high, with the crown about half an inch above soil level. This prevents water from pooling around the crown, which is the number one cause of rot. Mulch will cover the exposed roots.
Companion Planting Ideas
Coral bells play well with others. Their mounding habit and colorful foliage make them perfect for mixing with other shade lovers. Some winning combinations:
- With hostas: The bold hosta leaves contrast beautifully with ruffled coral bells foliage. Try blue hostas with purple coral bells, or gold hostas with dark varieties.
- With ferns: Airy fern fronds soften the structured mounds of coral bells. Japanese painted fern with ‘Obsidian’ is a classic pairing.
- With astilbe: Feathery astilbe plumes rise above coral bells mounds for a layered look. Both like similar conditions.
- With foamflower (Tiarella): Close relatives with similar needs. Foamflower spreads as a groundcover; coral bells stays in clumps.
- With spring bulbs: Plant daffodils or tulips among coral bells. The bulbs bloom early, then coral bells foliage hides the dying bulb leaves.
- In containers: Coral bells are stars in mixed pots. Pair with trailing ivy, upright grasses, and seasonal annuals.
When and How to Plant Coral Bells
Best Planting Times
You can plant coral bells almost any time the ground is workable, but timing affects how quickly they establish. Spring and fall are ideal. Here is the breakdown:
Spring planting (March-May): This gives plants a full growing season to establish roots before winter. Plants emerge from dormancy and put energy into root growth. Water regularly through the first summer. Spring-planted coral bells often bloom the same year.
Fall planting (September-October): Many experts prefer fall. Soil is warm, encouraging root growth, but air temperatures are cool, reducing stress. Plants focus entirely on roots since top growth slows. They emerge strong next spring. Plant at least 6 weeks before your ground freezes.
Summer planting: Doable but requires diligent watering. Heat stress can set plants back. If you must plant in summer, choose a cloudy day, provide temporary shade, and water daily for the first two weeks.
Winter planting: Only in mild climates where ground does not freeze (zones 8-9). Otherwise, wait for spring.
Buying Healthy Plants
Whether you shop at a local nursery, big box store, or order online, know what to look for. Healthy coral bells should have:
- Firm, colorful foliage without yellowing, browning, or spots
- No signs of insects on leaf undersides (check for vine weevil notches on leaf edges)
- Roots that fill the pot but are not tightly circling (gently slip the pot off to check)
- White or light tan roots, not brown or mushy
- A crown at soil level, not buried deep or exposed high
- Multiple growing points (fans) for a fuller plant faster
Avoid plants with flower stems already elongating in the pot. They have been forced and may struggle to transition. Smaller plants in 4-inch or quart pots often establish faster than large, root-bound gallon plants. They are also cheaper.
Step-by-Step Planting Process
Follow these steps for planting success:
1. Prepare the site. Remove weeds and grass. Loosen soil to 12-18 inches deep in an area 2-3 times wider than the pot. This encourages roots to spread.
2. Amend the soil. Mix in 2-3 inches of compost, leaf mold, or well-rotted manure. If your soil is heavy clay, add coarse sand or fine bark at the same time. Mix thoroughly.
3. Dig the hole. Make it as deep as the root ball and twice as wide. The wider hole lets roots spread horizontally, which is how coral bells naturally grow.
4. Remove the plant. Gently squeeze the pot sides to loosen. Tip it upside down while supporting the crown. If roots are circling, tease them apart with your fingers or make 3-4 vertical cuts with a knife. This sounds harsh but prevents girdling roots.
5. Position the plant. Set it in the hole so the crown sits slightly above the surrounding soil (about 1/2 inch). Backfill with amended soil, firming gently around roots. Do not bury the crown.
6. Water thoroughly. Apply water slowly until the soil is saturated to the bottom of the root zone. This settles soil and eliminates air pockets.
7. Mulch. Spread 2-3 inches of shredded bark, pine straw, or leaf mulch around the plant, keeping it an inch away from the crown. Mulch conserves moisture and prevents soil splash on leaves.
8. Label. Trust me, you will forget which variety is which. Use a durable plant marker.
Spacing Guidelines
Space coral bells based on mature width of the variety. Most reach 12-18 inches wide, though some giants like ‘Grande’ series can hit 24-30 inches. Check the tag. General spacing:
- Standard varieties: 14-18 inches apart
- Compact varieties: 10-12 inches apart
- Large varieties: 18-24 inches apart
- For groundcover effect: Plant at the closer end of the range
- For specimen plants: Give them extra room to show off their form
If planting in groups, stagger them in a triangle pattern rather than straight rows. This looks more natural and fills in faster.
Essential Care for Thriving Coral Bells
Watering Practices
Consistent moisture is key, especially the first year. Coral bells have relatively shallow root systems. They dry out faster than deep-rooted perennials. The goal is evenly moist soil, like a wrung-out sponge. Not soggy, not bone dry.
First growing season: Water deeply 2-3 times per week, more in heat. Check soil with your finger. If the top inch is dry, water. A soaker hose or drip irrigation is ideal. It keeps foliage dry, reducing disease risk.
Established plants: Water weekly during dry spells. In many climates, rainfall is sufficient once plants are established. But watch for drought stress: leaves may curl, droop, or develop crispy edges.
Container plants: Check daily in summer. Pots dry out fast. Water until it drains from the bottom. In winter, water occasionally during dry spells if the pot is not frozen.
Winter watering: In dry winters without snow cover, water once a month on days above freezing. This prevents desiccation, especially for evergreen varieties.
Fertilizing Schedule
Coral bells are light feeders. Too much fertilizer produces lush, weak growth that flops and attracts pests. It can also reduce foliage color intensity, especially in dark varieties.
At planting: Mix a balanced slow-release fertilizer (like 10-10-10 or 14-14-14) into the backfill soil at half the recommended rate. Or skip it if you amended well with compost.
Spring: Apply a light top-dressing of compost around each plant. Or use a slow-release fertilizer at quarter strength. Do this as new growth emerges.
Summer: Usually no fertilizer needed. If plants look pale or growth is very slow, a half-strength liquid feed once is fine.
Fall: Do not fertilize after late summer. You want plants to harden off for winter, not push tender new growth.
Organic options like fish emulsion, seaweed extract, or compost tea work well applied monthly at half strength during the growing season. They feed soil life too.
Mulching Techniques
Mulch is non-optional for coral bells. It does three critical things: retains moisture, moderates soil temperature, and prevents winter heaving (where freeze-thaw cycles push plants out of the ground).
Best mulches: Shredded hardwood bark, pine bark fines, pine straw, leaf mold, or compost. Avoid large wood chips (they rob nitrogen as they break down) and stone mulch (it holds heat and does not improve soil).
Application: Spread 2-3 inches in a donut shape around the plant. Keep mulch 1 inch away from the crown. Piling mulch against the stem causes rot. Replenish annually in spring as old mulch decomposes.
Winter mulch: In zones 4-6, add an extra inch of mulch after the ground freezes. Use evergreen boughs or straw that will not mat down. Remove excess in early spring.
Pruning and Deadheading
Coral bells need minimal pruning. Here is what to do and when:
Deadheading flowers: Snip flower stems at the base after blooming finishes. This redirects energy to foliage and prevents unwanted seedlings (which will not come true from hybrids). Some gardeners leave a few for birds.
Removing damaged leaves: Throughout the season, pull or cut off any leaves that are brown, torn, or diseased. Cut at the base. This keeps plants looking fresh and improves air circulation.
Spring cleanup: In early spring, before new growth starts, remove all old, winter-damaged foliage. Cut leaves to about 1 inch above the crown. Be careful not to damage emerging new leaves. This is the most important pruning task of the year.
Summer refresh: If plants look ragged in midsummer (common in hot climates), you can shear the entire plant back to 3-4 inches. Water well and fertilize lightly. Fresh foliage will emerge in a few weeks. Do not do this after August.
Dividing Coral Bells
Division is the secret to keeping coral bells vigorous long-term. Over time, the center of the clump becomes woody and dies out, leaving a ring of growth. Plants also rise up out of the soil as roots accumulate. Division fixes both problems.
When to divide: Early spring (as growth starts) or early fall (4-6 weeks before frost). Spring is slightly better because you can see the growth points. Fall works well in mild climates.
How often: Every 3-4 years for most varieties. Fast growers may need it every 2 years. Slow growers can go 5+ years.
Step-by-step division:
- Water the plant well the day before.
- Dig up the entire clump with a garden fork, going wide to get roots.
- Shake or wash off excess soil to see the crown structure.
- Pull or cut the clump into sections. Each division needs 3-5 healthy fans (growth points) with roots attached.
- Discard the woody, dead center.
- Trim any long roots to 4-6 inches.
- Replant divisions immediately at the same depth, following planting steps above.
- Water well and mulch.
- Keep soil consistently moist for 4-6 weeks while roots establish.
You will get 3-6 new plants from a mature clump. Share with friends or fill new garden areas.
Growing Coral Bells in Containers
Container Selection
Coral bells make fantastic container plants. Their tidy mounds look great alone or in mixed plantings. Choose a pot at least 12 inches wide and deep. Larger is better. It holds more soil, which means less frequent watering and better root insulation.
Material matters. Terracotta looks classic but dries out fast and cracks in freezing temps. Glazed ceramic, fiberglass, resin, and concrete hold moisture better and survive winter outdoors in most zones. Make sure the pot has drainage holes. Drill extra if needed.
Potting Mix
Never use garden soil in containers. It compacts, drains poorly, and may contain pathogens. Use a high-quality potting mix designed for perennials. Or make your own: 2 parts peat-based potting mix, 1 part compost, 1 part perlite or coarse sand. Add a slow-release fertilizer at planting.
Some growers add a handful of grit or chicken grit (insoluble crushed granite) to improve drainage further. Coral bells appreciate the sharp drainage.
Container Care
Container coral bells need more attention than in-ground plants:
- Water: Check daily in summer. Water thoroughly until it drains out. Do not let pots sit in saucers of water.
- Fertilize: Feed monthly with half-strength liquid fertilizer April through August. Or use slow-release at planting and again in midsummer.
- Winter protection: In zones 4-6, move pots to an unheated garage, shed, or against a protected wall. Mulch heavily over the top. In zones 7+, they can often stay in place with extra mulch.
- Repotting: Every 2-3 years in spring, refresh the potting mix and divide if needed.
Designing Container Combinations
Coral bells are the perfect “filler” in the thriller-filler-spiller container formula. Their colorful mounds bridge tall centerpieces and trailing edges. Try these combos:
- Shade pot: ‘Obsidian’ coral bells + Japanese forest grass (Hakonechloa) + variegated ivy + white impatiens
- Part sun pot: ‘Caramel’ coral bells + purple fountain grass + sweet potato vine ‘Marguerite’ + calibrachoa
- Foliage focus: ‘Lime Rickey’ + ‘Berry Smoothie’ + ‘Electric Plum’ (three coral bells varieties together)
- Four-season pot: ‘Forever Purple’ coral bells + dwarf conifer + hellebore + carex ‘Everillo’
Troubleshooting Common Problems
Pest Issues
Coral bells are relatively pest-resistant, but a few troublemakers appear regularly:
Black vine weevils: The #1 pest. Adults are black, flightless beetles that notch leaf edges at night. Larvae are white, C-shaped grubs that eat roots. Plants wilt and die suddenly. Control: Apply beneficial nematodes (Heterorhabditis bacteriophora) to soil in spring and fall. Hand-pick adults at night with a flashlight. Use sticky barriers on pot rims.
Foliar nematodes: Microscopic worms that live inside leaves. They cause angular brown patches between leaf veins. Infected leaves die. Control: Remove and destroy affected leaves. Avoid overhead watering. Space plants for air flow. No chemical control for home gardeners.
Slugs and snails: Chew holes in leaves, especially in damp shade. Control: Beer traps, copper tape, diatomaceous earth, iron phosphate baits, hand-picking at night.
Deer and rabbits: Sometimes browse coral bells, especially in winter. Control: Repellent sprays, fencing, interplanting with strongly scented herbs.
Disease Problems
Most coral bells diseases stem from too much moisture and poor air circulation:
Crown rot: Plants collapse at soil line. Crown turns brown/black and mushy. Caused by soil-borne fungi (Phytophthora, Pythium) in wet conditions. Prevention: Excellent drainage, proper planting depth, avoid overwatering. Treatment: Usually fatal. Remove plant, improve drainage, do not replant coral bells in same spot.
Root rot: Similar to crown rot but starts underground. Leaves yellow, wilt, plant declines. Same causes and prevention.
Powdery mildew: White powdery coating on leaves. Common in humid weather with poor air flow. Prevention: Space plants properly, water at base, choose resistant varieties. Treatment: Remove affected leaves. Spray with neem oil, potassium bicarbonate, or milk spray (1 part milk to 9 parts water).
Rust: Orange-brown pustules on leaf undersides. Leaves yellow and drop. Prevention: Same as powdery mildew. Treatment: Remove infected leaves. Fungicides containing sulfur or copper may help.
Bacterial leaf spot: Small, water-soaked spots that turn brown with yellow halos. Spreads by splashing water. Prevention: Avoid overhead watering, space plants. Treatment: Remove affected leaves. Copper sprays may slow spread.
Environmental Stress
Sun scorch: Bleached, crispy patches on leaves. Move to shadier spot or provide afternoon shade cloth.
Frost heaving: Plants pushed out of ground by freeze-thaw cycles. Crown exposed, roots dry out. Fix: Replant at proper depth immediately. Mulch heavily after ground freezes next winter.
Winter burn: Brown, desiccated leaves on evergreen varieties. Caused by wind and sun on frozen ground. Fix: Trim damaged leaves in spring. Protect with burlap screen or anti-desiccant spray next winter.
Poor color: Faded, dull foliage. Usually too much shade (for dark varieties) or too much sun (for light varieties). Or nutrient imbalance. Test soil and adjust location.
Seasonal Care Calendar
Spring (March-May)
- Remove winter mulch gradually as temperatures rise
- Cut back all old foliage to 1 inch above crown
- Apply compost top-dressing or light slow-release fertilizer
- Divide overcrowded clumps (early spring)
- Plant new coral bells
- Watch for vine weevil notching on new leaves
- Water if spring is dry
Summer (June-August)
- Deadhead spent flower stems
- Water deeply during dry spells
- Mulch to conserve moisture
- Monitor for pests and diseases
- Shear back ragged plants in early summer if needed
- Enjoy the foliage show!
Fall (September-November)
- Plant or divide (early fall, 6+ weeks before freeze)
- Stop fertilizing
- Reduce watering as temperatures cool
- Remove any diseased foliage
- Apply winter mulch after ground freezes (zones 4-6)
- Move containers to protected spots
Winter (December-February)
- Check for heaving during thaws; replant if needed
- Water containers monthly if dry and not frozen
- Brush heavy snow off evergreen varieties to prevent breakage
- Plan next year’s additions from catalogs
- Dream of spring!
Propagating Coral Bells
Division (Easiest Method)
As covered earlier, division is the fastest, most reliable way to get more plants. You get exact clones of the parent. Do it spring or fall. Water well after. That is it.
Seed (For Species and Fun)
Species coral bells (like Heuchera americana, H. villosa, H. sanguinea) come true from seed. Hybrids do not. Seedlings will be variable. But growing from seed is fun and cheap.
Process: Collect seed pods when dry in summer. Store cool and dry. Sow in late winter indoors on moist seed-starting mix. Do not cover; light aids germination. Keep at 65-70°F. Germination takes 2-8 weeks. Transplant seedlings to pots. Harden off and plant out after frost. Flowers in year 2.
Leaf Cuttings (Advanced)
Some growers propagate from leaf cuttings. Take a healthy leaf with a short petiole (stem). Dip in rooting hormone. Stick in moist perlite/peat mix. Cover with humidity dome. Bottom heat helps. Roots and a new plantlet form at the base in 6-8 weeks. Tricky but possible.
Tissue Culture (Commercial)
This is how nurseries produce the named varieties you buy. Tiny plant pieces grown in sterile lab conditions. Not feasible for home gardeners but good to know that your ‘Obsidian’ is genetically identical to every other ‘Obsidian’ worldwide.
Designing with Coral Bells
Color Theory in the Garden
Coral bells are color power tools. Use them intentionally:
Echo colors: Repeat a color from nearby plants. ‘Caramel’ coral bells near a ‘Caramel’ heucherella or amber-tinted ornamental grass creates harmony.
Contrast colors: Pair opposites on the color wheel. Purple coral bells (‘Obsidian’) with chartreuse (‘Lime Rickey’ or golden hosta). Silver (‘Silver Scrolls’) with deep green ferns.
Monochromatic schemes: Plant several shades of one color family. Dark purple, medium purple, silvery purple, pinkish purple. Sophisticated and cohesive.
Seasonal transitions: Choose varieties that shift color. ‘Delta Dawn’ goes gold-to-red. ‘Berry Smoothie’ deepens in fall. ‘Autumn Bride’ (a villosa hybrid) turns bronzy. Your garden evolves.
Garden Styles
Coral bells fit almost any garden style:
Woodland garden: Naturalistic drifts among native ferns, trilliums, and wild ginger. Use species types like H. americana or H. villosa.
Cottage garden: Mixed with roses, delphiniums, foxgloves. Let them self-sow gently (species only). Ruffled varieties like ‘Crispy’ fit the romantic vibe.
Modern/minimalist: Mass plantings of a single variety. ‘Forever Purple’ in a geometric grid. Clean lines, bold color.
Rock garden: Tuck compact varieties into crevices. ‘Petite Pearl Fairy’ or ‘Little Cutie’ series. Excellent drainage is natural here.
Container gardens: As discussed, they are container superstars. Mix pot sizes and heights for impact.
Using Coral Bells as Groundcover
While not a traditional spreader, coral bells planted close together (10-12 inches) form a dense, weed-suppressing mat over time. Best for this: vigorous, wide varieties like ‘Caramel,’ ‘Georgia Peach,’ ‘Citronelle,’ and villosa hybrids. Avoid slow, compact types. It takes 2-3 years to fill in. Mulch well between plants while they establish.
Advanced Tips from Experienced Growers
The “High Crown” Planting Technique
I mentioned this earlier, but it deserves emphasis. Planting with the crown slightly above grade is the single best thing you can do to prevent crown rot. Nursery growers do this routinely. The mulch covers the exposed roots. The crown stays dry. It works.
Summer Dormancy in Hot Climates
In zones 8-9, some coral bells (especially villosa types) go semi-dormant in midsummer heat. Leaves may look tired, growth stops. This is normal. Do not overwater or fertilize. They perk up when temperatures drop. Choose heat-tolerant varieties: ‘Caramel,’ ‘Georgia Peach,’ ‘Mocha,’ ‘Southern Comfort,’ villosa hybrids.
Companion Planting for Pest Control
Some gardeners swear by interplanting coral bells with alliums (onions, garlic, chives) to deter vine weevils. The strong scent may mask the coral bells. Worth a try. Garlic chives are pretty and edible too.
Using Coral Bells in Cut Arrangements
The flowers are lovely in small bouquets. Cut stems when half the bells are open. They last 5-7 days. The foliage is even better. Cut leaves last 2 weeks in water. Use them as filler in arrangements. Dark varieties add drama. Change water every few days.
Overwintering New Plants
Late-planted or small divisions need extra protection their first winter. After the ground freezes, cover with a loose layer of evergreen boughs, straw, or oak leaves. Do not use maple leaves; they mat leaves (they mat down and smother). Remove gradually in spring.
Conclusion
Coral bells have earned their place as garden essentials. Few plants offer such a dazzling range of foliage color, such long-season interest, and such easy-going nature. Whether you have a sprawling shade garden, a few pots on a balcony, or a sunny border in a cool climate, there is a coral bells (or ten) for you.
The keys to success are simple: give them well-draining soil, match the light to the variety, water consistently the first year, mulch well, and divide every few years. Do that, and they will reward you with color from the first crocus bloom to the last frost. Some varieties even keep their leaves through winter, providing structure when the garden is otherwise bare.
Start with one or two varieties that catch your eye. Plant them where you will see them daily. Watch how they change through the seasons. Notice which pollinators visit the flowers. Then, like me, you will find yourself making room for just one more. And one more after that. The coral bells addiction is real, and honestly, there are worse habits for a gardener to have.
Your garden deserves this kind of reliable, colorful, low-maintenance beauty. Go pick up a coral bells plant this week. Your future self will thank you every time you walk past that spot and see those gorgeous leaves glowing in the light.
Frequently Asked Questions
Do coral bells come back every year?
Yes, coral bells are herbaceous perennials that return reliably each spring in zones 4-9. The foliage may be evergreen in mild winters or die back to the ground in cold climates, but new growth emerges from the crown each spring.
Should I cut back coral bells in the fall?
No, do not cut back coral bells in fall. The foliage protects the crown over winter. Wait until early spring, then remove all old leaves to about 1 inch above the crown before new growth emerges.
How do I keep coral bells colorful all season?
Provide appropriate light for the variety (morning sun for dark colors, shade for light colors), avoid over-fertilizing which dulls color, water consistently, and choose varieties bred for color stability like ‘Forever Purple’ or ‘Obsidian’.
Can I grow coral bells indoors as houseplants?
Coral bells can grow indoors temporarily but prefer outdoor conditions. They need a cool dormancy period, bright indirect light, high humidity, and excellent drainage. They typically decline after a few months inside. Better to enjoy them outdoors.
What is the difference between coral bells and foamflower?
Coral bells (Heuchera) and foamflower (Tiarella) are close relatives in the same family. Foamflower spreads by runners to form a groundcover, has more deeply lobed leaves, and blooms earlier with foamier flower spikes. Coral bells form clumps, have rounder leaves, and offer more color variety.
Are coral bells deer resistant?
Coral bells are considered deer resistant but not deer proof. Deer may browse them in winter when food is scarce or in areas with high deer pressure. The fuzzy leaves of some varieties (especially villosa hybrids) are less palatable. Use repellents if deer are a persistent problem.