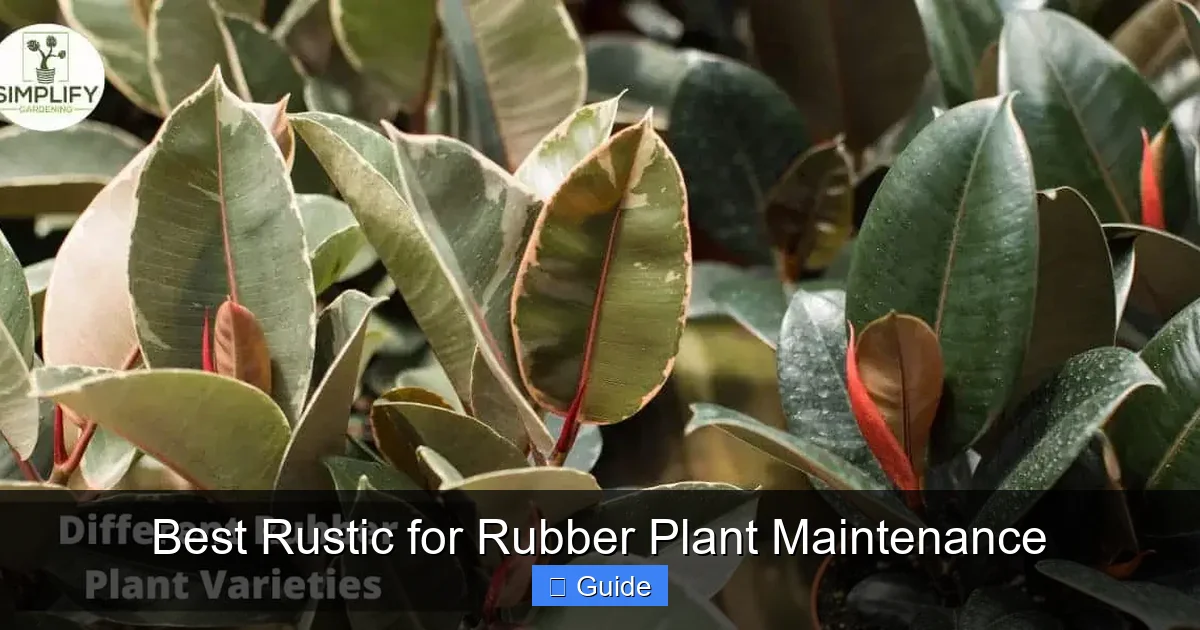
Best Rustic for Rubber Plant Maintenance
Rubber plants thrive in rustic containers that provide excellent drainage and breathability. This comprehensive guide covers the best rustic planter materials, soil mixes, watering schedules, and seasonal care routines to keep your Ficus elastica healthy and beautiful year-round.
If you have ever brought home a gorgeous rubber plant only to watch it struggle in a sleek modern pot, you are not alone. Many plant parents discover that their Ficus elastica actually prefers something a bit more old-school. The best rustic for rubber plant maintenance often comes down to choosing containers and care methods that mimic the plant’s natural environment. Rustic planters made from terracotta, unglazed ceramic, reclaimed wood, or even weathered concrete offer the drainage and breathability that these tropical natives crave.
In this guide, we will walk through everything you need to know about pairing your rubber plant with the perfect rustic container and maintaining it for years of lush, glossy growth. From soil mixes that prevent soggy roots to seasonal adjustments that keep your plant thriving through winter, consider this your complete roadmap to rubber plant success in rustic style.
Key Takeaways
- Terracotta and unglazed ceramic are top choices: These porous materials prevent root rot by allowing excess moisture to evaporate naturally.
- Well-draining soil mix is essential: Combine potting soil, perlite, and orchid bark for optimal aeration and moisture retention balance.
- Water only when top 2-3 inches of soil are dry: Overwatering is the number one killer of rubber plants in rustic containers.
- Bright indirect light promotes robust growth: Place near east or west-facing windows, avoiding harsh direct afternoon sun.
- Repot every 2-3 years in spring: Choose a container only 1-2 inches larger to prevent waterlogging in oversized pots.
- Monitor humidity levels year-round: Rustic planters in dry climates may need pebble trays or humidifiers during winter months.
- Prune strategically for shape and health: Remove yellowing leaves and trim leggy growth to encourage bushier development.
Quick Answers to Common Questions
What is the best rustic planter material for a rubber plant?
Terracotta is the top choice for rubber plants due to its excellent porosity, affordability, and stability. Unglazed ceramic and concrete are also excellent options that provide similar breathability with different aesthetics.
How often should I water a rubber plant in a terracotta pot?
Check every 5-7 days in spring/summer and every 10-14 days in fall/winter. Water only when the top 2-3 inches of soil feel completely dry. Terracotta dries faster than glazed pots, so monitor closely during heat waves.
Can I use a wooden barrel planter for my rubber plant?
Yes, but use it as a cachepot (decorative outer pot) with a plastic nursery pot inside. Direct planting in wood leads to rot. Ensure the inner pot has drainage and never sits in standing water at the bottom of the barrel.
Why are my rubber plant’s leaves turning yellow in a rustic planter?
Yellowing usually indicates overwatering, especially if lower leaves yellow first. Rustic planters need less frequent watering than you might expect. Check roots for rot and ensure your soil mix drains rapidly.
Should I put rocks at the bottom of my rustic planter for drainage?
No. This outdated practice creates a perched water table that keeps soil wetter longer. Instead, use a well-draining soil mix with perlite and bark, and ensure your planter has adequate drainage holes covered with mesh.
📑 Table of Contents
- Understanding Your Rubber Plant’s Natural Preferences
- Why Rustic Planters Work Perfectly for Rubber Plants
- Top Rustic Planter Materials for Healthy Growth
- Creating the Ideal Rustic Environment
- Seasonal Care in Rustic Containers
- Troubleshooting Common Issues in Rustic Setups
- Advanced Tips for Rubber Plant Enthusiasts
- Conclusion
Understanding Your Rubber Plant’s Natural Preferences
Before we dive into specific rustic containers, let’s talk about what your rubber plant actually wants. Ficus elastica originates from the tropical regions of Southeast Asia, where it grows as an understory tree in warm, humid forests. In its natural habitat, the plant enjoys consistent warmth, filtered light through the canopy, and soil that drains quickly after heavy rains. The roots need oxygen as much as they need water.
Why Drainage Matters More Than You Think
Rubber plants have thick, fleshy roots that store water. This adaptation helps them survive dry spells in nature, but it also makes them incredibly susceptible to root rot when sitting in soggy soil. The number one mistake new owners make is keeping the soil constantly moist. A rustic planter with excellent drainage holes and porous walls allows excess water to escape and air to reach the root zone. This single factor often determines whether your plant thrives or slowly declines.
Light Requirements for Glossy Growth
Your rubber plant will tell you exactly what it thinks of its lighting situation. Too little light leads to leggy growth, smaller leaves, and loss of that signature shine. Too much direct sun scorches the foliage, leaving brown crispy patches. The sweet spot is bright indirect light for 6-8 hours daily. An east-facing window provides gentle morning sun. A west-facing window works if you sheer the afternoon rays. South-facing windows need distance or filtration. North-facing windows rarely provide enough intensity unless you supplement with grow lights.
Temperature and Humidity Basics
Rubber plants prefer temperatures between 65-80°F (18-27°C). They dislike cold drafts, sudden temperature swings, and proximity to heating vents or air conditioners. Humidity levels around 40-60% keep leaves supple and prevent crispy edges. In dry climates or heated homes during winter, you may need to intervene with humidity trays, grouping plants together, or running a humidifier. The rustic container you choose can actually help moderate these conditions, as we will explore next.
Why Rustic Planters Work Perfectly for Rubber Plants
There is a reason experienced growers reach for terracotta and unglazed ceramics when potting ficus varieties. The best rustic for rubber plant maintenance leverages the natural properties of these materials to create a healthier root environment. Let’s break down exactly why rustic containers outperform their glazed, plastic, or metal counterparts for this specific plant.
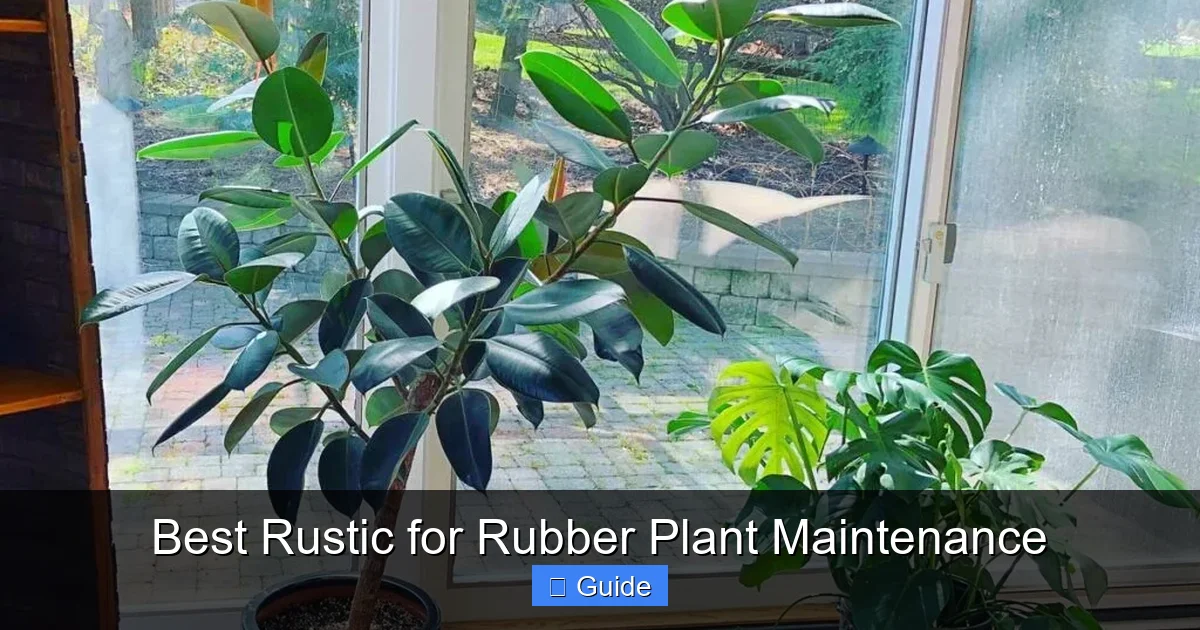
Visual guide about Best Rustic for Rubber Plant Maintenance
Image source: ohiotropics.com
The Breathability Factor
Porous materials like terracotta, unglazed ceramic, and concrete allow air exchange through the pot walls. This means the soil dries more evenly from all sides, not just the top. Roots receive oxygen throughout the container, not just near the surface. This reduces the risk of anaerobic conditions that breed harmful bacteria and fungi. For a plant with thick roots that need ample oxygen, this breathability is a game-changer.
Natural Moisture Regulation
Rustic planters act as a buffer against your watering mistakes. If you water a bit too much, the porous walls wick away excess moisture and release it into the air. If you forget to water for an extra day, the clay retains some residual dampness that the roots can access. This forgiveness factor makes rustic containers ideal for busy plant parents or those still learning their plant’s rhythms.
Stability for Top-Heavy Growth
Mature rubber plants become quite top-heavy with their large, leathery leaves. Lightweight plastic pots tip over easily. Rustic materials like thick terracotta, stoneware, or concrete provide a low center of gravity that keeps your plant upright even when it reaches impressive heights. This stability becomes crucial as your plant grows taller than three feet.
Aesthetic Harmony with the Plant’s Character
Beyond function, there is something visually satisfying about a rubber plant in a rustic container. The deep green, glossy leaves contrast beautifully with warm terracotta, weathered gray concrete, or natural wood tones. This pairing feels intentional and grounded, bringing an organic, collected-over-time quality to your space that perfectly suits the plant’s jungle origins.
Top Rustic Planter Materials for Healthy Growth
Not all rustic containers are created equal. The material you choose affects drainage, weight, insulation, and longevity. Here is a detailed breakdown of the best rustic options for rubber plant maintenance, including pros, cons, and ideal use cases for each.
Terracotta: The Classic Choice
Terracotta remains the gold standard for ficus varieties, and for good reason. Made from baked clay, these pots are highly porous, affordable, and widely available in sizes from tiny to enormous. The warm orange-brown color deepens beautifully with age, developing a patina that tells the story of your plant’s life.
Pros: Excellent breathability, affordable, wide size range, stable weight, develops character over time.
Cons: Can crack in freezing temperatures, dries out quickly in hot weather, salt buildup visible on exterior, heavy when large.
Best for: Most indoor rubber plants, especially in humid climates or for owners who tend to overwater.
Unglazed Ceramic: Refined Rustic
Unglazed ceramic planters offer similar breathability to terracotta but with more refined shapes, smoother textures, and often more sophisticated color palettes. Think matte whites, soft grays, warm sands, and deep charcoals. These pots bridge rustic charm and modern design.
Pros: Good breathability, attractive aesthetics, more shape variety than terracotta, durable when high-fired.
Cons: More expensive than terracotta, still vulnerable to freeze-thaw cycles, heavy.
Best for: Design-conscious spaces, plants in prominent locations, owners wanting rustic function with cleaner lines.
Concrete and Stone: Maximum Stability
Concrete planters bring serious weight and presence. They are incredibly stable, provide decent breathability (especially if unsealed), and offer a cool, industrial-rustic vibe. Stone planters carved from limestone, sandstone, or granite are even heavier and essentially permanent fixtures.
Pros: Extremely stable, excellent insulation against temperature swings, very long-lasting, striking aesthetic.
Cons: Very heavy (difficult to move), expensive, may leach lime into soil initially, limited size availability.
Best for: Large floor specimens, permanent placements, outdoor-to-indoor transitions, statement pieces.
Reclaimed Wood and Barrel Planters: Organic Warmth
Wooden planters made from reclaimed barn wood, whiskey barrels, or cedar boxes bring unmatched warmth and character. They insulate roots beautifully against temperature extremes. However, wood requires careful preparation to prevent rot and ensure drainage.
Pros: Excellent root insulation, beautiful natural aesthetic, customizable sizes, sustainable option.
Cons: Eventually rots (even with lining), heavy when wet, requires drainage modifications, may harbor pests.
Best for: Cover pots (cachepots) holding a plastic nursery pot, covered patios, owners willing to replace every few years.
Fiberstone and Composite Materials: Modern Rustic
Fiberstone blends stone powder with fiberglass for a lightweight yet rustic-looking container. These mimic the appearance of concrete or stone at a fraction of the weight. Quality varies significantly between brands.
Pros: Lightweight, rustic appearance, freeze-resistant, good insulation, easier to move.
Cons: Less breathable than true clay or concrete, quality varies, can look artificial up close.
Best for: Large plants that need occasional moving, balconies with weight limits, rental spaces.
Creating the Ideal Rustic Environment
Choosing the right rustic container is only half the equation. The soil mix, drainage setup, and placement complete the picture. The best rustic for rubber plant maintenance combines the perfect pot with a tailored growing medium and strategic positioning.
The Perfect Soil Mix for Rustic Containers
Rustic planters dry out faster than glazed or plastic pots. Your soil mix needs to retain enough moisture between waterings while still draining freely. A basic potting soil straight from the bag is usually too dense. Create a custom blend that mimics the airy, organic forest floor your rubber plant evolved in.
Recipe for Rubber Plant Success:
- 2 parts high-quality potting soil (peat or coco coir based)
- 1 part perlite or pumice for aeration
- 1 part orchid bark or coconut husk chips for structure
- 1/2 part horticultural charcoal (optional, prevents odors and bacteria)
- 1/2 part worm castings or compost for gentle nutrition
Mix thoroughly before potting. The result should feel light and springy in your hand, not dense or muddy. When watered, it should drain within seconds, not pool on the surface.
Drainage Layer: To Add or Not to Add?
Old advice suggested adding gravel or broken pottery to the bottom of pots for drainage. Modern horticulture shows this actually creates a perched water table, keeping the soil above wetter longer. Skip the drainage layer. Instead, ensure your rustic planter has at least one large drainage hole (or several smaller ones). Cover the hole with a piece of mesh screen, a coffee filter, or a single layer of landscape fabric to keep soil from washing out while letting water flow freely.
Potting Technique for Long-Term Health
When transferring your rubber plant to its new rustic home, timing matters. Spring is ideal, just as active growth resumes. Water the plant a day before repotting so the root ball holds together. Gently loosen any circling roots. Place enough soil in the bottom so the plant sits at the same depth as before (the soil line should be about an inch below the rim). Fill around the sides, tapping the pot to settle soil without compacting it. Water thoroughly until it runs out the bottom, then let drain completely.
Strategic Placement in Your Home
Your rustic planter’s location affects everything from watering frequency to growth rate. Consider these factors:
- Light: Bright indirect light as discussed earlier. Rotate the pot weekly for even growth.
- Airflow: Gentle air circulation prevents fungal issues. Avoid stagnant corners.
- Temperature stability: Keep away from drafty doors, heating vents, radiators, and single-pane windows in winter.
- Humidity zones: Bathrooms and kitchens often have higher humidity. Group plants together to create a microclimate.
- Floor protection: Rustic pots can scratch floors and leave mineral deposits. Use cork mats, felt pads, or decorative plant stands.
Seasonal Care in Rustic Containers
Rubber plants in rustic planters have different needs across the seasons. The porous nature of these containers means they respond more dramatically to environmental changes than sealed pots. Adjusting your care routine seasonally prevents problems before they start.
Spring: The Growth Surge
As days lengthen and temperatures rise, your rubber plant wakes up. This is the season for repotting if needed, fertilizing, and increasing water frequency.
- Water: Check soil every 5-7 days. Water when top 2-3 inches feel dry.
- Fertilize: Begin monthly feeding with balanced liquid fertilizer at half strength.
- Repot: If roots circle the bottom or emerge from drainage holes, move up one pot size.
- Prune: Remove any winter damage. Shape the plant if it’s getting leggy.
- Clean: Wipe leaves with a damp cloth to remove dust and maximize photosynthesis.
Summer: Peak Vigor
Summer brings the fastest growth but also the highest stress from heat and intense light. Rustic planters dry out quickly in hot weather.
- Water: Check every 3-5 days. Terracotta may need water every 2-3 days in heat waves.
- Fertilize: Continue monthly feeding. Switch to higher nitrogen if you want more leaf growth.
- Protect: Move back from west-facing windows during heat waves. Sheer curtains help.
- Humidity: Mist leaves or use pebble trays if air conditioning dries the air.
- Vacation care: Group plants, use watering spikes, or enlist a plant sitter for trips over a week.
Fall: Transition Time
Growth slows as light decreases. Your care routine should taper accordingly.
- Water: Extend to every 7-10 days. Let soil dry deeper between waterings.
- Fertilize: Stop feeding by mid-fall. The plant doesn’t need nutrients during dormancy.
- Inspect: Check thoroughly for pests before bringing any outdoor plants inside.
- Position: Move to the brightest spot available as sun angle changes.
- Humidity prep: Set up humidifiers or pebble trays before heating season starts.
Winter: Rest and Maintenance
Winter is the danger zone for rubber plants in rustic containers. Low light, dry heat, and cold drafts create a perfect storm for problems.
- Water: Check every 10-14 days. Water only when top half of soil is dry.
- No fertilizer: Completely stop until spring.
- Temperature: Keep above 60°F (15°C). Move away from cold windows at night.
- Humidity: Run humidifier to maintain 40%+ humidity. Group plants together.
- Light: Supplement with grow lights if natural light is insufficient.
- Clean: Continue wiping leaves monthly. Dust blocks precious winter light.
Troubleshooting Common Issues in Rustic Setups
Even with the best rustic for rubber plant maintenance, issues arise. The good news is that most problems show clear visual signals if you know what to look for. Here is your diagnostic guide for the most common rubber plant problems in rustic containers.
Yellowing Leaves: The Universal Distress Signal
Yellow leaves can mean almost anything, but the pattern tells the story.
- Bottom leaves yellowing first, then dropping: Usually natural aging or slight underwatering. Normal in moderation.
- Yellowing with mushy stems or black spots: Overwatering or root rot. Check roots immediately.
- Yellowing between veins (interveinal chlorosis): Nutrient deficiency, often magnesium or iron. Fertilize with complete formula.
- Uniform yellowing of newer growth: Could be cold damage, nutrient lockout from pH issues, or spider mites.
Brown Crispy Edges: Humidity or Water Quality
Rustic planters in dry air accelerate moisture loss from leaves. Brown tips and margins usually indicate low humidity, inconsistent watering, or fluoride/chlorine sensitivity. Use filtered or rainwater. Increase humidity. Ensure you are watering thoroughly, not just sipping the top inch.
Drooping or Curling Leaves: Thirst or Drowning
Both underwatering and overwatering cause drooping. The difference? Underwatered leaves feel soft and limp, perk up quickly after watering. Overwatered leaves feel firm but hang down, stay droopy after watering, may have yellowing. Check the soil. If bone dry, water. If soggy, stop watering and improve airflow.
Root Rot: The Silent Killer
Rustic planters reduce but don’t eliminate rot risk. Signs include: persistent wilting despite wet soil, foul smell from drainage holes, black mushy roots, leaves turning yellow-brown and dropping rapidly. Treatment: Remove plant, wash roots, cut away all rot (black/brown mushy parts), treat remaining roots with hydrogen peroxide solution (1 part 3% peroxide to 4 parts water), repot in fresh dry mix in a clean pot. Hold water for a week.
Pest Infestations: Uninvited Guests
Spider mites love dry winter air. Mealybugs hide in leaf axils. Scale looks like brown bumps on stems. Fungus gnats breed in constantly moist soil. Rustic planters that dry thoroughly between waterings naturally discourage fungus gnats. For other pests: isolate the plant, wipe leaves with insecticidal soap or neem oil weekly for three weeks, treat soil with mosquito bits for gnats, increase humidity to deter spider mites.
Leggy Growth: Reaching for Light
Long stems with wide gaps between leaves mean insufficient light. Move to brighter location. Prune back in spring to encourage branching. Rotate weekly. Consider a grow light for 12-14 hours daily if natural light is limited.
Salt Buildup on Terracotta: Cosmetic or Concerning?
White crusty deposits on the outside of terracotta pots are mineral salts from water and fertilizer. Mostly cosmetic, but heavy buildup can indicate over-fertilizing. Scrub with vinegar solution (1:4 vinegar to water) when plant is out of pot. Flush soil monthly by watering until water runs freely from bottom for several minutes.
Advanced Tips for Rubber Plant Enthusiasts
Once you have mastered the basics, these advanced techniques can take your rubber plant from surviving to spectacular.
Notching for Branching
Rubber plants naturally grow as single trunks. To create a fuller, bushier plant, try notching. In spring, use a clean sharp knife to make a small cut (1/8 inch deep) just above a node (where a leaf attaches). This interrupts auxin flow and often triggers a new branch at that node. Success rate varies but works well on healthy, vigorous plants.
Air Layering for Propagation
Want more rubber plants? Air layering produces larger, faster-establishing plants than cuttings. In spring, select a healthy stem. Make a 1-inch upward cut 1/3 through the stem. Insert a toothpick to keep it open. Wrap with damp sphagnum moss, then plastic wrap, secured with twist ties. Roots form in 4-8 weeks. Cut below roots and pot up.
Leaf Shine: Natural vs. Commercial
Those glossy leaves are a rubber plant’s trademark. Commercial leaf shine products can clog stomata (leaf pores). Instead, wipe leaves with a soft cloth dampened with water. For extra shine, use a tiny drop of neem oil on the cloth monthly. This cleans, shines, and deters pests simultaneously.
Supporting Tall Specimens
As your rubber plant exceeds 4-5 feet, it may need support. A moss pole mimics its natural climbing habit and encourages larger leaves. Bamboo stakes work for a cleaner look. Insert supports at repotting time to avoid root damage. Tie stems loosely with soft plant ties or strips of old t-shirt.
Summering Outdoors
If you have a shaded porch or patio, your rubber plant will love a summer vacation outdoors. Wait until nights stay above 55°F (13°C). Place in bright shade (no direct sun). Water more frequently. Check for pests before bringing back inside. The growth boost from increased light and airflow is remarkable.
Conclusion
Finding the best rustic for rubber plant maintenance is about more than aesthetics. It is about creating a partnership between container, soil, and care routine that honors what this magnificent plant needs to thrive. Terracotta, unglazed ceramic, concrete, and other porous materials give your rubber plant the drainage, breathability, and stability it craves. Paired with a chunky, well-draining soil mix and a seasonal care routine that respects its natural cycles, a rustic planter becomes the foundation for decades of lush, glossy growth.
Remember that every plant and every home is different. Use this guide as your starting point, then observe your own rubber plant closely. It will teach you exactly what it needs through its leaves, its growth rate, its response to your care. The rustic container you choose today will develop character alongside your plant, both telling a story of patience, attention, and the quiet joy of growing something beautiful.
Whether you are potting your first Ficus elastica in a humble terracotta pot or upgrading a mature specimen to a statement concrete planter, the principles remain the same: prioritize drainage, respect the seasons, and enjoy the journey. Your rubber plant, with its bold leaves and resilient spirit, is ready to become a lasting companion in your rustic plant collection.
Frequently Asked Questions
What size rustic planter should I choose for my rubber plant?
Select a pot 1-2 inches larger in diameter than the current root ball. Rubber plants prefer being slightly root-bound. Oversized pots hold excess moisture and increase root rot risk, especially in porous rustic materials.
Can I keep my rubber plant in a rustic planter outdoors year-round?
Only in USDA zones 10-11 where temperatures stay above 50°F. In cooler climates, bring rustic planters indoors before frost. Terracotta and ceramic can crack in freeze-thaw cycles. Concrete and fiberstone handle cold better but the plant itself cannot tolerate freezing.
How do I clean mineral deposits off my terracotta rubber plant pot?
Remove the plant, then scrub the empty pot with a solution of 1 part white vinegar to 4 parts water. For stubborn buildup, soak for 30 minutes before scrubbing. Rinse thoroughly and let dry completely before repotting.
Is it normal for terracotta pots to develop mold on the outside?
Yes, white or greenish mold on the exterior is common and harmless. It indicates healthy porosity and moisture evaporation. Wipe with vinegar solution if desired, or leave it for a natural aged patina. It does not affect the plant.
Can I paint or seal my rustic planter for my rubber plant?
Avoid sealing the interior or painting the inside, as this destroys the breathability that benefits rubber plants. You can paint or seal the exterior only for aesthetics, but ensure drainage holes remain unobstructed.
How do I know when to repot my rubber plant in its rustic container?
Repot when roots circle the bottom densely, emerge from drainage holes, or the plant dries out within 1-2 days of watering. Spring is the best time. Choose a rustic pot only one size larger to maintain proper moisture balance.