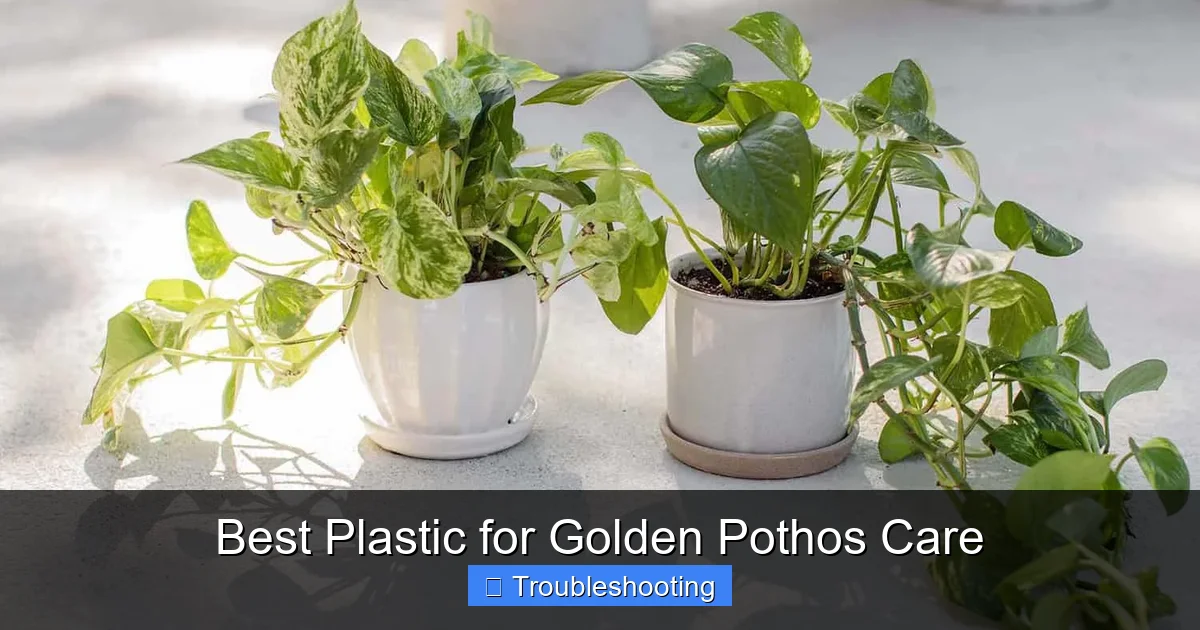
Best Plastic for Golden Pothos Care
Choosing the right plastic makes a huge difference for golden pothos health. This guide covers the best plastic pots, humidity trays, and propagation containers to prevent root rot, boost growth, and make care easier for beginners and experts alike.
If you have ever brought home a golden pothos, you know how forgiving this plant can be. It survives low light. It bounces back from missed waterings. It grows fast and looks gorgeous trailing from a shelf. But here is the thing. The plastic you choose for your pothos can make the difference between a plant that merely survives and one that absolutely thrives. I learned this the hard way after losing a few cuttings to rot and watching others struggle in pots that held too much water.
The best plastic for golden pothos care is not about fancy brands or expensive gear. It is about understanding what this tropical vine needs. Good drainage. Proper airflow around roots. The right humidity. And containers that make your life easier, not harder. In this guide, I will walk you through everything I have learned about plastic pots, trays, propagation boxes, and humidity solutions. You will know exactly what to buy, what to avoid, and how to use each type for the best results.
Key Takeaways
- Drainage is non-negotiable: Always choose plastic pots with multiple drainage holes to prevent waterlogged soil and root rot.
- Clear plastic helps propagation: Transparent containers let you monitor root development without disturbing cuttings.
- Humidity trays boost tropical growth: Plastic pebble trays maintain moisture around leaves without overwatering roots.
- Food-grade plastic is safest: Look for BPA-free, recyclable plastics marked #2, #4, or #5 for long-term plant health.
- Size up gradually: Move your pothos to a pot only 1-2 inches larger to avoid excess soil holding too much moisture.
- Self-watering pots work well: Plastic reservoirs provide consistent moisture for busy plant parents.
- Recycle and reuse: Clean old nursery pots and food containers to save money and reduce waste.
Quick Answers to Common Questions
What is the best plastic pot for golden pothos?
A standard polypropylene nursery pot (#5 plastic) with multiple drainage holes and raised feet is the best all-around choice for golden pothos.
Can I use clear plastic pots for pothos?
Yes, clear plastic pots are excellent for monitoring root health and propagation, but slip them into a cachepot to protect roots from light and heat.
Do golden pothos need plastic humidity trays?
Pebble trays made from plastic significantly boost humidity around pothos, preventing brown tips and spider mites, especially in dry indoor air.
Is it safe to propagate pothos in plastic containers?
Yes, food-grade plastics (#1, #2, #4, #5) are safe for water and soil propagation; avoid PVC (#3) and polystyrene (#6) for long-term use.
How often should I replace plastic pots for pothos?
Replace plastic pots when they become brittle, cracked, or heavily stained with mineral deposits; quality nursery pots last 5-10 years with proper care.
📑 Table of Contents
- Understanding Why Plastic Matters for Your Golden Pothos
- Types of Plastic Containers for Golden Pothos
- Choosing the Right Plastic Pot Size and Style
- Plastic Humidity Solutions for Tropical Growth
- Plastic Propagation Containers for Easy Rooting
- Safety and Environmental Considerations
- Maintenance Tips for Plastic Containers
- Common Mistakes and How to Avoid Them
- Conclusion
Understanding Why Plastic Matters for Your Golden Pothos
Golden pothos comes from the tropical forests of Southeast Asia. In nature, it climbs trees with its aerial roots. It gets rain often but the water drains fast. The roots never sit in soggy soil. When we grow pothos indoors, we need to mimic those conditions. The container you choose plays a huge role in that.
Plastic vs. Other Materials
You have options. Terracotta. Ceramic. Fabric. Glass. Each has fans. But plastic wins for pothos for several reasons. First, plastic is lightweight. You can move a large trailing plant without throwing out your back. Second, plastic retains moisture better than terracotta. This means less frequent watering. Third, plastic pots almost always come with drainage holes. Many decorative ceramic pots do not. Fourth, plastic is cheap. You can buy a dozen nursery pots for the price of one nice ceramic cachepot.
That said, not all plastic is created equal. Thin, brittle pots crack when you squeeze them to remove the root ball. Dark plastic absorbs heat and can cook roots in a sunny window. Cheap plastic may leach chemicals into the soil over time. The best plastic for golden pothos care balances durability, safety, and function.
Root Health Starts at the Bottom
Pothos roots need oxygen. Yes, roots breathe. When soil stays sopping wet, air pockets disappear. Roots suffocate. Then rot sets in. You see yellow leaves. Mushy stems. A foul smell from the pot. The right plastic pot prevents this with ample drainage holes. Look for pots with holes around the sides, not just one in the center. Side holes let excess water escape even if the center gets clogged with roots.
I prefer pots with raised feet or a recessed bottom. This creates an air gap between the pot and your saucer. Water drains completely. The pot never sits in a puddle. This simple design feature has saved more of my plants than anything else.
Types of Plastic Containers for Golden Pothos
Walk into any garden center and you will see a wall of plastic pots. Let me break down the main types so you know what you are looking at.
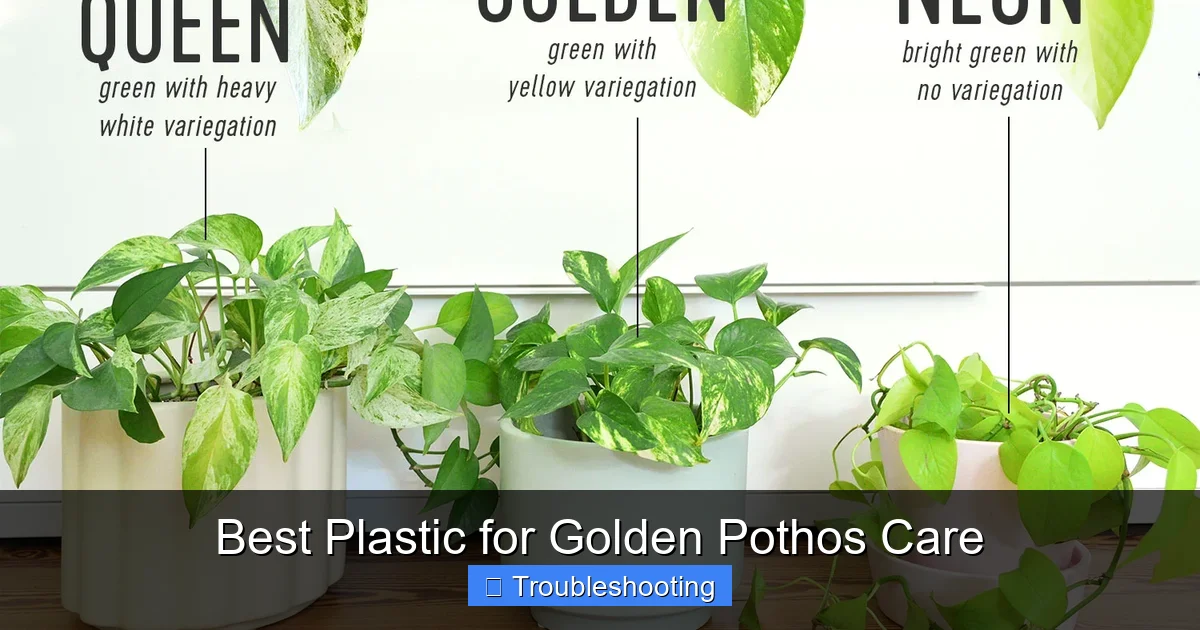
Visual guide about Best Plastic for Golden Pothos Care
Image source: younghouselove.com
Standard Nursery Pots
These are the black or green pots plants come in from the grower. They are made from polypropylene (plastic #5). They are flexible, durable, and have excellent drainage. The ribbed sides help roots grip and prevent circling. They come in standard sizes measured by diameter at the top. A 4-inch pot holds a young plant. A 6-inch pot suits a mature pothos. An 8-inch or 10-inch pot works for a large, full specimen.
Pro tip: Keep a stash of these in various sizes. When it is time to repot, you are ready. They stack neatly for storage. They cost pennies each if you buy in bulk. And they are recyclable in most municipalities.
Clear Plastic Pots
Clear pots are a game changer for pothos. You can see the root system without unpotting the plant. You spot root rot early. You know exactly when the plant is root bound. You watch new roots form after repotting. Clear pots are usually made from PET (plastic #1) or polystyrene (plastic #6). PET is more durable. Polystyrene is more brittle but cheaper.
I use clear pots for all my propagation projects. I also use them for newly repotted plants for the first few months. Once the plant is established, I slip the clear pot into a decorative cachepot. You get the monitoring benefits without the utilitarian look.
Self-Watering Plastic Pots
These have a reservoir at the bottom separated from the soil by a platform or wick. You fill the reservoir through a tube. The soil draws water up as needed. For pothos, this works beautifully. The plant gets consistent moisture. You water less often. Great for vacations. Great for forgetful plant parents.
Look for models with an overflow hole. This prevents the reservoir from flooding the soil. Choose a pot with a water level indicator so you know when to refill. The best plastic for golden pothos care in self-watering form uses a cotton or nylon wick, not just capillary action. Wicks are more reliable.
Fabric Pots Made from Recycled Plastic
Technically these are non-woven polypropylene fabric, not rigid plastic. But they deserve mention. Fabric pots air-prune roots. When roots hit the breathable sides, they branch instead of circling. This creates a dense, healthy root ball. They drain incredibly well. They are lightweight and fold flat for storage.
The downside? They dry out fast. You will water more often. They can leak soil particles. And they look industrial. I use fabric pots for mother plants I propagate from frequently. The vigorous root growth means more cuttings.
Decorative Plastic Cachepots
These are the pretty pots with no drainage holes. They come in every color, texture, and finish. Matte. Glossy. Textured like stone or woven rattan. They are made from thicker polypropylene or polyethylene. They are meant to hold a nursery pot inside. This is the best of both worlds. Your plant has drainage. Your decor has style.
Just remember to empty the cachepot after watering. Do not let the nursery pot sit in drained water. I add a layer of pebbles at the bottom of the cachepot. This lifts the inner pot above any standing water. It also adds humidity as the water evaporates.
Choosing the Right Plastic Pot Size and Style
Size matters more than most people realize. A pot too large holds excess soil. Excess soil holds excess water. Hello, root rot. A pot too small dries out in a day. The plant stresses. Growth stalls.
The Goldilocks Rule
When repotting, go up one size. Maybe two. That means moving from a 4-inch to a 6-inch pot. Or 6-inch to 8-inch. Not 4-inch to 10-inch. The new pot should give roots about an inch of fresh soil on all sides. This encourages root growth into the new space without drowning them.
For a mature golden pothos that you want to keep at its current size, you can root prune and repot into the same pot with fresh soil. This is done in early spring. Trim away the outer inch of roots and soil. Replant in the same clean pot with fresh mix. The plant stays manageable. The roots stay healthy.
Shape Considerations
Pothos roots spread wide more than deep. Wide, shallow pots work better than tall, narrow ones. Azalea pots (wider than they are tall) are ideal. Standard pots (height equals diameter) are fine. Tall pots (height greater than diameter) leave too much wet soil at the bottom where roots do not reach.
If you only have tall pots, fill the bottom third with packing peanuts, empty plastic bottles, or large bark chips. Cover with landscape fabric. Then add soil. This creates a false bottom. It improves drainage. It saves soil. It makes the pot lighter.
Color Matters More Than You Think
Black pots absorb heat. In a sunny window, soil temperatures can climb 10-15 degrees above air temperature. This stresses roots. It speeds up evaporation. It can kill beneficial microbes. Light-colored pots reflect heat. White, beige, light gray, or terracotta-colored plastic keeps roots cooler.
If you have black nursery pots, slip them into light-colored cachepots. Or wrap them in burlap or decorative paper. Or just keep them out of direct afternoon sun. Your pothos will thank you.
Plastic Humidity Solutions for Tropical Growth
Golden pothos loves humidity. In its native habitat, humidity runs 70-90%. Most homes sit at 30-50%. Low humidity causes brown leaf tips. Slow growth. Spider mite infestations. Plastic helps bridge this gap.
Pebble Trays Done Right
A pebble tray is a shallow plastic tray filled with pebbles and water. The pot sits on the pebbles above the water line. As water evaporates, humidity rises around the plant. Simple. Cheap. Effective.
Use a sturdy plastic tray at least twice the diameter of your pot. Plant saucers work. So do plastic boot trays, cat litter pans, or storage box lids. Fill with river rocks, clay pebbles (LECA), or glass marbles. Keep water level just below the top of the pebbles. Refill as needed.
I use clear plastic storage box lids. They are large, cheap, and you can see the water level at a glance. One lid holds several plants. Grouping plants on one tray creates a humidity zone that benefits all of them.
Humidity Domes for New Cuttings
Fresh cuttings have no roots. They lose water through leaves faster than they can absorb it through the stem. A humidity dome solves this. You can buy clear plastic domes made for seed starting. Or make your own from a clear plastic storage box, a 2-liter bottle with the bottom cut off, or a plastic bag propped up with stakes.
The dome should be tall enough that leaves do not touch the plastic. Condensation on the dome is good. It means humidity is high. But you need to vent daily. Lift the dome for 10-15 minutes. Wipe excess condensation. This prevents mold and fungal issues. Once roots are an inch long, start venting longer each day. Remove the dome entirely after a week of acclimation.
Plastic Greenhouse Cabinets
For serious collectors, a plastic greenhouse cabinet is the ultimate humidity solution. These are clear plastic storage cabinets with shelves, often with built-in grow lights and fans. You control humidity with a small humidifier. You control temperature. You control light. Pothos grows explosively in these.
IKEA MILSBO and DETOLF cabinets are popular hacks. Add weather stripping to the doors. Install a small USB fan for airflow. Add a mini humidifier on a timer. You have a tropical paradise in your living room. The best plastic for golden pothos care at this level is the cabinet itself.
Plastic Propagation Containers for Easy Rooting
Propagating pothos is one of the joys of owning this plant. Snip a stem. Put it in water or soil. Get a new plant. The container you use affects success rate and ease.
Water Propagation Vessels
For water propagation, you want clear, narrow containers. Narrow necks hold the stem upright. Clear walls let you see roots and water clarity. Glass works but breaks. Plastic is safer. Test tubes in a rack. Small plastic bud vases. Plastic shot glasses. Spice jars. Pill bottles.
I love plastic test tube racks. Each cutting gets its own tube. No tangling roots. Easy to change water. Easy to monitor. The rack sits on a windowsill taking minimal space. When roots are 2-3 inches, pot them up.
Soil Propagation Boxes
Soil propagation often has higher success rates for pothos. The transition to pot is seamless. Use a clear plastic storage box with a lid. Drill a few ventilation holes in the lid. Fill with moist perlite, vermiculite, or a 50/50 perlite-peat mix. Stick cuttings in. Close the lid. Place in bright indirect light.
The clear box acts as a mini greenhouse. High humidity. Stable temperature. You see condensation. You see root growth through the sides. Open the lid daily for air exchange. Mist if the medium looks dry. In 3-4 weeks, you have rooted cuttings ready for pots.
Cell Trays and Plug Trays
If you propagate in volume, plastic cell trays (like seed starting trays) are efficient. Each cell holds one cutting. Use a humidity dome over the tray. Bottom water by setting the tray in a larger tray of water. The cells draw up moisture. This prevents disturbing delicate new roots.
Choose trays with 2-inch or larger cells. Smaller cells dry too fast. Deeper cells (3+ inches) allow better root development before transplanting. Reuse trays for years. Wash with 10% bleach solution between uses to prevent disease.
DIY Propagation Containers
You do not need to buy special gear. Plastic clamshell containers from berries or salad greens make excellent propagation boxes. They have ventilation holes built in. The clear lid snaps shut. They are free. They recycle. They work great.
Plastic cups with holes poked in the bottom work for individual cuttings. Yogurt cups. Solo cups. Deli containers. Just add drainage holes. Use a clear cup inside an opaque cup for a self-contained system. The outer cup holds water. The inner cup holds the cutting and medium. Water wicks up.
Safety and Environmental Considerations
We keep plants for health and beauty. The containers should not undermine that. Some plastics raise concerns. Let me address the big ones.
BPA and Phthalates
Bisphenol A (BPA) and phthalates are plasticizers that can leach into soil, especially when heated or exposed to acidic conditions. Pothos prefers slightly acidic soil (pH 6.1-6.5). Over years, leaching is possible. The risk to the plant is low. The risk to you if you eat the plant (please do not) is theoretical. But why risk it?
Choose plastics marked #2 (HDPE), #4 (LDPE), or #5 (PP). These are considered food-safe and stable. Avoid #3 (PVC), #6 (PS), and #7 (other, often polycarbonate with BPA). Most nursery pots are #5. Most clear pots are #1 (PET) or #6. PET is generally safe for single use but can degrade with UV exposure. For long-term use, #5 is best.
Microplastics in Soil
Plastic pots degrade over time. Sunlight, freezing, physical stress cause micro-cracks. Tiny plastic particles enter the soil. Earthworms and microbes may ingest them. The long-term effects on soil ecology are still being studied. But reducing plastic degradation makes sense.
Protect pots from UV. Keep them out of direct sun when not in use. Store them indoors in winter. Replace cracked or brittle pots. Do not use pots that are flaking or crumbling. The best plastic for golden pothos care lasts years without degrading.
Recycling and Reuse
Plastic pots are recyclable but many curbside programs do not accept them. They are often black (carbon black pigment confuses optical sorters) or dirty. Check with your local nursery or big box store. Many have pot recycling programs. Home Depot and Lowe’s often take them back.
Better yet, reuse. Wash pots with hot soapy water. Soak in 10% bleach for 10 minutes. Rinse well. They are good as new. I have nursery pots that are 10 years old and still going strong. When they finally crack, I use the pieces as drainage crocks in the bottom of larger pots. Nothing wasted.
Biodegradable Alternatives
If you want to avoid plastic entirely, consider coconut coir pots, peat pots, rice hull pots, or cow pots. These break down in the soil. You plant the whole thing. Roots grow through the walls. They are great for propagation and annuals. For a long-lived perennial like pothos, they break down too fast. The plant outlives the pot. You end up repotting anyway. Plastic remains the practical choice for permanent specimens.
Maintenance Tips for Plastic Containers
Your plastic containers will last longer and perform better with a little care. Here is what I do.
Cleaning Between Uses
Never reuse a pot without cleaning. Old soil carries pathogens. Salt buildup burns roots. Pests hide in crevices. My routine: Dump old soil. Scrub with a stiff brush and dish soap. Soak in 1 part bleach to 9 parts water for 10 minutes. Rinse thoroughly. Dry in sun. The UV helps sanitize further.
For clear pots, avoid abrasive scrubbers. They scratch the plastic. Scratches harbor bacteria. They block visibility. Use a soft sponge or cloth. If mineral deposits cloud the plastic, soak in vinegar solution (1:4 vinegar to water) for an hour. Rinse. They will be crystal clear again.
Checking Drainage
Before each repotting, check the holes. Roots often grow through them and block them. Use a chopstick or skewer to clear each hole. If the pot has a recessed bottom, make sure the gap is clear. A blocked drainage hole defeats the whole purpose of the pot.
Preventing Salt Buildup
Fertilizer salts accumulate on the inside of plastic pots. You see a white crust. This crust can burn roots that touch it. It also wicks water up the sides, evaporating it and concentrating salts further. Scrub it off during cleaning. If a pot has heavy buildup you cannot remove, retire it. Use it for non-edible ornamentals only.
Storing Pots Properly
Stack pots by size. Nest them. Store in a bin or box out of sunlight. Temperature swings make plastic brittle. A garage or shed that freezes in winter and bakes in summer will ruin pots in a few seasons. Indoor storage is best. If you must store outside, use a heavy-duty tote with a lid.
Common Mistakes and How to Avoid Them
I have made all of these. Learn from my errors.
No Drainage Holes
Putting pothos in a plastic pot with no holes is a death sentence. Even if you are careful with watering. Even if you add rocks at the bottom. Rocks create a perched water table. The soil above stays wetter. Roots rot. Always drill holes if the pot lacks them. A 1/4-inch drill bit. 4-6 holes in a 6-inch pot. More for larger. Wear safety glasses. Go slow. The plastic will not crack if you do not force it.
Pot Too Large
We want our plants to have room. So we jump from a 4-inch to a 10-inch pot. The plant sulks. Soil stays wet for weeks. Roots rot. Fungus gnats move in. Stick to the one-size-up rule. Pothos likes to be slightly root bound. It blooms more (rare indoors but possible). It grows faster. It handles neglect better.
Standing Water in Saucers
Water drains out. Sits in the saucer. Pot wicks it back up. Soil never dries. Roots suffocate. Empty saucers 30 minutes after watering. Use a turkey baster for large pots. Or water in the sink and let drain fully before returning to the saucer. The pebble tray trick I mentioned earlier solves this beautifully.
Ignoring Root Bound Signs
Roots circling the bottom. Roots growing out of drainage holes. Soil drying in one day. Pot deformed by root pressure. These mean repot now. Do not wait for spring. A severely root bound pothos will decline fast. The plastic pot may crack. The plant may not recover. Check your pots every 6 months. Slide the plant out. Peek at the roots. Clear pots make this a 10-second job.
Using Degraded Plastic
That brittle pot from 2015? It cracks when you squeeze it. Shards cut roots. Microplastics enter soil. Toss it. Recycle it. Replace it. A new nursery pot costs less than a coffee. Your plant is worth more.
Conclusion
The best plastic for golden pothos care is not a single product. It is a system. A nursery pot with great drainage. A cachepot for style. A pebble tray for humidity. A clear container for propagation. A storage box for a humidity dome. Each piece plays a role. Together, they create the conditions your pothos craves.
Start with the basics. Good drainage holes. The right size. Safe plastic types. Add humidity solutions as you learn your plant’s needs. Experiment with propagation containers. Find what works for your space and your routine. There is no perfect setup. There is only what works for you and your plant.
My golden pothos collection has grown from one struggling cutting to dozens of lush vines. The difference was not magic. It was paying attention to the containers. It was understanding that the pot is not just a holder. It is the plant’s home. Its environment. Its foundation.
Now you know what I know. Go check your pots. Are they serving your pothos well? If not, swap them out. Watch what happens. I bet you see new growth within weeks. That is the power of the right plastic. Happy growing.
Frequently Asked Questions
What type of plastic is safest for golden pothos pots?
Polypropylene (#5 plastic) is the safest and most durable choice for golden pothos pots. It is food-grade, BPA-free, heat-resistant, and recyclable. Most quality nursery pots use this material.
Can I use a plastic pot without drainage holes for my pothos?
Never use a pot without drainage holes for pothos. Standing water causes root rot within days. Always drill 4-6 holes in the bottom or use it as a cachepot with a draining nursery pot inside.
Why are clear plastic pots recommended for pothos propagation?
Clear pots let you see root development without disturbing cuttings. You can spot rot early, know when roots are ready for potting, and monitor water clarity in water propagation.
How do I make a plastic humidity tray for golden pothos?
Use a plastic tray twice the pot’s diameter. Fill with pebbles or LECA. Add water to just below the pebble tops. Set the pot on the pebbles, not in the water. Refill as water evaporates.
Should I repot my pothos into a much larger plastic pot?
No, only go up 1-2 inches in diameter. A pot too large holds excess wet soil that causes root rot. Pothos prefers being slightly root bound and grows faster in snug pots.
How do I clean used plastic pots before reusing for pothos?
Scrub with hot soapy water, soak in 10% bleach solution for 10 minutes, rinse thoroughly, and dry in sunlight. This kills pathogens and removes salt buildup for safe reuse.