Best Modular for Beginner Plant Parents
Starting your plant journey doesn’t have to be overwhelming. Modular growing systems offer the perfect solution for beginner plant parents who want flexibility, easy maintenance, and room to grow. This guide breaks down the top modular options, key features to look for, and expert tips to help your green babies thrive from day one.
Key Takeaways
- Modular systems simplify plant care: They provide built-in drainage, aeration, and often self-watering features that remove the guesswork for beginners.
- Start small and scale up: The best modular setups let you add modules as your confidence and plant collection grow.
- Look for food-safe materials: Choose BPA-free, UV-resistant plastics or ceramic modules that won’t leach chemicals into your edible plants.
- Light integration matters: Systems with built-in grow lights or light-mounting options save you from buying separate fixtures.
- Drainage is non-negotiable: Every module needs proper drainage holes and a reservoir or tray to prevent root rot.
- Consider your space and style: Wall-mounted, freestanding, and countertop modular systems each fit different living situations.
- Budget for the long term: Quality modular systems cost more upfront but save money on replacements and plant losses over time.
Quick Answers to Common Questions
What is the easiest modular plant system for a complete beginner?
The Click & Grow Smart Garden 9 is the easiest for total beginners because it automates light, water, and nutrients with pre-seeded pods. For soil-based growing, the GreenStalk 3-tier planter is the most foolproof with its gravity-fed watering system.
Do modular plant systems require electricity?
Not all of them. Stackable towers like GreenStalk and wall-mounted systems like WallyGrow work purely on gravity and capillary action. Hydroponic systems and light-integrated shelves require electricity for pumps and grow lights.
Can I use regular potting soil in modular systems?
Yes, but choose a high-quality container mix with perlite and compost. Avoid garden soil, pure peat moss, or cheap topsoil. Some hydroponic modular systems require soilless media like LECA or coco coir instead.
How often do I need to water a modular self-watering system?
Typically every 1-3 weeks depending on reservoir size, plant types, and environment. Check the water level indicator weekly. The system provides a buffer but doesn’t eliminate the need to monitor.
Are modular plant systems worth the higher upfront cost?
Yes, for beginners. Quality modular systems last 5-10+ years, prevent common plant-killing mistakes, and scale with your skills. They save money on replacement plants, wasted supplies, and failed experiments compared to improvised setups.
📑 Table of Contents
- Why Modular Systems Are a Game Changer for New Plant Parents
- Understanding What Makes a System “Modular”
- Key Features That Actually Matter for Beginners
- Top Modular System Recommendations by Category
- Setting Up Your First Modular System: Step by Step
- Common Beginner Mistakes with Modular Systems (And How to Avoid Them)
- Scaling Up: Growing With Your Modular System
- Budgeting for Your Modular Journey
- Maintaining Your Modular System Long-Term
- Conclusion: Your Modular Journey Starts Today
Why Modular Systems Are a Game Changer for New Plant Parents
Let me tell you a secret. When I first started keeping plants alive, I killed a lot of them. Like a lot. I overwatered. I underwatered. I put sun lovers in dark corners and shade plants in scorching windows. The learning curve was steep and honestly pretty discouraging.
Then I discovered modular growing systems. And everything changed.
If you’re a beginner plant parent feeling overwhelmed by all the choices, the conflicting advice, and the fear of wasting money on plants that just won’t make it, modular systems might be exactly what you need. Think of them as training wheels for your green thumb. They provide structure, built-in safeguards, and the flexibility to learn at your own pace without committing to a permanent setup you might outgrow in six months.
In this guide, I’ll walk you through everything you need to know about choosing the best modular for beginner plant parents. We’ll cover the different types available, the features that actually matter (versus the marketing fluff), real recommendations at different price points, and the mistakes I see new plant parents make again and again. By the end, you’ll feel confident picking a system that fits your space, your budget, and your lifestyle.
Understanding What Makes a System “Modular”
The Core Concept
At its simplest, a modular plant system is any growing setup made of interchangeable, connectable units. Instead of buying one big planter or a random assortment of pots that don’t match, you get standardized modules that snap, stack, or link together. You can start with three modules. Add three more next month. Rearrange them when you move furniture. Take them apart for deep cleaning. The system grows with you.
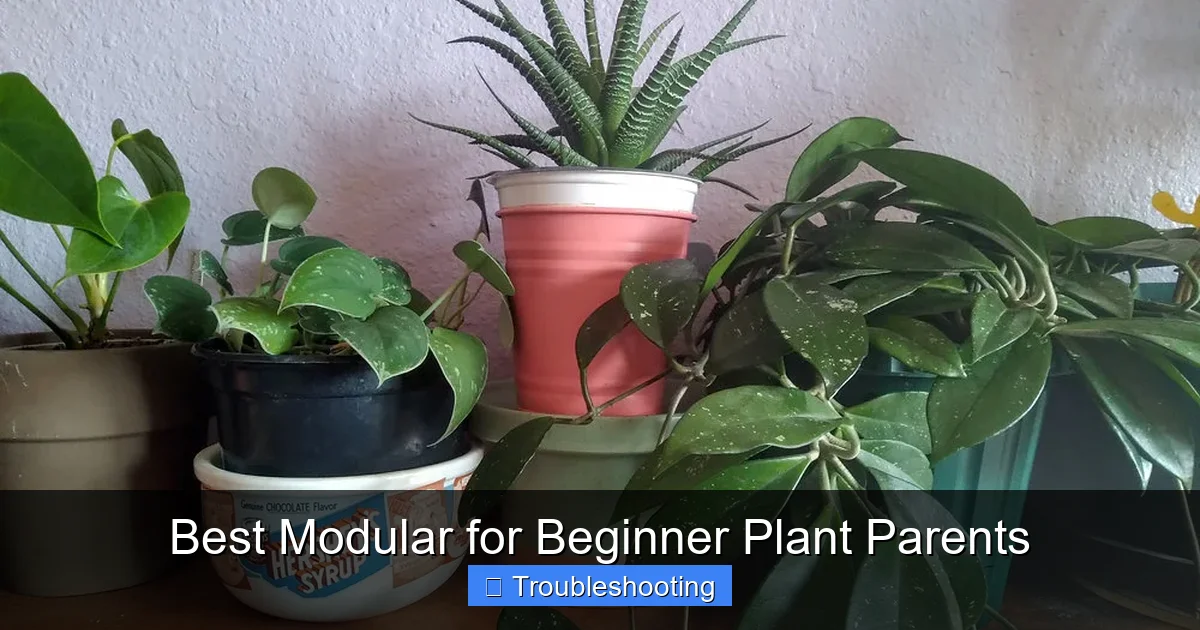
Visual guide about Best Modular for Beginner Plant Parents
Image source: static.wixstatic.com
This flexibility is huge for beginners. Your first plant collection will look completely different a year from now. Maybe you’ll discover you love herbs. Maybe you’ll get obsessed with succulents. Maybe you’ll want to try hydroponics. A modular system lets you pivot without starting from scratch.
Types of Modular Systems You’ll Encounter
Not all modular systems are created equal. Here are the main categories you’ll see on the market:
Stackable Tower Systems
These are vertical columns of planting pockets that stack on a central pole or nest inside each other. The classic example is the GreenStalk or similar tiered planters. You fill each tier with soil, plant in the pockets, and water from the top. Gravity distributes moisture downward. They’re fantastic for small footprints, balconies, and growing lots of herbs or strawberries in minimal floor space.
Wall-Mounted Panel Systems
Think of these as living wall kits for home use. You mount a backing panel to your wall, then attach individual planting cells or pots that click into a grid. Brands like WallyGrow, Florafelt, and newer magnetic systems fall here. They turn empty wall space into growing space and look incredibly stylish. Great for trailing plants, small tropicals, and creating a focal point.
Freestanding Modular Shelves with Integrated Planters
These look like bookshelves but each shelf is actually a planter tray or has cutouts for pots. Some have built-in grow lights on each tier. The IKEA Socker series is a budget version; companies like Rise Gardens and Gardyn make high-end versions with app-controlled lighting and watering. Ideal if you have floor space and want a furniture piece that doubles as a garden.
Connectable Pot Systems
Individual pots that link together via clips, magnets, or interlocking rims. You can arrange them in lines, circles, squares, whatever fits your windowsill or shelf. The Click & Grow system is the most famous, but there are simpler versions without the tech. These offer maximum layout flexibility and let you move individual plants around easily.
Hydroponic Modular Systems
Soil-free systems where plants grow in nutrient solution. Modules are typically net pots that sit in channels or reservoirs. The AeroGarden is the entry-level king here, but modular NFT (nutrient film technique) and DWC (deep water culture) systems let you expand. These grow food faster and cleaner but have a steeper learning curve for total beginners.
Key Features That Actually Matter for Beginners
Drainage and Aeration Design
This is the single biggest killer of beginner plants. Poor drainage leads to root rot. Poor aeration leads to suffocated roots. A good modular system solves both without you having to think about it.
Look for modules with multiple drainage holes, not just one in the center. Look for raised bottoms or internal channels that create an air gap between the soil and the reservoir. Some systems use wicking strips or capillary mats that pull water up as needed. This is gold for beginners because it prevents both overwatering and underwatering.
If you’re looking at a system without visible drainage, ask how excess water escapes. “It has a reservoir” isn’t enough. You need to know: can you see the water level? Can you drain it completely? Does air reach the root zone? If the answer to any of these is no, keep looking.
Material Safety and Durability
You’d be surprised how many cheap modular planters are made from plastics that degrade in sunlight, leach chemicals, or crack after one season. For edible plants especially, you want food-grade, BPA-free, UV-stabilized materials. Look for certifications or clear material specifications.
Polypropylene (PP #5) and high-density polyethylene (HDPE #2) are the gold standards for plastic planters. They’re inert, durable, and recyclable. Avoid PVC, polystyrene, and mystery plastics. Ceramic and terracotta modules are beautiful and safe but heavier and breakable. Metal modules need food-safe coatings that won’t chip.
Durability matters because modular systems are an investment. You want modules that survive being moved, bumped, frozen (if outdoors), and cleaned repeatedly. Read reviews specifically about longevity. A $200 system that lasts ten years beats a $50 system you replace annually.
Water Management Features
Watering is where beginners struggle most. The best modular systems build in foolproof water management:
- Visible water level indicators so you never guess
- Overflow protection that prevents flooding your floor
- Large reservoirs that extend time between waterings
- Wicking or sub-irrigation that delivers water from below
- Easy drain valves or plugs for flushing salts and refreshing water
Self-watering doesn’t mean “never water.” It means “water less often and with a bigger safety margin.” That’s perfect for learning. You still check weekly. You still observe your plants. But you have a buffer against the “oops I forgot for two weeks” scenario.
Light Integration Options
Most homes don’t have enough natural light for the plants beginners want to grow. Herbs, tomatoes, peppers, and many tropicals need 12-16 hours of strong light. A modular system with integrated lighting or standardized light mounting saves you from the “which grow light fits this weird shape” headache.
Look for systems with built-in LED bars, channels for standard T5 or T8 fixtures, or mounting points for clip lights. Even better: programmable timers and adjustable intensity. If a system has none of this, budget separately for lighting. Don’t skip it. Leggy, pale, stretching plants are a beginner heartbreak you can avoid.
Ease of Cleaning and Maintenance
You will need to clean your system. Salt buildup, algae, old roots, pests — they happen. Modular systems should come apart easily for deep cleaning. No tools required. Smooth interior surfaces. Dishwasher-safe modules are a huge plus. If you can’t easily scrub every surface a plant touches, you’ll eventually have problems.
Also consider: can you replace individual modules if one cracks? Can you buy expansions years later? Companies that stock replacement parts and honor compatibility across product generations are worth supporting.
Top Modular System Recommendations by Category
Best Overall for Total Beginners: Click & Grow Smart Garden 9
I hesitate to recommend proprietary pod systems because they lock you into buying their seeds. But for absolute beginners who want guaranteed success with herbs and greens, the Click & Grow Smart Garden 9 is unbeatable. You plug it in, insert pre-seeded pods, fill the tank, and the system handles light, water, and nutrients automatically. The app reminds you when to add water. Plants grow in 3-4 weeks.
Downsides: ongoing pod cost, limited to their plant selection, small grow height. But as a “gateway drug” to plant parenting? It builds confidence fast. Many users graduate to soil-based systems after their first harvest.
Best Soil-Based Stackable: GreenStalk Original 5-Tier Vertical Planter
This is my top pick for outdoor or bright indoor spaces. Five tiers, 30 planting pockets, made in USA from UV-resistant polypropylene. You fill with your own soil mix, plant whatever you want, water from the top reservoir. The patented watering system distributes evenly to every tier. No electricity. No pumps. No apps. Just gravity and good design.
It’s large (about 2 sq ft footprint, 5 ft tall) so measure your space. But the yield per square foot is incredible. Strawberries, herbs, lettuce, flowers — they all thrive. And you can buy just the 3-tier or add tiers later. GreenStalk also offers a “Leaf” version with shallower pockets for smaller roots.
Best Wall-Mounted for Style: WallyGrow Eco Planters
These recycled plastic planters mount individually or in grids. They have a built-in water reservoir, aeration holes, and a front-facing water level window. The curved design looks modern and hides the mechanics. You can start with three, arrange in a triangle, add more as you go. They’re made in the USA from post-consumer recycled milk jugs.
Best for: trailing pothos, philodendrons, string of hearts, small ferns. Not for deep-rooted edibles. The reservoir holds about 2 cups per planter, so you water weekly-ish. Installation requires a drill and level, but the mounting hardware is included and foolproof.
Best Freestanding Furniture Piece: IKEA Socker Series (Budget) or Rise Gardens (Premium)
At the budget end, IKEA’s Socker greenhouse and plant stands let you build a modular shelf garden for under $150. You add your own pots, lights, and trays. It’s not a true “system” but it’s modular furniture you customize. Great if you’re handy and want total plant freedom.
At the premium end, Rise Gardens makes beautiful bamboo shelving units with integrated full-spectrum LEDs, automatic watering, and app control. The 3-level family garden grows 36+ plants. It’s $900+ but replaces a piece of furniture and produces serious food. The app guides you through every step. For busy beginners with budget, it’s a lifestyle upgrade.
Best Connectable Pot System: Modern Sprout Terracotta Kit
These are genuine terracotta pots with a clever twist: they have a silicone gasket and stainless steel clips that let you connect them side-by-side or in rings. Terracotta breathes, preventing overwatering. The clips are strong but release easily. You can buy 4-packs and expand infinitely. They look gorgeous on a windowsill or shelf.
No reservoir, no tech. Just smart design. You learn to read the terracotta color (dark = wet, light = dry) which is an invaluable skill. Pair with a simple moisture meter and you’re developing real plant intuition.
Best Entry Hydroponic: AeroGarden Harvest (or Bounty for More Space)
The classic countertop hydroponic system. 6-pod (Harvest) or 9-pod (Bounty) models. Built-in LED arm adjusts height. Control panel reminds you to add water and nutrients. Pre-seeded pods in dozens of varieties. Vacation mode keeps plants alive for two weeks. It’s foolproof hydroponics.
Limitations: proprietary pods (though you can DIY with grow sponges), small grow height (12-24 inches), pump noise. But for learning hydroponics basics without building PVC pipes in your garage? It’s the best starting point. Many users eventually build their own systems after understanding the principles here.
Setting Up Your First Modular System: Step by Step
Step 1: Assess Your Space Honestly
Before buying anything, spend a week observing. Where does sunlight actually hit? For how many hours? Is it direct or filtered? Morning or afternoon? Use a light meter app on your phone (Photone is free and decent) to measure PPFD at different spots. Most edibles need 200+ PPFD for 12+ hours. Tropicals can handle 50-100.
Also measure: floor space, wall space, shelf dimensions, distance to outlets, distance to water source, humidity levels, temperature swings. Take photos. Sketch a rough layout. This prevents the “it doesn’t fit” heartbreak.
Step 2: Choose Your Growing Medium
Modular systems work with different media. Your choice affects everything:
- Potting mix: Most familiar, most forgiving, widely available. Use a quality peat-free mix with perlite and compost. Avoid garden soil, pure compost, or cheap “topsoil.”
- Coco coir: Sustainable, excellent water retention, neutral pH. Needs added nutrients. Great for self-watering systems.
- LECA (clay pebbles): Reusable, sterile, incredible aeration. Requires hydroponic nutrients and pH management. Steeper learning curve.
- Pon/lechuza substrate: Engineered mineral mix for self-watering planters. Expensive but foolproof.
- Pre-seeded pods: Easiest start, most expensive long-term, limited variety.
For your first system, I recommend a high-quality organic potting mix. You can experiment later. The goal is early wins.
Step 3: Select Your First Plants Strategically
Don’t buy the Instagram plants. Buy the “I can’t kill this” plants. Here are foolproof starters by system type:
For Stackable Towers:
- Strawberries (everbearing varieties)
- Herbs: mint, thyme, oregano, chives, parsley
- Leafy greens: lettuce, spinach, arugula, kale
- Flowers: petunias, calibrachoa, lobelia
For Wall-Mounted:
- Pothos (any variety)
- Philodendron heartleaf or brasil
- Spider plant
- String of hearts / pearls / turtles
- English ivy
- Ferns: bird’s nest, button, rabbit’s foot
For Freestanding Shelves:
- Snake plant
- ZZ plant
- Chinese evergreen
- Peace lily
- Herbs under lights
- Microgreens (fast, rewarding, edible in 10 days)
For Hydroponic:
- Basil (grows like crazy)
- Lettuce (buttercrunch, romaine, oak leaf)
- Cherry tomatoes (determinate varieties)
- Peppers (compact varieties)
- Cilantro, dill, parsley
Start with 3-5 plants max. Different types. Observe how each responds. Keep a simple notebook: date, what you did, how plants look. This builds your intuition faster than any book.
Step 4: Establish a Simple Care Routine
Modular systems reduce work but don’t eliminate it. Set a weekly 15-minute “plant appointment” on your calendar. During this time:
- Check water levels / reservoirs
- Feel soil moisture (finger test or meter)
- Inspect leaves top and bottom for pests
- Rotate modules for even light
- Remove yellow/dead leaves
- Harvest anything ready
- Note observations in your notebook
That’s it. 15 minutes. Consistency beats intensity. A little attention weekly prevents the monthly crisis.
Common Beginner Mistakes with Modular Systems (And How to Avoid Them)
Mistake 1: Overcrowding Modules
It’s tempting to fill every pocket. “More plants = more harvest” seems logical. But plants need root space, air flow, and light penetration. Overcrowded modules become pest hotels and disease incubators. Follow the spacing guidelines for each plant. If a module has 6 pockets but you’re planting tomatoes, use 2 pockets and let the others grow companions like basil or marigold.
Mistake 2: Ignoring the Reservoir Until It’s Empty
Self-watering doesn’t mean “fill and forget.” Reservoirs develop algae, mosquito larvae, anaerobic bacteria, and nutrient imbalances. Check weekly. Flush monthly (drain completely, rinse, refill with fresh water). If your system has a drain valve, use it. If not, tip carefully or siphon.
Mistake 3: Using the Wrong Soil Mix
Garden soil compacts into concrete in containers. Pure peat moss repels water when dry. Cheap potting mixes turn to mush. Invest in a quality mix: look for “container mix” or “raised bed mix” with compost, perlite/pumice, and coco coir or peat. Add worm castings for slow-release nutrition. Your plants will thank you.
Mistake 4: Skipping Acclimation
Plants from nurseries are grown in perfect greenhouse conditions. Moving them to your home — different light, humidity, airflow — causes shock. Harden them off: keep in shade for 2 days, then dappled light for 2 days, then their final spot. For indoor plants, place in slightly lower light than target for a week. Water well but don’t fertilize for 2 weeks.
Mistake 5: Fertilizing Too Much, Too Soon
New potting mix has nutrients. Nursery plants have slow-release fertilizer in their root balls. Adding more burns roots. Wait 4-6 weeks after planting, then start with half-strength organic liquid fertilizer every 2-3 weeks. Less is more. You can always add. You can’t easily remove.
Mistake 6: Not Planning for Growth
That cute 4-inch basil becomes a 2-foot bush. The trailing pothos reaches 6 feet. The tomato vine needs trellising. Before planting, research mature sizes. Install supports early (tomato cages, trellis netting, moss poles). Prune regularly. Modular systems make it easy to swap out finished plants for new ones — plan for succession planting.
Scaling Up: Growing With Your Modular System
When to Expand
You’ll know you’re ready to add modules when:
- You’ve kept your starter plants alive 3+ months
- You understand watering rhythms without checking the manual
- You’re propagating successfully (cuttings rooting in water)
- You have a wishlist of plants that won’t fit current space
- You’ve identified a new location with good light
Don’t expand because you’re bored or saw a cool Instagram reel. Expand because your skills and needs have grown.
How to Expand Smartly
Stick with the same system if possible. Compatibility saves headaches. But if you’re switching types (e.g., from wall-mounted to freestanding), choose a system that complements your care routine. Same watering day. Same fertilizer. Same light timer schedule. Consistency prevents neglect.
Consider dedicating modules to specific purposes: one tower for herbs, one shelf for tropicals, one hydroponic for lettuce. Specialization lets you optimize conditions per group rather than compromising for all.
Advanced Techniques to Try Later
Once you’re comfortable, modular systems let you experiment:
- Companion planting: Basil with tomatoes, marigolds with everything, nasturtiums as trap crops
- Succession planting: Start lettuce seeds in empty pockets every 2 weeks for continuous harvest
- Propagation stations: Dedicate a module to rooting cuttings in perlite or water
- Seasonal rotation: Cool-season crops in spring/fall, heat-lovers in summer
- Hydroponic conversion: Some soil modules adapt to LECA or NFT with minor mods
The modular design means each experiment is isolated. If one module fails, the others keep thriving.
Budgeting for Your Modular Journey
Real Cost Breakdown
Let’s talk numbers. A quality modular setup isn’t cheap, but it’s an investment that pays in food, beauty, and mental health. Here’s a realistic first-year budget for a beginner starting with a mid-range system:
- System (5-tier stackable): $150-250
- Quality potting mix (3 cu ft): $40-60
- Starter plants (10-15): $50-100
- Organic fertilizer: $20-30
- Moisture meter + pH strips: $15-25
- Grow light (if needed): $60-150
- Trellis/supports: $20-40
- Misc (pruners, gloves, labels): $30-50
Total: $385-705
Year two costs drop dramatically: just plants, fertilizer, and occasional media refresh. Compare to grocery store herbs ($3-5 per pack weekly) or houseplants ($15-50 each). A productive herb tower pays for itself in 4-6 months.
Where to Save vs. Splurge
Splurge on: The system itself (durability, safety, warranty), grow lights (cheap LEDs burn out or lack spectrum), potting mix (foundation of everything).
Save on: Plants (start from seed, propagate, swap with friends), pots (reuse nursery pots inside modules), fertilizer (make compost tea, use worm castings), tools (thrift store finds).
DIY options: Build your own stackable from food-grade buckets. Create a wall system from recycled gutters. Hack IKEA furniture. These work but require time, tools, and trial-and-error. If you enjoy building, go for it. If you want to grow plants, buy a proven system.
Maintaining Your Modular System Long-Term
Seasonal Deep Cleaning
Twice a year (spring and fall), do a full system breakdown:
- Remove all plants (pot them temporarily or harvest)
- Disassemble every module
- Scrub with 10% vinegar solution or hydrogen peroxide
- Rinse thoroughly
- Inspect for cracks, clogged holes, worn gaskets
- Replace damaged parts
- Reassemble with fresh media or refreshed media
- Replant
This prevents salt buildup, disease carryover, and mechanical failures. It’s also a great time to redesign your layout.
Media Refresh Strategy
Potting mix breaks down over 12-18 months. It compacts, loses aeration, accumulates salts. You don’t always need full replacement. For perennials: remove plant, shake off loose mix, trim dead roots, repot in same module with 50% fresh mix blended in. For annuals: full refresh each season. For hydroponic: clean reservoirs monthly, replace nutrient solution every 2-3 weeks.
Pest Management in Modular Systems
The good news: modular systems isolate problems. If spider mites hit one module, you can treat or remove just that module. The bad news: connected reservoirs can spread root pathogens. Best practices:
- Quarantine new plants 2 weeks before adding to system
- Yellow sticky traps in every module (cheap, effective monitoring)
- Neem oil spray monthly as prevention
- Beneficial insects (ladybugs, predatory mites) for enclosed systems
- Immediate removal of heavily infested plants
- Clean tools between modules (alcohol wipe)
Conclusion: Your Modular Journey Starts Today
Here’s the truth nobody tells you: there’s no perfect modular system. There’s only the system that matches your space, your budget, your aesthetic, and your current skill level. The best modular for beginner plant parents is the one you’ll actually use consistently.
Start small. Choose a system that solves your biggest pain point (watering? light? space? aesthetics?). Set it up with three forgiving plants. Commit to 15 minutes a week. Keep a notebook. Celebrate every new leaf.
Six months from now, you’ll look at your thriving modular garden and barely remember the anxiety of killing those first few plants. You’ll have developed an intuition for moisture, light, and growth that no article can teach. You’ll be the friend people ask for plant advice.
And when you’re ready, you’ll add another module. Try a new plant. Experiment with a technique. Because that’s the beauty of modular: it grows with you, one module at a time.
Your green thumb isn’t something you’re born with. It’s something you build. And a good modular system is the best set of tools I know for building it.
Now go pick your system. Your future plants are waiting.
Frequently Asked Questions
Can I grow vegetables in a modular plant system indoors?
Yes, many modular systems support indoor vegetables with proper lighting. Leafy greens, herbs, cherry tomatoes, and peppers thrive in systems with integrated grow lights or supplemental lighting. Choose compact varieties bred for container growing.
How do I prevent algae in my modular system’s water reservoir?
Use opaque reservoirs or cover transparent ones. Add a few drops of hydrogen peroxide monthly. Keep nutrient levels balanced. Clean reservoirs completely during seasonal deep cleans. Avoid over-fertilizing which feeds algae.
What happens if one plant in my modular system gets pests?
Modular systems isolate problems well. Remove the affected module, treat the plant separately, and monitor neighbors. Clean the empty module before reuse. Connected reservoirs can spread root issues, so flush the system if pests are soil-borne.
Can I move my modular plant system outdoors in summer?
Most UV-stabilized plastic systems transition outdoors beautifully. Harden off plants gradually over 7-10 days. Ensure drainage works with rainfall. Bring tender systems indoors before frost. Metal and ceramic modules may need winter protection.
How do I know when to upgrade to a larger modular system?
Upgrade when you’ve mastered your current system (3+ months success), need more growing space, want different plant types, or have identified a new location with better light. Don’t upgrade just for aesthetics — skill should drive expansion.
Are modular systems suitable for renters who move frequently?
Absolutely. Modular systems disassemble easily for moves. Wall-mounted systems leave minimal holes (patchable). Freestanding and stackable systems move like furniture. They’re far more portable than built-in gardens or heavy ceramic collections.