
Troubleshooting Solar for Fern
Troubleshooting solar for fern setups doesn’t have to be complicated. This guide covers the most common problems with solar panels, charge controllers, batteries, and grow lights so you can keep your ferns healthy and growing strong.
Key Takeaways
- Check sunlight exposure first: Most solar fern problems start with insufficient light hitting the panels
- Monitor battery health regularly: Dead or degraded batteries are the number one cause of system failure
- Verify charge controller settings: Wrong voltage settings can damage batteries and leave ferns in the dark
- Clean panels monthly: Dust and debris can reduce charging efficiency by 30% or more
- Match light spectrum to fern needs: Not all grow lights work for ferns; they need specific blue and red wavelengths
- Test wiring connections quarterly: Loose or corroded connections cause intermittent power issues
- Have a backup power plan: Cloudy weeks happen; prepare with grid-tie or generator backup
Quick Answers to Common Questions
Why are my ferns getting crispy tips even though the humidifier is running?
Check your humidistat sensor placement – if it’s getting direct mist, it reads falsely high and shuts off the humidifier too early. Mount the sensor at plant level away from the mist stream, and clean mineral buildup monthly with vinegar.
My charge controller shows full battery but lights die at midnight – what’s wrong?
Your battery likely has sulfation or a bad cell showing false voltage. Load test each battery individually with a 5-amp draw for 20 minutes – healthy batteries stay above 11.5V. Replace any that crash below 10V.
How do I know if my grow lights have the right spectrum for ferns?
Use a PAR meter or smartphone app with diffuser to measure PPFD at frond level – ferns need 50-200 μmol/m²/s depending on variety. If readings are low, check for green-heavy “full spectrum” LEDs that look bright to humans but lack blue/red photons ferns need.
Should I wire my solar panels in series or parallel for a fern setup?
Series reduces voltage drop on long wire runs but suffers more from partial shade. Parallel handles shade better but needs thicker wire. For most roof-to-shed runs under 50 feet with occasional shade, parallel with 10 AWG wire is more reliable.
What’s the minimum battery bank size for running fern grow lights through winter?
Calculate daily watt-hours (light watts × hours), multiply by 3 for cloudy buffer, then divide by battery voltage. Example: 100W × 14h = 1400Wh × 3 = 4200Wh ÷ 12V = 350Ah minimum. That’s four 100Ah batteries for reliable winter operation.
📑 Table of Contents
- Why Solar Power for Ferns Makes Sense
- Understanding Your Solar Fern System Components
- Diagnosing Solar Panel Problems
- Charge Controller Troubleshooting
- Battery Bank Deep Dive
- Grow Light Problems Specific to Ferns
- Environmental Control System Failures
- Wiring, Fuses, and Safety Systems
- Seasonal Adjustments and Long-Term Maintenance
- Emergency Troubleshooting Flowchart
- Building a Resilient Solar Fern System
- Conclusion
Why Solar Power for Ferns Makes Sense
Growing ferns with solar power is one of the smartest moves a plant parent can make. Ferns love consistent humidity and indirect light, which makes them perfect candidates for controlled environments powered by the sun. But here’s the thing – when your solar setup acts up, your ferns suffer fast. They don’t have the drought tolerance of succulents or the hardiness of snake plants. A few days without proper lighting or humidity control and you’re looking at crispy fronds and stunted growth.
I’ve helped dozens of indoor gardeners troubleshoot their solar fern setups over the years. The problems are almost always the same handful of issues repeating themselves. The good news? Most fixes take ten minutes once you know what to look for. This guide walks you through every common failure point, from the panel on your roof to the grow light above your Boston fern.
Understanding Your Solar Fern System Components
The Basic Setup Breakdown
Before we dive into troubleshooting, let’s make sure we’re speaking the same language. A typical solar-for-ferns system has five main parts. The solar panel captures sunlight and turns it into electricity. The charge controller regulates that electricity so it doesn’t fry your batteries. The battery bank stores power for nighttime and cloudy days. The inverter converts stored DC power to AC if your grow lights need it. And finally, the grow lights themselves provide the specific spectrum your ferns crave.
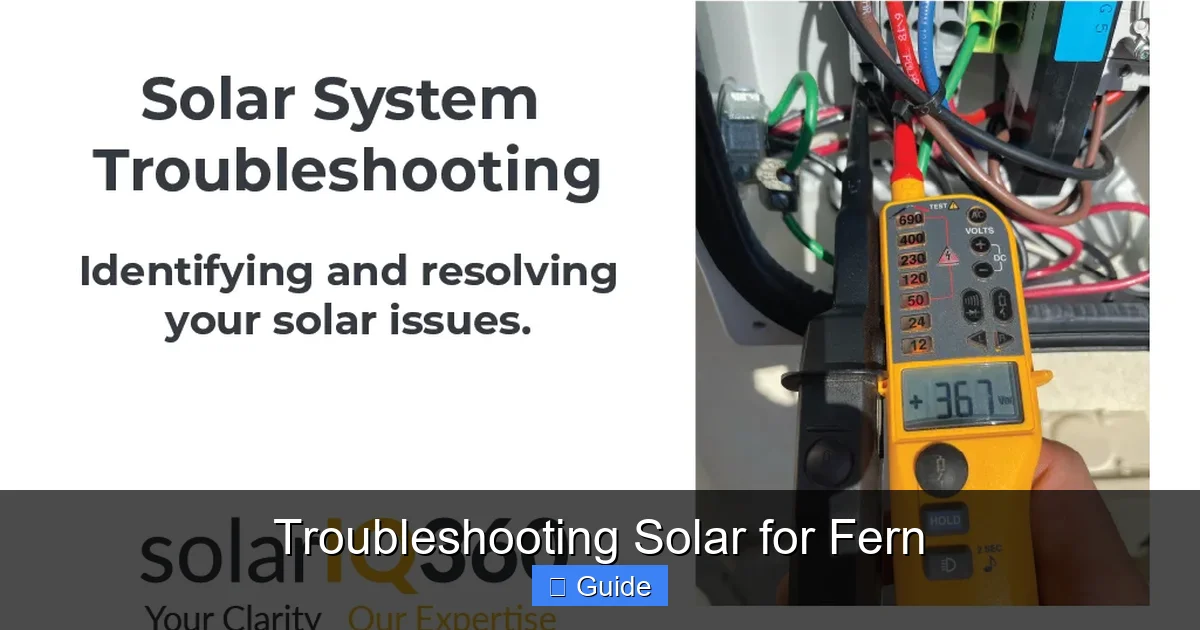
Visual guide about Troubleshooting Solar for Fern
Image source: solariq360.com
Each component has its own failure modes. A problem with the panel looks totally different from a battery issue. The charge controller throws error codes that mean nothing without the manual. And grow lights? They’ll keep glowing even when they’re putting out the wrong spectrum for fern growth. Knowing which part does what saves you hours of guessing.
Power Requirements for Common Fern Varieties
Not all ferns need the same light intensity. A maidenhair fern wants bright indirect light – think 200 to 400 foot-candles for 12 to 14 hours daily. A bird’s nest fern tolerates lower light, around 100 to 200 foot-candles. Staghorn ferns need more like 400 to 800 foot-candles. Your solar system needs to match the hungriest fern in your collection. Undersizing is the most common design mistake I see. People calculate for their current plants, then add three more ferns and wonder why the batteries die at 2 AM.
Here’s a rough power budget: a decent LED grow light for a 2×4 foot fern shelf draws 60 to 100 watts. Run that 14 hours a day and you need 840 to 1400 watt-hours daily. Factor in cloudy days with a 3x buffer and you’re looking at 2500 to 4200 watt-hours of battery storage. That’s two to four 100Ah 12V batteries minimum. Your panels need to replenish that plus daily usage – so 400 to 600 watts of solar in most climates.
Diagnosing Solar Panel Problems
Signs Your Panels Aren’t Producing Enough
Start your troubleshooting at the source. If your batteries never reach full charge, or they drain faster each day, your panels are the prime suspect. Check the charge controller display at solar noon on a clear day. You should see voltage at or above your panel’s rated Vmp (voltage at maximum power). For a 12V nominal panel, that’s usually 17 to 19 volts. Anything below 15 volts at noon means trouble.
Current matters too. A 100W panel at 18V should push around 5.5 amps in full sun. If you’re seeing 2 amps, something’s blocking light or the panel has degraded. Shade is the silent killer. Even a tiny shadow from a vent pipe or tree branch can cut output by 80% on series-wired panels. Walk your roof at 9 AM, noon, and 3 PM. Watch for shadows you didn’t notice before. Seasons change sun angles dramatically.
Cleaning and Physical Inspection
Dust, pollen, bird droppings, and that weird sticky stuff from aphids on nearby plants – it all adds up. A dirty panel loses 15 to 30% efficiency. In dry climates, monthly cleaning is non-negotiable. Use deionized water and a soft brush. Never use a pressure washer. Never walk on panels. Check for microcracks while you’re up there. They look like tiny spiderwebs in the glass. Microcracks don’t stop production immediately, but they worsen with thermal cycling and moisture intrusion.
Inspect the junction box on the panel back. Corroded terminals, melted bypass diodes, or water ingress all kill output. Smell the box – burnt electronics have a distinct acrid odor. Check the MC4 connectors. They should click firmly and show no green corrosion. A loose MC4 connector acts like a high-resistance heater, wasting power and eventually failing completely.
Wiring and Voltage Drop Issues
Long wire runs from roof to charge controller eat voltage. Every foot of 10 AWG wire at 10 amps drops 0.01 volts. Fifty feet drops half a volt. That’s power lost as heat. If your panels are far from your gear, you need thicker wire or higher voltage panel configuration. Series wiring raises voltage and lowers current, reducing losses. But series strings suffer more from partial shade. Parallel handles shade better but needs thicker wire. There’s no perfect answer – just tradeoffs.
Check every connection with a multimeter under load. Measure voltage at the panel, then at the charge controller input. More than 0.5V difference means wiring problems. Feel the wire – warm wire is losing power. Hot wire is a fire hazard. Tighten every terminal. Crimp new lugs if needed. Use heat shrink. Water finds every unsealed connection eventually.
Charge Controller Troubleshooting
PWM vs MPPT – Know What You Have
This matters enormously for troubleshooting. PWM (Pulse Width Modulation) controllers are simpler and cheaper. They essentially connect panel directly to battery, pulsing the connection to regulate voltage. They work fine when panel voltage matches battery voltage (12V panel for 12V battery). But they waste excess voltage as heat. If you have a 24V panel on a 12V battery with PWM, you lose half your potential power.
MPPT (Maximum Power Point Tracking) controllers are smarter. They convert excess voltage to extra current. A 24V panel charging a 12V battery through MPPT gives you nearly double the amps compared to PWM. But MPPT controllers have more settings to mess up. They also cost more and have more failure points. Check your manual. Know which type you own. The troubleshooting steps differ.
Common Configuration Errors
Wrong battery type setting is epidemic. Lead acid, AGM, gel, lithium – each needs different charge voltages. Setting “lithium” for AGM batteries will undercharge them chronically. Setting “AGM” for lithium can overcharge and cause fire. Absorption voltage, float voltage, equalization settings – they all matter. Write down your battery specs. Match every setting. Take a photo of the correct screen for future reference.
Temperature compensation is another silent killer. Lead acid batteries need higher charge voltage when cold, lower when hot. If your controller’s temperature sensor is zip-tied to the controller body instead of taped to the battery side, it reads wrong. The controller then applies wrong voltages all year. In summer, it overcharges. In winter, it undercharges. Both kill batteries fast.
Reading Error Codes and Indicators
Every controller speaks a different blink code language. Red blink twice, pause, red blink three times – what does it mean? Download the manual PDF to your phone. Bookmark the error code page. Common codes: overvoltage (panel voltage too high for controller), undervoltage (battery too low), overcurrent (too much load), overtemperature (controller too hot), battery disconnected (loose wire or blown fuse).
Some controllers log history. Check it. A controller that shows “overtemperature” at 2 PM daily needs better ventilation or a fan. One showing “battery disconnected” intermittently has a loose terminal. “Overvoltage” in winter might mean your panels are too cold – voltage rises as temperature drops. You might need a controller with higher input voltage rating.
Battery Bank Deep Dive
Load Testing – The Only Way to Know
Voltage lies. A battery can show 12.7V at rest and die under 5 amps of load. You need a load tester. The cheap carbon pile ones work fine for 12V systems. Or use a known resistive load – a 12V 50W halogen bulb draws about 4 amps. Hook it up. Watch voltage. A healthy 100Ah battery should hold above 11.5V for 20+ minutes under 5 amp load. If it drops to 10V in 5 minutes, that battery is toast.
Test each battery individually if you have a bank. One bad battery in series drags down the whole string. In parallel, a bad battery with a shorted cell will drain the good ones. Disconnect and test solo. Label them. Date them. Replace in sets. Mixing old and new batteries is false economy – the new ones will degrade fast trying to compensate for the old.
Sulfation and How to Fix It
Lead acid batteries left partially charged develop sulfate crystals on plates. These crystals harden and block chemical reaction. The battery loses capacity permanently. Early sulfation is reversible with equalization charging – a controlled overcharge at 15.5 to 16V for a few hours. Your charge controller might have an equalize function. Use it monthly if you cycle batteries daily. But never equalize sealed AGM or gel batteries. Never equalize lithium. Read the battery manual first.
Desulfators (pulse chargers) claim to dissolve crystals electronically. Some work, some are snake oil. The ones with independent third-party testing tend to cost $50+. For a $200 battery, maybe worth trying. For a $2000 bank, just replace the batteries and fix the root cause – usually chronic undercharging.
Lithium Battery Specific Issues
Lithium (LiFePO4) batteries are amazing but different. They have a BMS (Battery Management System) inside that can shut off output without warning. If your system dies instantly at 20% state of charge, the BMS hit low voltage cutoff. This is normal protection. But if it happens at 50%, cells are unbalanced. The BMS sees one low cell and shuts down the whole pack.
Balancing happens during the absorption phase of charging. If your charge controller’s absorption time is too short (default often 1 hour), cells never balance. Set absorption to 2-4 hours for lithium. Some cheap lithium batteries have passive balancing that only works above 3.45V per cell. Your charge voltage must reach 14.2V+ for a 12V pack. Check your specs.
Cold weather charging destroys lithium. Below 32°F (0°C), lithium plating occurs on anodes during charging. Permanent damage. Most BMS blocks charging below freezing. But if yours doesn’t, or if the sensor is in the wrong spot, you’ll kill the pack. Never charge frozen lithium. Heat the battery compartment or bring batteries inside.
Grow Light Problems Specific to Ferns
Spectrum Mismatch – The Invisible Killer
Your lights turn on. They look bright. Your ferns still decline. Why? Human eyes peak sensitivity at 555nm (green). Ferns need 400-500nm (blue) for compact growth and 600-700nm (red) for photosynthesis. Cheap “full spectrum” LEDs often skimp on blue and red, pumping green because it looks bright to us. Your ferns stretch, pale, and weaken under green-heavy light.
Get a PAR meter if you’re serious. Or use a smartphone app with a diffuser (rough accuracy). Measure PPFD (photosynthetic photon flux density) at frond level. Most ferns want 50-150 μmol/m²/s. Maidenhair wants 100-200. Staghorn wants 200-400. If you’re at 20 μmol, your lights are too weak, too far, or wrong spectrum. Raise lights. Add more. Or replace with proper horticultural LEDs.
Photoperiod and Timer Failures
Ferns need consistent day length. 12-14 hours on, 10-12 hours off. Mechanical timers fail. Digital timers lose programming during power blips. Smart plugs depend on WiFi. The most reliable timer is a simple mechanical one wired directly to the load circuit, powered by the battery so it runs during grid outages. Check your timer weekly. Ferns notice missed cycles fast – they’ll abort new fronds if photoperiod gets erratic.
Some charge controllers have built-in load timers. These are gold for solar fern setups. They switch the load output on/off based on time or battery voltage. Set them to cut lights at 50% state of charge to protect batteries. But know this: if the controller resets (firmware update, power cycle), timer settings may revert to defaults. Document your settings. Check them monthly.
Heat Management Around Ferns
LED grow lights produce heat. Not much at the diodes, but the drivers get hot. A 100W LED fixture might have a 15W driver running at 140°F. If that driver sits above your ferns, it creates a hot dry microclimate. Ferns hate hot dry air. Crispy tips follow. Mount drivers outside the grow tent. Use remote drivers. Add a small USB fan blowing across the light heatsink. Keep air moving.
Also, lights too close burn fronds. Even cool LEDs cause photobleaching at 6 inches on sensitive ferns. Start at 18-24 inches. Watch for bleaching (white patches) or curling. Adjust daily for a week. Mark the sweet spot. Different ferns want different distances. Group by light needs or use dimmable lights per shelf.
Environmental Control System Failures
Humidity Controllers and Solar Power
Ferns need 60-80% humidity. Most solar fern setups run humidifiers. Ultrasonic humidifiers draw 25-50W. Warm mist draw 200-400W – avoid these on solar. The humidifier plugs into a humidistat controller. The controller plugs into the battery/inverter. Three things go wrong: humidistat sensor gets wet and reads 99% constantly (humidifier never runs), sensor gets crusty from minerals and reads low (humidifier runs constantly), or the controller loses power and resets to wrong settings.
Mount humidistat sensors away from direct mist. Clean monthly with vinegar. Use distilled water in humidifiers. Put the controller on a UPS or the battery-backed load output of your charge controller. If power blips, the humidifier keeps running. Ferns crisp in 4 hours at 30% humidity. This is not optional.
Air Circulation – The Forgotten Factor
Stagnant air breeds fungus. Ferns need gentle air movement. A 120mm PC fan draws 2-3 watts. Run it 24/7. That’s 50-70 watt-hours daily – trivial for solar. But if your fan dies, you get botrytis, powdery mildew, or fungus gnats in days. Wire fans directly to battery with a fuse. No timer. No controller. Just constant airflow. Use two fans for redundancy. They’re $5 each.
Temperature Extremes
Solar gear gets hot. Batteries hate heat. Every 15°F above 77°F cuts lead acid life in half. Lithium degrades faster above 95°F. Your battery box needs ventilation. Passive vents top and bottom. Active fan if temps exceed 90°F. In winter, batteries lose capacity. At 32°F, lead acid has 80% capacity. At 0°F, 50%. Insulate the box. Add a small heater mat on a thermostat if you freeze. But vent the heater – combustion fumes kill ferns and corrode electronics.
Wiring, Fuses, and Safety Systems
The Fuse That Blew For A Reason
Never replace a blown fuse with a bigger one. Never bypass a fuse with wire. The fuse blew because current exceeded safe limits. Find the cause. Short circuit? Damaged wire insulation? Failed component drawing too much? Water in a connector? A 20A fuse on 10 AWG wire is correct. A 30A fuse on 10 AWG wire is a fire waiting to happen. The wire becomes the fuse. It melts inside walls. You don’t see it until smoke appears.
Use ANL or MRBF fuses for battery cables. Use ATC/ATO blade fuses for smaller loads. Use MIDI/MEGA fuses for mid-range. Every positive wire needs a fuse within 18 inches of the power source. Battery positive to charge controller – fuse at battery. Charge controller to load – fuse at controller. Solar panel to controller – fuse at panel (or use controller’s built-in protection). No exceptions.
Grounding and Lightning Protection
Off-grid solar on a shed or greenhouse needs grounding. Drive an 8-foot ground rod. Connect panel frames, charge controller ground, battery negative (if system grounded), and inverter chassis to it with 6 AWG bare copper. Add a surge protector (SPD) on the panel input and load output. Lightning doesn’t need a direct hit. Induced surge from a strike 100 feet away fries unprotected electronics. A $30 SPD saves thousands.
Corrosion – The Slow Death
Battery terminals corrode. Green fuzz on lead acid. White powder on lithium. It adds resistance. Resistance makes heat. Heat makes more corrosion. Clean with baking soda water (lead acid) or alcohol (lithium). Coat with dielectric grease or petroleum jelly. Check monthly. Use stainless steel washers under lugs. Tin-plated lugs resist corrosion better than bare copper. Heat shrink every connection. Adhesive-lined heat shrink seals out moisture.
Seasonal Adjustments and Long-Term Maintenance
Winter Strategy
Solar production drops 50-80% in winter at temperate latitudes. Days are shorter. Sun is lower. Weather is cloudier. Your summer-sized system will fail in December. Plan for this. Option 1: Oversize panels 3x summer need. Expensive but works. Option 2: Reduce fern load – fewer lights, shorter photoperiod, dormant varieties. Option 3: Grid-tie backup – plug in when batteries hit 50%. Option 4: Generator charge – run 2 hours every 3 days.
Adjust charge controller settings for winter. Lower absorption voltage slightly for cold lead acid (temperature compensation should do this automatically). Increase absorption time – weak sun means longer to reach full. Disable equalization if batteries rarely hit full. Check water levels in flooded batteries monthly – winter charging gasses more.
Summer Overproduction
July brings the opposite problem. Panels make more power than you can use or store. Batteries hit float by 10 AM. Excess energy is wasted. This is fine for batteries but annoying. Use opportunity loads – run a dehumidifier, charge power tools, heat water. Or add more ferns! Summer is when you can expand. Just remember winter comes back.
High summer temps degrade everything. Panels lose 0.5% efficiency per °C above 25°C. On a 100°F roof, panels are 140°F – 20% loss. Controllers throttle or shut down. Batteries age double speed. Ventilate everything. Shade the battery box. Paint it white. Add a thermostat fan.
Annual Maintenance Checklist
Once a year, do the full audit. Disconnect everything. Clean every terminal. Load test every battery. Verify every charge controller setting against battery manual. Measure panel Voc and Isc at noon – compare to nameplate. Degradation over 10% means panel issues. Check all wire insulation for cracks, UV damage, rodent bites. Tighten every lug. Test every fuse with multimeter continuity. Verify ground rod connection <5 ohms. Update charge controller firmware. Backup settings. Take photos of everything. Next year you'll thank yourself.
Emergency Troubleshooting Flowchart
System Dead – No Lights, No Display
Start at the battery. Multimeter on DC volts. 0V? Battery disconnected or dead short. 10-11V? Deeply discharged – charge immediately with external charger. 12V+? Battery okay. Check main fuse. Blown? Find short before replacing. Not blown? Check charge controller power input. No voltage? Trace to panel. Panel voltage present? Controller failed. No panel voltage? Panel wiring or panel failed.
Lights Dim / Flickering
Measure battery voltage under load. Dropping below 11V? Battery weak or undersized. Holding 12V+ but lights dim? Voltage drop in wiring to lights. Measure at light input. Low? Thicker wire or shorter run. Normal at light but dim? Light failing or wrong voltage. LED drivers need minimum input voltage – check specs.
Batteries Won’t Charge Fully
Check panel voltage at controller at noon. Low? Panel issue. Normal? Check charge current. Near zero at absorption? Battery full or sulfated. High current but voltage stuck at 13V? Battery sulfated or bad cell. Controller in float but battery not full? Absorption voltage set too low or time too short. Controller shows error? Read manual.
Erratic Behavior
Intermittent issues are almost always loose connections. Wiggle every wire while system runs. Watch for voltage jumps. Check crimps – pull test each. Check terminal block screws – they loosen from thermal cycling. Check MC4 connectors – they corrode invisibly. Reseat everything. Clean with contact cleaner. Replace suspect connectors.
Building a Resilient Solar Fern System
Redundancy Principles
Single points of failure kill fern collections. One charge controller fails – everything dies. One battery shorts – bank dies. One light driver fails – shelf goes dark. Design for N+1 redundancy where it matters. Two smaller charge controllers instead of one big. Two battery strings with isolation switches. Two lights per shelf on separate circuits. Extra fuses, wire, connectors, and a spare controller in your parts box.
Monitor remotely. A $30 Bluetooth battery monitor (Victron SmartShunt or similar) lets you check voltage, current, state of charge from your phone. Set alerts for low voltage, high temperature, no charging. Catch problems before ferns suffer. Data logs show trends – creeping capacity loss, seasonal patterns, controller quirks.
Documentation That Saves Time
Create a system binder. Paper survives EMP, water, and dead phones. Include: wiring diagram with wire gauges and fuse sizes. Component model numbers and serial numbers. Battery install dates and test results. Charge controller settings screenshots. Panel specs and install date. Maintenance log with dates and actions. Emergency contacts – electrician, solar installer, battery supplier. Spare parts list with sources. Update it every visit.
Conclusion
Troubleshooting solar for fern setups feels overwhelming at first. There are so many components, so many failure modes, so many settings. But here’s the truth: 90% of problems come from 10% of causes. Dirty panels. Loose connections. Wrong charge settings. Dead batteries. Wrong light spectrum. Master these five and you’ll fix almost everything you encounter.
Your ferns don’t care about voltage drop calculations or MPPT algorithms. They care about consistent light, steady humidity, gentle airflow, and stable temperatures. Your solar system is just the machine that delivers those things. When the machine hiccups, the ferns tell you fast. Listen to them. Crispy tips mean humidity dropped. Pale stretched fronds mean light failed. Sudden collapse means power died completely.
Build good habits. Weekly visual checks. Monthly deep checks. Annual full audit. Keep spare fuses, a multimeter, dielectric grease, and zip ties handy. Know your system well enough to explain it to someone else. That’s the real test of understanding. And remember – every expert started by blowing a fuse, killing a battery, or frying a controller. The difference is they wrote down what happened and didn’t repeat it.
Your solar fern setup can run for decades with basic care. The panels last 25+ years. Good charge controllers last 10-15. Quality batteries last 5-10 (lead acid) or 10-15 (lithium). LEDs last 50,000 hours. The weak link is always maintenance. Be the maintainer. Your ferns will reward you with lush, ancient beauty that makes every troubleshooting hour worth it.
Frequently Asked Questions
Can I use a car battery for my solar fern system?
Car batteries are designed for short high-current bursts, not deep cycling. They’ll fail within months in daily solar use. Use deep cycle lead acid (AGM, gel, flooded) or LiFePO4 batteries rated for solar storage.
Why does my charge controller show error codes only in the afternoon?
Afternoon errors usually mean overtemperature – the controller gets too hot from high current or poor ventilation. Add a fan blowing across the heatsink, ensure 6 inches clearance on all sides, and check that the temperature sensor isn’t stuck to the hot controller body.
How often should I clean my solar panels for fern growing?
Monthly in dry dusty climates, quarterly in rainy areas. Pollen season may require bi-weekly cleaning. Use deionized water and soft brush only – never pressure washers or harsh chemicals that damage anti-reflective coating.
My ferns look fine but stop growing in November – is this normal?
Yes, many ferns slow growth naturally in low light. But if using grow lights, check that your timer maintains 12-14 hour photoperiod and lights haven’t dimmed from aging LEDs. Also verify batteries aren’t chronically undercharged from weak winter sun.
Can I add more fern shelves to my existing solar system?
Only if you have surplus panel and battery capacity. Each new shelf adds 60-100W load for 14 hours. Measure your current daily depth of discharge – if already hitting 50% daily, you need more panels and batteries before expanding.
What’s the best backup plan for extended cloudy periods?
Grid-tie charger (AC battery charger) is simplest – plug in when batteries hit 50%. Generator with charger works off-grid. Size charger at 10-20% of battery bank Ah (e.g., 20-40A charger for 200Ah bank). Run until absorption voltage reached.