How to Maintain Perlite for Pepper
Perlite is a game-changer for growing peppers. It keeps roots oxygenated, drains excess water, and prevents root rot. This guide covers everything you need to know about how to maintain perlite for pepper plants, from setup to long-term care.
Key Takeaways
- Perlite improves drainage and aeration: It creates air pockets that pepper roots need for healthy growth and prevents waterlogging.
- Rinse perlite before use: Removing fine dust prevents clogging and keeps your system clean from day one.
- Monitor moisture levels daily: Perlite dries faster than soil, so check moisture often and water accordingly.
- Flush regularly to prevent salt buildup: Nutrient salts accumulate in perlite; flush with plain water every two weeks.
- Reuse perlite with proper sterilization: Bake or soak in hydrogen peroxide between seasons to kill pathogens.
- Watch for pH drift: Perlite is neutral but nutrient solutions change pH; test and adjust weekly.
- Combine with other media for best results: Mix perlite with coco coir or vermiculite to balance water retention and drainage.
Quick Answers to Common Questions
How often should I water peppers in perlite?
Water peppers in perlite 2 to 6 times daily depending on temperature, humidity, and plant size. Check moisture 2 inches deep; water when it feels slightly damp but not wet. In hot weather, increase frequency with shorter cycles.
Do I need to flush perlite every time I water?
No, you do not need to flush every watering. Aim for 10 to 20 percent runoff each time to prevent salt buildup, and do a heavy flush with plain pH-adjusted water every two weeks using three times the container volume.
Can I reuse perlite after a pepper crop?
Yes, perlite is reusable for many seasons. Remove large roots, rinse thoroughly, then sterilize by baking at 200 F for 30 minutes, soaking in hydrogen peroxide, or solarizing on black plastic for 6 hours before replanting.
What pH should I maintain for peppers in perlite?
Maintain a nutrient solution pH of 5.8 to 6.2 for peppers in perlite. Test runoff weekly and adjust input pH by 0.2 increments to keep the root zone in this optimal range for nutrient uptake.
Why are my pepper leaves curling in perlite?
Leaf curl in perlite usually indicates heat stress, underwatering, or excessive EC. Check root zone temperature, increase watering frequency, and reduce nutrient strength by 25 percent if runoff EC is climbing.
📑 Table of Contents
- Why Perlite Matters for Pepper Plants
- Understanding Perlite and Why Peppers Love It
- Setting Up Your Perlite System for Pepper Plants
- Daily and Weekly Maintenance Routines
- Managing Nutrients and pH in Perlite
- Troubleshooting Common Perlite Problems
- Seasonal Care and Long-Term Perlite Management
- Advanced Tips for Maximum Pepper Yields in Perlite
- Conclusion
Why Perlite Matters for Pepper Plants
Growing peppers can feel like a balancing act. You want moisture but not soggy roots. You want nutrients but not salt burn. You want oxygen reaching the roots but the medium must hold the plant steady. This is where perlite shines. Those little white balls are not just filler. They are a powerhouse for root health.
If you have ever pulled a pepper plant from a pot and seen brown mushy roots, you know the pain of root rot. Perlite stops that before it starts. It creates space. It lets water drain. It lets air in. Pepper roots love air. They need it to take up nutrients and grow strong. When you learn how to maintain perlite for pepper plants the right way, you set yourself up for bigger plants and heavier yields.
This guide walks you through every step. We cover setup. We cover daily habits. We cover fixing problems. We cover keeping perlite working season after season. Whether you grow in pots, hydroponics, or raised beds, the principles stay the same. Let us dig in.
Understanding Perlite and Why Peppers Love It
What Is Perlite Exactly
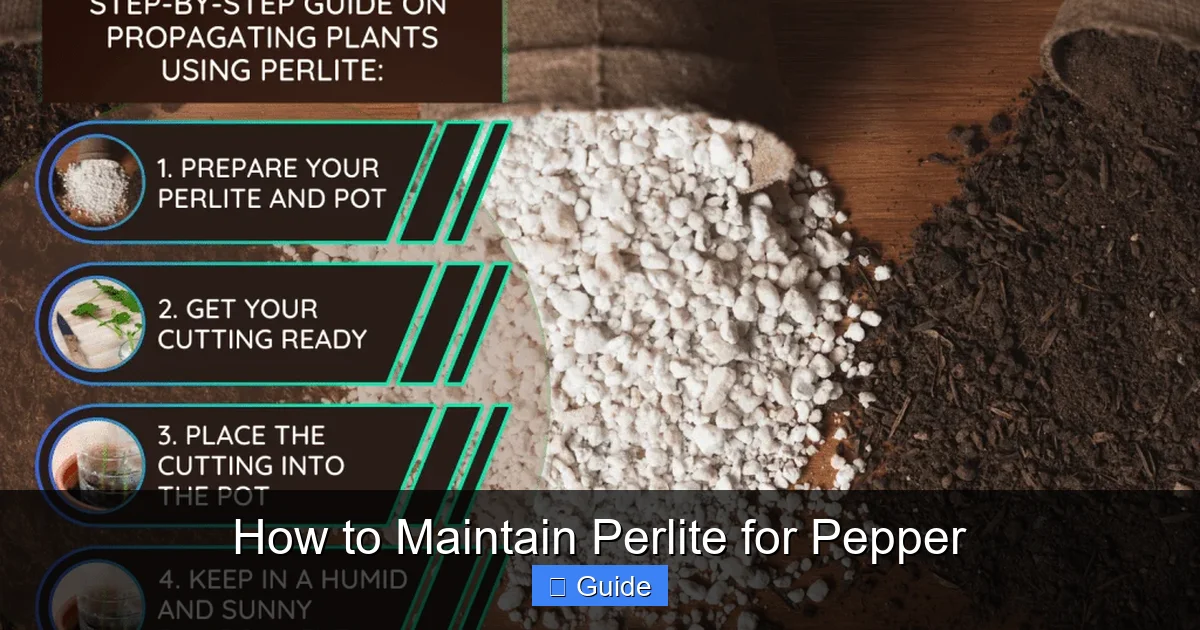
Perlite starts as volcanic glass. It forms when obsidian meets water. Miners heat it to extreme temperatures. It pops like popcorn. The result is a lightweight, sterile, white granule. It holds no nutrients. It has a neutral pH around 7.0. It does not break down fast. It does not harbor pests or diseases. That makes it clean and predictable.
Visual guide about How to Maintain Perlite for Pepper
Image source: gardentabs.com
You will see different grades. Fine perlite holds more water. Coarse perlite drains faster. For peppers, coarse or medium grade works best. It gives the largest air pockets. Roots can spread easily. Water moves through without pooling. Fine perlite can compact over time. That reduces the very benefits you want.
Why Pepper Roots Need Air
Roots breathe. They take in oxygen and release carbon dioxide. In dense soil, air gets pushed out. Water fills every gap. Roots suffocate. They turn brown. They rot. Pathogens move in. The plant wilts even when the medium is wet. That confuses many growers. They water more. The problem gets worse.
Perlite solves this. Each particle is rigid. Particles touch at points. Large gaps stay open. Air flows through. Oxygen reaches every root tip. The plant can drink and breathe at the same time. This is critical for peppers. They are heavy feeders. They need lots of oxygen to process nutrients fast.
Perlite Versus Other Growing Media
Soil holds water well but compacts. Coco coir holds water and air but can hold salts. Rockwool holds water and air but irritates skin and lungs. Vermiculite holds too much water for peppers. Clay pebbles drain well but are heavy and expensive. Perlite hits a sweet spot. It is light. It is cheap. It is sterile. It drains fast. It holds just enough moisture on its surface.
Many growers mix perlite with other media. A classic mix is 50 percent coco coir and 50 percent perlite. The coir holds water. The perlite ensures drainage. You get the best of both. Pure perlite works for hydroponics like drip systems or flood and drain. It works for container growing with frequent watering. It does not work well for passive wicking systems. It dries too fast at the top.
Setting Up Your Perlite System for Pepper Plants
Choosing the Right Container
Container choice changes how you maintain perlite. Fabric pots breathe. They air-prune roots. They dry faster. Plastic pots hold moisture longer. They need more perlite for drainage. Net pots work for hydroponics. They let roots grow out. Whatever you choose, ensure drainage holes. Lots of them. Perlite needs an exit path for water.
Size matters. A pepper plant needs at least a 3-gallon container. Five gallons is better. Ten gallons for long-season varieties. More volume means more stable moisture and temperature. It means less frequent watering. It means a bigger root mass. Bigger roots mean bigger fruit.
Rinsing Perlite Before Use
New perlite comes with dust. Fine particles from processing. This dust clogs pores. It turns to sludge when wet. It reduces drainage. It can raise pH slightly. Always rinse. Put perlite in a bucket. Run water through. Stir with your hand. Drain the cloudy water. Repeat until water runs clear. This takes five minutes. It saves weeks of headaches.
Wear a mask. Perlite dust is silica. You do not want it in your lungs. Wet perlite is safe. Dry perlite creates airborne dust. Work outdoors or in a ventilated area. If you buy pre-rinsed perlite, you can skip this. But most bagged perlite benefits from a quick rinse.
Pre-Soaking and pH Stabilizing
Perlite is pH neutral. But your water and nutrients are not. Before planting, soak rinsed perlite in pH-adjusted water. Target 5.8 to 6.2 for peppers. Let it sit for an hour. Drain. This pre-loads the perlite with safe moisture. It prevents the medium from wicking water away from tender new roots. It gives you a known starting point.
If you use tap water, let it sit overnight. Chlorine evaporates. Or use a carbon filter. Check pH after adding nutrients. Nutrients shift pH. Always adjust after mixing. Use pH up or down solutions. Test with a reliable pen. Calibrate monthly. A bad reading leads to bad decisions.
Planting Peppers in Perlite
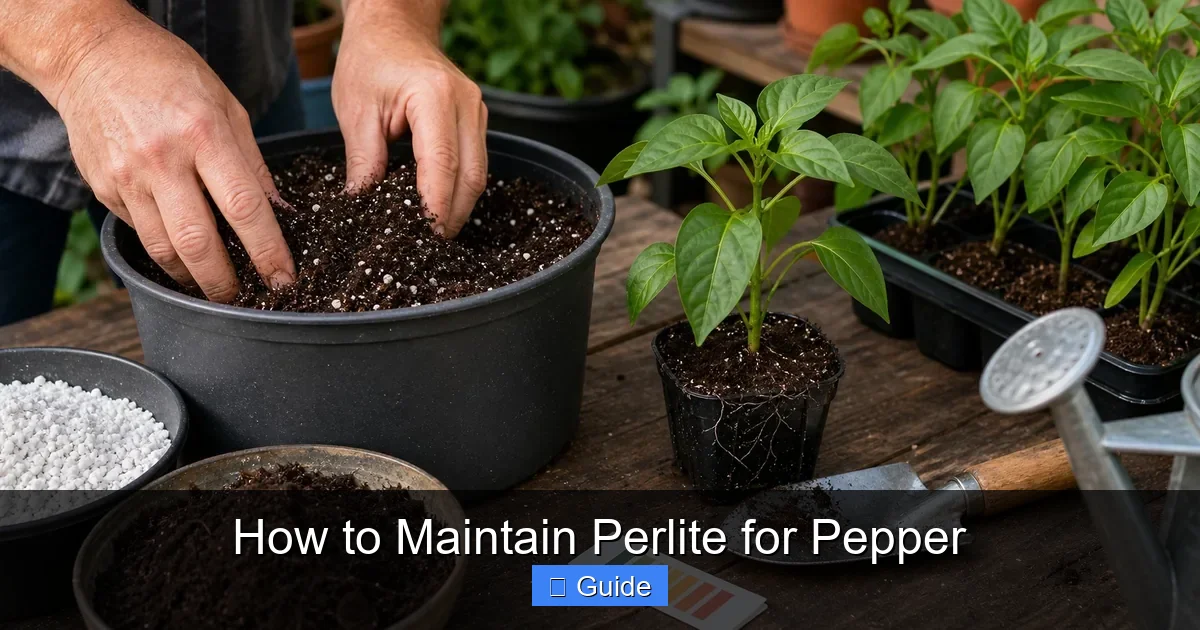
Start seeds in rockwool cubes or peat pellets. Transplant when roots show at the bottom. Make a hole in the perlite. Place the cube in. Gently fill around it. Do not pack. Perlite should stay loose. Water gently to settle. The cube should stay moist but not sit in a puddle.
For clones, use a humidity dome. Perlite dries fast at the surface. Clones have no roots to drink. Mist the dome interior. Keep humidity high. Open vents gradually over a week. Once roots hit the perlite, treat like a seedling.
Setting Up Irrigation
Hand watering works for a few plants. Use a watering can with a rose head. Water slowly. Let it soak in. Water until runoff appears. That ensures full saturation and flushes salts. For more plants, use drip irrigation. One emitter per plant. Run 2 to 4 times daily. Duration depends on climate and plant size. Start with 2 minutes. Adjust based on runoff.
Flood and drain systems work well. Flood for 10 to 15 minutes. Drain completely. Cycle 4 to 6 times daily. The key is full drain. Standing water defeats the purpose of perlite. Use a timer. Check it daily. Timers fail. Pumps clog. Lines kink. A missed cycle in hot weather can kill plants in hours.
Daily and Weekly Maintenance Routines
Checking Moisture Levels
This is the single most important habit. Perlite looks dry on top but may be wet below. Stick your finger in. Two inches deep. It should feel cool and slightly damp. Not wet. Not bone dry. If dry, water now. If wet, wait. Do not guess. Inconsistent moisture stresses peppers. It causes blossom end rot. It slows growth.
Use a moisture meter if you prefer. Cheap probes work okay. Calibrate by testing known wet and dry perlite. Check multiple spots. Edges dry faster. Centers stay wet longer. Water when the average reads dry. In hot weather, check twice daily. Morning and late afternoon. Never water at night. Wet leaves overnight invite fungal disease.
Monitoring Runoff EC and pH
Runoff tells you what the roots see. Collect the first 50 ml of runoff. Test EC and pH. EC shows salt buildup. pH shows nutrient availability. Target runoff EC close to input EC. If runoff EC climbs, salts accumulate. Flush with plain pH water. If runoff pH drifts, adjust input pH. Peppers want 5.8 to 6.2 in hydroponics. 6.0 to 6.5 in containers with some organic matter.
Do this weekly. More often if you see problems. Keep a log. Trends matter more than single readings. A slow EC creep means you feed too strong. A sudden pH drop means root disease or anaerobic zones. Catch it early. Fix it fast.
Flushing to Prevent Salt Buildup
Nutrients leave salts. Perlite does not bind them. They accumulate. High salts burn roots. They cause nutrient lockout. The plant starves in a sea of food. Flush every two weeks. Use plain pH-adjusted water. Run three times the container volume through. For a 5-gallon pot, use 15 gallons. Let it drain fully. Then resume normal feeding.
If EC runs high, flush weekly. If you use organic nutrients, flush less. They release slowly. But still flush monthly. Some growers flush at every watering with 10 to 20 percent runoff. That works too. It prevents buildup continuously. It uses more water and nutrients. Choose what fits your setup.
Inspecting Roots and Plant Health
Healthy roots are white. Tips are creamy. They smell earthy or sweet. Brown roots mean trouble. Black roots mean rot. Slimy roots mean anaerobic conditions. Smell the root zone. Sour or swampy smell is bad. Lift a fabric pot. Look at the bottom. Roots should be white and fuzzy.
Check leaves daily. Yellowing between veins means magnesium deficiency. Purple stems mean phosphorus issue or cold. Curled edges mean heat or wind stress. Spots mean pests or disease. Early detection saves crops. Perlite makes root inspection easy. Just lift the pot or peek in a net pot.
Cleaning Algae and Debris
Light hits wet perlite. Algae grows. Green slime on top. It is mostly harmless but looks bad. It can attract fungus gnats. It holds moisture against stems. Cover the surface. Use white plastic mulch. Or a layer of clay pebbles. Or coco chips. Block light. Stop algae.
Remove dead leaves. They rot. They breed botrytis. They attract pests. Keep the canopy clean. Prune lower leaves that touch the medium. Improve airflow. A clean grow is a productive grow.
Managing Nutrients and pH in Perlite
Choosing the Right Nutrient Formula
Peppers need a complete hydroponic formula. Look for calcium nitrate. Peppers love calcium. It prevents blossom end rot. It strengthens cell walls. Many general formulas lack enough calcium. Use a cal-mag supplement if needed. Avoid urea-based nitrogen. It converts to ammonium. Ammonium toxicity hurts peppers. Choose nitrate-based nitrogen.
Follow the manufacturer schedule. Start at half strength for seedlings. Increase weekly. Full strength at flowering. Reduce nitrogen late in flower. Increase phosphorus and potassium. Some growers use a bloom booster. Others just switch formulas. Both work. Consistency matters more than brand.
Understanding EC Targets by Growth Stage
EC measures total dissolved salts. Seedlings want 0.8 to 1.0 mS/cm. Vegetative growth wants 1.5 to 2.0. Early flower wants 2.0 to 2.5. Peak fruit wants 2.5 to 3.0. Late flush wants 0.5 to 0.8. These are guidelines. Your variety matters. Your climate matters. Watch the plant. Dark green curled leaves mean too high. Pale stretched growth means too low.
Measure input EC. Measure runoff EC. The difference tells you uptake. If runoff EC is much higher, the plant is not drinking fast enough. Reduce feed strength. If runoff EC is lower, the plant is hungry. Increase slightly. Adjust in small steps. 0.2 mS/cm at a time. Wait three days. Recheck.
pH Management Strategies
pH controls which nutrients are available. In perlite, pH shifts fast. No buffer. Test daily if possible. Weekly minimum. Adjust input pH to keep runoff in range. If runoff pH rises, lower input pH by 0.2. If runoff pH falls, raise input pH by 0.2. Small changes. Wait a day. Retest.
Use phosphoric acid to lower. Potassium hydroxide to raise. Or commercial pH up and down. Add acid to water. Never water to acid. Wear gloves. Splashing acid burns. Store safely. Keep away from children and pets.
Supplements That Help in Perlite
Silica strengthens stems. It helps heat tolerance. It reduces pest damage. Add potassium silicate. Follow label rates. Beneficial microbes colonize perlite. They protect roots. They cycle nutrients. Add a hydroponic inoculant. Reapply monthly. Enzymes break down dead root matter. They keep the root zone clean. Add weekly. Amino acids help stress recovery. Use during heat waves or after pruning.
Organic Versus Mineral Nutrients in Perlite
Mineral salts dissolve instantly. Predictable. Easy to measure. Risk of salt buildup. Organics need microbes. Perlite has low microbe populations initially. Organics can go anaerobic. They smell bad. They clog drippers. If you want organic, use a biofilter. Or mix perlite with compost. Or use mineral base with organic supplements. Many growers find mineral easier in pure perlite.
Troubleshooting Common Perlite Problems
Perlite Drying Too Fast
Top layer bone dry. Bottom wet. Plant wilts at noon. This is common in hot, dry, windy conditions. Fix it. Mulch the surface. White plastic. Coco chips. Clay pebbles. Increase watering frequency. Shorter cycles more often. Add a water retention polymer if desperate. But polymers break down. They change EC. Better to adjust irrigation.
Check your perlite grade. Fine perlite holds more water. But compacts. Mix in 20 percent vermiculite. Or 30 percent coco coir. This bridges the gap. You keep aeration. You gain buffer. Experiment. Find your sweet spot.
Salt Crust on Surface
White crust. Hard layer. Water runs off. Roots burn underneath. This means insufficient flushing. Or too strong nutrients. Or high evaporation. Scrape off the crust. Flush heavily. Three times container volume. Reduce feed strength by 25 percent. Increase runoff target to 20 percent. Mulch to reduce evaporation.
If using hard water, you start with high EC. Calcium and magnesium carbonates. They precipitate. Use an RO filter. Or blend with rainwater. Or account for it in your feed formula. Hard water grows great peppers if managed. But it needs management.
Algae and Fungus Gnats
Green slime. Tiny flies. Larvae eat root hairs. Sticky traps catch adults. Mosquito bits (BTi) kill larvae. Sprinkle on surface. Water in. Repeat weekly. Cover surface to stop algae. Hydrogen peroxide drench kills larvae fast. 3 ml of 3 percent per gallon. Use at lights out. It oxygenates too. But it kills beneficials. Re-inoculate after.
Prevention beats cure. Keep the top dry. Water from below if possible. Sub-irrigation. Or drip with emitters buried. Dry surface stops gnats. Stops algae. Stops stem rot.
Root Rot Despite Perlite
Perlite prevents rot. But it cannot fix overwatering. If you water constantly, pores stay full. Air cannot enter. Roots drown. Pythium moves in. Brown roots. Wilting. The fix. Stop watering. Let it dry back. Increase air flow. Add hydrogen peroxide. 5 ml per gallon. Drench. Repeat in three days. Introduce beneficial bacteria. Bacillus subtilis. Trichoderma. They outcompete pathogens.
Check your timer. Check your pump. Check your drain. A clogged drain hole turns a pot into a swamp. One blocked hole kills a plant. Inspect weekly. Clear debris.
pH Drift That Won’t Stabilize
You adjust. It drifts back. Up or down. This usually means biological activity. Microbes produce acids. Or alkalinity. Or your water has high bicarbonate. Bicarbonate buffers pH up. It fights your acid. Use phosphoric acid. It adds phosphorus. Plants use it. Nitric acid adds nitrogen. Good for veg. Sulfuric acid adds sulfur. Use what fits your feed schedule.
If pH crashes low, check for anaerobic zones. Smell the medium. Sour smell means bad biology. Flush. Peroxide. Re-inoculate. If pH climbs high, check for old root matter decomposing. Or high bicarbonate water. RO solves bicarbonate. But adds cost. Acid injection systems automate this. Worth it for large grows.
Seasonal Care and Long-Term Perlite Management
End of Season Cleanup
Harvest done. Plants pulled. Now what. Do not just dump perlite. It is reusable. But it needs cleaning. Shake off loose roots. Big roots pull out. Fine roots stay. They decompose. That is okay if you sterilize. Spread perlite on a tarp. Remove large debris. Rinse with hose. Let dry in sun. UV kills many pathogens.
Store dry in bags or bins. Label with date and variety. Keep dry. Moisture invites mold. A garage or shed works. Freezing temps do not hurt perlite. It is rock. But freeze-thaw cycles can break particles down over years. Indoor storage is better.
Sterilization Methods for Reuse
Three main ways. Heat. Chemical. Solar. Heat is most reliable. Oven at 200 F for 30 minutes. Or 180 F for an hour. Do small batches. It smells earthy. Ventilate. Do not use microwave. Uneven heating. Steam works too. Pressure cooker at 15 psi for 30 minutes. Best for small amounts.
Chemical: Hydrogen peroxide soak. 10 ml of 35 percent per gallon. Or 1 cup of 3 percent per gallon. Soak 24 hours. Rinse well. Rinse until no peroxide smell. Or bleach. 1 tablespoon per gallon. Soak 30 minutes. Rinse extremely well. Bleach residue kills plants. Neutralize with vitamin C powder. 1 gram per gallon. Rinse again.
Solar: Spread thin on black plastic. Full sun. 4 to 6 hours. 140 F plus kills most things. Turn once. Works in summer. Free. But less reliable. Combine with peroxide for safety.
How Many Times Can You Reuse Perlite
Indefinitely. In theory. In practice, particles break down. Fines accumulate. Drainage slows. After 3 to 5 cycles, screen it. Use a 1/4 inch hardware cloth. Shake. Fines fall through. Keep the coarse. Discard fines. Top up with fresh perlite. 20 percent fresh each cycle keeps structure perfect.
Watch for pH changes. Old perlite can buffer slightly. Test a sample. Soak in RO water. Check pH. If it drifts, soak in pH 5.5 water overnight. Rinse. Retest. Usually stabilizes fast.
Transitioning Between Crops
Peppers to tomatoes. Similar needs. Same perlite works. Just sterilize. Adjust nutrient formula. Tomatoes want more potassium earlier. Peppers to lettuce. Different EC. Different pH. Lettuce wants lower EC. 1.2 to 1.6. pH 5.8 to 6.0. Flush well. Reset. Perlite does not care. It is inert.
If you had disease. Sterilize aggressively. Heat or peroxide. Do not risk carryover. Some viruses survive. Tobacco mosaic virus. Pepino mosaic. If you suspect virus, discard perlite. Burn or bag for trash. Not compost. Not worth the risk.
Upgrading Your Perlite System Over Time
Start simple. Hand water. Fabric pots. Learn the plant. Then automate. Drip lines. Timer. Then monitor. EC meter. pH pen. Data logger. Then optimize. Climate control. CO2. LED spectrum tuning. Perlite stays the same. It is the constant. Your skill grows around it.
Consider a recirculating system. NFT with perlite in net pots. Or drip to waste with collection. Recirculating saves water and nutrients. But needs more management. EC and pH drift faster. Pathogens spread faster. Start with drain to waste. Master it. Then decide.
Advanced Tips for Maximum Pepper Yields in Perlite
Root Zone Temperature Control
Roots like 68 to 72 F. Hot roots slow growth. Cold roots stop uptake. In perlite, temperature changes fast. No insulation. In hot weather, shade pots. White pots. Reflective mulch. Insulate with bubble wrap. In cold weather, heat mats. Or heated nutrient solution. 65 F minimum. A chiller or heater in your reservoir pays off. Consistent root temp means consistent growth.
CO2 Enrichment with Perlite
CO2 boosts photosynthesis. But only if roots keep up. Perlite roots are efficient. They can support high CO2. 1200 to 1500 ppm. Seal the room. Add CO2 during lights on. Stop during lights off. Monitor with a sensor. Vent if over 1800 ppm. Dangerous for you. Useless for plants. With CO2, increase feed EC by 10 to 15 percent. Plants drink more. Grow faster. Need more food.
Pruning and Training for Perlite Grows
Perlite grows big roots. Big roots support big tops. But you must manage the canopy. Top early. 4th or 5th node. Create 4 to 8 main stems. Remove suckers below first flower. Defoliate lower canopy. Improve airflow. Reduce humidity. Direct energy to fruit. Use trellis netting. Support heavy branches. Fruit weight snaps stems. Perlite anchors well. But stems need help.
Harvest Techniques That Protect Roots
Pick peppers gently. Twist and pull. Do not yank. Yanking rocks the root ball. In perlite, roots hold loose particles. Disturbance breaks root hairs. Broken hairs invite disease. Use scissors for thick stems. Cut clean. Harvest regularly. Removing fruit signals more production. Leaving ripe fruit slows new set.
Record Keeping for Continuous Improvement
Write it down. Date. Variety. Nutrient brand. EC. pH. Water volume. Runoff data. Temperature. Humidity. Yield. Notes. Photos. Next season you compare. You see patterns. You stop guessing. You start knowing. A simple notebook beats memory every time. Digital spreadsheet works too. Backup to cloud. Losing data hurts.
Conclusion
Learning how to maintain perlite for pepper plants changes everything. You move from hoping to knowing. You control the root zone. You prevent problems before they start. You reuse your medium. You save money. You grow better peppers.
The habits are simple. Rinse well. Water often. Flush regularly. Test runoff. Watch the plant. Keep it clean. Sterilize between crops. These are not secrets. They are discipline. The growers who follow them win. The ones who skip steps struggle.
Perlite is honest. It shows you exactly what you do. Overwater. It shows. Underfeed. It shows. Neglect pH. It shows. But treat it right. It rewards you. White roots. Thick stems. Heavy fruit. Vibrant color. That is the perlite promise.
Start today. Check your moisture. Test your runoff. Flush if needed. Write it down. Tomorrow do it again. In a week you see changes. In a month you see results. In a season you harvest the proof. Your peppers will thank you. Your taste buds will thank you. Your friends will ask your secret. Tell them. Perlite. And consistency.
Now go grow something amazing.
Frequently Asked Questions
What grade of perlite is best for pepper plants?
Coarse or medium grade perlite works best for peppers because it creates larger air pockets for root oxygenation and drains faster than fine grades, which can compact over time and reduce aeration.
Should I mix perlite with other growing media for peppers?
Yes, mixing 50 percent perlite with 50 percent coco coir or peat moss balances drainage with water retention, reducing watering frequency while maintaining excellent root zone aeration for pepper plants.
How do I prevent algae growth on perlite surfaces?
Block light from hitting wet perlite by covering the surface with white plastic mulch, clay pebbles, or coco chips. A dry surface layer prevents algae and deters fungus gnats from laying eggs.
Can I grow peppers in pure perlite without any other media?
Yes, peppers grow well in pure perlite with frequent irrigation such as drip systems running 4 to 6 times daily, but pure perlite requires more precise water and nutrient management than mixed media.
What causes salt crust on top of perlite and how do I fix it?
Salt crust forms from high nutrient strength, insufficient flushing, or high evaporation. Scrape off the crust, flush heavily with plain pH-adjusted water, reduce feed strength by 25 percent, and add surface mulch to reduce evaporation.
How do I know if my perlite needs to be replaced instead of reused?
Replace perlite if particles have broken down into fines that slow drainage, if pH cannot be stabilized after sterilization, or if a viral disease like tobacco mosaic virus was present in the previous crop.