How to Use Macrame for Echeveria
Discover the art of using macrame for echeveria to create stunning plant displays that showcase your succulents beautifully. This comprehensive guide covers everything from basic knots to advanced patterns, helping you craft custom hangers and holders perfect for echeveria’s unique rosette shape.
Key Takeaways
- Choose the right cord: Natural cotton or jute works best for echeveria holders because they breathe well and support the plant’s weight.
- Master basic knots first: Square knots, spiral knots, and gathering knots form the foundation of every macrame plant hanger design.
- Account for drainage: Design your holder with an open bottom or removable pot section to prevent water buildup around echeveria roots.
- Size matters: Measure your pot diameter and add extra space for growth when planning your macrame for echeveria project.
- Light exposure is key: Position finished hangers where echeveria receives bright, indirect light for optimal color and compact growth.
- Water carefully: Remove the pot from the hanger for watering to avoid soaking the macrame cords and prevent rot.
- Experiment with patterns: Combine different knot types to create unique textures that complement echeveria’s geometric rosette form.
Quick Answers to Common Questions
What type of cord is best for macrame echeveria hangers?
Natural cotton cord (3mm-5mm) is ideal because it’s strong, easy to knot, breathes well, and supports the weight of potted echeveria without stretching excessively.
How do I water echeveria in a macrame hanger without damaging the cords?
Always remove the entire hanger and pot to water. Let the pot drain completely and the exterior dry before returning it to the hanger to prevent cord rot and stretching.
Can I use macrame for outdoor echeveria displays?
Yes, but use weather-resistant synthetic cord or treat natural fibers with fabric protector. Bring hangers inside during heavy rain or freezing temperatures to prolong their life.
What size pot works best for macrame echeveria hangers?
Shallow pots 4-6 inches wide work best. They showcase the rosette shape, keep weight manageable, and match echeveria’s shallow root system perfectly.
How do I prevent my macrame hanger from leaning?
Ensure even tension in all crown knots, center the pot in the cage, and use a level during installation. Adjust corner knot spacing if one side pulls tighter.
📑 Table of Contents
- Why Macrame and Echeveria Make the Perfect Pair
- Getting Started: Materials and Tools You Need
- Mastering the Fundamental Knots
- Designing Your Custom Echeveria Hanger
- Step-by-Step: Building Your First Echeveria Hanger
- Caring for Macrame and Echeveria Together
- Creative Variations and Advanced Techniques
- Troubleshooting Common Issues
- Conclusion: Your Macrame Journey Begins
Why Macrame and Echeveria Make the Perfect Pair
If you love plants and crafts, you have probably seen macrame plant hangers everywhere lately. They are on Instagram, in plant shops, and maybe even in your friend’s living room. But have you thought about using macrame for echeveria specifically? These rosette-shaped succulents look amazing when suspended in handmade holders. Their geometric symmetry plays beautifully against the organic texture of knotted cord.
Echeveria plants have a special charm. Their tight, flower-like rosettes come in colors from powder blue to deep purple. When you hang them at eye level, you see details you miss on a shelf. The macrame adds a boho touch that softens modern spaces. It also saves precious windowsill real estate. This guide walks you through everything you need to know. We cover materials, knots, design tips, and care advice. By the end, you will feel ready to create your own stunning displays.
Getting Started: Materials and Tools You Need
Choosing the Right Cord for Your Project
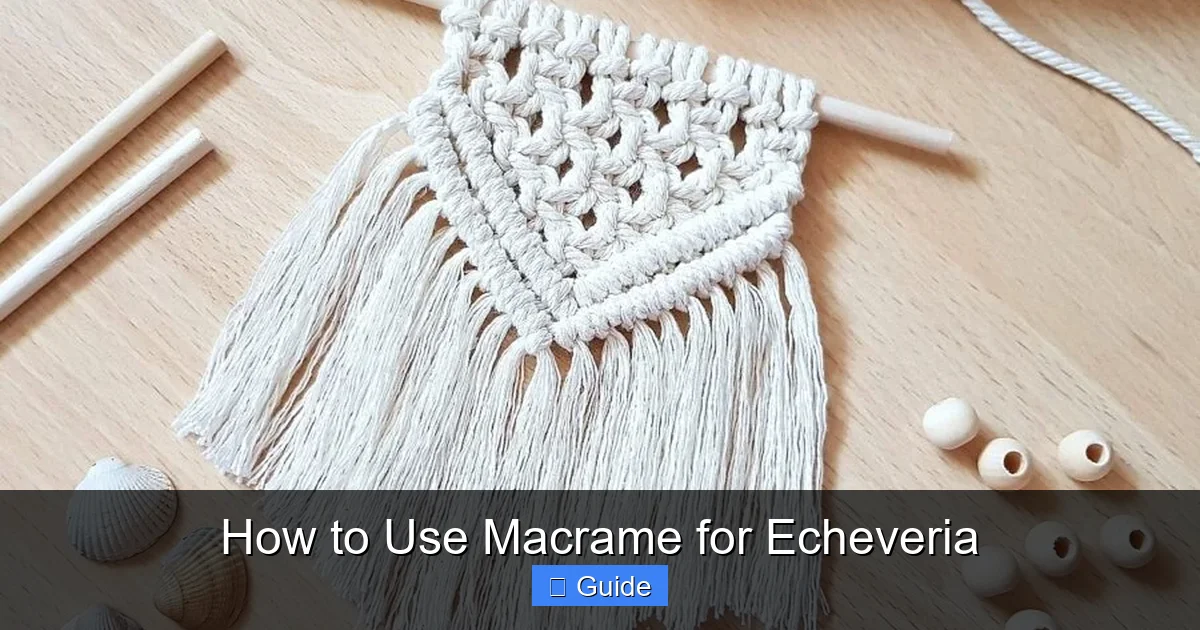
The cord you pick changes how your finished piece looks and lasts. For macrame for echeveria, natural fibers work best. Cotton cord is the top choice. It is soft, strong, and easy to knot. It also comes in many thicknesses. A 3mm to 5mm single-strand cotton cord is ideal for most plant hangers. It holds knots well without being too bulky.
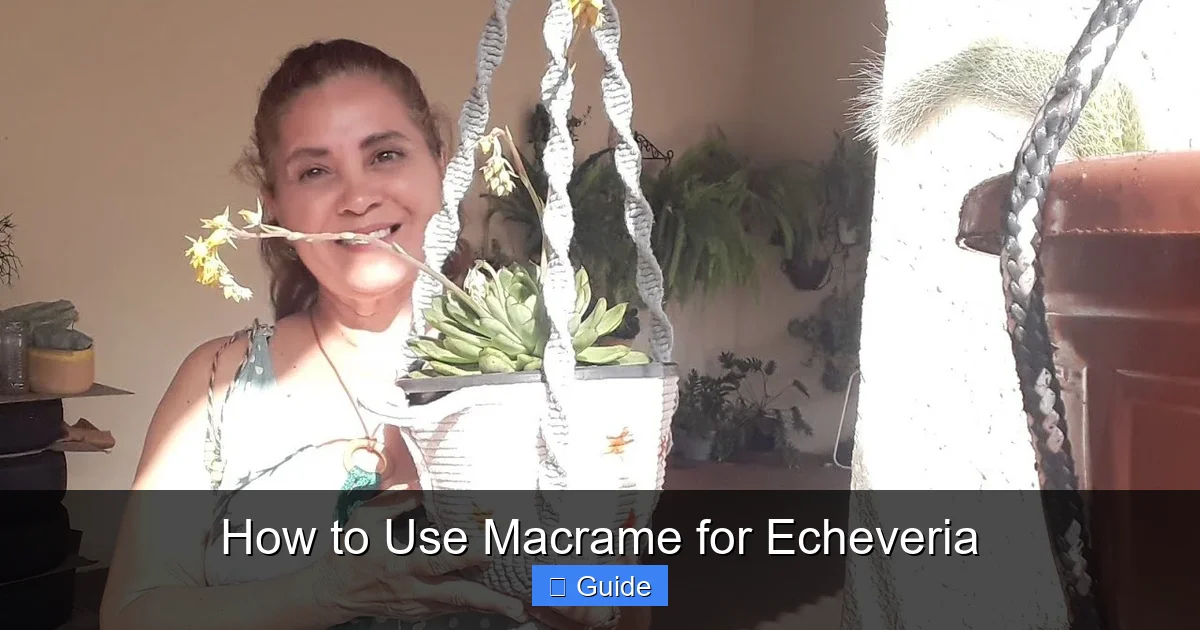
Visual guide about How to Use Macrame for Echeveria
Image source: macramenation.com
Jute and hemp are great alternatives. They have a rustic, earthy look that suits succulents perfectly. These fibers are stiffer than cotton. They create more structured shapes. However, they can be rough on your hands during long knotting sessions. Synthetic cords like nylon or polyester are durable and weather-resistant. They work for outdoor hangers. But they lack the natural warmth that makes macrame for echeveria so appealing.
Avoid thin embroidery floss or thick rope over 6mm. Thin cord cannot support a heavy ceramic pot with wet soil. Thick rope makes intricate knots difficult. Always buy a little extra cord. Running out halfway through is frustrating. A good rule: multiply your finished hanger length by four for the main cords. Add twenty percent for mistakes and fringe.
Essential Tools for Clean Knots
You do not need a fancy workshop. A few simple tools make the job easier. Sharp scissors are non-negotiable. Frayed ends ruin knot definition. A tape measure ensures symmetry. A clipboard or macrame board holds your work steady. You can make a board from cardboard and push pins. A comb or pet brush fringes ends beautifully. A spray bottle with water helps tighten cotton knots. Keep a notebook nearby to sketch patterns and record cord lengths.
Selecting the Perfect Pot for Your Echeveria
The pot matters as much as the hanger. Echeveria needs excellent drainage. Choose a pot with a drainage hole. Terracotta is classic. It wicks moisture away from roots. Plastic pots are lighter for hanging. They come in fun colors too. Measure the pot diameter at its widest point. This measurement determines your hanger’s cage size. Consider the pot height as well. Tall pots need longer cage sections. Shallow pots show off the rosette better.
If you want to water without removing the pot, use a cachepot system. Place a plastic nursery pot inside a decorative outer pot. The macrame holds the outer pot. You lift the inner pot out to water. This keeps the cords dry. Dry cords last longer and resist mold. Whatever pot you choose, weigh it wet. Wet soil is surprisingly heavy. Your cords and ceiling hook must handle the load.
Mastering the Fundamental Knots
The Lark’s Head Knot: Your Starting Point
Every macrame for echeveria project begins here. The lark’s head knot attaches cords to a ring or dowel. Fold a cord in half. Place the loop behind your mounting ring. Pull the loose ends through the loop. Tighten gently. You now have two working cords hanging down. Repeat for all cords. Keep tension even. Uneven starter knots throw off the whole pattern. This knot is also called a cow hitch. It is secure and easy to adjust before you commit.
Square Knots: The Backbone of Macrame
Square knots create flat, strong fabric. They are essential for the cage that holds your pot. You need four cords: two outer working cords and two center filler cords. Take the left working cord over the fillers, under the right working cord. Take the right working cord under the fillers, up through the left loop. Tighten. That is a half square knot. Reverse the process: right over, left under, through the loop. Two halves make one full square knot. Alternate starting sides to keep the work flat. If you always start left, the piece twists into a spiral.
Practice square knots until they feel automatic. Consistent tension creates professional results. Too loose looks sloppy. Too tight distorts the pattern and strains cords. Count your knots per row. Write it down. Matching counts on both sides keeps your hanger balanced. Square knots use lots of cord. Factor this into your cutting calculations.
Spiral Knots: Adding Twist and Texture
Spiral knots are just square knots done one way. Always start with the same side. The work naturally twists into a helix. This creates beautiful rope-like columns. Spiral knots use less cord than square knots. They are perfect for decorative sections between cage rows. They also make lovely hanging tassels at the bottom. Try alternating square knot rows with spiral knot rows. The contrast highlights echeveria’s rosette geometry.
Gathering Knots: Finishing Strong
The gathering knot wraps a bundle of cords neatly. It secures the bottom of your hanger. Take a separate short cord. Make a loop along the bundle. Wrap the long end around all cords and the loop. Wrap tightly six to eight times. Thread the end through the loop. Pull the top short end to cinch the loop under the wraps. Trim both ends. Tuck them under wraps with a needle. This knot is strong and tidy. It also works to attach the top ring if you prefer it over lark’s head knots.
Half Hitch Variations: Details That Shine
Double half hitches create diagonal lines and borders. They wrap one cord around another. They are great for adding patterns to the cage sides. Vertical half hitches make straight lines. Horizontal half hitches make waves. Experiment on scrap cord first. These knots add personality to your macrame for echeveria without much extra effort.
Designing Your Custom Echeveria Hanger
Planning the Cage Structure
The cage is the part that cradles the pot. It needs to be secure but accessible. Start with four groups of cords after your top knots. Each group becomes a cage corner. Space them evenly around the pot circumference. A typical small pot needs four corner groups. Larger pots may need six or eight. More corners mean more stability but more knotting.
Decide on cage height. Measure your pot height. Add two inches for the base knots. Add three inches for the top gathering knot. This gives your cage working height. Divide this height into sections. A common pattern: three inches of square knots, two inches of spiral knots, three inches of square knots. This creates visual rhythm. The spiral sections add stretch. They accommodate slight pot size variations.
Creating a Removable Base Option
Watering is easier if the pot comes out. Design a base that opens. One method: leave the bottom four inches unknotted. Gather cords with a loose overhand knot. Slide the pot in. Tighten the knot under the pot. To remove, loosen the knot. Another method: make two separate cage halves. Join them with removable ties or buttons. This works well for heavy pots. Test your design with an empty pot first. Adjust knot spacing until the pot sits level.
Adding Decorative Elements
This is where your style shines. Add beads to cords before knotting. Wooden beads suit natural themes. Glass beads catch light. Gemstone chips echo echeveria colors. Place beads at knot intersections. They become little jewels in the pattern. Incorporate different knot textures. A row of berry knots adds dimension. Picot loops create delicate edges. Fringe the bottom cords. Brush them out for a soft tassel. Dip-dye the fringe tips for an ombre effect. Keep decorations balanced. Too much weight pulls the hanger crooked.
Sizing for Different Echeveria Varieties
Echeveria varieties vary in size. Echeveria elegans stays under six inches wide. Echeveria ‘Afterglow’ can span twelve inches. Match your hanger scale to the mature plant size. A tiny hanger looks silly on a large specimen. A massive hanger swallows a small rosette. For growing plants, make the cage adjustable. Use sliding knots on the cage corners. Loosen them as the plant expands. This extends the hanger’s useful life.
Step-by-Step: Building Your First Echeveria Hanger
Preparing and Cutting Your Cords
Measure twice, cut once. For a standard thirty-inch hanger with a six-inch pot, cut eight cords at twelve feet each. That sounds like a lot. But square knots consume length fast. Fold each cord in half. You now have sixteen working cords. Attach all to a two-inch metal ring using lark’s head knots. Space them evenly. This ring hangs on your hook. Ensure the ring is rated for at least twenty pounds. Safety first.
Knotting the Top Crown
The crown sits just below the ring. It gathers cords into four groups of four. Take four adjacent cords. Tie a row of three square knots. Repeat around the ring. You have four knot clusters. Keep them at the same distance from the ring. Use a ruler. This crown distributes weight evenly. It prevents the ring from tilting. If your pot is heavy, add a second crown row two inches below the first.
Weaving the Cage Body
Now form the cage sides. Separate cords into four groups of four. These are your corner posts. Leave the center eight cords free for now. On each corner group, tie alternating square and spiral knot sections. Follow your planned pattern. Check pot fit every few rows. Slip the pot into the forming cage. Adjust tension if needed. The cage should hug the pot without squeezing. Continue until you reach your target cage height.
Constructing the Base
The base closes the bottom. Bring all sixteen cords together. Divide into two groups of eight. Tie a gathering knot around each group. Leave a two-inch gap between knots. This gap fits the pot drainage hole. If your pot has no hole, close the gap completely. For a removable base, tie a loose overhand knot instead. Test with the actual pot. The pot bottom should rest on the knots. The drainage hole should align with the gap. Trim excess cord. Leave six inches for fringe.
Finishing Touches
Comb out the fringe. Trim to even length. Brush again for fluffiness. Steam the fringe lightly to relax fibers. Inspect every knot. Tug gently to ensure security. Spray the whole piece with water. Let it dry flat. This sets the knots. Attach a sturdy ceiling hook. Use a toggle bolt for drywall. Screw into a joist for plaster. Hang your creation. Step back. Admire. Place your echeveria inside. Adjust until level.
Caring for Macrame and Echeveria Together
Watering Without Damaging Cords
Water is the enemy of macrame. Wet cords stretch, stain, and mildew. Always remove the pot to water. Take the whole hanger down. Set it on a towel. Water the echeveria thoroughly. Let it drain completely. Wait until the pot exterior feels dry. Only then return it to the hanger. This extra step saves your macrame for echeveria from premature aging. If you must water in place, use a turkey baster. Target the soil only. Keep a cloth handy to catch drips.
Light Requirements for Hanging Succulents
Echeveria loves bright light. South or west windows work well. But glass magnifies heat. Watch for sunburn. Bleached patches on leaves mean too much direct sun. Sheer curtains filter harsh rays. Rotate the hanger weekly. This promotes even growth. Without rotation, echeveria leans toward light. The rosette becomes lopsided. In low light, echeveria stretches. It loses its compact form. Colors fade. If your space is dim, choose shade-tolerant varieties like Echeveria ‘Perle von Nürnberg’. Supplement with a grow light.
Cleaning and Maintaining Your Macrame
Dust collects on cords. Shake the hanger gently outdoors monthly. Use a soft brush attachment on low suction. Spot clean stains with mild soap and cool water. Dab, do not rub. Rinse with a damp cloth. Air dry completely before rehanging. Never machine wash. Agitation felts the cords. Check knots annually. Retighten any that have loosened. Replace the hanger if cords show fraying or thinning. Safety outweighs sentiment.
Seasonal Adjustments
Echeveria goes dormant in winter. Water less. Move hangers away from cold drafts. Heating vents dry air. Mist the plant occasionally. Not the macrame. In summer, watch for rapid soil drying. Hanging pots dry faster than grounded ones. Check soil weekly. Fertilize monthly during growing season. Use half-strength succulent fertilizer. Stop in fall. These rhythms keep both plant and hanger thriving year-round.
Creative Variations and Advanced Techniques
Multi-Plant Macrame Displays
Why stop at one? Create a tiered hanger for three echeveria. Use a longer top section. Add two more cage levels. Stagger the pot sizes. Largest on bottom, smallest on top. This creates a living chandelier. Ensure your ceiling hook handles the combined weight. Space tiers so lower plants get light. Twelve inches between tiers works well. Water each tier separately. This project showcases a collection beautifully.
Wall-Mounted Macrame for Echeveria
No ceiling hook? Go vertical. Mount a wooden dowel on the wall. Attach multiple hangers at different lengths. This creates a living tapestry. Mix echeveria with trailing succulents like string of pearls. The contrast of rosettes and cascades is stunning. Use command strips for rental-friendly mounting. Ensure the wall gets adequate light. South-facing walls are ideal. This approach turns empty walls into focal points.
Incorporating Driftwood and Natural Elements
Replace the metal ring with a piece of driftwood. The organic shape adds character. Attach cords with lark’s head knots along the wood. Vary the spacing for asymmetry. Add air plants to the driftwood itself. Glue them with plant-safe adhesive. They need no soil. Mist them weekly. This combines two low-maintenance plant types. The result looks like a found object from a beachside cottage.
Color Theory for Cord and Pot Pairings
Color transforms your macrame for echeveria from craft to art. Match cord to pot for harmony. White cord with white pot feels clean and modern. Natural cord with terracotta feels earthy. Contrast for drama. Black cord makes pastel echeveria pop. Mustard cord highlights blue-green rosettes. Dip-dye cords in gradient. Start dark at top, fade to light. This draws the eye downward to the plant. Test color combos with scraps before committing.
Macrame Terrariums for Miniature Echeveria
Tiny echeveria like ‘Minima’ deserve tiny homes. Make micro macrame with 1mm cord. Use a small glass orb or geometric terrarium. The hanger becomes delicate jewelry for plants. These make incredible gifts. They fit on curtain rods or cabinet knobs. Care is the same. Remove to water. Use a syringe for precision. The scale is fiddly but the impact is huge. Guests always ask about them.
Troubleshooting Common Issues
Hanger Leans to One Side
A leaning hanger usually means uneven cord tension. Check your crown knots. One side may be tighter. Loosen and re-knot the tight side. Ensure the pot sits centered in the cage. Adjust corner knot spacing. If the pot itself is lopsided, shim the base with cork pieces. A level hanger looks intentional. A crooked one looks messy.
Cords Stretch Over Time
Cotton stretches under constant weight. After a few months, your hanger may be two inches longer. Plan for this. Make the initial length slightly shorter. Or add a wooden bead at the top. Slide it down as cords stretch. It hides the gap at the ring. Jute and hemp stretch less. Consider them for heavy pots. Retie the gathering knot at the bottom to take up slack.
Echeveria Outgrows the Cage
Healthy echeveria expands. The rosette may push against cage cords. This damages leaves. Loosen corner knots. Slide them down. Retie lower. If the pot is root-bound, repot into a wider shallow container. Update the hanger cage to match. This is a good problem. It means your plant is happy.
Mold on Cords
Mold means chronic dampness. Improve air circulation. Space hangers further apart. Water less frequently. Ensure pots drain fully before rehanging. Spray cords with diluted tea tree oil. It inhibits mold naturally. Test on a hidden spot first. Replace severely affected sections. Cut out bad areas. Splice in new cord with secure knots.
Conclusion: Your Macrame Journey Begins
You now have the knowledge to create beautiful macrame for echeveria displays. We covered materials, knots, design, construction, and care. Each piece you make will teach you more. Your knots will tighten. Your designs will evolve. Your echeveria will thrive in their handmade homes. There is deep satisfaction in combining two living arts. The ancient craft of knotting meets the quiet resilience of succulents.
Start simple. A basic four-strand hanger teaches fundamentals. Make one for a friend. Make one for each window. Experiment with patterns. Share photos online. Join macrame communities. The community is generous with tips and encouragement. Remember that every expert began with a tangled mess of cord. Your first hanger might be imperfect. It will still hold a plant. It will still bring joy.
Echeveria rosettes are nature’s mandalas. Macrame is human geometry. Together they create harmony. Hang them where you drink morning coffee. Where you read evening books. Where you need a breath of green calm. The gentle sway of a macrame hanger reminds us to slow down. The echeveria’s patient growth reminds us to persist. Happy knotting. Happy growing.
Frequently Asked Questions
How long does it take to make a macrame echeveria hanger?
A basic hanger takes 2-3 hours for beginners. Complex patterns with beads or multiple tiers can take 5-6 hours. Speed improves with practice.
Can I wash my macrame plant hanger?
Spot clean only with mild soap and cool water. Never machine wash or submerge fully. Agitation damages knots and felts natural fibers irreversibly.
What echeveria varieties work best in hanging macrame?
Compact rosette types like Echeveria elegans, ‘Perle von Nürnberg’, and ‘Lola’ work beautifully. Avoid tall, leggy varieties that lose their shape when suspended.
How much weight can a standard macrame hanger hold?
A well-made cotton cord hanger with 8 cords (3-5mm) supports 15-20 pounds. Always use hardware rated for at least double your wet pot weight for safety.
Do I need a special ceiling hook for macrame hangers?
Use a heavy-duty ceiling hook rated for 25+ pounds. For drywall, use toggle bolts. For plaster, screw directly into a joist. Never rely on adhesive hooks for living plants.
Can I make macrame hangers without a macrame board?
Yes! A clipboard, clipboard with binder clip, or even tape on a table edge works perfectly. The key is keeping your work stationary while knotting.