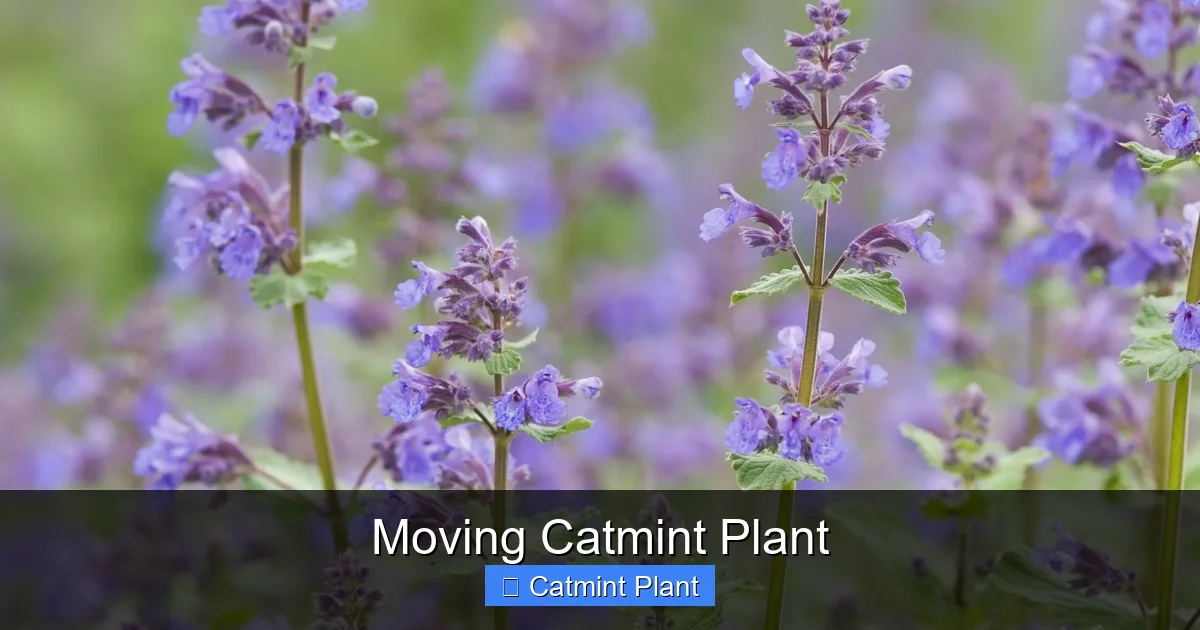
Moving Catmint Plant
Moving catmint plant successfully requires proper timing, careful root handling, and attentive aftercare. The best time to transplant is early spring or fall when temperatures are mild. Follow our step-by-step guide to ensure your catmint thrives in its new location with minimal transplant shock.
So you have decided it is time for moving catmint plant to a new spot in your garden. Maybe it has outgrown its current home. Maybe you are redesigning your flower beds. Or perhaps the plant just is not getting enough sun where it sits. Whatever the reason, you are in the right place. Catmint is one of those wonderful perennials that handles transplanting well if you follow a few simple rules. I have moved catmint more times than I can count. Some moves went beautifully. Others taught me lessons the hard way. Let me share everything I know so your move goes smoothly the first time.
Catmint, also known as Nepeta, is a tough plant. It survives drought. It laughs at poor soil. It attracts bees and butterflies like a magnet. But even tough plants appreciate a little TLC when being uprooted. The good news is that moving catmint plant is a straightforward process. You do not need special tools. You do not need a degree in horticulture. You just need the right timing, a bit of preparation, and some patience during the recovery period. By the end of this guide, you will feel confident tackling this garden task.
Key Takeaways
- Timing matters most: Move catmint in early spring or early fall for the highest success rate and least stress on the plant.
- Prepare the new site first: Dig the new hole before digging up the plant to minimize root exposure time.
- Water deeply before and after: Hydrate the plant 24 hours before moving and water thoroughly after transplanting to settle soil around roots.
- Keep the root ball intact: Dig wide and deep to preserve as many roots as possible during the move.
- Trim foliage after transplanting: Cut back about one-third of the top growth to reduce water demand while roots establish.
- Mulch and monitor: Apply 2-3 inches of mulch and watch for signs of stress like wilting or yellowing leaves.
- Divide while moving: Take the opportunity to divide large clumps into multiple plants for free garden expansion.
Quick Answers to Common Questions
When is the absolute best time to move catmint?
Early spring when new growth appears at the base is the absolute best time. The plant has the full growing season to establish roots before winter.
Can I move catmint in summer if I have to?
You can but it is risky. Only do it on a cool, cloudy day. Provide shade. Water daily. Expect significant stress. Spring or fall is far better.
How much should I cut back the foliage when transplanting?
Remove one-third to one-half of the top growth. This reduces water demand while the damaged root system recovers.
Should I divide my catmint when moving it?
Yes, if the clump is over 3 years old or has a dead center. Division rejuvenates the plant and gives you free new plants.
How long until transplanted catmint looks normal again?
Expect 2-3 weeks for recovery signs. Full vigor returns by the second growing season. First year may have reduced flowering.
📑 Table of Contents
Why You Might Need to Move Your Catmint
Plant Has Outgrown Its Space
Catmint spreads. Some varieties spread enthusiastically. A small plant you tucked into a corner three years ago might now be a sprawling mound three feet wide. It might be crowding its neighbors. It might be spilling onto a pathway. When a plant outgrows its allotted space, moving catmint plant to a roomier location solves the problem. You can also divide it at the same time. This gives you multiple smaller plants for other areas of your garden.
Wrong Growing Conditions
Catmint loves full sun. It needs at least six hours of direct sunlight daily. If your catmint is in too much shade, it will get leggy. It will flop over. It will produce fewer flowers. Moving it to a sunnier spot will transform the plant. You will see tighter growth. More blooms. Happier pollinators. Sometimes a plant struggles because the soil stays too wet. Catmint hates wet feet. If the current spot has poor drainage, moving it to a raised bed or a slope can save its life.
Garden Redesign
Gardens evolve. You might be creating a new pollinator border. You might be installing a patio where the catmint currently grows. You might want to group all your drought-tolerant plants together. Moving catmint plant during a redesign lets you place it exactly where it will look best and perform well. Think of it as editing your garden layout. The plant gets a fresh start. You get the design you envisioned.
Poor Performance
Sometimes a plant just does not thrive in a specific spot. The soil might be wrong. The microclimate might be off. There might be root competition from a nearby tree. Before giving up on a struggling catmint, try moving it. A change of scenery often works wonders. I have seen sad, sparse catmint become lush and floriferous after a simple relocation.
Best Time for Moving Catmint Plant
Early Spring: The Gold Standard
Early spring is the absolute best time for moving catmint plant. The soil is warming up. The plant is just waking from dormancy. New growth has not fully emerged yet. Cool temperatures reduce water stress. Spring rains help keep the soil moist. The plant has the entire growing season ahead to establish strong roots before winter. Aim for when you see the first green shoots at the base. This is usually March or April in most regions. Wait until the ground is workable. Not frozen. Not waterlogged.
Early Fall: The Excellent Alternative
Early fall is the second-best window. The summer heat has passed. The soil is still warm from months of sun. Warm soil encourages root growth. Cooler air temperatures reduce top growth demand. The plant can focus energy on root establishment. You want to move it at least six weeks before your first hard frost. This gives roots time to anchor before the ground freezes. In many areas, September is ideal. October works in milder climates. The plant will go dormant soon after. It will wake up in spring already settled in.
Times to Avoid
Summer is the worst time for moving catmint plant. The heat stresses the plant. High transpiration rates demand water the damaged roots cannot supply. The plant will likely suffer severe shock. It might die. If you absolutely must move it in summer, do it on a cool, cloudy day. Provide temporary shade. Water religiously. But really, just wait for spring or fall. Winter is also bad in cold climates. The ground is frozen. The plant is dormant. Roots cannot grow into new soil. In very mild climates without hard freezes, winter moves are possible but still not ideal.
Reading Your Plant’s Signals
Your catmint will tell you when it is ready. In spring, look for new basal growth. Those fresh green leaves at the crown mean the plant is active. In fall, the plant should still have green foliage. It should not be fully brown and dormant yet. If you are unsure, spring is the safer bet. The plant has more recovery time. You can also move it right after flowering in early summer if you cut it back hard. But spring and fall remain the top choices.
Preparing for the Move
Choose the New Location Carefully
Before you dig up anything, pick the new spot. Catmint wants full sun. Six to eight hours minimum. Well-drained soil is non-negotiable. Sandy or gritty soil is perfect. Heavy clay needs amendment. Mix in compost and coarse sand or gravel. Check the soil pH. Catmint prefers slightly alkaline to neutral soil. 6.5 to 7.5 is the sweet spot. Space matters too. Give each plant 18 to 24 inches of room. More for larger cultivars like ‘Six Hills Giant’. Less for compact ones like ‘Little Titch’. Consider the view. Catmint looks gorgeous spilling over a wall. It softens path edges. It creates a purple haze in mass plantings.
Prepare the New Planting Hole
Dig the new hole before you touch the existing plant. This is rule number one. The hole should be twice as wide as the expected root ball. Just as deep. Loosen the soil at the bottom and sides. This helps roots penetrate outward. Mix some compost into the backfill soil. About one part compost to three parts native soil. Do not add fertilizer. Fresh fertilizer can burn damaged roots. Wait until the plant shows new growth. Then feed lightly. Have a bucket of water ready. A tarp or wheelbarrow for transport. Clean, sharp spade or garden fork. Pruning shears. Gloves.
Water the Plant Before Digging
Water the catmint deeply 24 hours before moving catmint plant. Moist soil holds together better around roots. Dry soil crumbles away. Wet soil makes a heavy, messy root ball. Aim for that Goldilocks zone. Moist but not soggy. The plant will also be fully hydrated. This helps it withstand the stress of root loss. If the soil is already moist from rain, skip this step. You want damp, not mud.
Gather Your Tools
Having everything ready makes the job smooth. You need a sharp spade. A garden fork works well too. It causes less root damage than a spade. Pruning shears for trimming foliage. A tarp or large piece of burlap. A wheelbarrow if moving far. A hose or watering can. Mulch for after planting. Garden gloves. Kneeling pad if you like comfort. Clean tools prevent disease transfer. Wipe blades with alcohol if they have been used on diseased plants.
Step-by-Step Guide to Moving Catmint Plant
Step 1: Trim the Foliage
Before digging, cut the plant back. Remove about one-third to one-half of the top growth. This reduces water loss through leaves. The damaged root system cannot support full foliage. Cut stems back to 6-12 inches. Make clean cuts. Remove any dead or diseased stems entirely. If it is spring and new growth is just starting, just trim off last year’s dead stems. If it is fall and the plant is full size, cut it back harder. Do not worry. It will grow back quickly.
Step 2: Dig Around the Plant
Start digging at the drip line. That is the outer edge of the foliage. Push your spade or fork straight down. Go deep. At least 10-12 inches for established plants. Work your way around the entire plant. Rock the tool gently to loosen the root ball. Do not pry up yet. Just sever the lateral roots. Take your time. A wider root ball means more roots survive. For large clumps, you might need to dig a trench around it first. Then undercut.
Step 3: Lift the Root Ball
Once the circle is complete, slide your spade under the root ball. Lift from underneath. Keep the root ball intact. If it is large, get help. Or slide it onto a tarp. Drag the tarp to the new location. This saves your back. It keeps the root ball together. Shake off excess loose soil. But do not wash or bare-root the plant. The clinging soil protects delicate root hairs. Those tiny hairs do most of the water absorption.
Step 4: Divide If Desired
This is the perfect time to divide. Large catmint clumps benefit from division every 3-4 years. The center often dies out. Division rejuvenates the plant. Use your spade to cut the clump into sections. Or pull apart by hand. Each division needs healthy roots and several stems. Discard the woody, dead center. Keep the vigorous outer sections. You just turned one plant into three or four. Free plants. Who does not love free plants?
Step 5: Plant in the New Hole
Place the plant in the prepared hole. The crown should sit at the same level it was before. Not deeper. Not shallower. Spread the roots outward. Backfill with your amended soil. Firm gently with your hands. Do not stomp. You want good soil contact but not compaction. Water halfway through backfilling. This settles soil around roots. Finish backfilling. Water again thoroughly. Create a shallow basin around the plant to hold water.
Step 6: Mulch and Label
Apply 2-3 inches of mulch. Shredded bark. Straw. Pine needles. Compost. Keep mulch an inch away from the crown. Wet mulch against stems causes rot. Mulch conserves moisture. It moderates soil temperature. It suppresses weeds. Label the plant if you have multiple varieties. A simple plant marker saves confusion next spring. Write the variety name and date moved.
Aftercare for Transplanted Catmint
Watering Schedule
Water is critical for the first few weeks. Check soil daily. Stick your finger in two inches. If dry, water. Water deeply. Not a light sprinkle. You want moisture to reach the bottom of the root zone. For the first week, water every other day unless it rains. Week two, every three days. Week three, twice a week. Then transition to normal watering. Established catmint is drought tolerant. New transplants are not. They need consistent moisture until new roots grow out into the surrounding soil.
Monitoring for Stress
Watch your plant daily. Some wilting in afternoon sun is normal the first week. It should recover by morning. If it stays wilted, increase watering. Yellowing lower leaves are common. The plant sheds older leaves to support new roots. Remove yellow leaves to prevent fungal issues. New growth at the crown is a great sign. It means roots are working. No new growth after three weeks? Gently tug the plant. Resistance means roots are anchoring. Easy pull means trouble.
Temporary Shade
If you move catmint during a warm spell, provide shade. A piece of shade cloth. An old sheer curtain. A lawn chair draped with fabric. Anything that blocks midday sun. Keep it on for 5-7 days. Gradually increase sun exposure. Remove shade on cloudy days. This is especially important for fall moves during an Indian summer. Spring moves rarely need shade unless a heat wave hits.
Fertilizing: Wait and See
Do not fertilize immediately. Damaged roots cannot absorb nutrients. Fertilizer salts can burn them. Wait until you see active new growth. Then apply a light feeding. Compost tea. Fish emulsion. Balanced organic fertilizer at half strength. Catmint is not a heavy feeder. Too much nitrogen makes floppy growth with fewer flowers. A top-dressing of compost in spring is usually all it needs.
Dealing with Flopping
Catmint can get floppy after transplanting. The stems grow fast. The roots are not anchored yet. Wind and rain knock it over. Use peony rings. Bamboo stakes and twine. Or just let it sprawl. It will root where stems touch soil. More plants! If you want upright growth, shear the whole plant back by half after the first flush of bloom. It will rebloom on shorter, sturdier stems.
Common Mistakes to Avoid
Moving at the Wrong Time
I cannot stress this enough. Summer moves are heartbreak. The plant looks fine for two days. Then it crashes. Leaves crisp. Stems wither. By the time you realize, it is too late. Winter moves in cold zones fail because roots cannot grow in frozen soil. The plant heaves out of the ground. Freeze-thaw cycles destroy the root ball. Stick to spring and fall. Your patience will be rewarded.
Digging Too Small a Root Ball
Catmint has a fibrous root system. It spreads wide. Not deep. A narrow deep hole misses most roots. Dig wide. At least the drip line diameter. Wider if possible. Shake off loose soil but keep the root mass together. Those fine root hairs are microscopic. You cannot see them. But they do the work. Preserve as much soil contact as you can.
Planting Too Deep or Too Shallow
The crown must be at soil level. Planting deep smothers the crown. Rot sets in. The plant dies. Planting shallow exposes roots. They dry out. The plant struggles. Look at the plant before you dig it up. Note where the stems meet the roots. That is the crown. Match that level in the new hole. When in doubt, plant slightly high. It can settle. You can add soil. You cannot easily fix a buried crown.
Skipping the Water-In
Watering after planting is not optional. It eliminates air pockets. Air pockets kill roots. Roots cannot grow in air. They die. Water until the soil is saturated. You should see puddling. Let it drain. Water again. This one step dramatically increases survival. Do it even if rain is forecast. Rain might not come. Or it might be a light drizzle.
Overwatering After Establishment
Once established, catmint wants dry conditions. Constant moisture causes root rot. Fungal diseases. Floppy growth. After the first month, taper off. Let the top inch of soil dry between waterings. In most climates, established catmint needs no supplemental water. Except in extreme drought. Trust the plant. It evolved in dry, rocky soils. It knows how to handle dry spells.
Not Dividing Old Clumps
Moving a woody, dead-centered clump without dividing just moves the problem. The center will not magically revive. Divide it. Discard the dead wood. Plant the vigorous pieces. You get healthier plants. More plants. Better blooms. It takes five extra minutes. Worth every second.
Special Situations
Moving Catmint in Containers
Container catmint is easier to move. You just move the pot. But sometimes you want to plant it in the ground. Or move it to a larger pot. The process is similar. Tip the pot. Slide the root ball out. Loosen circling roots. Plant at same depth. Water well. The advantage is zero root disturbance. The plant barely notices. Spring and fall are still best. But container plants can be moved in summer with extra care. Keep them shaded and watered.
Moving Catmint from Seedling Trays
If you grew catmint from seed, transplant seedlings when they have 2-3 sets of true leaves. Harden them off first. A week of increasing outdoor exposure. Plant in prepared soil. Space 12 inches apart. Water gently. Protect from slugs. They love tender seedlings. A ring of diatomaceous earth helps. Copper tape. Beer traps. Whatever works for you.
Rescuing Catmint from Construction
Sometimes you have no choice. The backhoe is coming Monday. It is July. You have to move it now. Dig the largest root ball you can manage. Pot it up in a large container. Use good potting mix. Water thoroughly. Place in full shade. Mist foliage daily. Keep soil moist but not soggy. Treat it like a critical care patient. In fall, plant it in its permanent spot. It might survive. It might not. But you tried.
Moving Catmint Varieties: Size Matters
Not all catmint is the same size. ‘Walker’s Low’ gets 2-3 feet tall and wide. ‘Six Hills Giant’ reaches 3-4 feet. ‘Little Titch’ stays under 10 inches. ‘Purrsian Blue’ forms a neat 18-inch mound. Larger varieties have larger root systems. They need wider holes. More water to establish. More space in the new location. Compact varieties move easier. They recover faster. Know your variety. Plan accordingly.
Long-Term Care After the Move
First Year Expectations
The first year after moving catmint plant, the plant focuses on roots. Top growth might be less vigorous. Fewer flowers. This is normal. Do not panic. By year two, it should be back to full glory. Year three, it might need dividing again. That is the cycle. Perennials sleep, creep, then leap. Year one: sleep (root growth). Year two: creep (moderate growth). Year three: leap (full size).
Annual Maintenance
Cut back dead stems in late winter or early spring. Before new growth emerges. Shear the plant by half after the first bloom flush. This encourages a second bloom. Keeps the plant tidy. Prevents flopping. Divide every 3-4 years. Or when the center dies out. Spring division is easiest. The plant recovers fast. Fall division works too. Just do it early enough.
Pest and Disease Watch
Catmint is remarkably pest-free. Deer hate it. Rabbits avoid it. Insects rarely bother it. The main issues are fungal. Powdery mildew in humid, crowded conditions. Root rot in wet soil. Good air circulation prevents mildew. Proper drainage prevents rot. Space plants correctly. Do not overwater. Remove affected leaves promptly. The plant usually outgrows minor issues.
Companion Planting After the Move
Catmint plays well with others. Plant it with roses. It hides their bare knees. The purple flowers complement pink, yellow, white roses. Pair with salvia. Coneflowers. Black-eyed Susans. Ornamental grasses. Lavender. Russian sage. All love the same conditions. Sun. Drainage. Low water. Create a drought-tolerant tapestry. The pollinators will thank you.
Conclusion
Moving catmint plant is one of those garden tasks that feels daunting but is actually quite forgiving. This tough perennial wants to live. It wants to bloom. It wants to feed bees and butterflies. Give it the right timing. A sunny, well-drained spot. A wide root ball. Deep watering. A little shade if it is hot. Some patience while it settles. That is all it asks. In return, you get years of aromatic foliage. Clouds of lavender-blue flowers. A magnet for beneficial insects. A plant that asks little and gives much.
I have moved catmint in spring. In fall. In desperate summer rescues. In careful planned relocations. Every time, the plant surprised me with its resilience. The key is respecting its needs. Roots need soil contact. Leaves need sun. Crown needs air. Water needs drainage. Get these right, and your catmint will thrive. So grab your spade. Pick a cool morning. Give your catmint the new home it deserves. Your garden will thank you. The pollinators will thank you. And you will have the satisfaction of a job well done.
Happy gardening. May your transplants take hold fast. May your blooms be abundant. May your catmint bring you joy for many seasons to come.
Frequently Asked Questions
Can I move catmint while it is blooming?
You can move catmint while blooming but it is not ideal. Cut back the flower spikes and foliage by half to reduce stress. The plant will sacrifice blooms to focus on root establishment. Spring or fall before blooming is much better.
How deep do catmint roots grow?
Catmint has a fibrous root system that spreads wide rather than deep. Most roots are in the top 10-12 inches of soil. The root spread often matches the foliage spread. Dig wide, not just deep, when transplanting.
Will catmint survive transplant shock?
Catmint is very resilient and usually survives transplant shock well if moved at the right time with proper care. Expect some wilting and yellowing leaves for the first 1-2 weeks. New growth at the crown signals recovery.
Do I need to amend the soil when moving catmint?
Catmint prefers lean, well-drained soil. Mix compost into heavy clay to improve drainage. Avoid rich amendments or fertilizer at planting time. Too much fertility causes floppy growth and fewer flowers.
Can I move catmint from shade to sun?
Yes, and it will thank you! Catmint needs full sun (6+ hours) for best flowering and compact growth. Moving from shade to sun may cause temporary leaf scorch. Provide a few days of partial shade during transition.
How often should I water newly transplanted catmint?
Water deeply every other day for the first week, then every 3 days for week two, twice a week for week three. After that, water weekly until established. Check soil moisture with your finger before watering.