Chives Care for Apartment Living
Growing chives in an apartment is easy and rewarding with the right setup. This guide covers everything from choosing the best pot and soil to mastering light, water, and harvest techniques for a year-round supply of fresh flavor.
Key Takeaways
- Light is critical: Chives need at least 6 hours of direct sun or 12-14 hours under a grow light daily.
- Choose the right pot: Use a container at least 6 inches deep with drainage holes to prevent root rot.
- Water consistently: Keep soil evenly moist but never soggy; water when the top inch feels dry.
- Harvest correctly: Snip leaves 1-2 inches above the soil to encourage regrowth and avoid killing the plant.
- Fertilize lightly: Feed with a balanced liquid fertilizer at half strength once a month during the growing season.
- Divide annually: Split crowded clumps every spring to maintain vigor and prevent the center from dying out.
- Watch for pests: Inspect regularly for aphids and thrips; treat early with neem oil or insecticidal soap.
Quick Answers to Common Questions
How much light do chives need indoors?
Chives need at least 6 hours of direct sunlight daily or 12-14 hours under a full-spectrum LED grow light to thrive indoors.
What size pot is best for apartment chives?
Use a pot at least 6 inches deep and 6-8 inches wide with drainage holes; deeper pots support healthier root systems for perennial growth.
How often should I water potted chives?
Water when the top inch of soil feels dry; typically every 2-3 days in summer and weekly in winter, but always check with the finger test first.
Can I grow chives from grocery store plants?
Yes, living herb pots from the grocery store transplant well; divide the dense clump into 3-4 sections and repot in fresh potting mix for best results.
Why are my chives flowering and should I cut the flowers?
Flowering is natural in late spring; cut flower buds to maximize leaf production, or allow blooms for edible flowers and pollinators, then trim stalks to the base.
📑 Table of Contents
- Why Chives Are the Perfect Apartment Herb
- Getting Started: Choosing Your Chives and Container
- Mastering Light: The Apartment Challenge
- Watering and Humidity: Finding the Balance
- Feeding and Maintenance for Long-Term Health
- Harvesting, Storing, and Using Your Bounty
- Troubleshooting Common Apartment Chives Problems
- Advanced Tips for the Enthusiast
- Conclusion: Your Year-Round Flavor Source
Why Chives Are the Perfect Apartment Herb
If you have ever wanted to grow your own food but felt limited by a small space, chives are your best friend. They are compact, forgiving, and incredibly useful in the kitchen. Unlike basil or cilantro, which can be dramatic about light and temperature, chives just keep going. They are a perennial herb, meaning they come back year after year with minimal fuss. You can snip what you need for scrambled eggs, baked potatoes, or a fancy compound butter, and the plant will push out fresh growth within days.
Living in an apartment often means dealing with less-than-ideal light, dry air from heating systems, and limited balcony access. Chives handle these challenges better than most herbs. They tolerate lower light better than Mediterranean herbs like rosemary or thyme. They don’t mind the dry air as much as tender leafy greens. And because they grow in tight clumps, they fit perfectly on a narrow windowsill or a small shelf under a grow light. This guide will walk you through every step of chives care for apartment living so you can enjoy that fresh, oniony flavor whenever you want.
Getting Started: Choosing Your Chives and Container
Seeds vs. Transplants vs. Divisions
You have three main options for starting your chives patch. Starting from seed is the cheapest route, but it requires patience. Chive seeds can take two to three weeks to germinate, and the seedlings look like tiny blades of grass for the first month. If you want a faster harvest, buy a small transplant from a nursery or grocery store. These are usually sold in 4-inch pots and are ready to be moved into a permanent home immediately. The third option is division. If a friend has a mature chives plant, ask for a small clump in early spring. This is the fastest way to a full, productive pot because the root system is already established.
Visual guide about Chives Care for Apartment Living
Image source: balconygardenweb.b-cdn.net
Picking the Right Pot
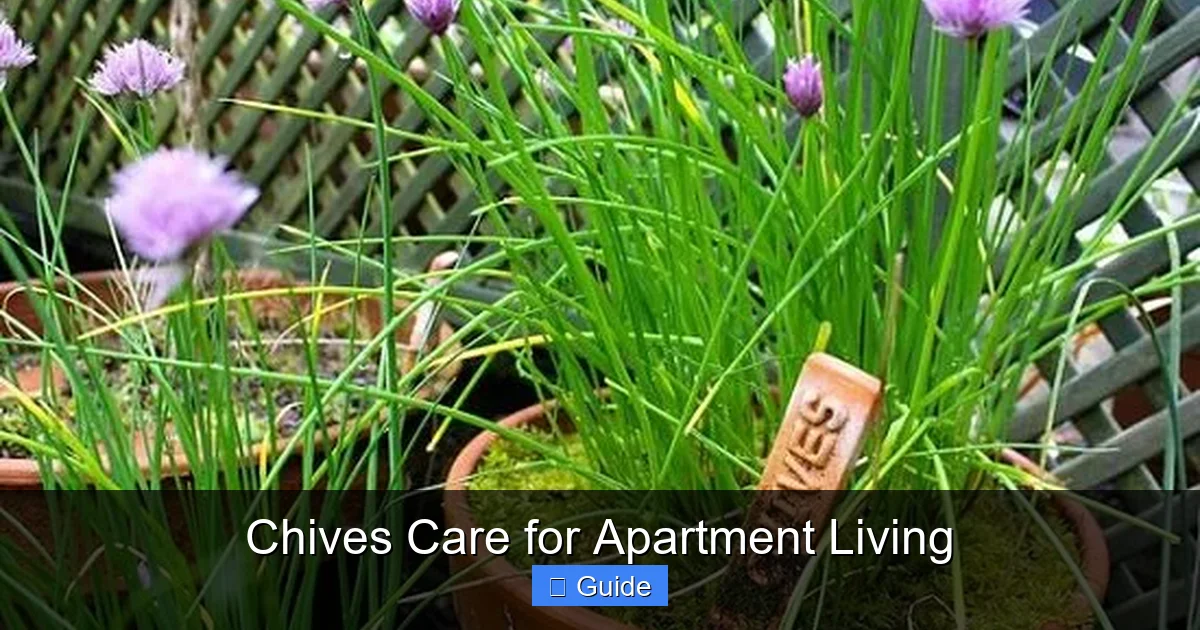
Do not underestimate the importance of the container. Chives have a surprisingly robust root system for such a skinny plant. They need depth more than width. Choose a pot that is at least 6 inches deep. An 8-inch depth is even better for long-term health. The diameter can be as small as 6 inches for a single plant, but a 10 to 12-inch pot allows you to grow a small cluster that yields more harvest.
Drainage holes are non-negotiable. Chives hate wet feet. Standing water leads to root rot faster than almost any other issue. If you fall in love with a decorative cache pot without holes, use it as a cover. Keep your chives in a plain nursery pot with holes, and slip that into the pretty pot. Just remember to dump out any water that collects in the bottom of the cache pot after watering. Terracotta is a classic choice because it wicks moisture away from the soil, reducing rot risk. Plastic retains water longer, which is helpful if you tend to forget to water. Glazed ceramic sits in the middle. Pick what matches your aesthetic and your watering habits.
The Ideal Potting Mix
Garden soil is too heavy for containers. It compacts over time, suffocating roots. You need a high-quality potting mix. Look for a blend labeled for vegetables or herbs. These usually contain peat moss or coconut coir for moisture retention, perlite or vermiculite for drainage, and compost for nutrients. Avoid mixes with added “moisture control” crystals or heavy wetting agents; they can keep the soil too wet for chives. If you want to make your own, mix two parts coconut coir, one part perlite, and one part compost. This creates a light, airy, nutrient-rich home for your roots.
Mastering Light: The Apartment Challenge
Understanding Chives Light Needs
Chives are technically “full sun” plants. In a garden, that means 6 to 8 hours of direct sunlight. In an apartment, “direct sunlight” usually means unobstructed south-facing windows. East or west windows can work if they get 4 to 6 hours of direct rays. North-facing windows rarely provide enough intensity for robust growth. The plant will survive, but it will become leggy, pale, and floppy. The leaves will be thin and lack that punchy flavor. If you only have a north window, you absolutely need a grow light.
Using Grow Lights Effectively
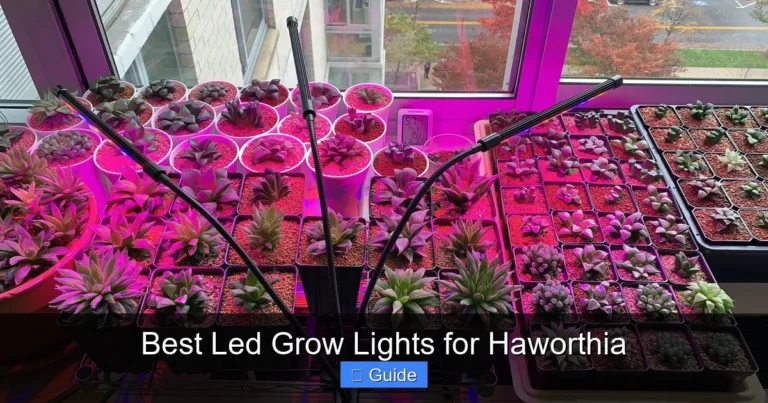
Grow lights are a game-changer for apartment herb gardening. They let you grow chives in a dark corner, a basement, or even a closet. For chives, you want a full-spectrum LED light. Look for a color temperature around 5000K to 6500K, which mimics midday sun. Watts matter less than PPFD (Photosynthetic Photon Flux Density), but a 20W to 30W panel or bulb is usually sufficient for a small pot.
Position the light 6 to 12 inches above the plant canopy. Run it for 12 to 14 hours a day. A simple outlet timer makes this effortless. If the leaf tips start turning brown and crispy, the light is too close or too intense. Raise it a few inches. If the plant stretches toward the light with long gaps between leaves, lower the light or increase the duration. Rotate the pot a quarter turn every few days so the plant grows upright instead of leaning.
Seasonal Light Adjustments
Even with a south window, winter light is weak and short. Your chives will slow down naturally. This is normal. They are entering a semi-dormant phase. You can supplement with a grow light for a few hours in the evening to keep them producing, or just accept a smaller winter harvest. In summer, a south window might get too hot. If the leaves look scorched or the soil dries out in a few hours, pull the plant back a foot from the glass or use a sheer curtain to diffuse the intense afternoon rays.
Watering and Humidity: Finding the Balance
The Finger Test
Overwatering kills more apartment chives than underwatering. The schedule method (watering every Tuesday) fails because conditions change. The finger test never fails. Stick your index finger into the soil up to the second knuckle. If it feels dry at your fingertip, water. If it feels cool and damp, wait. Check every day or two. In a small terracotta pot in summer, you might water daily. In a plastic pot in winter, it might be weekly.
How to Water Properly
When you water, do it thoroughly. Pour water slowly over the soil surface until it runs freely out of the drainage holes. This ensures the entire root ball gets wet and flushes out accumulated salts from fertilizer. Let the pot drain completely in the sink. Never let it sit in a saucer of water. That is the fast track to root rot. If your tap water is heavily chlorinated, let it sit out overnight before using. Chives are not super sensitive, but they prefer chlorine-free water. Room temperature water is best; cold water shocks the roots.
Dealing with Dry Indoor Air
Apartments, especially in winter with forced-air heating, can have humidity as low as 20%. Chives prefer 40% to 50%. Low humidity causes brown leaf tips and makes the plant more susceptible to spider mites. You have a few easy fixes. Group your plants together; they create a microclimate of higher humidity through transpiration. Set the pot on a pebble tray: fill a shallow tray with pebbles, add water to just below the top of the pebbles, and sit the pot on top. The water evaporates upward around the plant. A small humidifier nearby works great too. Misting the leaves helps only briefly and can encourage fungal issues if air circulation is poor, so focus on raising ambient humidity instead.
Feeding and Maintenance for Long-Term Health
Fertilizing Basics
Chives are not heavy feeders, but they are in a finite pot of soil. Nutrients get used up or washed out within a few months. During the active growing season (spring through early fall), feed once a month with a balanced liquid fertilizer diluted to half the label strength. A 10-10-10 or 5-5-5 NPK ratio works perfectly. Fish emulsion or seaweed extract are excellent organic options; they provide micronutrients and beneficial microbes. Stop fertilizing in late fall and winter when growth slows. Resume in early spring when you see new green shoots emerging.
The Annual Division Ritual
This is the secret to keeping a chives plant productive for years. Over time, the clump gets dense. The center dies out, leaving a ring of growth around a dead middle. The plant loses vigor. Every spring, ideally just as new growth starts, divide the plant. Gently pull the root ball out of the pot. Use your hands or a clean knife to split the clump into 3 or 4 sections, each with healthy roots and shoots. Replant one section back into the same pot with fresh potting mix. Pot up the others for friends, or expand your own herb collection. This rejuvenates the plant, giving it fresh soil and room to grow.
Pruning and Flower Management
Regular harvesting is the best pruning. Snip leaves down to 1 to 2 inches above the soil line. Always cut from the outside of the clump. New growth comes from the center. If you see flower buds forming, decide your goal. The flowers are edible and beautiful—purple pom-poms that taste like mild onion. They look stunning in salads or as a garnish. However, flowering signals the plant to shift energy from leaf production to seed production. Leaf growth slows, and the leaves can get tougher. If you want maximum leaves, pinch off flower buds as soon as you see them. If you want flowers for the bees (or your plate), let a few bloom, then cut the flower stalks down to the base once they fade to encourage fresh leaf growth.
Harvesting, Storing, and Using Your Bounty
When and How to Harvest
You can start harvesting once the plant is about 6 inches tall, usually 60 days from seed or immediately from a transplant. Never take more than one-third of the plant at a time. Use clean scissors or herb snips. Cut the leaves 1 to 2 inches above the soil. Avoid pulling or twisting; that damages the crown. Harvest in the morning after the dew (or overnight moisture) has dried but before the heat of the day. This is when the essential oils—and flavor—are most concentrated.
Short-Term Storage
Fresh chives are best used immediately. If you must store them, do not wash them until ready to use. Moisture promotes rot. Wrap the stems loosely in a slightly damp paper towel. Place the bundle in a plastic bag or airtight container. Leave the bag slightly open or poke a few holes for airflow. Store in the crisper drawer of your fridge. They will stay crisp for 7 to 10 days. Check every couple of days and remove any slimy or yellowing stems.
Long-Term Preservation
If you have a glut, you have options. Freezing preserves flavor better than drying. Chop the chives finely. Pack them into ice cube trays. Top with water or olive oil and freeze. Pop out the cubes and store in a freezer bag. Drop a cube straight into soups, sauces, or sautés. You can also freeze chopped chives flat on a baking sheet, then transfer to a bag. For drying, use a dehydrator at 95°F (35°C) or the lowest oven setting with the door propped open. Dry until brittle. Crumble and store in a dark jar. Dried chives lose a lot of their signature punch, so use them in cooked dishes where they rehydrate.
Culinary Inspiration
The classic use is a sprinkle over a baked potato with sour cream. But think bigger. Stir them into softened butter with lemon zest and garlic for an instant compound butter on steak or corn. Fold them into cream cheese for a bagel spread. Whisk them into vinaigrettes. Add them at the very end of cooking scrambled eggs or omelets—heat destroys their delicate flavor instantly. The flowers are a gourmet touch. Pull the florets apart and scatter over deviled eggs, pasta salad, or grilled fish. You can even infuse vinegar with chive blossoms for a gorgeous pink onion vinegar.
Troubleshooting Common Apartment Chives Problems
Yellowing Leaves
Yellow leaves usually mean one of three things: overwatering, underwatering, or nutrient deficiency. Check the soil first. Soggy soil? Cut back watering and ensure drainage. Bone dry? Water thoroughly. If moisture is perfect but older leaves are yellowing while new growth is pale green, it’s likely nitrogen deficiency. Apply a half-strength liquid fertilizer. If only the tips are yellow and crispy, it’s usually low humidity or fertilizer burn (too strong). Flush the soil with plain water and increase humidity.
Leggy, Floppy Growth
This is almost always insufficient light. The plant is stretching desperately for photons. Move it to a brighter window immediately. Add a grow light. Rotate the pot daily. You can stake floppy leaves with thin bamboo skewers and soft ties, but the real fix is more light. Once the light improves, new growth will be shorter, thicker, and upright. You can cut the floppy leaves back to the base; they won’t stand up on their own.
Pests: Aphids, Thrips, and Spider Mites
Indoor plants aren’t immune. Aphids cluster on new growth and flower buds. They are small, pear-shaped, and green, black, or gray. Thrips are tiny, slender insects that rasp the leaves, leaving silvery streaks and black dots of frass. Spider mites are microscopic but leave fine webbing and stippled, dusty-looking leaves. They thrive in dry air. Prevention is best: inspect weekly, especially under leaves. Keep humidity up. If you see pests, isolate the plant. Blast it with a strong spray of water in the sink (cover the soil with foil first). Follow up with neem oil or insecticidal soap spray, coating all surfaces. Repeat weekly for 3 weeks to catch hatchlings.
Fungal Issues: Rust and Downy Mildew
These are less common indoors but possible in stagnant, humid air with wet leaves. Rust shows as orange pustules on the undersides of leaves. Downy mildew looks like pale patches on top with gray fuzz underneath. Both spread via water splash. Water at the soil level, not overhead. Ensure good air circulation—a small fan on low nearby helps. Remove and trash affected leaves immediately (don’t compost). If severe, a copper-based fungicide labeled for edibles can help, but usually, cultural fixes work if caught early.
Advanced Tips for the Enthusiast
Growing Chives Hydroponically
If you want to skip soil entirely, chives thrive in simple hydroponic systems. A Kratky method jar (a Mason jar with a net pot, clay pebbles, and nutrient solution) works beautifully for a single plant. The roots hang in the solution; an air gap provides oxygen. Change the solution monthly. This eliminates soil mess, fungus gnats, and watering guesswork. It’s a fun project for a kitchen counter.
Companion Planting in Containers
Chives play well with others. Their strong scent deters aphids and spider mites. Plant them around the base of a potted tomato or pepper on a balcony. They also pair nicely with parsley and cilantro in a mixed herb bowl, as they have similar water and light needs. Just ensure the pot is large enough—at least 14 inches diameter—for multiple plants.
Saving Seeds
Let a few flowers go to seed. The seed heads turn tan and papery. Snip the whole head into a paper bag. Let it dry for a week. Shake the bag to release the tiny black seeds. Store in a cool, dark envelope. They stay viable for 1 to 2 years. Note: seeds from hybrid varieties may not grow true to type, but standard chives (Allium schoenoprasum) are open-pollinated and reliable.
Conclusion: Your Year-Round Flavor Source
Growing chives in an apartment is one of the highest-reward, lowest-effort gardening projects you can undertake. They ask for so little—a pot with holes, some decent soil, a sunny window or a cheap grow light, and a sip of water when thirsty. In return, they give you a perennial supply of fresh, vibrant flavor that transforms everyday meals into something special. They connect you to the seasons even in a high-rise. Watching the first green spikes push through in late winter feels like a promise kept. Snipping a handful for dinner makes you feel capable and connected to your food.
Don’t overthink it. Grab a pot this weekend. Buy a transplant or sow a pinch of seeds. Put it in your brightest spot. Water when the soil feels dry. In a few short weeks, you’ll be reaching for your own homegrown chives. That first taste—bright, clean, unmistakably onion-y—will make you wonder why you waited. Happy growing.
Frequently Asked Questions
Can chives survive winter indoors in an apartment?
Yes, chives are perennial and will survive winter indoors. Growth slows in low light. Keep them in a bright spot, water sparingly, and stop fertilizing until spring. They may die back slightly but will rebound vigorously when days lengthen.
Do chives need fertilizer in a pot?
Yes, container nutrients deplete quickly. Feed monthly with half-strength balanced liquid fertilizer during spring through early fall. Do not fertilize in winter when the plant is semi-dormant.
How do I prevent my chives from getting leggy and falling over?
Leggy growth means insufficient light. Move the plant to a south-facing window or add a grow light 6-12 inches above the plant for 12-14 hours daily. Rotate the pot regularly for even growth.
Are chive flowers edible and how do I use them?
Yes, chive flowers are edible and have a mild onion flavor. Separate the purple florets and sprinkle them on salads, soups, eggs, or compound butters. They also make a beautiful pink infused vinegar.
What is the best way to harvest chives without killing the plant?
Snip leaves 1-2 inches above the soil line using clean scissors. Cut from the outside of the clump, never pulling. Take no more than one-third of the plant at a time to allow quick regrowth.
Why are the tips of my chives turning brown?
Brown tips usually indicate low humidity, underwatering, or fertilizer salt buildup. Increase humidity with a pebble tray, water consistently when the top inch is dry, and flush the soil monthly with plain water.