Mint Care for Mudroom
Transform your mudroom into a thriving herb garden with our complete mint care for mudroom guide. Learn exactly how to provide the right light, water, and humidity for lush, aromatic mint plants that flourish in entryway conditions. Enjoy fresh herbs for cooking and tea just steps from your kitchen all year long.
Walk into any well-designed mudroom and you’ll spot the usual suspects: hooks for coats, cubbies for shoes, maybe a bench for pulling on boots. But lately, something green and fragrant has been making an appearance in these transitional spaces. Mint plants, with their bright leaves and unmistakable aroma, are turning ordinary entryways into miniature herb gardens. It makes perfect sense when you think about it. The mudroom sits right between outdoors and indoors, often catching decent light from side windows or glass door panels. It stays cooler than the rest of the house in winter, which mint actually prefers. And having fresh herbs right where you kick off your shoes? That’s convenience at its finest.
But here’s the thing about mint care for mudroom success: it’s not quite as simple as sticking a plant on a shelf and hoping for the best. Mudrooms present unique challenges. Temperature swings when the exterior door opens. Tracking salt and debris from boots. Variable humidity levels depending on the season. Light that might be bright one day and dim the next if you live in a climate with short winter days. I’ve watched plenty of enthusiastic gardeners bring home a beautiful mint plant in April only to watch it struggle by July. The good news? Every single one of those challenges has a straightforward solution. This guide walks you through all of them, drawing on both horticultural science and real-world experience from gardeners who’ve mastered the art of growing mint in entryway spaces.
Key Takeaways
- Choose the right container: Use wide, shallow pots with excellent drainage to prevent root rot and contain mint’s aggressive spreading habit.
- Provide adequate light: Mint needs 4-6 hours of bright, indirect light daily; supplement with grow lights during darker winter months.
- Water consistently but carefully: Keep soil evenly moist but never soggy; water when the top inch feels dry to the touch.
- Manage humidity levels: Mudrooms often have fluctuating humidity; use pebble trays or occasional misting to maintain 40-50% humidity.
- Harvest regularly for bushier growth: Pinch stems just above leaf nodes weekly to encourage branching and prevent leggy, woody plants.
- Watch for common pests: Inspect weekly for spider mites, aphids, and whiteflies that thrive in warm, dry indoor conditions.
- Rotate varieties for continuous harvest: Grow 2-3 different mint types with staggered planting times for year-round fresh leaves.
Quick Answers to Common Questions
Can mint survive in a mudroom with no windows?
No, mint cannot survive without light. You would need to provide 14-16 hours of full-spectrum LED grow light daily to keep it alive and productive in a windowless mudroom.
How often should I water mint in my mudroom during winter?
Water only when the top 2 inches of soil feel dry, typically every 10-14 days in winter. Overwatering during dormancy is the most common cause of winter mint failure.
Why is my mudroom mint turning yellow and leggy?
Yellowing lower leaves with long, weak stems indicate insufficient light. Move the plant closer to the window or add supplemental grow lights running 14+ hours daily.
Can I plant different mint varieties in the same pot?
Not recommended. Different varieties have varying growth rates and water needs. The stronger variety will crowd out the others. Give each variety its own container.
Is it safe to eat mint that’s been growing near road salt and boot debris?
Yes, if you rinse leaves thoroughly before use. Salt and debris stay on leaf surfaces and don’t absorb into the plant tissue. A quick cold water wash removes contaminants.
📑 Table of Contents
- Understanding Why Mint Thrives in Mudroom Environments
- Selecting the Perfect Mint Varieties for Your Space
- Container Selection and Soil Preparation
- Light Management Strategies for Every Season
- Watering Wisdom: The Make-or-Break Skill
- Feeding, Pruning, and Harvesting for Maximum Yield
- Troubleshooting Common Mudroom Mint Problems
- Creative Display Ideas That Enhance Your Mudroom
- Seasonal Care Calendar: A Year in Your Mudroom Mint Garden
- Advanced Techniques for the Enthusiast
- Conclusion: Your Mudroom Mint Journey Starts Today
Understanding Why Mint Thrives in Mudroom Environments
The Natural Habitat Advantage
Mint evolved in damp, partially shaded areas along stream banks and woodland edges across Europe, Asia, and North America. This heritage gives us huge clues about what it wants in our homes. The plant prefers cool root runs, consistent moisture without waterlogging, and dappled light rather than harsh direct sun. A well-designed mudroom mimics these conditions surprisingly well. The concrete or tile floor keeps root zones cooler than carpeted rooms. Exterior doors provide natural air circulation. Windows often filter light through sheer curtains or frosted glass, creating that dappled effect mint loves. When you understand this connection, mint care for mudroom setups becomes intuitive rather than a guessing game.
Temperature Preferences and Seasonal Adaptation
Most mint varieties thrive between 55-70°F (13-21°C), making them perfect for mudrooms that dip cooler than heated living spaces. In fact, a slight winter chill around 50-55°F actually benefits the plant, triggering a natural dormancy period that strengthens it for spring growth. Summer heat above 80°F can stress mint, causing leaf scorch and reduced essential oil production. If your mudroom gets hot in afternoon sun, consider a sheer curtain or moving pots slightly back from the window. The key is observing your specific space through all four seasons before committing to permanent placement.
Humidity Dynamics in Transition Zones
Mudrooms occupy a fascinating humidity middle ground. Winter heating systems dry out indoor air to 20-30% humidity, but the mudroom often stays higher thanks to wet coats, boots, and occasional snow melt. Summer brings the opposite challenge: outdoor humidity of 70-80% meeting air-conditioned interiors. Mint prefers 40-60% humidity. This fluctuation actually works in your favor if you manage it right. The natural humidity spikes from wet gear give your plants periodic moisture boosts. Just ensure good air circulation to prevent fungal issues during prolonged damp periods. A small clip-on fan running on low for a few hours daily works wonders.
Selecting the Perfect Mint Varieties for Your Space
Classic Culinary Workhorses
Spearmint (Mentha spicata) remains the gold standard for cooking and tea. Its clean, sweet flavor lacks the intense menthol punch of peppermint, making it versatile for everything from mojitos to tabbouleh. The variety ‘Kentucky Colonel’ offers particularly large, flavorful leaves on upright stems that handle indoor conditions beautifully. Peppermint (Mentha × piperita) brings that classic candy-cane intensity perfect for desserts and digestive teas. ‘Black Mitcham’ is a commercial favorite with high oil content and good disease resistance. Both spread aggressively, so container growing is non-negotiable unless you want mint escaping into your walls.
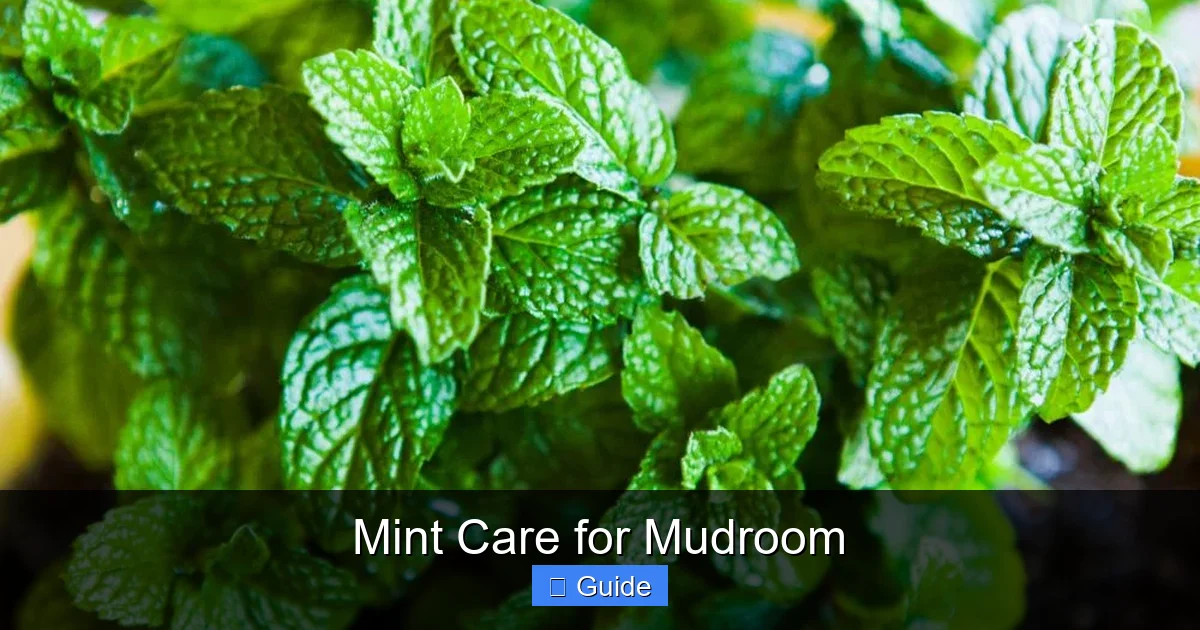
Visual guide about Mint Care for Mudroom
Image source: thegardenbeds.com
Specialty Varieties Worth the Hunt
Chocolate mint (Mentha × piperita ‘Chocolate’) delivers a genuine cocoa-mint aroma that transforms hot chocolate and ice cream. It’s slightly less vigorous than standard peppermint, making it manageable in smaller pots. Apple mint (Mentha suaveolens) features fuzzy, rounded leaves with a subtle fruity undertone. Its softer texture makes it delightful in fruit salads and summer drinks. Pineapple mint (Mentha suaveolens ‘Variegata’) adds visual drama with cream-edged leaves while tasting distinctly tropical. Ginger mint (Mentha × gracilis) offers a warm, spicy complexity that shines in Asian-inspired dishes. These specialty types often command premium prices at grocery stores, making them especially rewarding to grow yourself.
Compact Varieties for Tight Spaces
If your mudroom shelf space is limited, look for naturally smaller cultivars. Corsican mint (Mentha requienii) forms a tiny, moss-like mat barely an inch tall with intense pennyroyal fragrance. It’s perfect for shallow dishes or fairy garden arrangements. ‘Bowles’ mint (Mentha × villosa ‘Aloha’) stays under 12 inches with a tidy, mounding habit. Pennyroyal (Mentha pulegium) creeps along the soil surface rather than growing upright, making it ideal for hanging baskets where it can cascade. Note: pennyroyal oil is toxic in concentrated form, so keep it away from curious pets and children.
Container Selection and Soil Preparation
Pot Size, Material, and Drainage Essentials
Mint roots spread horizontally, not vertically. Choose wide, shallow containers at least 12 inches across and 8-10 inches deep. Terra cotta breathes beautifully, preventing soggy roots, but dries out fast in dry winter air. Glazed ceramic or high-quality plastic retains moisture better. Whatever material you choose, drainage holes are non-negotiable. Drill extra holes if needed. Elevate pots on pot feet or a layer of pebbles in the saucer so water never wicks back up into the soil. This single detail prevents 90% of mint care for mudroom failures I’ve seen.
The Ideal Potting Mix Recipe
Standard bagged potting soil holds too much water for mint’s liking. Create your own blend: two parts quality potting soil, one part coarse perlite or pumice, one part composted bark fines or coconut coir. Add a handful of horticultural charcoal per gallon of mix to keep things sweet. This drains instantly yet holds enough moisture for consistent hydration. If mixing feels like too much work, look for cactus/succulent mix and amend it with 30% extra compost or worm castings for nutrients. Mint is a heavy feeder and will deplete poor soil within weeks.
Planting Techniques for Long-Term Success
Plant mint at the same depth it grew in its nursery pot. The crown, where stems meet roots, should sit just at soil level. Burying it deeper invites rot. Water thoroughly after planting until water runs freely from drainage holes. This settles the soil and eliminates air pockets. Top with a half-inch layer of fine gravel or decorative stones. This mulch reduces evaporation, prevents soil splash on leaves, and deters fungus gnats from laying eggs. Space multiple plants 8-10 inches apart in shared containers. They’ll fill in quickly.
Light Management Strategies for Every Season
Assessing Your Mudroom’s True Light Levels
Human eyes are terrible at judging light intensity. What looks “bright” to you might deliver only 200 foot-candles, while mint needs 1,000-2,000 for robust growth. Use a light meter app on your phone or invest in a $20 handheld meter. Measure at plant level at 9 AM, 1 PM, and 5 PM on a clear day. Note which spots hit the target range. South-facing windows often deliver too much intense afternoon sun in summer. East-facing provides gentle morning light ideal for mint. North-facing works only with supplemental lighting. West-facing gives strong afternoon heat that can scorch leaves.
Supplemental Lighting Made Simple
From November through February in northern latitudes, natural light falls short. LED grow lights solve this elegantly. Choose full-spectrum 4000K-5000K fixtures with adjustable arms. Position 12-18 inches above plant canopy. Run 14-16 hours daily on a timer. A 20-watt LED panel covers a 2×2 foot area perfectly. Modern LEDs use minimal electricity and produce negligible heat. Clip-on models attach to shelves without drilling. For a polished look, install under-cabinet LED strips on a shelf above your plants. The key is consistency. Plants respond to reliable photoperiods, not sporadic attention.
Rotating and Adjusting for Even Growth
Mint leans toward light sources with surprising speed. Rotate pots a quarter turn every three days to maintain symmetrical, bushy growth. If one side consistently receives more light, you’ll get lopsided plants with bare stems on the shaded side. During seasonal transitions, gradually move plants to brighter or dimmer spots over 7-10 days. Sudden light changes shock the plant, causing leaf drop. Watch for signs: pale, elongated stems mean too little light. Bleached or crispy leaf edges mean too much. Adjust accordingly and your mint will reward you with dense, flavorful foliage.
Watering Wisdom: The Make-or-Break Skill
Reading Soil Moisture Like a Pro
Forget calendar watering. Mint needs water when the top inch of soil feels dry, not on Tuesdays. Stick your finger in up to the first knuckle. Cool and damp? Wait. Dry and warm? Water. A moisture meter removes guesswork if you prefer gadgets. Aim for the “wrung-out sponge” consistency throughout the root zone. Water thoroughly until it streams from drainage holes, then empty the saucer within 30 minutes. Never let pots sit in standing water. This flushes accumulated salts and ensures even hydration. In winter, you might water every 7-10 days. Summer could mean every 2-3 days. Let the plant tell you.
Water Quality Matters More Than You Think
Tap water varies wildly. Hard water leaves mineral crusts on soil surfaces and eventually raises pH beyond mint’s preferred 6.0-7.0 range. Chlorine and chloramine harm beneficial soil microbes. If your water smells like a swimming pool, let it sit overnight in an open pitcher before using. Better yet, collect rainwater or use filtered water. Room temperature water prevents root shock. Cold water straight from the tap in January can stall growth for days. A watering can kept in the mudroom solves this automatically. It also lets you add liquid fertilizer at the right dilution without measuring each time.
Seasonal Watering Adjustments
Active growth in spring and summer demands frequent watering. Dormancy in winter means drastically reduced needs. But here’s the trap: indoor heating dries soil from below while the surface stays deceptively damp. Check deeper with a chopstick or moisture probe. Humidity trays help. Fill a tray larger than your pot with pebbles and water to just below the pebble tops. Set the pot on top. As water evaporates, it creates a humid microclimate without wetting roots. Group plants together for the same effect. Their collective transpiration raises local humidity naturally. This is especially valuable during heating season when indoor air turns desert-dry.
Feeding, Pruning, and Harvesting for Maximum Yield
Fertilization Schedule and Products
Mint in containers exhausts nutrients fast. Feed every two weeks during active growth (March-October) with half-strength balanced liquid fertilizer. Fish emulsion or seaweed extract provides micronutrients and growth hormones that synthetics lack. The smell dissipates in hours. Stop fertilizing entirely November-February. Residual salts build up without active growth to use them. Once a month, flush pots by watering heavily until water runs clear for several minutes. This prevents fertilizer burn. If leaves yellow between veins while veins stay green, that’s iron deficiency. Add chelated iron per package directions. Purple-tinged leaves often signal phosphorus shortage in cool soil.
Pruning for Shape and Vigor
Regular pruning isn’t optional. It’s the difference between a lush, productive plant and a woody, leggy mess. Pinch growing tips weekly once plants reach 6 inches tall. Cut just above a leaf node where you see tiny leaves emerging. This forces branching from that node, doubling your stem count each time. Remove any flowers immediately unless you want seeds. Flowering signals the plant to stop leaf production and reduces oil content in remaining leaves. In late winter, do a hard cutback to 2-3 inches above soil. This rejuvenates the plant and prevents the center from dying out. New growth emerges within weeks.
Harvesting Techniques That Keep Plants Producing
Harvest in the morning after dew dries but before heat stress. Essential oils peak at this time. Cut stems 1/3 down from the top, always above a node. Never strip more than 1/3 of the plant at once. For small amounts, pinch individual leaves from the top down. This encourages bushiness better than cutting whole stems. Wash gently and pat dry. Store in the refrigerator wrapped in a damp paper towel inside a plastic bag for up to a week. For longer storage, freeze leaves in ice cube trays with water or oil. Dry bundles upside down in a dark, airy spot for tea. Each method preserves different flavor compounds.
Troubleshooting Common Mudroom Mint Problems
Pest Identification and Organic Control
Spider mites love warm, dry mudrooms. Look for fine webbing on leaf undersides and stippled, bronze foliage. Blast with water weekly to disrupt them. Neem oil every 7-10 days breaks their lifecycle. Aphids cluster on new growth, leaving sticky honeydew. Squish by hand or spray with insecticidal soap. Whiteflies flutter up when disturbed. Yellow sticky traps catch adults. Fungus gnats indicate overwatering. Let soil dry more between waterings and apply mosquito bits (BTi) to soil. Inspect weekly with a magnifying glass. Early detection makes control easy. Quarantine new plants for two weeks before introducing them to your collection.
Disease Prevention and Treatment
Powdery mildew appears as white dust on leaves in humid, stagnant air. Improve circulation. Remove affected leaves. Spray with 1 tablespoon baking soda plus 1 teaspoon horticultural oil per gallon of water weekly. Rust shows as orange pustules on leaf undersides. Same treatment. Root rot from overwatering causes wilting despite wet soil. Unpot, trim black mushy roots, repot in fresh mix, and water sparingly until recovery. Mint is resilient. Most diseases resolve quickly if you correct the underlying cultural issue. Clean tools between plants with 70% alcohol to prevent spread.
Environmental Stress Signals
Curled leaves often mean underwatering or spider mites. Check both. Yellow lower leaves with green tops suggest nitrogen deficiency or natural aging. Feed if it’s the former. Brown crispy edges indicate low humidity, fertilizer burn, or heat stress. Increase humidity, flush soil, or move away from heat source. Leggy, pale growth screams insufficient light. Add grow lights or relocate. Reddish-purple leaves in winter are usually cold stress or phosphorus uptake issues in cool soil. Warm the root zone with a seedling heat mat on low. Plants communicate constantly. Learning their language makes mint care for mudroom success almost automatic.
Creative Display Ideas That Enhance Your Mudroom
Vertical Gardens for Floor Space Savings
Mudrooms often have more wall space than floor space. Mount a series of shallow rectangular planters at staggered heights. Plant different mint varieties in each for a living tapestry of textures and greens. Use a drip irrigation line with a timer for effortless watering. Or install a pocket planter system made from recycled felt. These hold surprising soil volume and look stunning when fully grown in. Ensure your mounting hardware hits studs. Wet soil is heavy. A 12-inch planter can weigh 15+ pounds saturated. Safety first.
Tiered Stands and Rolling Carts
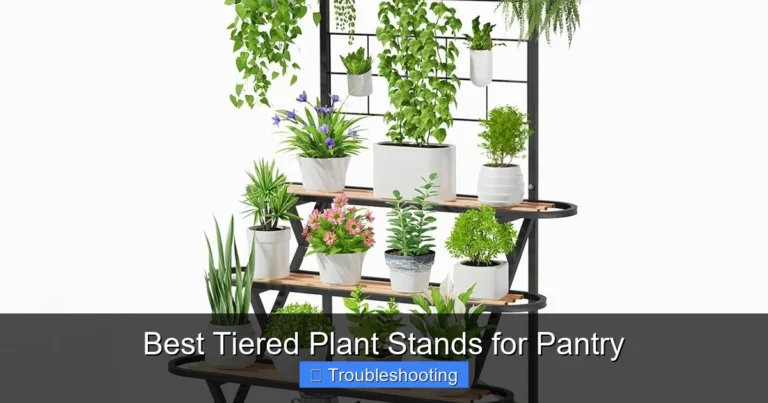
A three-tier plant stand turns a corner into a herb haven. Place sun-lovers on top, shade-tolerant varieties below. Rolling utility carts let you chase seasonal light. Wheel plants to the sunniest spot in winter, back to shade in summer. Locking casters prevent accidental rolls when the dog zooms past. Choose metal or sealed wood that handles moisture. Add grow lights to the underside of each shelf for consistent coverage. This mobile approach is perfect for renters who can’t install permanent fixtures.
Integrating with Existing Mudroom Systems
Tuck a mint pot into an open cubby beside boots. The slight warmth from footwear actually benefits roots in winter. Hang a macramé planter from a coat rack crossbar. Mint cascades beautifully. Build a narrow shelf above the bench at window height. Line with matching pots for a cohesive look. Use the top of a locker-style cabinet if it gets light. Just ensure whatever surface you use can handle occasional water drips. A silicone mat or waterproof tray protects finishes. The best mint care for mudroom setups feel like they’ve always been there, not like an afterthought.
Seasonal Care Calendar: A Year in Your Mudroom Mint Garden
Spring Awakening (March-May)
As days lengthen, mint explodes with new growth. Repot if roots circle the pot bottom or emerge from drainage holes. Divide congested plants. Share divisions with friends or start new pots. Begin biweekly fertilizing. Increase watering frequency. Watch for aphids on tender new shoots. This is prime time to take cuttings for propagation. Snip 4-inch stems, strip lower leaves, place in water. Roots appear in 7-10 days. Pot up for gifts or to expand your collection. Spring cuttings establish faster than any other season.
Summer Abundance (June-August)
Harvest heavily. The more you cut, the more you get. Process surplus into pesto, mint jelly, infused vinegars, or frozen cubes. Monitor for heat stress if mudroom temperatures climb. Move pots back from hot glass. Increase humidity with daily misting or pebble trays. Check daily for water needs. Spider mites thrive in hot, dry conditions. A strong weekly spray with the kitchen sprayer keeps them at bay. If you go on vacation, group pots in a bathtub with an inch of water. They’ll manage a week easily.
Autumn Transition (September-November)
Gradually reduce fertilizing. Stop by Halloween. Water less frequently as growth slows. Bring any outdoor mint pots inside before first frost. Inspect meticulously for hitchhiking pests. Quarantine two weeks. This is your last chance for major pruning before dormancy. Shape plants for winter aesthetics. Take a few final cuttings to root indoors. Clean up fallen leaves promptly to prevent fungal issues. Enjoy the last big harvests for holiday cooking and gifting.
Winter Rest (December-February)
Mint semi-dormancy is normal. Don’t panic over reduced growth or some leaf drop. Water only when soil is dry 2 inches down. No fertilizer. Provide 14-hour grow light days if natural light is minimal. Maintain 50-60°F if possible. Cooler temperatures prevent weak, leggy growth. Resist the urge to overwater. This is the season most mint care for mudroom efforts fail. Trust the process. Come March, your patience rewards you with vigorous fresh growth that makes the winter wait worthwhile.
Advanced Techniques for the Enthusiast
Hydroponic and Semi-Hydro Setups
LECA (lightweight expanded clay aggregate) eliminates soil pests and makes watering foolproof. Roots grow into the clay balls. A reservoir at the bottom wicks moisture up. You simply top off the reservoir when the water level drops. Nutrient solution replaces plain water. This method yields faster growth and cleaner leaves. No soil means no mess on mudroom floors. The initial setup costs more but pays off in consistency. Many commercial herb growers use this method for exactly these reasons.
Companion Planting in Shared Containers
Mint plays well with certain neighbors. Chives deter aphids. Thyme shares similar water needs and creeps politely around mint’s edges. Nasturtiums act as trap crops for pests and add edible flowers. Avoid planting mint with other aggressive spreaders like oregano or lemon balm in the same pot. They’ll wage underground war. In large troughs, create zones with root barriers (plastic edging buried vertically). This lets you grow a mini herb garden in one container while keeping each plant in its lane.
Propagation Mastery for Endless Plants
Beyond stem cuttings, try root cuttings in late winter. Dig up a mature plant. Cut 2-inch root sections thickness of a pencil. Lay horizontally on moist potting mix. Cover with 1/2 inch mix. Keep warm and moist. Shoots emerge in 2-3 weeks. This produces more vigorous plants than stem cuttings. Layering works too. Pin a low stem to soil in a adjacent pot with a U-shaped wire. Sever once rooted. Division during spring repotting is fastest. Each method has its season. Master all three and you’ll never buy mint again.
Conclusion: Your Mudroom Mint Journey Starts Today
There’s something deeply satisfying about brushing past fragrant mint leaves as you hang up your coat. That burst of aroma transforms a purely functional space into something that engages the senses. More practically, having fresh mint steps from your kitchen changes how you cook. You’ll find yourself adding leaves to water pitchers, tossing them into salads, muddling them into drinks, brewing impromptu tea. The convenience factor alone justifies the modest effort. But beyond utility, tending living things in the transitional space between outside and inside creates a small daily ritual of care. You notice the new unfurling leaf. You observe the light shifting with seasons. You respond to the plant’s needs. In return, it gives you flavor, fragrance, and a quiet connection to growing things.
The principles of mint care for mudroom success aren’t complicated. Right container. Good drainage. Appropriate light. Consistent moisture. Regular harvesting. Seasonal awareness. Pest vigilance. Each element supports the others. Miss one, and the system wobbles. Nail them all, and you create a resilient, productive little ecosystem that asks little and gives abundantly. Start with one pot. One variety. Learn its rhythms in your specific space. Then expand. The mint community is generous. Gardeners share cuttings, tips, and enthusiasm freely. Your mudroom herb garden might just become the neighborhood’s not-so-secret source for the best mojito mint around. That first harvest from your own plants? It tastes like victory. And it’s only the beginning.
Frequently Asked Questions
What size pot does mint need in a mudroom?
Mint needs a wide, shallow container at least 12 inches in diameter and 8-10 inches deep. The horizontal root system spreads laterally, so width matters more than depth. Ensure the pot has multiple drainage holes.
How much light does mint need in a mudroom setting?
Mint requires 4-6 hours of bright, indirect light daily. East-facing windows are ideal. South or west windows may need sheer curtains in summer. Supplement with LED grow lights (14-16 hours) from November through February in northern climates.
Why does my mint keep dying in the mudroom?
The most common causes are overwatering (especially in winter), poor drainage, insufficient light, or letting the plant flower without pruning. Check soil moisture before watering, ensure pots drain freely, and pinch back weekly to maintain bushy growth.
Can I grow mint year-round in my mudroom?
Yes, with proper care. Mint slows growth in winter but continues producing leaves if given adequate light (supplement with grow lights), consistent moisture, and temperatures above 50°F. Stop fertilizing November-February.
How do I prevent mint from taking over my mudroom?
Always grow mint in containers, never in ground beds. Use pots with saucers to contain roots. Prune runners that escape over pot edges. Divide and repot annually in spring to prevent root-binding and maintain vigor.
What’s the best way to harvest mint without killing the plant?
Cut stems 1/3 down from the top, just above a leaf node, in the morning. Never remove more than 1/3 of the plant at once. Regular harvesting actually stimulates bushier growth. Pinch off flower buds immediately to maintain leaf production.