Care for Coral Bells Plant
Coral bells (Heuchera) are stunning perennial foliage plants that thrive in partial shade with well-draining soil. Master the basics of watering, fertilizing, and seasonal maintenance to enjoy their colorful leaves and delicate blooms year after year.
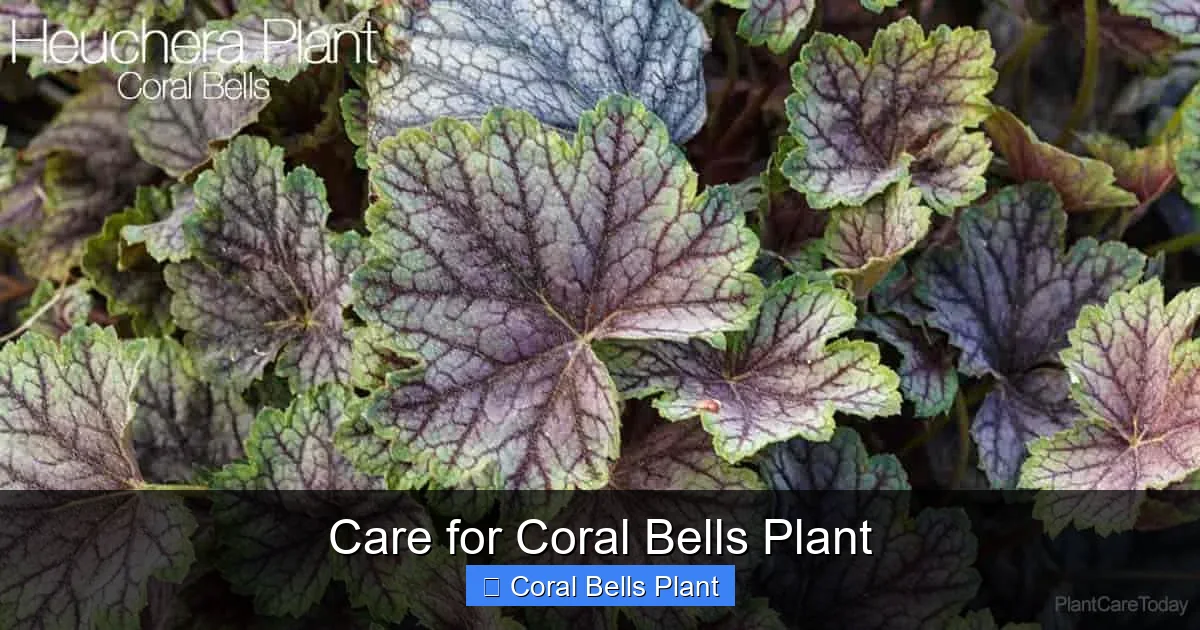
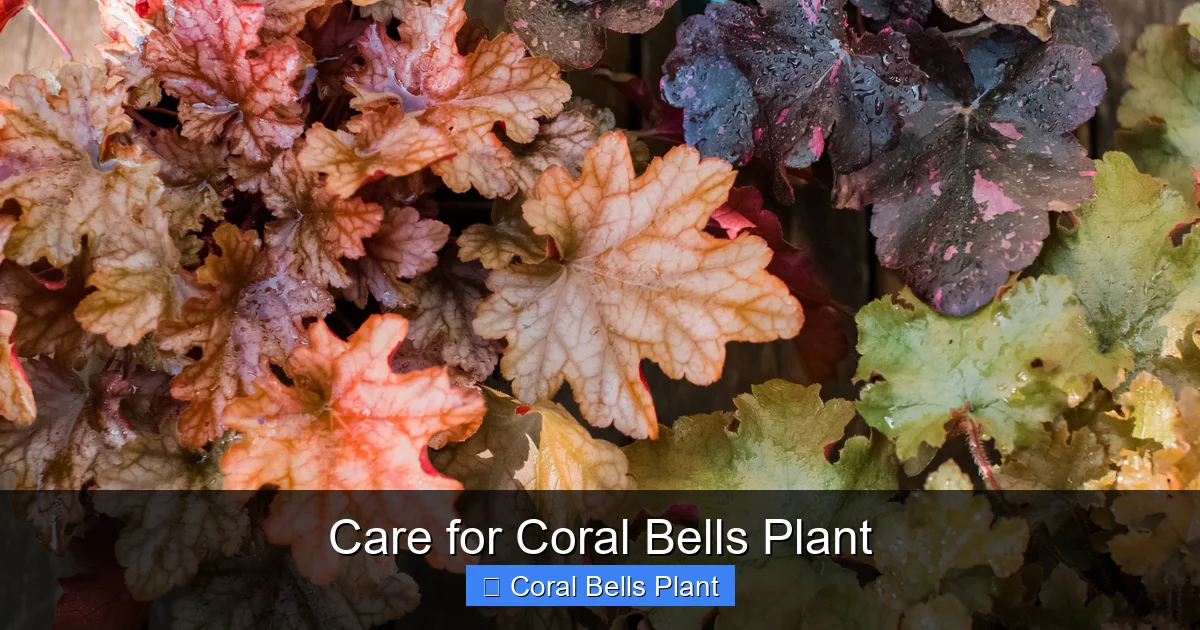
If you have ever walked through a shade garden and spotted those ruffled, jewel-toned leaves catching the dappled light, you have likely met the coral bells plant. Known botanically as Heuchera, these North American natives have become superstars in the perennial world. Their foliage comes in shades of lime green, deep purple, caramel, silver, and even near-black. Some varieties shift colors with the seasons. Others send up delicate bell-shaped flowers on wiry stems that hummingbirds adore.
Growing coral bells is not difficult, but they do have preferences. Treat them right, and they will reward you with year-round interest. Neglect their needs, and they may sulk, scorch, or simply disappear. This guide covers everything you need to know about coral bells plant care. From choosing the right spot to dividing mature clumps, we will walk through each step together. Think of this as a conversation over the garden fence. Let us dig in.
Key Takeaways
- Light Requirements: Coral bells prefer partial shade with 4-6 hours of morning sun; too much direct afternoon sun can scorch their colorful foliage.
- Soil Preferences: Plant in rich, well-draining soil with a slightly acidic to neutral pH (6.0-7.0); amend heavy clay with compost for better drainage.
- Watering Schedule: Keep soil consistently moist but not soggy; water deeply once or twice weekly, increasing frequency during hot, dry spells.
- Fertilizing Needs: Apply a balanced, slow-release fertilizer in early spring; avoid over-fertilizing which can reduce foliage color intensity.
- Division Timing: Divide mature clumps every 3-4 years in early spring or fall to maintain vigor and prevent center die-out.
- Winter Protection: Mulch around the base in late fall to prevent frost heaving; avoid covering the crown to prevent rot.
- Pest Management: Watch for vine weevils, foliar nematodes, and powdery mildew; practice good sanitation and proper spacing for air circulation.
Quick Answers to Common Questions
How much sun can coral bells tolerate?
Most coral bells prefer 4-6 hours of morning sun with afternoon shade. Dark-leaved varieties handle more sun than light-colored ones. In hot climates, afternoon shade is essential to prevent leaf scorch.
When is the best time to divide coral bells?
Early spring or early fall are ideal for dividing coral bells. Spring division allows roots to establish before summer heat. Fall division gives plants time to settle before winter. Divide every 3-4 years when centers become woody.
Why are my coral bells leaves turning brown and crispy?
Brown, crispy leaves usually indicate sun scorch or drought stress. Move plants to a shadier location or increase watering frequency. New plantings may need temporary shade while roots establish.
Do coral bells need to be cut back in fall?
No, do not cut back coral bells foliage in fall. The leaves protect the crown through winter. Remove only damaged leaves in early spring before new growth emerges.
Can coral bells grow in full shade?
Coral bells survive in full shade but become leggy with faded foliage color and reduced flowering. For deep shade, choose green-leaved varieties or Heucherella hybrids which tolerate lower light better.
📑 Table of Contents
- Understanding the Coral Bells Plant
- Choosing the Perfect Planting Location
- Planting Coral Bells Successfully
- Watering and Feeding Your Coral Bells
- Seasonal Maintenance Through the Year
- Common Pests and Diseases
- Designing with Coral Bells in the Garden
- Propagating Coral Bells
- Troubleshooting Common Problems
- Conclusion
Understanding the Coral Bells Plant
Before we talk about care, it helps to know what you are growing. Coral bells belong to the Saxifragaceae family. The genus Heuchera includes roughly 50 species native to North America. Most garden varieties are hybrids bred for foliage color, form, and heat tolerance. You will also see the name Heucherella. Those are crosses between Heuchera and Tiarella (foamflower). They share similar care needs.
These plants form low mounds of basal leaves. The leaves are lobed, often ruffled or veined, and grow on short petioles. In late spring to early summer, slender stems rise above the foliage. They bear tiny bell-shaped flowers in white, pink, or red. The blooms last for weeks and make charming cut flowers. But let us be honest. Most gardeners grow coral bells for the leaves. The flowers are a bonus.
Popular Coral Bells Varieties
There are dozens of named cultivars. New ones appear every year. Here are a few standouts that have proven themselves in gardens across many zones.
- ‘Palace Purple’: The classic that started the craze. Large, maple-like leaves in deep bronze-purple. Reliable and tough.
- ‘Caramel’: Warm gold-apricot leaves that hold color well in heat. Vigorous grower.
- ‘Obsidian’: Near-black, glossy leaves that keep their darkness all season. Striking contrast plant.
- ‘Lime Rickey’: Bright chartreuse foliage that lights up shade. Ruffled edges add texture.
- ‘Berry Smoothie’: Large rose-pink leaves with a metallic sheen. Color deepens in cooler weather.
- ‘Forever Purple’: Intense purple leaves with fluted edges. Holds color through summer heat.
- ‘Fire Alarm’: Bright red spring foliage matures to deep red. Compact habit.
When shopping, read the plant tag. Some varieties tolerate more sun. Others need deep shade. Some handle humidity better. Match the plant to your site for the best results.
Hardiness Zones and Climate Adaptability
Most coral bells are hardy in USDA zones 4 through 9. A few stretch to zone 3 with good snow cover. In hot, humid climates (zones 8-9), look for varieties bred for heat tolerance. ‘Caramel,’ ‘Citronelle,’ and ‘Southern Comfort’ are good choices. In the deep south, they may act as cool-season perennials. They flourish in fall, winter, and spring, then struggle in midsummer heat.
In cold climates, the main threat is not low temperatures. It is freeze-thaw cycles that heave the shallow crowns out of the ground. We will cover winter protection later. For now, know your zone and choose accordingly.
Choosing the Perfect Planting Location
Location is everything with coral bells. Get this right, and half your work is done. These plants evolved on woodland edges and rocky slopes. They want dappled light, good drainage, and air movement.
Visual guide about Care for Coral Bells Plant
Image source: i.pinimg.com
Light Requirements for Optimal Growth
The ideal spot offers morning sun and afternoon shade. Four to six hours of gentle morning light brings out the best foliage color. Too much direct sun, especially hot afternoon sun, bleaches or burns the leaves. Dark-leaved varieties like ‘Obsidian’ or ‘Palace Purple’ can handle more sun than chartreuse or silver types. In cooler northern climates, they may tolerate full sun if soil stays moist. In the south, afternoon shade is non-negotiable.
Deep shade is not ideal either. The plants will survive, but they become leggy. Colors fade to green. Flower production drops. If your only option is heavy shade, choose green-leaved varieties or Heucherella. They cope better with low light.
Soil Preparation and Requirements
Coral bells hate wet feet. Their crowns sit at soil level. If water pools around them, rot sets in fast. The perfect soil is rich, loose, and well-draining. A sandy loam amended with organic matter is ideal. The pH should be slightly acidic to neutral, around 6.0 to 7.0.
If you have heavy clay, do not just dig a hole and plant. That creates a bathtub effect. Water fills the hole and cannot escape. Instead, amend a wide area. Mix in compost, aged manure, or leaf mold. Aim for at least 50% native soil to 50% amendment. Raised beds work beautifully. So do berms or mounds. Elevate the planting area slightly to encourage drainage.
For sandy soils that drain too fast, add organic matter to hold moisture. Compost works wonders here too. It improves water retention and adds nutrients. A 2-3 inch layer worked into the top 8-10 inches of soil gives roots a great start.
Spacing and Air Circulation
Space plants 12 to 18 inches apart, depending on the mature size of the variety. Check the tag. Good air circulation prevents fungal diseases like powdery mildew and rust. Crowded plants stay damp longer after rain or watering. That invites trouble. If you are planting in groups, stagger them in a triangle pattern rather than a straight line. It looks more natural and improves airflow.
Planting Coral Bells Successfully
You have picked the spot. You have prepped the soil. Now it is time to plant. Spring and early fall are the best times. The soil is workable, and temperatures are mild. Roots can establish before summer heat or winter cold hits.
Step-by-Step Planting Guide
Follow these steps for a smooth planting day.
- Water the plant thoroughly in its pot an hour before planting. This reduces transplant shock.
- Dig a hole twice as wide as the root ball and just as deep.
- Gently remove the plant from its pot. Loosen any circling roots with your fingers.
- Place the plant in the hole. The crown (where stems meet roots) should sit at or slightly above soil level. This is critical. Planting too deep buries the crown and causes rot.
- Backfill with your amended soil. Firm it gently around the roots. Do not pack it hard.
- Water deeply to settle the soil and eliminate air pockets.
- Apply a 1-2 inch layer of mulch around the plant, keeping it away from the crown. Shredded bark, pine straw, or leaf mold all work well.
If you are planting multiple varieties, group them by water and light needs. It makes maintenance easier.
Container Planting Tips
Coral bells shine in containers. Their mounding habit and colorful foliage look great in pots, window boxes, and troughs. Choose a container at least 12 inches wide and deep. It must have drainage holes. Use a high-quality potting mix, not garden soil. Mix in some perlite or coarse sand for extra drainage.
Plant at the same depth as in the nursery pot. Water well. Container plants dry out faster than in-ground plants. Check daily in hot weather. Fertilize more often too. A diluted liquid fertilizer every 2-3 weeks during the growing season keeps them lush.
In cold zones, containers need winter protection. The roots are exposed to freezing air on all sides. Move pots to an unheated garage or shed. Or sink them into the ground up to the rim. Mulch heavily. Another option: treat them as annuals and replace each spring. Many gardeners do this with the showiest varieties.
Watering and Feeding Your Coral Bells
Water and fertilizer keep your coral bells looking their best. But more is not always better. These plants prefer consistency over extremes.
Watering Best Practices
The goal is evenly moist soil. Not soggy. Not bone dry. Stick your finger in the soil up to the second knuckle. If it feels dry at that depth, water. If it feels damp, wait. During the first growing season, water deeply once or twice a week. This encourages deep roots. After establishment, they are moderately drought-tolerant. But they look better with regular moisture.
Water at the base of the plant. Wet foliage invites fungal diseases. Soaker hoses or drip irrigation are ideal. If you must use a sprinkler, water early in the day so leaves dry before evening. In hot, dry spells, you may need to water every other day. In cool, cloudy weather, once a week may suffice. Mulch helps tremendously. It conserves moisture and keeps soil temperature stable.
Watch for signs of stress. Wilting in the heat of the day that recovers by evening is normal. Persistent wilting, crispy leaf edges, or dull color means the plant is too dry. Yellowing lower leaves, mushy stems, or a foul smell indicate overwatering or poor drainage.
Fertilizing Schedule and Types
Coral bells are light feeders. Too much nitrogen produces lush green growth at the expense of those brilliant colors. It also makes plants more susceptible to pests and diseases.
In early spring, as new growth emerges, apply a balanced, slow-release granular fertilizer. Something like a 10-10-10 or 14-14-14 works fine. Scatter it around the base of the plant, following package rates. Scratch it lightly into the soil surface. Water well. That is usually all they need for the year.
If your soil is poor, or if plants are in containers, you can supplement with a liquid fertilizer at half strength once a month through early summer. Stop fertilizing by mid-July. Late-season feeding encourages tender growth that will not harden off before winter.
Organic options include compost tea, fish emulsion, or a top-dressing of worm castings in spring. These feed slowly and improve soil health over time.
Seasonal Maintenance Through the Year
Coral bells are low-maintenance, not no-maintenance. A few timely tasks keep them tidy and vigorous.
Spring Care: Cleanup and Division
In early spring, before new growth pushes hard, remove any winter-damaged leaves. They will be brown, tattered, or flattened. Cut them off at the base with clean scissors or pruners. Be gentle. The crown is fragile. If the plant has heaved out of the ground (common in freeze-thaw cycles), gently press it back down. Add a little soil around the base if roots are exposed.
Spring is also the prime time to divide mature clumps. If the center of the plant looks woody, dead, or sparse, it is time. Division every 3-4 years rejuvenates the plant. Here is how:
- Dig up the entire clump with a garden fork. Go wide to avoid severing roots.
- Shake or wash off excess soil so you can see the structure.
- Pull or cut the clump into sections. Each division needs healthy roots and several growth points (little buds at the crown).
- Discard the woody, dead center.
- Replant divisions immediately at the same depth. Water well.
- Mulch lightly.
Divided plants may look a bit rough for a few weeks. They bounce back fast.
Summer Care: Deadheading and Monitoring
After flowering, you can remove the spent flower stems. Cut them down to the basal foliage. This tidies the plant and may encourage a light rebloom. Some gardeners leave the seed heads for winter interest or self-sowing. Seedlings rarely come true to the parent, but they can be fun surprises.
Summer is when pests and diseases show up. Check leaves weekly. Flip them over. Look for notches (vine weevils), yellowing between veins (nematodes), or white powdery coating (mildew). We will cover treatments in the pest section. Keep up with watering during dry spells. Mulch conserves moisture and suppresses weeds.
Fall Care: Preparing for Winter
Do not cut back the foliage in fall. The leaves protect the crown through winter. They also look beautiful with frost on them. In late fall, after the ground freezes (in cold zones) or in early winter (in mild zones), apply a loose mulch around the plants. Pine needles, straw, or shredded leaves work well. Do not use heavy, wet leaves that mat down. They hold moisture against the crown and cause rot.
Keep mulch away from the crown itself. A donut shape, not a volcano. The goal is to insulate the soil and prevent freeze-thaw heaving, not to bury the plant.
Winter Care: Minimal Intervention
In zones 6 and warmer, coral bells are often evergreen. They may look a bit ragged by March, but they hang on. In colder zones, they die back to the crown. Either way, leave them alone. Do not water unless you have an extreme winter drought (rare). Do not fertilize. Just let them rest.
If you have container plants in an unheated garage, check them monthly. The soil should not be bone dry. Water lightly if needed. Do not let them sit in water.
Common Pests and Diseases
Healthy, well-sited coral bells have few serious problems. But issues arise. Knowing what to look for helps you act fast.
Vine Weevils: The Nighttime Nibblers
Adult vine weevils are flightless beetles that feed at night. They notch the edges of leaves in a distinctive C-shape. The damage is cosmetic. The real threat is their larvae. White, C-shaped grubs live in the soil and eat roots. A heavy infestation can kill a plant.
Control starts with inspection. Check plants at night with a flashlight. Hand-pick adults and drop them in soapy water. For larvae, apply beneficial nematodes (Steinernema kraussei or Heterorhabditis bacteriophora) to moist soil in spring or fall. They parasitize the grubs. Chemical controls exist but harm beneficial insects. Use as a last resort.
Foliar Nematodes: Microscopic Trouble
These tiny roundworms live inside leaves. They cause angular yellow or brown patches bounded by leaf veins. The damage looks like a geometric mosaic. Infected leaves eventually die. There is no cure for the plant. Remove and destroy affected leaves. Do not compost them. Avoid overhead watering. Nematodes splash from plant to plant on water droplets. Space plants for good airflow. In severe cases, remove the entire plant.
Powdery Mildew: The White Coating
This fungal disease appears as a white, powdery film on leaves. It thrives in humid conditions with poor air circulation. It rarely kills but weakens the plant and ruins the look.
Prevention is best. Space plants properly. Water at the base. Choose resistant varieties. Many modern hybrids have good mildew resistance. If it appears, remove badly affected leaves. Spray with a homemade solution of 1 tablespoon baking soda, 1 teaspoon horticultural oil, and 1 gallon water. Or use a commercial fungicide labeled for powdery mildew on ornamentals. Neem oil works as both preventive and treatment.
Rust: Orange Pustules
Rust shows as orange-brown pustules on leaf undersides. Upper surfaces show yellow spots. It spreads in wet, humid weather. Remove infected leaves. Improve air circulation. Avoid overhead watering. Fungicides containing sulfur or copper can help if applied early.
Crown Rot: The Silent Killer
This is usually caused by soil-borne fungi (Phytophthora, Rhizoctonia) in poorly drained soil. The crown turns brown and mushy. Leaves yellow and collapse. The plant pulls out easily with no roots. There is no saving it. Prevention is everything. Plant in well-draining soil. Do not bury the crown. Do not overwater. Do not mulch over the crown.
Designing with Coral Bells in the Garden
Beyond care, let us talk about using these plants beautifully. Their foliage colors and textures make them design powerhouses.
Companion Planting Ideas
Coral bells play well with many shade-loving perennials. Their mounding habit contrasts nicely with vertical or spreading plants.
- Hostas: Large, smooth hosta leaves make a perfect backdrop for ruffled coral bells. Choose contrasting colors. Blue hosta with chartreuse coral bells. Gold hosta with purple coral bells.
- Ferns: The airy texture of ferns (Japanese painted fern, autumn fern, maidenhair) softens the bold coral bells foliage.
- Astilbe: Feathery plumes rise above the mounds in early summer. Similar moisture needs.
- Bleeding Heart (Dicentra): Arching stems and heart-shaped flowers complement the basal mounds.
- Lungwort (Pulmonaria): Silver-spotted leaves echo the silver in many coral bells varieties.
- Foamflower (Tiarella): A natural partner. Similar habit, different leaf shape.
- Spring Bulbs: Plant daffodils, grape hyacinths, or snowdrops among coral bells. The bulbs bloom early. Coral bells foliage hides the dying bulb leaves later.
Using Coral Bells in Different Garden Styles
These versatile plants fit many aesthetics.
- Woodland Garden: Mass them along paths or under deciduous trees. Mix varieties for a tapestry effect.
- Rock Garden: Tuck them into crevices or at the base of rocks. Their native habitat includes rocky slopes.
- Container Gardens: Use as the “filler” in thriller-filler-spiller designs. Pair with trailing ivy or creeping jenny and a tall grass or fern.
- Border Edging: Plant in a row along a shady walkway. The consistent mounds create a neat edge.
- Rain Garden: In the drier upper zones of a rain garden, they handle occasional wet feet better than many perennials.
- Pollinator Garden: The flowers attract hummingbirds, bees, and butterflies. Plant near a seating area to watch the show.
Color Combination Strategies
Think like a painter. Coral bells offer a palette.
- Monochromatic: Plant shades of one color. ‘Palace Purple,’ ‘Forever Purple,’ and ‘Berry Smoothie’ together create a deep, rich drift.
- Complementary: Pair opposites on the color wheel. Purple coral bells with chartreuse hostas or golden Japanese forest grass (Hakonechloa).
- Analogous: Blend neighbors. Caramel, amber, and peach varieties flow into each other.
- Silver Accents: Silver-leaved varieties (‘Silver Scrolls,’ ‘Appletini’) brighten dark corners and connect disparate colors.
Propagating Coral Bells
You can make more plants for free. Division is the easiest and most reliable method. We covered that in spring care. But there are other ways.
Seed Propagation
Coral bells produce tiny seeds in capsules after flowering. Collect them when the capsules turn brown and split. Sow fresh seed on the surface of moist seed-starting mix. Do not cover. They need light to germinate. Keep at 65-70°F. Germination takes 2-8 weeks. Seedlings are variable. They will not match the parent. But you might discover something wonderful. Species plants come truer than hybrids.
Leaf Cuttings
Some gardeners have success with leaf cuttings. Take a healthy leaf with a short piece of petiole (leaf stem). Dip the cut end in rooting hormone. Insert into moist perlite or sand. Cover with a plastic bag to maintain humidity. Place in bright, indirect light. Roots and a new plantlet may form at the base in 6-8 weeks. This works better with some varieties than others. It is fun to try but less reliable than division.
Tissue Culture
This is how nurseries produce the named varieties you buy. It requires a sterile lab. Not practical for home gardeners. But it is worth knowing that the plant you buy is a clone. Every ‘Caramel’ is genetically identical to the original selection. That consistency is why cultivars exist.
Troubleshooting Common Problems
Even with good care, things go wrong. Here is a quick diagnostic guide.
Leaves Turning Brown and Crispy
Usually sun scorch or drought stress. Move to a shadier spot or increase watering. If it is a new planting, the roots may not be established yet. Provide temporary shade with a shade cloth or lattice.
Leaves Yellowing, Plant Looks Weak
Could be overwatering, poor drainage, or crown rot starting. Check soil moisture. Dig gently around the crown. If it feels mushy, it is rot. If soil is soggy, improve drainage or move the plant.
Center of Plant Dead, Woody, or Hollow
Classic sign the plant needs division. The crown ages and dies out. Divide in spring or fall. Replant the vigorous outer sections.
Plant Heaved Out of Ground
Freeze-thaw cycles push the shallow crown up. Gently press back down in early spring. Mulch well next winter to prevent recurrence.
Foliage Color Faded or Green
Too much shade or too much fertilizer (especially nitrogen). Move to a brighter spot or cut back on feeding. Some varieties naturally green up in summer heat. They often re-color in fall.
No Flowers
Too much shade, too much nitrogen, or the plant is too young. Some varieties are shy bloomers. Others need a certain maturity. Patience.
Conclusion
Caring for coral bells plant is a rewarding journey. These perennials give so much—color, texture, flowers, winter interest—and ask for so little in return. Give them partial shade, well-draining soil, consistent moisture, and a little spring cleanup. Divide them every few years. Watch for pests. That is the recipe.
Remember that every garden is different. Your soil, your climate, your microclimates—they all matter. Observe your plants. They will tell you what they need. A crispy leaf says “too much sun.” A yellowing leaf says “check my roots.” A vibrant mound says “I am happy here.”
Start with one or two varieties. Learn their rhythms. Then expand. Mix colors. Play with combinations. Tuck them into containers. Line a path. Fill a woodland edge. However you use them, coral bells will become reliable friends in your garden. Friends that return each spring with fresh ruffles and fresh possibilities.
Now grab your trowel. Your shade garden is waiting.
Frequently Asked Questions
How often should I water coral bells?
Water coral bells deeply once or twice weekly to maintain consistently moist soil. Increase frequency during hot, dry periods. Check soil moisture by inserting your finger two inches deep; water when dry at that depth. Established plants tolerate brief drought but look best with regular moisture.
What kind of fertilizer is best for coral bells?
Apply a balanced, slow-release granular fertilizer (10-10-10 or 14-14-14) in early spring as new growth emerges. Avoid high-nitrogen fertilizers which reduce foliage color intensity. Container plants benefit from monthly diluted liquid fertilizer through early summer. Stop fertilizing by mid-July.
Are coral bells deer resistant?
Coral bells are generally deer resistant due to their fuzzy, astringent foliage. However, hungry deer may browse them, especially in early spring when other food is scarce. Young plants are most vulnerable. Use repellents or fencing in high-deer-pressure areas.
Why is the center of my coral bells plant dying?
A dead, woody, or hollow center indicates the plant needs division. This typically occurs every 3-4 years as the crown ages. Dig up the clump in spring or fall, discard the dead center, and replant vigorous outer sections with healthy roots and growth buds.
Can I grow coral bells indoors as houseplants?
Coral bells can grow indoors temporarily but prefer outdoor conditions. They need bright, indirect light, cool temperatures (60-65°F), high humidity, and excellent drainage. They often decline long-term indoors due to insufficient light and dry air. Better to enjoy them as garden perennials.
What causes holes in coral bells leaves?
Notched leaf edges are typically caused by adult vine weevils feeding at night. Irregular holes may be from slugs or caterpillars. Inspect plants at night with a flashlight to identify the culprit. Hand-pick pests or apply appropriate organic controls like beneficial nematodes for vine weevil larvae.