Planting Wild Ginger Seeds
Wild ginger (Asarum canadense) is a beautiful native groundcover that thrives in shady woodland gardens. Growing it from seed requires patience and a cold stratification period, but the reward is a lush, low-maintenance carpet of heart-shaped leaves. This guide walks you through every step from seed to established patch.
If you have a shady spot under trees where grass refuses to grow, wild ginger might be the answer you have been looking for. This charming native perennial forms a dense, weed-suppressing carpet of deep green, heart-shaped leaves. It asks for very little. It gives back a lot. But there is a catch. Planting wild ginger seeds is not a weekend project with instant results. It is a lesson in patience. It is a partnership with the seasons.
Unlike the spicy root you buy at the grocery store, this plant (Asarum canadense) is not a culinary ginger. It belongs to the birthwort family. It grows wild across eastern North America, from Canada down to the southeastern states. Indigenous peoples used the root for medicinal purposes and as a flavoring. Today, gardeners prize it for its ability to thrive in dry shade. That is a tough niche to fill. If you are ready to play the long game, let us walk through the process together. We will cover everything from mimicking winter in your fridge to celebrating the first tiny sprout.
Key Takeaways
- Cold stratification is mandatory: Wild ginger seeds need 60 to 90 days of cold, moist conditions to break dormancy before they will germinate.
- Shade is non-negotiable: This plant evolved on forest floors. It requires full to dappled shade and will scorch in direct afternoon sun.
- Soil must stay consistently moist: Rich, humus-heavy soil that retains moisture without becoming waterlogged is essential for survival.
- Germination is slow and erratic: Even after stratification, seeds may take weeks or months to sprout. Do not give up on the pot too early.
- Rhizomes spread faster than seeds: Once established, wild ginger spreads via underground rhizomes. Dividing mature clumps is quicker than starting new plants from seed.
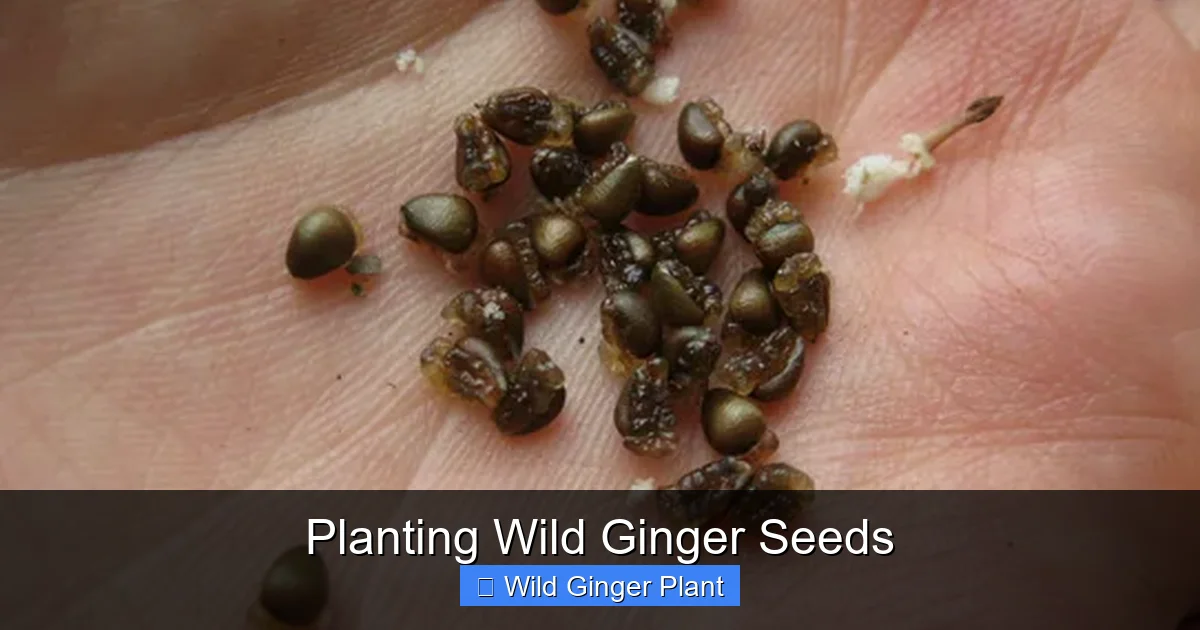
- Ants are your planting partners: Wild ginger seeds have an elaiosome (fatty appendage) that attracts ants, who disperse the seeds naturally in the wild.
- Deer and rabbit resistant: The aromatic foliage contains compounds that deter most browsing mammals, making it a great choice for unfenced woodland areas.
Quick Answers to Common Questions
How long does it take for wild ginger seeds to germinate?
After cold stratification, germination typically takes 30 to 90 days, but it can be sporadic and take up to 120 days. Patience is essential.
Can I plant wild ginger seeds directly in the ground in spring?
Only if you have already cold-stratified them in the refrigerator for 60 to 90 days. Fresh, unstratified seeds planted in spring will not germinate until the following year.
Does wild ginger need deep soil?
No, wild ginger has shallow, spreading rhizomes. It thrives in just a few inches of rich, organic humus over heavier subsoil, making it perfect for planting under trees where digging is difficult.
Is wild ginger invasive?
No, it is a native North American plant that spreads slowly via rhizomes to form a well-behaved clump. It does not spread aggressively by seed or runners into unwanted areas.
Can I grow wild ginger in a container?
Yes, use a wide, shallow pot with rich, moisture-retentive potting mix. Keep it in full shade and water frequently, as containers dry out much faster than ground soil.
📑 Table of Contents
- Getting to Know Wild Ginger Before You Plant
- Preparing the Perfect Site and Soil
- The Critical Step: Cold Stratification Demystified
- Sowing Seeds: Techniques for Success
- Nurturing Seedlings Through Their First Year
- Long-Term Care and Expanding Your Patch
- Troubleshooting Common Problems
- Conclusion: The Reward of Patience
Getting to Know Wild Ginger Before You Plant
What Exactly Is This Plant?
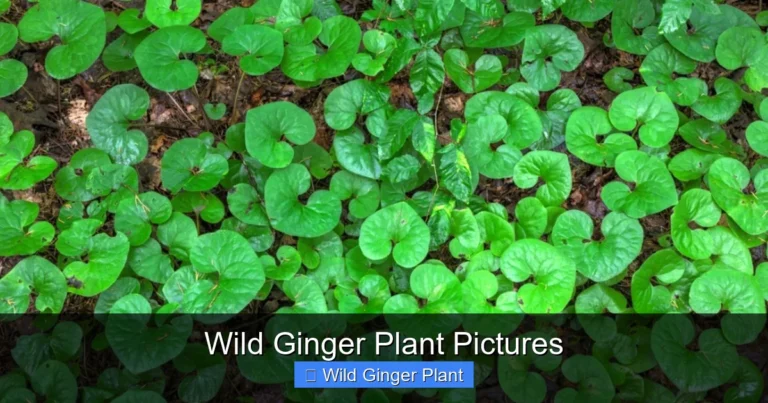
Wild ginger is a low-growing herbaceous perennial. It typically reaches six to twelve inches in height. The leaves are the main show. They are kidney-shaped or heart-shaped. They have a soft, almost velvety texture. They emerge in spring in pairs. They create a solid mat that smothers weeds effectively. The flowers are curious things. They hide at ground level, nestled between the leaf stems. They are bell-shaped. They are usually a deep burgundy or brownish-purple. They are pollinated by early spring flies and beetles, not bees. You often have to move the leaves aside to see them. It is a secret garden moment.
Why Grow It From Seed?
You might wonder why bother with seeds when you can buy potted plants or divide a friend’s patch. Buying plants is faster, yes. But seeds are economical. A single packet can yield dozens of plants for the price of one pot. Seeds also allow you to cover a large area gradually. There is a deeper satisfaction, too. You witness the full life cycle. You learn the rhythm of the plant. Plus, growing from seed preserves genetic diversity. Clonal divisions are genetic copies. Seed-grown plants have slight variations. This makes the population more resilient to disease and environmental shifts over time.
Understanding the Native Habitat
To succeed, mimic nature. Wild ginger grows in deciduous forests. It likes the base of slopes. It likes ravines. It likes rich, mesic woods. The soil there is built from centuries of fallen leaves. It is dark. It is spongy. It holds moisture but drains well. The light is dappled in spring. It is deep shade in summer. The air is humid. The ground rarely freezes solid because of the insulating leaf litter. Keep this picture in your mind. It dictates every choice you make. Site selection. Soil amendment. Watering schedule. Mulch type. It all comes back to the forest floor.
Preparing the Perfect Site and Soil
Choosing the Right Location
Walk your property at noon in July. Where is the shade deepest? That is your spot. Wild ginger needs full shade to part shade. Morning sun is okay if the soil stays moist. Afternoon sun is a death sentence. The leaves will crisp and burn. The plant will retreat. Look for areas under mature deciduous trees. Oaks, maples, hickories are ideal. Their roots run deep. They compete less for surface moisture than shallow-rooted maples or beeches. The north side of a building or a solid fence works too. Avoid the south or west side unless tall structures cast permanent shadows. Avoid low spots where cold air settles and frost lingers late. The emerging leaves are tender.
Visual guide about Planting Wild Ginger Seeds
Image source: getbusygardening.com
Building Forest Floor Soil
Your existing soil is likely not forest soil. It might be clay. It might be sandy. It might be compacted lawn. You need to transform it. The goal is high organic matter. Aim for fifty percent organic material by volume. Start by removing grass and weeds. Do not till deeply. Tree roots hate that. Instead, smother the area with cardboard or thick newspaper. Wet it down. Cover it with four to six inches of shredded leaves. Add compost. Add aged manure if you have it. Add a sprinkle of garden lime if your soil is very acidic (wild ginger prefers neutral to slightly acidic, pH 6.0 to 7.0). Let this sit for a few months if you can. If you are in a hurry, mix the amendments into the top four inches gently with a fork. Do not use peat moss. It repels water when dry. It is not sustainable. Leaf mold is the gold standard. Make your own by piling shredded leaves in a corner for a year. It is free. It is perfect.
Timing Your Planting Efforts
Nature drops seeds in late spring to early summer. The seeds sit on the soil. They go through summer heat. They go through winter cold. They sprout the following spring. You have two main windows for planting wild ginger seeds. Option one: Direct sow outdoors in late fall or early winter. Let nature do the stratification. Option two: Artificial stratification in the fridge, then sow indoors in late winter for spring transplanting. Option three: Direct sow outdoors in early spring after you have stratified the seeds in the fridge. Fall direct sowing is easiest. Spring transplanting gives you more control and higher survival rates for tiny seedlings. Choose based on your patience and your setup.
The Critical Step: Cold Stratification Demystified
Why Seeds Refuse to Wake Up
Wild ginger seeds have a double dormancy. They have a hard seed coat. They have an internal physiological block. In the wild, the seed coat softens over the warm, moist summer. The physiological block breaks during the cold, moist winter. Both must happen. If you plant fresh seeds in spring without treatment, they will likely just sit there. They might rot. They might wait two years. You are not failing. The seeds are just following their programming. You must simulate the seasons. You must provide warm moist, then cold moist. Or just cold moist if the seed coat is already permeable (often true for commercially cleaned seeds).
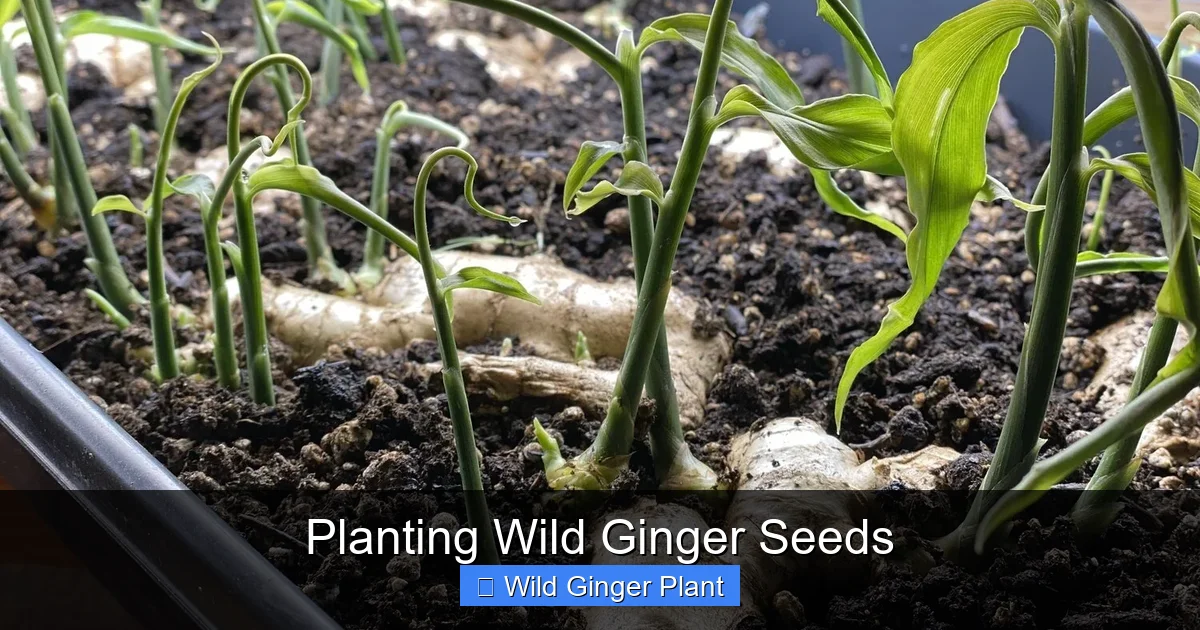
Visual guide about Planting Wild Ginger Seeds
Image source: images.squarespace-cdn.com
The Refrigerator Method: Step by Step
This is the most reliable method for home gardeners. You need a zip-top bag. You need a moist medium. Vermiculite is great. Fine sand works. Sphagnum moss works. Peat moss works but rewets poorly. Dampen the medium. It should feel like a wrung-out sponge. No dripping water. Place your seeds in the medium. Mix them in. Seal the bag. Label it with the date and species. Put it in the refrigerator. Not the freezer. The temperature should stay between 34 and 40 degrees Fahrenheit. Check it once a month. Ensure it stays moist. Watch for mold. If you see fuzzy white mold, spread the medium on a tray. Let it air dry slightly. Rinse seeds in a weak hydrogen peroxide solution (one part peroxide to ten parts water) if needed. Return to fresh medium. Stratify for 60 to 90 days. Ninety is better. Mark your calendar. Do not forget them.
Outdoor Stratification: The Lazy Gardener Way
If you have a cold frame or a protected shady bed, you can stratify outdoors. Sow seeds in pots or flats. Use a good seed starting mix. Cover with a thin layer of coarse sand or fine grit. This prevents washing away. Cover the pots with hardware cloth. This stops mice and squirrels. Mice love these seeds. Sink the pots into the ground up to their rims. Mulch around them with leaves. Snow cover is perfect insulation. Let winter happen. In spring, move pots to a bright shady spot. Keep moist. Watch for germination. This method follows the natural rhythm perfectly. It requires less fridge space. It requires trust in the weather.
Warm Stratification: Do You Need It?
Some sources say wild ginger needs warm stratification first (simulating summer). This means 60 to 90 days at 70 to 75 degrees Fahrenheit, moist, before the cold period. Freshly harvested seeds often need this. Commercially purchased seeds have often been stored dry. This may have satisfied the warm requirement or induced a deeper dormancy. It rarely hurts to do both. If you have time, do warm then cold. If you are starting in fall for spring germination, just do the cold period. The summer just passed was your warm stratification. If you are starting in January for spring planting, just do the cold period. Most home gardeners skip the warm step and still get germination. It might just be lower or slower.
Sowing Seeds: Techniques for Success
Indoor Sowing After Stratification
Your stratification period is done. It is late winter. February or March. Get your pots ready. Use deep pots. Four inches deep minimum. Wild ginger makes a long initial root. Use a sterile seed starting mix. Moisten it well. Fill pots. Tap to settle. Do not pack hard. Sow seeds on the surface. Space them about an inch apart. Do not bury them deep. They need light to germinate. Press them gently into the mix. Just good contact. Cover with a very thin layer of fine vermiculite or coarse sand. Just enough to hide them. This keeps them moist but lets light through. Label the pots. Water from the bottom. Set pots in a tray. Add water to the tray. Let it wick up. Remove when the surface is damp.
Creating a Mini Greenhouse
Humidity is key now. Cover the pots with a clear plastic dome. Or use a plastic bag propped up with sticks. Place in bright, indirect light. A north window is good. Under grow lights is better. Twelve to fourteen hours of light. Temperature should be cool. 60 to 65 degrees Fahrenheit is ideal. Warmer speeds germination but can cause weak, leggy growth. Cooler mimics the forest floor. Check daily. Vent the cover if you see heavy condensation. Wipe the lid. Water from the bottom only when the surface feels dry. Do not let them dry out. Do not let them sit in water. Patience. Germination can take two weeks. It can take three months. It is often sporadic. One seed sprouts. Three weeks later, another. Keep the faith. Keep the moisture.
Direct Sowing Outdoors in Spring
If you stratified in the fridge, you can sow directly into your prepared bed in early spring. As soon as the soil can be worked. Rake the surface smooth. Scatter seeds thinly. Aim for about one seed per square inch. Press them into the soil with a board or your hand. Do not cover with soil. Cover with a very light dusting of fine sand or screened leaf mold. Water gently with a fine rose can. Cover the bed with a layer of loose straw or pine needles. Just a whisper. This holds moisture. It hides seeds from birds. Remove the mulch gradually as seedlings emerge. Keep the bed constantly moist. This is harder outdoors. Wind dries the surface fast. Check morning and evening. A soaker hose on a timer is a lifesaver here.
Direct Sowing in Fall: The Natural Way
This is the simplest method. In late fall, after a few hard frosts but before the ground freezes solid, go to your prepared bed. Scatter seeds. Press them in. Cover with a thin layer of shredded leaves. That is it. Walk away. Winter does the work. Spring brings the babies. The downside? You cannot control moisture as well. You cannot protect from hungry mice as easily. You might lose track of where you sowed. Mark the area well. Use stakes with flags. Use a garden map. Germination rates are often lower than controlled indoor sowing. But the seedlings that survive are tough. They are acclimated from day one. They often outperform coddled transplants in the long run.
Nurturing Seedlings Through Their First Year
The Delicate Transplant Stage
If you started indoors, your seedlings have two true leaves. Maybe three. They are an inch tall. Roots are showing at the bottom of the pot. It is time to move them out. But not straight into the garden. Harden them off first. Place pots in a shady, sheltered spot outdoors. Two hours day one. Add an hour each day. Bring them in at night if frost threatens. After a week, they can stay out nights if no hard freeze. Keep them watered. They dry fast in small pots. Transplant on a cloudy day. Or late afternoon. Water the bed deeply the day before. Dig holes the size of the pot. Space plants twelve to eighteen inches apart. They will fill in. Gently pop the seedling out. Keep the root ball intact. Set it in the hole. The crown (where leaves meet roots) should be at soil level. Not buried. Not exposed. Firm soil gently. Water in well. Mulch with shredded leaves around, not over, the crown.
Watering: The Lifeline
First year seedlings have tiny root systems. They cannot reach deep moisture. The top inch of soil must never dry out completely. Check with your finger. Daily in hot weather. Every two days in cool. Water at the base. Keep leaves dry to prevent fungal spots. A soaker hose or drip irrigation is best. It saves water. It saves time. It keeps foliage dry. If you hand water, use a wand with a gentle shower head. Water until the soil is moist six inches down. Mulch is your best friend for moisture retention. Two inches of shredded leaves. Replenish as it breaks down. Do not use wood chips. They tie up nitrogen as they decompose. They can be too alkaline. Leaf mold feeds the soil as it holds water.
Feeding: Less Is More
Wild ginger grows in lean forest soil. It does not want heavy fertilizer. Too much nitrogen makes soft, weak growth. It invites slugs. It reduces the aromatic oils that deter deer. If you built your bed with good compost and leaf mold, you likely need zero fertilizer the first year. If growth looks pale or stunted by midsummer, apply a very light top-dressing of compost around the plants. Or use a half-strength organic liquid fertilizer once. Fish emulsion works. Seaweed extract works. Stop fertilizing by August. You want the plants to harden off for winter. Soft growth dies in cold.
Weeding Without Disturbing Roots
Weeds will appear. Your disturbed soil woke up weed seeds. Pull them young. Pull them when the soil is moist. They slide out easier. Disturb the ginger roots as little as possible. Wild ginger roots are shallow. They spread just under the surface. A hoe is dangerous. Hand pull only. If a weed is deep and stubborn, clip it at the soil line repeatedly. It will eventually starve. Once the ginger forms a solid mat (year two or three), it shades out most weeds itself. Your weeding job gets easier every year. This is the payoff.
Long-Term Care and Expanding Your Patch
The Waiting Game: Year One vs. Year Three
Year one is about survival. The plants are small. They might only have two or three leaves each. They are building roots. Do not panic. Year two, they double in size. They might flower. The flowers are easy to miss. Look down. Year three, the magic happens. The rhizomes start running. The patches merge. You see a continuous carpet. Weeds vanish. The ground stays cool and moist. This is the groundcover you dreamed of. It only gets better. A happy patch can live for decades. It slowly expands outward. The center might thin out after many years. That is normal. It is a ring of life.
Dividing Mature Clumps
This is how you get more plants fast. Do it in early spring. Just as the noses of new growth appear. Or early fall, four weeks before ground freeze. Dig up a clump. Use a sharp spade or knife. Cut it into sections. Each section needs a piece of rhizome with roots and at least one growing point (a bud or leaf shoot). Replant immediately at the same depth. Water well. Mulch. The divisions establish quickly. They often flower the same year. This is the best way to fill a large area. Do it every three to five years to rejuvenate the center of old patches.
Managing Pests and Diseases
Good news. Wild ginger has few enemies. Slugs and snails sometimes nibble young leaves. Beer traps work. Diatomaceous earth works. Copper tape works. Hand picking at night works. Fungal leaf spots can happen in very wet, stagnant air. Ensure good air circulation. Do not crowd plants. Water the soil, not the leaves. Remove badly spotted leaves. Do not compost them. Burn or trash. Root rot happens in soggy, poorly drained soil. That is on you. Fix the drainage. Deer and rabbits ignore it. The leaves contain aristolochic acid and other compounds. They taste bad. They might be toxic in large quantities. Do not eat the plant yourself. It is not culinary ginger. Enjoy it with your eyes.
Companion Planting for a Woodland Garden
Wild ginger plays well with others. It is the perfect living mulch under taller shade plants. Pair it with ferns. Christmas fern. Maidenhair fern. Lady fern. Their textures contrast beautifully. Add spring ephemerals. Virginia bluebells. Trilliums. Bloodroot. They bloom early. The ginger hides their dying foliage later. Add native sedges. Carex plantaginea (plantain-leaved sedge) has broad, puckered leaves. It looks great with ginger. Add foamflower (Tiarella). Add wild geranium (Geranium maculatum). Add Solomon’s seal. The ginger knits it all together at ground level. It creates that seamless, layered forest look.
Troubleshooting Common Problems
Seeds Never Germinated
First, check your dates. Has it been less than 90 days since sowing post-stratification? Wait longer. Some seeds take 120 days. Second, check moisture. Did the medium dry out completely at any point? That kills the embryo. Third, check temperature. Was it too warm? Above 70 degrees can induce secondary dormancy. Was it too cold? Freezing damages moist seeds. Fourth, seed viability. Wild ginger seeds lose viability fast if stored dry and warm. Buy from reputable native plant nurseries. Ask when they were harvested. Current year is best. Do your own float test. Put seeds in water. Sinkers are usually viable. Floaters are often empty. But some viable seeds float due to the elaiosome. Remove the fatty appendage before testing.
Seedlings Damping Off
They sprout. They look good. Then they pinch at the soil line. They fall over. Dead. This is damping off. A fungal disease. It loves wet, still, warm conditions. Prevention is the only cure. Use sterile mix. Do not reuse old potting soil. Provide air movement. A small fan on low, not blowing directly on them. Water from the bottom. Do not overwater. Let the surface dry slightly between waterings. Thin crowded seedlings. If you see it, remove affected plants immediately. Sprinkle cinnamon on the soil surface. It is a natural fungicide. Chamomile tea spray helps too. But usually, by the time you see it, it is too late for those babies. Start over. Clean pots. Fresh mix.
Leaves Yellowing or Burning
Yellow leaves usually mean too much sun. Or too little water. Or nutrient deficiency (rare if soil is good). Move the plant if it gets direct sun. Water more consistently. Burned, crispy edges mean too much sun or wind. Or salt buildup from fertilizer. Flush the soil with lots of water. Stop fertilizing. If it is a new transplant, it might be transplant shock. Keep it shaded. Keep it moist. It often recovers. If the whole patch yellows in midsummer, it might be going dormant early due to drought. Water deeply. It will return next spring.
Patch Not Spreading
It has been three years. The plants are healthy but solitary. They are not running. Check the soil. Is it compacted? Rhizomes cannot push through hardpan. Aerate gently with a fork around the clumps. Top dress with compost and leaf mold. Check moisture. Is it too dry? Rhizomes run in moist soil. Check light. Is it too dark? Deep, dark evergreen shade slows growth. Deciduous shade is best. Spring sun fuels the root growth. Check competition. Are tree roots stealing all the water? You might need to water more. Or create a raised bed with imported soil above the tree roots. Do not pile soil on tree trunks. Keep it six inches back.
Conclusion: The Reward of Patience
You started with a pinch of seeds. You simulated winter in a baggie in your fridge. You watched pots of dirt for months. You celebrated the first crooked stem. You coddled seedlings through their first summer. You pulled weeds on your knees. And now? Now you have a piece of the forest floor in your yard. A living carpet that asks for nothing but shade and moisture. It suppresses weeds. It holds the soil on slopes. It feeds native insects. It connects your garden to the wider ecosystem. Planting wild ginger seeds is an act of faith. It is slow gardening in a fast world. But the result is permanent. It is beautiful. It is yours. Next spring, when the heart-shaped leaves unfurl fresh and green, you will know. It was worth every day of waiting. Go make some shade.
Frequently Asked Questions
What is the difference between wild ginger and culinary ginger?
They are completely unrelated plants. Culinary ginger (Zingiber officinale) is a tropical plant grown for its rhizome. Wild ginger (Asarum canadense) is a temperate woodland native grown as an ornamental groundcover. Wild ginger root is not used for cooking and contains compounds that can be toxic in large quantities.
Do I need to remove the fleshy appendage (elaiosome) from the seeds before planting?
No, you do not need to remove it. In nature, ants eat this fatty structure and disperse the seed. It does not inhibit germination. Leaving it on mimics natural conditions, though removing it makes seeds easier to handle and space evenly.
Why are my wild ginger seedlings growing so slowly?
Slow growth is normal for the first year. The plant invests almost all energy into root and rhizome development. Top growth remains minimal. Ensure consistent moisture, deep shade, and a mulch of shredded leaves. Growth accelerates significantly in years two and three.
When is the best time to divide established wild ginger plants?
Early spring, just as new growth emerges, is the ideal time. Early fall (September in most zones) is the second-best window. Divisions need 4 to 6 weeks of mild weather to establish roots before extreme heat or frozen ground.
Will wild ginger grow under pine trees?
It can, but it prefers the neutral to slightly acidic soil under deciduous trees. Pine needles create more acidic conditions and shed less nutrient-rich humus. If planting under pines, amend heavily with compost and leaf mold, and monitor soil pH, adding lime if it drops below 5.5.
Are wild ginger flowers showy?
No, the flowers are small, jug-shaped, and burgundy-brown. They bloom at ground level, hidden beneath the foliage. They are fascinating botanically—pollinated by flies and beetles—but they are not grown for floral display. The foliage is the primary ornamental feature.