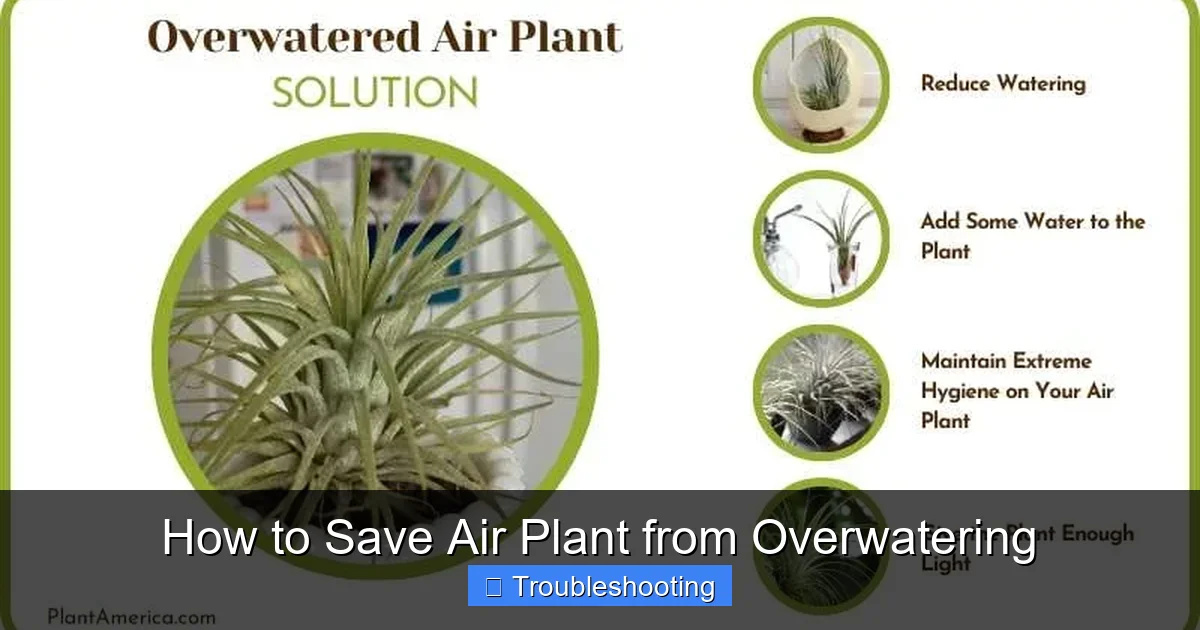
How to Save Air Plant from Overwatering
Overwatering is the number one killer of air plants, but quick action can save them. Learn to spot mushy bases, brown tips, and rot early, then follow our proven drying and recovery steps. With proper airflow, adjusted watering schedules, and a little patience, your tillandsia can bounce back stronger than ever.
You bought that gorgeous air plant. You loved it. You misted it every morning. You soaked it every weekend. You basically drowned it with kindness. Now the base feels squishy, the leaves are turning brown, and you are googling frantically at midnight wondering if you just killed your tillandsia. Take a breath. You are not alone. Overwatering is the single most common way people lose air plants, and the good news is — if you catch it early enough, you can absolutely save it.
Air plants, or tillandsias, are not like your pothos or your snake plant. They do not live in soil. They pull moisture and nutrients through tiny scales on their leaves called trichomes. Their roots are just for anchoring. When water sits trapped in the base or between leaves, rot moves in fast. Fungus and bacteria love that damp, dark environment. But here is the thing — air plants are surprisingly resilient. They want to live. They evolved to survive drought, scorching sun, and months without rain. What they did not evolve for is a well-meaning human with a spray bottle and a heavy hand. This guide walks you through every step of the rescue process, from spotting the very first warning signs to nursing your plant back to full health and making sure it never happens again.
Key Takeaways
- Act fast when you see signs: Mushy bases, dark spots, and falling leaves mean rot has started — immediate drying is critical.
- Remove all moisture completely: Shake excess water, pat dry with paper towels, and place upside down in bright, airy spots for hours.
- Cut away rotted tissue: Use sterilized scissors to trim black or brown mushy parts — this stops spread and saves healthy tissue.
- Adjust your watering method: Switch from soaking to misting or quick dunks, and always dry within 4 hours after watering.
- Improve airflow permanently: Use fans, open windows, or hanging displays to keep air moving around leaves and bases.
- Watch for recovery signs: New green growth, firm leaves, and pups appearing mean your rescue worked — celebrate the win.
- Prevent future overwatering: Set a schedule, check humidity, and remember — when in doubt, underwater rather than overwater.
Quick Answers to Common Questions
How do I know if my air plant is overwatered or underwatered?
Overwatered plants feel soft and mushy at the base with dark, wet-looking rot. Underwatered plants feel stiff with crispy brown leaf tips and exaggerated curling. Check the base — firm means thirsty, squishy means drowning.
Can an air plant recover from severe rot?
Yes, if any firm green tissue remains in the center. Remove all rotted parts, treat cuts with cinnamon, dry thoroughly with fan airflow, and withhold water for 5-7 days. Recovery takes weeks but is possible.
Should I cut off brown tips on my air plant?
Only if the brown is mushy — that is rot. Cut back to healthy tissue with sterilized scissors. If brown tips are dry and crispy, leave them. They are just cosmetic and trimming damages more trichomes.
How often should I water my air plant after saving it from overwatering?
Start with one quick dunk, dry fully in 4 hours with fan, wait 3 days. If stable, repeat. Build slowly to every 4-5 days in average conditions. Always adjust for your humidity — less in bathrooms, more near heaters.
Can I save an air plant that is glued to decor and rotting?
Try warming the glue with a hair dryer on low to gently free the plant. If impossible, maximize airflow with a fan 24/7, stop all watering, trim visible rot, and dust cuts with cinnamon. Some survive; many don’t — which is why glue mounts are discouraged.
📑 Table of Contents
- Understanding Why Air Plants Rot So Easily
- Spotting the Early Warning Signs of Overwatering
- Emergency Rescue Steps — What to Do Right Now
- Adjusting Your Watering Routine for Long-Term Health
- Special Situations — Mounted, Terrarium, and Glued Plants
- Signs of Recovery and When to Resume Normal Care
- Common Mistakes That Lead to Repeat Overwatering
- When to Accept Loss and What to Learn
Understanding Why Air Plants Rot So Easily
The Unique Anatomy of Tillandsia
To save your air plant from overwatering, you first need to understand how it works. Air plants belong to the bromeliad family. They are epiphytes, which means they grow on other plants, rocks, or even telephone wires — never in soil. Their roots serve one purpose: attachment. They grip bark or stone to stay put. All water and nutrient absorption happens through the leaves.
Those fuzzy, silvery patches you see on the leaves? Those are trichomes. They look like tiny cups or scales under a microscope. When humidity rises or water lands on the leaf, trichomes open up and drink. When the air is dry, they close to lock moisture in. This is brilliant design for survival in the wild. But in your living room, it creates a trap. Water gets caught in the cup-shaped base where leaves meet. It sits there. Trichomes stay open. The plant keeps drinking. Cells swell and burst. Rot-causing fungi wake up and feast.
Why Overwatering Happens to Good Plant Parents
Nobody overwaters on purpose. It usually comes from one of three places. First, treating air plants like regular houseplants. You water your monstera twice a week, so you figure your tillandsia needs the same. It does not. Second, following generic advice without adjusting for your environment. “Soak for 30 minutes once a week” works in Arizona. In Florida? That is a death sentence. Third, loving them too visibly. Misting every morning feels like care. It is actually waterboarding.
Humidity changes everything. A bathroom with daily showers might need zero supplemental watering. A heated apartment in January might need two soaks a week. The same plant in two different rooms can have totally different needs. Most care guides give one-size-fits-all schedules. Real life does not work that way. Learning to read your plant — not the calendar — is the real skill.
Spotting the Early Warning Signs of Overwatering
Visual Clues You Can See
The sooner you catch trouble, the easier the fix. Check your plants every time you water. Make it a habit. Look at the base first. A healthy base feels firm and looks pale green or silvery. An overwatered base turns dark green, then brown, then black. It may look translucent or waterlogged. You might see dark spots spreading upward from the center.
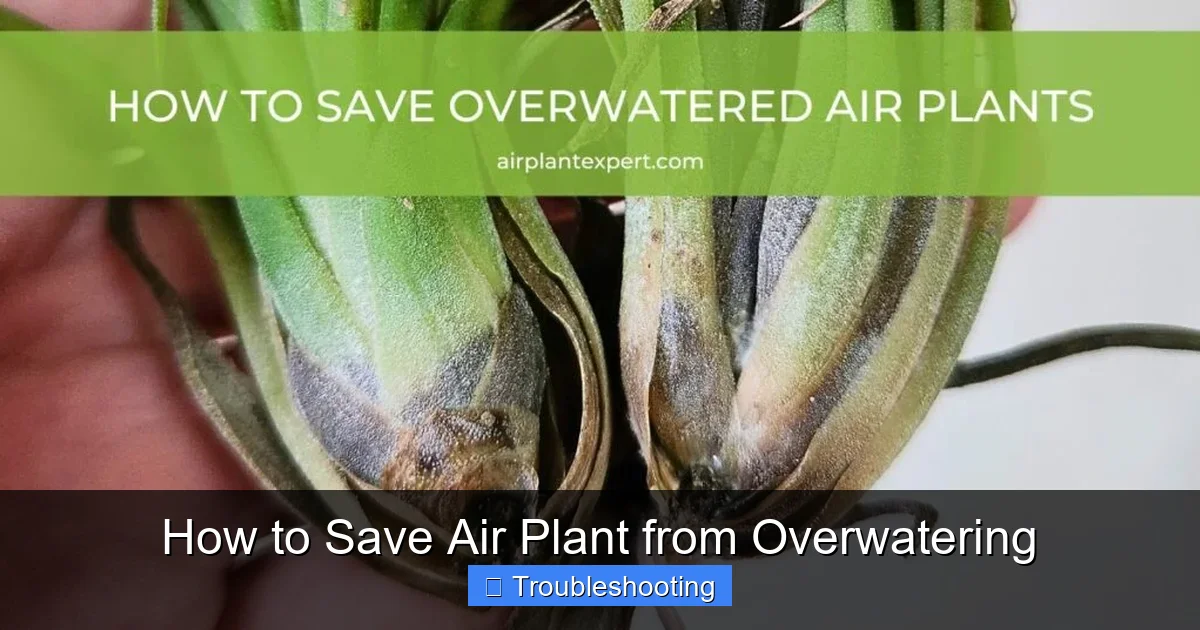
Visual guide about How to Save Air Plant from Overwatering
Image source: airplantexpert.com
Leaves tell stories too. Healthy leaves are stiff and slightly curved. Overwatered leaves feel soft, almost rubbery. They may develop brown tips that feel mushy, not crispy. Crispy brown tips usually mean underwatering or low humidity. Mushy brown tips mean rot. The difference matters. Leaves might also start falling off with the slightest tug. That is a bad sign — the connective tissue has rotted through.
Color changes can be subtle at first. The vibrant silver-green fades to a dull, dark green. The plant looks “full” but in a swollen, tense way. Some varieties naturally blush red or pink before blooming. That is different — it starts at leaf tips and looks intentional. Rot looks messy, uneven, and spreads from the center out.
Tactile Signs You Can Feel
Touch teaches you more than eyes alone. Gently squeeze the base between thumb and forefinger. A healthy air plant has a slight give, like a firm grape. An overwatered one feels like a water balloon — squishy, yielding, maybe even leaking. Run a finger along the inner leaf surfaces near the base. If it feels slimy or slippery, bacteria are already colonizing.
Pick up the plant. Shake it gently. Water should not pour out. If it does, the plant is holding way too much moisture inside. Smell the base. Healthy tillandsias smell faintly green or like nothing at all. Rotting ones smell musty, swampy, or faintly sweet in a bad way. Trust your nose. It catches rot before your eyes do.
The Difference Between Rot and Natural Aging
Not every brown leaf is a crisis. Air plants naturally shed older leaves as they grow. These bottom leaves turn brown, dry, and papery. They crumble when touched. That is normal. Rot looks wet, dark, and spreads. Natural aging looks dry, light, and stays isolated to the oldest leaves.
Bloom spikes can also confuse people. When a tillandsia flowers, the mother plant slowly dies after producing pups. The center may brown and soften as energy shifts to babies. This takes months. Rot takes days. If you are unsure, compare photos from a week ago. Rapid change means trouble. Slow change means life cycle.
Emergency Rescue Steps — What to Do Right Now
Step One: Remove All Excess Moisture Immediately
Stop everything. Take the plant out of its display, terrarium, holder, or glue mount. If it is glued, you may need to carefully work it free — more on that later. Hold the plant upside down. Give it a few firm, sharp shakes. Not gentle taps. Real shakes. Centrifugal force pulls water out of the base cups where towels cannot reach. Do this over a sink or towel.
Next, grab paper towels or a clean cotton cloth. Pat every surface dry. Get into the leaf axils — those tight spaces where leaves meet the stem. Roll a corner of the towel into a point and dab deep. Do not rub. Rubbing damages trichomes. Just press and lift. Press and lift. Change towels as they get damp. You want the plant bone dry to the touch.
Step Two: Create Maximum Airflow
Airflow is the single most powerful drying tool you have. Place the plant upside down on a wire rack, mesh tray, or even a cooling rack from your kitchen. Point a fan at it on low or medium. Not high — you don’t want to dehydrate the leaves, just evaporate trapped water. If you have no fan, put it near an open window with a cross breeze. Outdoors in bright shade works beautifully if temperatures are above 50°F.
Leave it there for at least four hours. Six is better. Eight if the base felt very wet. Rotate the plant every hour so different angles get airflow. You are not just drying the surface. You are pulling moisture out of the inner leaf tissue through the trichomes. This takes time. Do not rush it.
Step Three: Assess and Trim Rotted Tissue
Once the plant is fully dry, examine it in bright light. Look for any black, dark brown, or mushy areas. These will not recover. They will only spread. You must cut them away. Use small, sharp scissors — cuticle scissors or bonsai snips work great. Sterilize them first with rubbing alcohol or a flame. Cut back to healthy, firm, green tissue. Make clean cuts. Jagged tears invite more infection.
If the rot is only in the very center of the base, you may need to peel away the innermost leaves one by one until you reach clean tissue. This feels brutal. It is necessary. Each rotted leaf you leave is a bridge for fungus to cross. If the entire base is black and mushy, the plant is likely too far gone. But if you find firm green tissue anywhere, keep going. Air plants can regrow from surprisingly little.
Step Four: Apply Cinnamon or Hydrogen Peroxide (Optional but Helpful)
After trimming, you have open wounds. In nature, the plant would seal these slowly. You can help. Ground cinnamon is a natural antifungal. Dust a tiny amount on cut surfaces using a small brush or cotton swab. Do not cake it on. A light dusting is enough. Alternatively, mix one part 3% hydrogen peroxide with four parts water. Dab this on cuts with a cotton swab. It oxygenates the tissue and kills surface pathogens. Let it dry completely before the next step.
Skip commercial fungicides. Most are too harsh for trichomes. Skip sealing cuts with wax or glue. The plant needs to breathe. Cinnamon and peroxide are gentle, cheap, and effective. Many collectors swear by them. Science backs the antimicrobial properties. Your call.
Step Five: The Recovery Environment
Now your plant needs a safe place to heal. Bright, indirect light. Good airflow. No water for at least three days — five if the rot was severe. Place it on a mesh rack or hang it upside down. Do not put it back in a terrarium, glass globe, or against a wall. It needs 360-degree air movement.
Temperature matters. 65-85°F is ideal. Below 60°F slows metabolism and drying. Above 90°F stresses the plant. Humidity should be moderate — 40-60%. If your home is very dry, you can mist once lightly after day three, but dry within two hours. If your home is humid, skip misting entirely. Let the plant tell you when it is ready. Firm leaves, upright posture, and a perky appearance mean it is stabilizing.
Adjusting Your Watering Routine for Long-Term Health
Soaking vs. Misting vs. Dunking — Which Is Right for You
There are three main ways to water air plants. Soaking means submerging the whole plant in water for 20-60 minutes. Misting means spraying until dripping wet. Dunking means quick submersions — dip, pull out, shake, repeat three to five times. Each has a place. Your job is matching method to environment.
Soaking delivers the most water. Use it for xeric (desert) varieties with thick, fuzzy leaves in dry climates. Skip it for mesic (tropical) varieties with smooth, green leaves in humid homes. Misting delivers the least water but highest frequency. It works for mounted plants you cannot remove, or for daily humidity boosts in dry air. But misting alone rarely hydrates deeply enough. Dunking is the sweet spot for most people. Quick, thorough, controllable. You decide how many dips. You shake immediately. You dry fast.
How to Build a Custom Schedule
Forget the calendar. Build a schedule around three variables: your climate, your variety, and your display method. Start with this baseline: dunk two to three times per week in average home conditions (65-75°F, 40-50% humidity). Adjust up for heat, low humidity, xeric varieties, or open mounting. Adjust down for cool temps, high humidity, mesic varieties, or enclosed displays.
Test by weighing your plant. Literally. Use a kitchen scale. Weigh it fully dry. Weigh it fully hydrated. The difference is its water capacity. After a few cycles, you will know by heft alone when it needs water. A dry tillandsia feels startlingly light. A hydrated one has heft. This skill beats any schedule.
The Golden Rule: Dry Within Four Hours
This is non-negotiable. However you water, the plant must be completely dry within four hours. Not “mostly dry.” Bone dry. Base dry. Leaf axils dry. If you cannot guarantee this, water less often or use a different method. Night watering is a common trap. You soak before bed. Plant sits wet all night. Rot starts in the dark. Always water in the morning. Always. This gives the full day for drying.
If you live somewhere humid where four-hour drying is impossible, change your method. Switch from soaking to dunking. Reduce frequency. Add a fan. Move the plant to the driest, airiest spot you have. Some people in Florida or Hawaii only water their air plants once every two weeks because ambient humidity does the job. There is no shame in watering less. There is only shame in rotting your plants.
Special Situations — Mounted, Terrarium, and Glued Plants
Rescuing a Glued Air Plant
This is the nightmare scenario. Your tillandsia is hot-glued to driftwood, a shell, or a decorative rock. You cannot remove it for proper drying. You cannot shake it upside down. You cannot see the base. But you can still save it.
First, stop watering entirely. Let the mount dry completely. Use a hair dryer on cool setting to blow air into the base. Hold it there for five minutes. Do this twice daily. If you can see any rotted leaf tips, trim them with tiny scissors. Apply cinnamon to cuts with a fine brush. Point a small fan directly at the plant 24/7 until stable.
If the rot is at the glue line — where plant meets mount — you have a harder choice. You can try to gently wiggle the plant free. Warm the glue with a hair dryer on low heat to soften it. Pull slowly. If it releases, treat as a free plant. If it does not, you are in triage mode. Maximize airflow. Minimize water. Pray. Some make it. Some don’t. This is why experienced growers never glue air plants. Wire, fishing line, or non-waterproof adhesive only.
Terrarium and Globe Rescues
Glass enclosures are humidity traps. They look beautiful. They kill air plants. If your plant is in a terrarium or hanging globe and showing rot signs, get it out immediately. Do not put it back. Ever. Air plants need fresh air exchange. Stagnant humid air breeds fungus.
If the terrarium is open-top and large, you might get away with it — but only with a fan blowing across the opening. Most terrariums are too small, too closed, or too wet. Move the plant to an open mount. Let the terrarium hold moss, ferns, or fittonias instead. They love that environment. Your tillandsia does not.
Mounted Plants on Wood, Cork, or Wire
These are the easiest to save. Unmount if possible. If wired, unwind carefully. If tied with fishing line, cut the line. Treat as a free plant. Remount only after fully recovered — at least two weeks of healthy growth. When remounting, use materials that dry fast. Cork bark. Grapevine wood. Cholla wood skeletons. Wire loops. Avoid sphagnum moss at the base — it holds water against the plant. If you must use moss, keep it away from the crown.
Signs of Recovery and When to Resume Normal Care
What Healing Looks Like
Recovery is slow. Air plants operate on plant time, not human time. The first sign is usually color returning. The dull, dark green brightens. Silver trichomes become visible again. Leaves firm up. They hold their shape instead of flopping. The base feels solid when squeezed.
New growth is the ultimate victory. Look at the very center of the plant. Tiny new leaves emerging — often lighter green, softer — mean the meristem (growing point) survived. This can take weeks. Do not panic if you see nothing for a month. As long as the plant is not declining, it is working underground, so to speak.
Pups are the bonus round. If your plant was mature enough to bloom, it may produce offsets (pups) at the base during recovery. This is the plant saying, “I made it, and here is the next generation.” Pups can be separated when they reach one-third the mother’s size. Or leave them to form a clump. Either way, it is a sign you won.
Gradually Reintroducing Water
Once you see consistent improvement for seven to ten days — firm leaves, good color, no new rot — you can water again. Start with a single quick dunk. Shake thoroughly. Dry in maximum airflow. Watch for 24 hours. If the plant looks happy, repeat in three days. Build back to your adjusted schedule slowly. Two weeks of success means you can trust your new routine.
Keep a log. Note date, method, drying time, and plant response. Patterns emerge. You will learn exactly what your plant needs in your space. This log becomes your custom care guide — far better than any internet article.
Long-Term Prevention Habits
Prevention is easier than rescue. Build these habits now. Check plants weekly — really check. Touch bases. Smell centers. Weigh them. Water in the morning only. Use a fan daily, even just for an hour. Rotate displays so no plant stays in a stagnant corner. Adjust for seasons — less water in winter, more in summer. Quarantine new plants for two weeks before adding to your collection. They may bring rot or pests.
Teach anyone else who waters your plants. Partners, roommates, plant sitters. Write instructions on a sticky note near the watering bowl. “Dunk 3 times. Shake hard. Fan 4 hours. No night watering.” Simple. Clear. Effective.
Common Mistakes That Lead to Repeat Overwatering
Trusting the Schedule Over the Plant
It is so tempting to set a calendar reminder. “Water air plants every Sunday.” Life gets busy. You want a system. But your plant does not care about Sunday. It cares about humidity, temperature, light, and airflow — all of which change daily. A rigid schedule guarantees overwatering eventually. The only schedule that works is “check and decide.” Make checking the habit. Watering becomes the variable.
Confusing Thirst Signals with Rot Signals
Curling leaves can mean “I am thirsty” or “I am drowning.” The difference? Thirsty leaves curl inward, getting tighter, feeling stiff. Drowning leaves curl randomly, feel soft, and the base is wet. Thirsty tips turn crispy brown. Rotting tips turn mushy brown. Learn to read the base. The base never lies. If the base is firm, water. If the base is soft, dry.
Using the Wrong Water
Tap water varies. Hard water leaves mineral deposits that clog trichomes. Softened water adds salt — toxic to tillandsias. Chlorine and chloramine can damage sensitive tissues. Best water: rainwater, filtered, or distilled. Second best: tap water left out 24 hours to off-gas chlorine. Never use softened water. If you must use tap, dunk instead of soak to minimize contact time. And always dry fast.
Ignoring Seasonal Shifts
Your plant’s needs change with the seasons even indoors. Winter heating drops humidity but also slows growth. Summer AC does the same. Spring growth spurts increase thirst. Fall cooling reduces it. Pay attention to your home’s microclimate. A hygrometer (humidity meter) costs ten dollars and saves hundreds in plants. Know your numbers.
When to Accept Loss and What to Learn
Knowing When It Is Too Late
Sometimes, despite everything, the plant dies. The entire base turns black and collapses. Leaves fall off in clumps. A foul smell persists. No green tissue remains anywhere. At this point, compost it. Do not keep a rotting plant near healthy ones — spores spread. Wash your hands after handling. Disinfect tools. Mourn briefly. Then apply what you learned.
But here is the thing — even experienced growers lose plants. It is not failure. It is data. Each loss teaches you something about your conditions, your habits, your varieties. The growers with the healthiest collections are the ones who killed the most plants early on and took notes.
Saving Pups from a Dying Mother
If the mother plant is gone but pups are present, you may still save the genetics. Gently separate pups that are at least one-third the mother’s size. Use clean hands or sterilized scissors. Check pup bases carefully — they sometimes rot first because they are tucked against the dying mother. Treat any suspicious spots with cinnamon. Establish pups in the ideal recovery environment: bright, airy, minimal water. They often grow faster than mature plants because they have no bloom cycle draining energy.
Choosing More Forgiving Varieties Next Time
Some air plants are drama queens. Others are tanks. If you struggle with rot, lean toward xeric varieties: Tillandsia xerographica, tectorum, harrisii, duratii, streptophylla. These have thick leaves, abundant trichomes, and high drought tolerance. They forgive missed waterings and resist rot. Mesic varieties like ionantha, brachycaulos, and bulbosa are stunning but demand precision. Match the plant to your lifestyle, not just your aesthetic.
And remember — every expert was once a beginner who overwatered their first tillandsia. The fact that you are reading this, learning the signs, adjusting your care — that makes you a good plant parent. Not the mistakes. The response. Your air plant is lucky to have you. Now go check your bases.
Frequently Asked Questions
What does an overwatered air plant look like?
An overwatered air plant has a dark, mushy base that may appear black or translucent. Leaves feel soft and rubbery rather than stiff, with brown tips that are wet and mushy instead of dry and crispy. The plant may smell musty or swampy, and leaves might fall off with gentle tugging.
How long does it take for an air plant to recover from overwatering?
Recovery typically takes 2-6 weeks depending on severity. Minor cases stabilize in 7-10 days with proper drying. Severe rot requiring tissue removal may need 4-8 weeks for new growth to appear. Patience and consistent airflow are key — do not resume normal watering until the plant shows firm leaves and bright color for at least a week.
Can I use hydrogen peroxide on my air plant?
Yes, a diluted solution of 1 part 3% hydrogen peroxide to 4 parts water can be dabbed on trimmed cuts to disinfect. Let it dry completely. Do not soak the whole plant in peroxide — it can damage trichomes. Cinnamon powder is a gentler alternative for antifungal treatment.
Why does my air plant keep rotting even after I fixed it?
Recurring rot usually means the environment has not changed. Check: Are you watering in the morning? Drying within 4 hours with a fan? Avoiding enclosed displays? Using rain or filtered water? Adjusting for seasonal humidity? The plant will keep rotting until the conditions causing it are permanently fixed.
Should I fertilize my air plant while it is recovering from overwatering?
No. Fertilizer stresses a recovering plant. Wait until you see 2-3 weeks of stable, healthy growth with firm leaves and good color. Then resume at quarter-strength, once monthly during active growth. Skip fertilizer entirely in winter or low-light conditions.
Can air plants live in bathrooms without extra watering?
Often yes. Bathrooms with daily showers provide enough ambient humidity for many mesic varieties. Monitor the plant — if bases stay firm and color is good, skip supplemental watering entirely. Xeric varieties with fuzzy leaves may still need occasional dunking even in bathrooms. Always ensure airflow with an exhaust fan or open window.