Plant Shelf Ideas for Attic
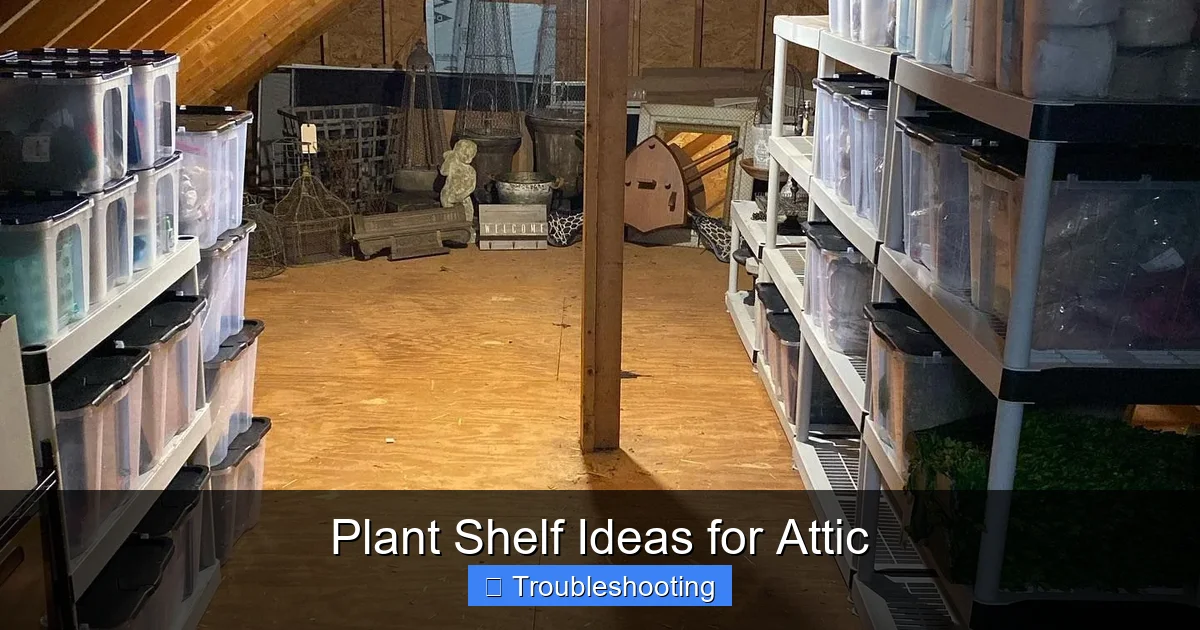
Attics offer unique growing potential with abundant natural light and unused vertical space. This guide covers plant shelf ideas for attic conversions including custom-built shelving, modular systems, hanging solutions, and DIY projects tailored for sloped ceilings and temperature fluctuations.
Key Takeaways
- Assess light conditions first: Map sun exposure throughout the day before choosing plants or shelf placement.
- Work with sloped ceilings: Custom triangular shelves or adjustable modular units maximize awkward angles.
- Control temperature swings: Insulate, ventilate, and use heat mats or fans to stabilize attic climate.
- Prioritize weight distribution: Reinforce floor joists and use lightweight pots to prevent structural issues.
- Choose adaptable plants: Select varieties tolerant of bright light, temperature shifts, and lower humidity.
- Incorporate grow lights: Supplement winter light with full-spectrum LEDs on timers for year-round growth.
- Plan for water access: Install a utility sink or use self-watering systems to simplify maintenance.
Quick Answers to Common Questions
Can I put heavy ceramic pots on attic shelves?
Only if you reinforce floor joists and distribute weight across multiple joists. Lightweight fabric pots with perlite-heavy soil mix are safer for standard attic floors rated at 10 psf live load.
What plants handle attic temperature swings best?
Succulents, snake plants, ZZ plants, pothos, and spider plants tolerate wide temperature ranges. Mediterranean herbs like rosemary and thyme also handle heat and cool nights well.
Do I need grow lights in a sunny attic?
Yes for winter. Even south-facing attics get only 8-9 hours of weak winter sun. Most plants need 12-16 hours. Full-spectrum LEDs on timers supplement November through February.
How do I water plants on high shelves safely?
Use a long-spout watering can, install drip irrigation with a timer, or use self-watering reservoir trays. Rolling library ladders provide safe access for weekly maintenance.
What’s the cheapest way to start an attic plant shelf?
Repurpose a thrifted bookshelf or baker’s rack ($20-30), add $15 clip-on grow lights, use recycled containers with drainage holes, and start with easy cuttings from friends’ plants.
📑 Table of Contents
- Why Your Attic Deserves a Plant Makeover
- Understanding Your Attic’s Growing Environment
- Custom Built-In Shelving Solutions
- Modular and Adjustable Systems
- Hanging and Vertical Solutions
- DIY Projects for Weekend Builders
- Plant Selection for Attic Conditions
- Lighting Solutions for Year-Round Growth
- Watering and Maintenance Systems
- Seasonal Transitions and Care
- Design Aesthetics and Styling
- Budget-Friendly Approaches
- Common Problems and Solutions
- Conclusion: Your Attic Garden Awaits
Why Your Attic Deserves a Plant Makeover
Most attics sit empty, stuffed with holiday decorations and forgotten boxes. But look up. That space gets incredible light. South-facing windows flood the floor with sun for eight hours or more. East and west exposures offer gentle morning or afternoon glow. Even north-facing attics provide bright indirect light that many tropical plants love.
The challenge? Sloped ceilings. Temperature swings. Limited headroom. Weird angles that standard furniture ignores. That’s where smart plant shelf ideas for attic spaces come in. You don’t need a full renovation. You need shelves that fit the geometry, plants that handle the climate, and a layout that makes watering easy. This guide walks through every option from weekend DIY builds to modular systems you can rearrange next season.
Understanding Your Attic’s Growing Environment
Map the Light Before You Build
Grab a notebook. Spend a sunny day tracking light patches every two hours. Mark where direct sun hits the floor. Note where shadows linger. South-facing dormers create intense afternoon beams. Skylights cast moving spotlights. Gable windows offer consistent side lighting. This map determines everything. High-light succulents go in the hot zones. Ferns and pothos claim the softer corners.
Light intensity drops fast behind glass. A south window delivers maybe 5,000 foot-candles outside but only 1,500 inside. Double-pane cuts it further. Sheer curtains diffuse beautifully. Consider removable window film for summer heat reduction. Rotate plants weekly so all sides get equal exposure. Leggy growth means they’re stretching for more light.
Temperature Extremes Need Management
Attics bake in July and freeze in January. Uninsulated spaces swing 40 degrees daily. Most houseplants prefer 65-75°F. Prolonged heat stresses roots. Cold snaps kill tropicals overnight. Insulation helps. So does airflow. Install operable windows or a solar attic fan. A small space heater with thermostat prevents winter disasters. Heat mats under seed trays boost germination.
Monitor with a min/max thermometer. Check weekly. Humidity drops when heating runs. Group plants to create microclimates. Pebble trays add moisture. A compact humidifier runs quietly on a timer. Avoid placing sensitive plants directly under roof vents where hot dry air blasts them.
Structural Reality Check
Floor joists matter. Standard attic floors support 10 pounds per square foot live load. That’s not much. A 50-gallon soil-filled planter weighs 400+ pounds. Distribute weight across multiple joists. Use lightweight potting mix with perlite. Choose fabric pots over ceramic. Reinforce from below if possible. Consult a contractor before heavy built-ins. Safety first always.
Custom Built-In Shelving Solutions
Triangular Units That Hug the Roofline
Sloped ceilings create triangular dead zones. Custom shelves turn them into tiered displays. Build simple right-triangle boxes from 1×12 pine. Depth matches the knee wall height. Width spans between rafters. Secure to studs with lag bolts. Paint white to reflect light. Add LED strip lighting under each tier for winter growth.
Stagger shelf heights. Bottom tier holds large pots. Middle fits medium herbs. Top displays trailing plants cascading down. Leave 18 inches between shelves for plant height and air circulation. Drill drainage holes in shelf bottoms or use waterproof liners. Slope shelves slightly forward so water runs to the front edge for easy cleanup.
Knee Wall Bench with Integrated Storage
Knee walls beg for bench seating. Build a 18-inch deep bench along the wall. Top lifts for soil and tool storage. Front face holds cubbies for pots. Back edge mounts a pegboard for tools. Add a cushion for a reading nook surrounded by plants. Run a narrow shelf above the bench at sitting eye level for smaller specimens.
Use moisture-resistant MDF or exterior-grade plywood. Seal all edges with marine varnish. Line storage compartments with plastic bins. Install a pull-out tray for mixing soil. Keep a watering can hidden but accessible. This becomes your potting station and display area combined.
Window Seat Greenhouse Extension
Dormer windows create perfect alcoves. Extend the sill inward 12-16 inches with a deep shelf. Support with decorative brackets every 16 inches. Add a second shelf 14 inches above. Glass doors on the front create a mini greenhouse. Hinge them for access. Magnetic catches hold them closed. This traps humidity for ferns and orchids while protecting from drafts.
Line the back with reflective mylar film. Mount a small circulation fan. Install a thermometer probe. Vent doors slightly on sunny days. This microclimate lets you grow plants that would struggle in the open attic air.
Modular and Adjustable Systems
Wire Shelving on Casters for Flexibility
Chrome wire racks adjust shelf height in one-inch increments. Four-foot wide units fit between rafters. Locking casters let you chase seasonal light. Move the whole unit to the south wall in winter. Roll to north side in summer. Open wire allows light through to lower shelves. Air circulates freely preventing fungal issues.
Add S-hooks for hanging baskets from the frame. Clip-on grow lights attach to shelf lips. Use zip ties to secure light cords. Line shelves with rubber mats to stop pots sliding. Weight capacity reaches 600-800 pounds per shelf evenly distributed. Check manufacturer specs. Anchor tall units to wall studs for earthquake safety.
Pegboard Wall Systems with Shelf Brackets
Pegboard covers entire gable walls. Heavy-duty brackets hold 12-inch deep shelves at any height. Rearrange monthly as plants grow. Hooks hold tools, watering cans, spray bottles. Baskets clip on for seed packets. Paint pegboard white for maximum light reflection. Mount on 1×2 furring strips for airflow behind the board.
Use metal brackets rated for 50+ pounds. Space shelves 16 inches apart vertically. Stagger depths. Top shelf 8 inches deep for small pots. Middle 12 inches. Bottom 16 inches for large specimens. This creates a living wall effect with every plant visible.
Track Mounted Shelving for Infinite Adjustment
Vertical metal tracks screw into studs. Brackets slide up and down. Shelves rest on brackets. Move a shelf in seconds. Brands like Elfa and Rubbermaid offer attic-friendly widths. Choose ventilated shelves for plant health. Add bracket extenders for deeper shelves at the bottom.
Tracks come in white, platinum, bronze. Match your aesthetic. Install two tracks per shelf unit. Space tracks 32 inches apart for 36-inch shelves. Use end caps for finished look. This system handles heavy ceramic pots better than wire. Clean with a damp cloth. No tools needed for adjustments.
Hanging and Vertical Solutions
Ceiling-Mounted Rail Systems
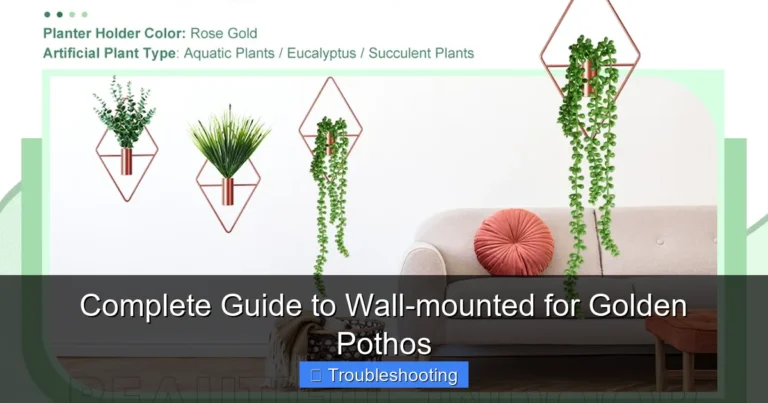
Exposed rafters are hanging gold. Install curtain wire systems like IKEA DIGNITET between rafters. Slide S-hooks along the wire. Hang macramé planters at varying heights. Creates a floating garden effect. Adjust seasonally. Lower for winter light. Raise for summer heat.
Weight limit depends on anchors. Use lag screws into rafters, not drywall. Test each anchor with 50 pounds before hanging plants. Space wires 18 inches apart. Run parallel to roof slope. Add fairy lights for evening ambiance. This works beautifully for pothos, philodendron, string of pearls, and hoyas.
Tension Rod Shelves Between Rafters
Spring-loaded tension rods fit between rafters without drilling. Place two rods 12 inches apart. Lay a wooden board across. Instant shelf. Remove for cleaning. Adjust height anytime. Use 1×6 pine boards sanded smooth. Paint or stain. Add rubber feet to prevent sliding.
Best for lightweight plants. Herbs, succulents, air plants. Not for heavy ceramic pots. Check tension monthly. Heat expands metal. Rods can loosen. Add a safety screw through rod into rafter for permanent installations. Great for renters or temporary setups.
Living Wall Panels on Gable Ends
Modular living wall systems mount flat on vertical gable walls. Felt pockets hold individual plants. Irrigation lines run behind. Recirculating pump in a reservoir below. Timer controls watering. Creates dramatic visual impact. Insulates the wall too.
Choose shallow-rooted plants. Ferns, fittonia, peperomia, small pothos. Avoid large root systems. Fertilize through irrigation. Monitor for dry pockets. Rotate panels seasonally for even growth. Professional systems start around $200 per square foot. DIY versions use landscape fabric stapled to plywood with drip tubing.
DIY Projects for Weekend Builders
Repurposed Ladder Shelf Against Knee Wall
Old wooden ladder. Sand. Paint. Lean against knee wall. Add planks across rungs for shelves. Each rung becomes a tier. Natural A-frame shape fits sloped ceilings perfectly. Zero wall attachment needed. Move anytime. Costs maybe $30 if you buy a ladder.
Secure planks with wood screws from below. Drill drainage gaps between boards. Stain with outdoor sealant. Add casters to ladder feet for mobility. Top rung holds a grow light clamp. This rustic look suits boho and farmhouse styles. Plants spill over edges softening the geometry.
PVC Pipe Hydroponic Window Farm
Food-grade PVC pipes cut to window width. Drill 3-inch holes every 8 inches. Cap ends. Mount on brackets at slight angle. Nutrient solution flows down by gravity. Pump returns it from a bucket below. Net pots sit in holes. Roots dangle in flowing solution.
Grow lettuce, herbs, strawberries year-round. No soil mess. Fast growth. Uses 90% less water. Build for under $100. Needs electricity for pump and grow lights. Test pH weekly. Clean between crops. This turns a sunny attic window into a salad factory.
Pallet Wood Tiered Plant Stand
Heat-treated pallets only. Stamp reads HT not MB. Disassemble carefully. Cut boards to length. Build three-tier stand: 12, 18, 24 inches deep. Back legs taller following roof slope. Front legs shorter. Shelves step down toward the room. Staggered depths catch light at different angles.
Sand thoroughly. Round all edges. Apply two coats spar urethane. Line shelves with landscape fabric. Staple underneath. Holds soil directly for shallow-rooted plants. Or place pots on top. Casters on front legs only. Back stays fixed. Tips forward slightly for drainage.
Plant Selection for Attic Conditions
High Light Heat Lovers for South Exposures
Succulents thrive in hot attic windows. Echeveria, sedum, haworthia, aloe. They want six hours direct sun. Rotate for even color. Water deeply but infrequently. Cacti work too but watch for etiolation in winter. Citrus trees in large pots produce fruit with enough light. Dwarf varieties stay manageable.
Herbs love heat. Basil, rosemary, thyme, oregano, sage. Harvest regularly to prevent flowering. Mediterranean herbs prefer lean soil. Add extra perlite. Feed monthly with diluted fish emulsion. Bring indoors before frost if attic freezes.
Bright Indirect Specialists for East/West/North
Monstera deliciosa grows massive in bright indirect light. Split-leaf philodendron too. Fiddle leaf fig if you can maintain humidity. Rubber plant handles temperature swings better. Bird of paradise flowers with age. These become statement pieces on floor stands.
Hanging basket stars: pothos varieties, heartleaf philodendron, spider plant, tradescantia, hoya. They trail beautifully from high shelves. Tolerate irregular watering. Propagate easily in water. Share cuttings with friends.
Low Light Tolerant for Dark Corners
Snake plant survives anywhere. ZZ plant too. Cast iron plant lives up to its name. Chinese evergreen adds color. Peace lily signals thirst dramatically. These handle the darkest attic corners. Growth slows but they persist.
Ferns need humidity more than light. Maidenhair, button fern, rabbit’s foot fern. Group them. Use humidifier. Terrariums work well. Closed systems maintain moisture. Open for air exchange weekly.
Lighting Solutions for Year-Round Growth
Full Spectrum LED Grow Lights
Modern LEDs run cool. Use 30-50 watts per square foot. Hang 12-18 inches above canopy. Timer set for 14-16 hours daily. Choose 4000K-6500K color temperature. High CRI above 90 shows true plant colors. Dimmable models adjust for seasons.
Bar lights mount under shelves. Panel lights cover larger areas. Clip-ons work for spot lighting. Look for Samsung LM301H or similar quality diodes. Avoid blurple cheap panels. They waste electricity as heat. Quality lights last 50,000 hours. That’s 10+ years at 12 hours daily.
Supplemental Lighting Strategies
Winter days offer 8-9 hours light. Plants want 12-16. Supplement morning and evening. Don’t extend midday. Plants need dark period for respiration. Use smart plugs for scheduling. Group plants by light needs. High-light shelves get more hours.
Rotate plants under lights weekly. Outer edges receive less intensity. Measure with PAR meter if serious. Phone apps approximate. Aim for 200-400 PPFD for foliage. 400-600 for flowering/fruiting. Adjust height not duration for intensity changes.
Natural Light Enhancement
Clean windows inside and out monthly. Dust blocks 10% light. Trim exterior branches. Install reflective film on adjacent walls. Mylar emergency blankets work cheap. White paint reflects 85%. Mirrors double light but create hot spots. Diffuse with sheer curtains.
Light shelves redirect sun deeper. White painted plywood angled upward. Mount below window. Bounces light onto ceiling then down. Passive. No electricity. Works surprisingly well. Ancient Egyptian technique updated.
Watering and Maintenance Systems
Self-Watering Reservoir Trays
Capillary mats wick water from reservoir to pots. Pots need drainage holes touching mat. Refill weekly. Great for vacations. Prevents overwatering. Roots take what they need. Algae grows in light. Cover reservoir with opaque lid.
DIY version: plastic storage bin, pond liner, felt fabric. Cut fabric larger than bin. Drape edges into water. Pots sit on fabric. Drill overflow hole at max water level. Costs $20 for 4×2 foot system. Works with any pot size.
Drip Irrigation with Timer
1/4 inch tubing runs along shelves. Emitters at each pot. Pressure regulator at faucet. Timer sets frequency and duration. Adjust seasonally. Winter once weekly. Summer daily. Flush lines monthly. Check emitters for clogs.
Use a 5-gallon bucket elevated as reservoir. Gravity feeds system. No pump noise. Refill bucket weekly. Add liquid fertilizer to bucket monthly. Filter prevents sediment clogging. This scales from 10 to 100 plants easily.
Humidity Management
Attic air dries fast. Group plants. Pebble trays under each shelf. Water evaporates locally. Humidifier on hygrostat set to 50%. Clean weekly to prevent mold. Circulation fan prevents stagnant air. Gentle breeze strengthens stems.
Misting helps temporarily. Do it morning so leaves dry by night. Wet leaves overnight invite fungus. Use distilled water to avoid mineral spots. Terrariums create self-contained humidity. Open weekly for gas exchange.
Seasonal Transitions and Care
Spring Awakening
March brings longer days. Increase watering gradually. Start fertilizing at half strength. Repot root-bound plants. Check for pests emerging from dormancy. Spider mites love dry heat. Wipe leaves with neem oil solution. Prune leggy winter growth.
Harden off seedlings started indoors. Attic makes perfect transitional space. Cooler nights toughen stems. Bright light prevents stretching. Move outdoors permanently after last frost. Clean windows for maximum spring light.
Summer Heat Management
July temperatures spike. Move heat-sensitive plants to lower shelves. Increase watering frequency. Check daily. Morning water reduces evaporation loss. Shade cloth on south windows cuts 30-50% intensity. White fabric works. Remove for cloudy days.
Run fans continuously. Evaporative cooling helps. Damp towel over fan intake drops temp 5-10 degrees. Monitor for heat stress: curled leaves, brown edges, dropped buds. Succulents may need shade too. Even cacti burn in glass-amplified sun.
Fall Preparation
Reduce fertilizing September 1. Plants slow growth. Check for pests before bringing outdoor plants in. Quarantine two weeks. Treat preventatively. Clean shelves thoroughly. Remove dead leaves. Check grow light timers adjust for shorter days.
Insulate windows with bubble wrap. Cut to size. Spray water on glass. Press bubble side against pane. Stays all winter. Removes cleanly spring. Adds R-value. Reduces drafts. Saves heating costs too.
Winter Survival
Grow lights run 14 hours. Heat mats for tropicals. Space heater on thermostat at 60°F minimum. Water sparingly. Check soil moisture not calendar. Humidifier essential. Group plants tightly. Rotate weekly for even light.
Inspect weekly for pests. Fungus gnats love damp soil. Yellow sticky traps catch adults. Mosquito bits in water kill larvae. Let top inch dry between waterings. Don’t repot now. Wait for active growth spring.
Design Aesthetics and Styling
Color Palettes for Plant Backdrops
White walls maximize light. Plants pop against neutral. Sage green adds calm. Terracotta pots warm the space. Black pots modern. Mix materials: ceramic, concrete, woven baskets, metal. Cohesive palette unifies diverse plants.
Paint shelf edges a color. Hidden surprise. Chalkboard paint on one shelf labels herbs. Magnetic paint holds plant markers. Stencil patterns on risers. Have fun. This is your sanctuary.
Creating Vignettes and Focal Points
Rule of three. Group plants in odd numbers. Vary heights. Tall back, medium middle, trailing front. Add non-plant elements: ceramic mushroom, geode, driftwood, favorite book. Personal touches make it yours not a nursery.
Mirror behind a grouping doubles visual impact. Reflects light too. Lean large mirror on floor against knee wall. Cluster plants in front. Instant jungle vibe. Ensure mirror secured to wall.
Flooring Considerations
Water happens. Protect subfloor. Interlocking foam tiles drain. Vinyl plank waterproof. Epoxy coating permanent. Rugs washable. Avoid carpet. Mold risk. Place large pots on rolling plant caddies. Move for cleaning. Check for leaks monthly.
Budget-Friendly Approaches
Thrift Store and Marketplace Finds
Bookshelves become plant stands. $20 at Goodwill. Paint them. Add grow lights. Metal baker’s racks hold dozens of pots. Industrial look. Wire shelves perfect. Old ladders, crates, pallets free on Craigslist. Creativity beats budget.
Mismatched pots unify with spray paint. One color ties collection together. Terracotta ages beautifully. Seal inside with yacht varnish extends life. Drainage holes essential. Drill your own with masonry bit.
Phased Implementation Plan
Start small. One shelf. Three plants. Learn your space. Observe light. Track temperatures. Note watering rhythm. Expand monthly. Reinvest savings from growing herbs and microgreens. Share cuttings. Build community.
Phase 1: Light assessment and two wire shelves. Phase 2: Grow lights and timer. Phase 3: Custom knee wall bench. Phase 4: Hanging system and irrigation. Phase 5: Living wall panel. Each phase teaches. Mistakes stay small.
Common Problems and Solutions
Leggy Growth and Pale Leaves
Insufficient light. Move closer to window. Add grow light. Rotate more frequently. Prune leggy stems. Propagate cuttings. New growth will be compact. Fertilize with nitrogen-rich formula temporarily.
Brown Leaf Tips and Edges
Low humidity or fertilizer burn. Increase humidity. Flush soil with water. Reduce fertilizer strength. Check for fluoride sensitivity. Use distilled water for sensitive species. Trim brown tips with clean scissors.
Pest Infestations
Isolate affected plants. Identify pest. Spider mites: webbing, stippled leaves. Mealybugs: white cottony masses. Scale: brown bumps on stems. Fungus gnats: flying adults. Treat specifically. Neem oil weekly for three weeks breaks cycles.
Mold on Soil Surface
Overwatering or poor airflow. Scrape off top inch. Replace with fresh dry mix. Increase air circulation. Reduce watering frequency. Bottom water instead. Cinnamon sprinkle antifungal. Hydrogen peroxide 1:4 water drench.
Conclusion: Your Attic Garden Awaits
That empty attic holds a garden waiting to happen. Start with one shelf. Three plants. A grow light. Observe. Learn. Expand. The sloped ceilings become design features not obstacles. Temperature swings teach you plant resilience. Weird angles inspire creative solutions.
Your plant shelf ideas for attic spaces will evolve. What works in March fails in July. What thrives in the south window sulks in the north corner. That’s gardening. The joy comes from paying attention. From the first unfurling leaf. The unexpected bloom. The basil in January pasta.
Share your harvest. Gift cuttings. Post photos. Inspire others to look up at their attics differently. Every green space heals a little of the world. Yours starts now. Grab a plant. Find a shelf. Begin.
Frequently Asked Questions
How much weight can my attic floor support for plant shelves?
Standard attic floors support 10 pounds per square foot live load. A 4×4 foot shelf area holds 160 pounds total. Distribute weight across joists, use lightweight pots and soil mixes, and consult a contractor before adding heavy built-in units or large water reservoirs.
Which direction should my attic windows face for the best plant growth?
South-facing provides the most intense light for succulents and citrus. East and west offer bright indirect light ideal for tropicals. North-facing gives consistent low light perfect for ferns and shade-tolerant foliage. Map your specific light patterns before choosing plants.
How do I prevent mold and mildew in my attic plant area?
Ensure good air circulation with fans, avoid overwatering, space plants for airflow, use well-draining soil, and run a dehumidifier if humidity exceeds 70%. Clean shelves monthly with diluted vinegar solution and remove dead leaves promptly.
Can I grow vegetables in my attic year-round?
Yes with supplemental lighting. Leafy greens, herbs, microgreens, and dwarf tomatoes thrive under 14-16 hours of full-spectrum LED light. Maintain 65-75°F temperatures, use hydroponic or container systems, and hand-pollinate fruiting plants since insects won’t be present.
What’s the best way to handle water drainage in an attic?
Use waterproof shelf liners with raised edges, place pots on pebble trays, install a floor drain if plumbing allows, or use self-watering systems that eliminate runoff. Always protect the subfloor with epoxy coating, vinyl plank, or interlocking drainage tiles.
How do I secure shelves to sloped attic walls safely?
Mount into rafters or wall studs using lag bolts, not drywall anchors. For knee walls, attach cleats to studs then rest shelves on cleats. Use adjustable brackets on track systems screwed into studs every 16 inches. Always verify structural attachment points before loading shelves.