Troubleshooting Flood for Peace Lily
Overwatering is the most common cause of a flooded peace lily. Act fast by removing excess water, improving drainage, and adjusting your watering schedule to prevent root rot.
You love your peace lily. It sits on the shelf and brightens the room. But sometimes the soil stays wet for days. That is a flood. A flood can kill the roots. This guide shows you how to fix it.
Troubleshooting flood for peace lily starts with knowing why it happens. Too much water, poor drainage, or a pot without holes can all cause a flood. You can stop the damage if you act quickly.
In the next sections you will learn the signs, the immediate steps, and the long‑term fixes. Follow each step and your plant will recover.
Key Takeaways
- Identify the cause: Too much water, poor drainage, or a pot without holes leads to flooding.
- Remove standing water immediately: Drain the saucer and tilt the pot to let excess water escape.
- Inspect roots for rot: Healthy roots are white and firm; brown mushy roots must be trimmed.
- Repot in a well‑draining mix: Use a pot with drainage holes and a light, airy soil blend.
- Water only when the top inch is dry: Test with your finger before each watering.
- Monitor humidity and avoid water‑filled saucers: Keep the environment balanced to stop future floods.
Quick Answers to Common Questions
How do I know if my peace lily is flooded?
Look for yellowing leaf tips, a sour smell, and soil that stays wet for days.
Can I save a peace lily with root rot?
Yes, trim the rotten roots, repot in fresh draining soil, and adjust watering.
What soil mix works best for peace lilies?
A mix of peat moss, perlite, and orchid bark provides good drainage and moisture retention.
How often should I water my peace lily?
Water when the top inch of soil feels dry, usually once a week in summer and every two weeks in winter.
Should I use a saucer under the pot?
Use a saucer but empty it after each watering to prevent water from re‑entering the pot.
📑 Table of Contents
Understanding Why Peace Lilies Flood
Common Causes
Overwatering is the top cause. Many owners water on a schedule instead of checking the soil. A pot without drainage holes traps water. Heavy soil holds moisture too long. High humidity can also slow drying. All these factors add up to a flood. When troubleshooting flood for peace lily, check each of these causes first.
Signs of a Flood
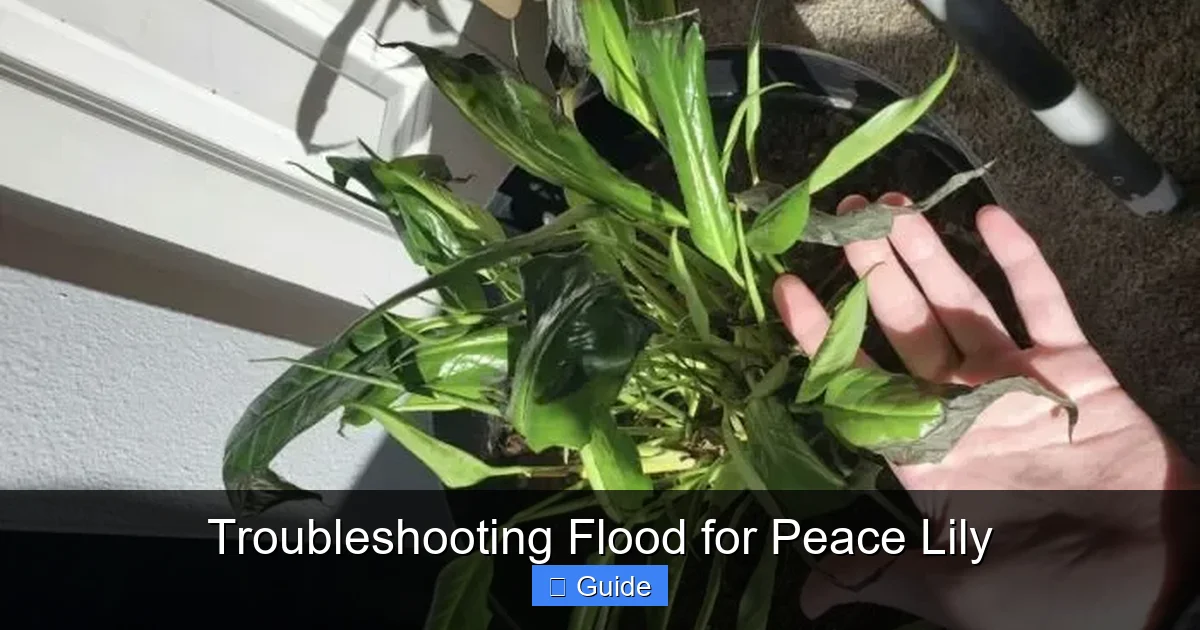
Leaves turn yellow or brown at the tips. The plant may droop even when the soil feels wet. A sour smell can rise from the pot. You may see white mold on the surface. These signs tell you the roots are drowning. Recognizing these signs early makes troubleshooting flood for peace lily much easier.
Why Roots Suffer
Roots need oxygen. Water fills the air spaces in soil. Without oxygen the roots suffocate. Suffocated roots rot and turn mushy. Rot spreads fast and can kill the whole plant. Early action saves the root system. Understanding root needs is key when troubleshooting flood for peace lily.
Environmental Factors
Low light reduces evaporation. Cool temperatures slow soil drying. A crowded shelf blocks airflow. Each factor keeps the soil wet longer. Adjusting the environment helps prevent future floods. When troubleshooting flood for peace lily, look at light, temperature, and airflow.
Pot Size Matters
A pot that is too large holds extra soil. Extra soil holds extra water. The roots cannot use all that moisture. Choose a pot only slightly larger than the root ball. Proper pot size reduces the risk of flooding. This tip is vital for troubleshooting flood for peace lily.
Immediate Steps to Rescue a Flooded Peace Lily
Remove Excess Water
First, take the pot out of any saucer. Tilt the pot gently to let water run out. Use a towel to soak up water on the surface. Do not shake the plant hard. Gentle handling protects the roots. This step is the first action when troubleshooting flood for peace lily.
Visual guide about Troubleshooting Flood for Peace Lily
Image source: bindy.com.au
Check the Roots
Slide the plant out of the pot. Look at the roots. Healthy roots are white and firm. Brown, soft, or smelly roots are rotting. Trim away any bad roots with clean scissors. Cut only the damaged parts. Root inspection is essential when troubleshooting flood for peace lily.
Repot if Needed
If many roots are gone, repot in fresh soil. Choose a pot with several drainage holes. Fill the bottom with a layer of coarse gravel or perlite. Add a light, airy potting mix. Place the plant and firm the soil around the roots. Water lightly to settle the mix. Repotting correctly finishes the rescue when troubleshooting flood for peace lily.
Apply a Fungicide Drench
If rot is extensive, use a mild fungicide. Follow the label directions exactly. Drench the soil once, then let it dry. This stops fungal spread. A fungicide drench can be a lifesaver when troubleshooting flood for peace lily.
Monitor Recovery
Place the plant in bright indirect light. Keep the soil just moist, not soggy. Watch for new growth in two weeks. New leaves mean the rescue worked. Ongoing monitoring is part of troubleshooting flood for peace lily.
Improving Drainage and Soil Mix
Choose the Right Pot
A pot with multiple holes drains fast. Terracotta pots breathe and pull moisture away. Plastic pots work if they have enough holes. Avoid decorative pots without holes unless you use a liner. The right pot is the foundation of good drainage when troubleshooting flood for peace lily.
Use a Well‑Draining Mix
Mix one part peat moss, one part perlite, and one part orchid bark. This blend holds some moisture but lets excess water escape. You can also buy a ready‑made aroid mix. Do not use garden soil; it compacts and stays wet. A proper mix makes troubleshooting flood for peace lily much simpler.
Add Drainage Material
Place a layer of small stones or broken pottery at the bottom of the pot. This creates a space for water to collect away from roots. The layer should be about one inch thick. It helps the soil dry faster. Adding drainage material is a quick win when troubleshooting flood for peace lily.
Refresh the Mix Annually
Old mix breaks down and holds water. Repot with fresh mix once a year. This keeps drainage optimal. Annual refresh prevents future floods. Regular repotting is a proactive step in troubleshooting flood for peace lily.
Test Drainage Speed
Water the pot and time how fast water exits. Good drainage empties in under thirty seconds. Slow drainage means you need more holes or a lighter mix. Testing drainage helps you verify your fixes when troubleshooting flood for peace lily.
Adjusting Your Watering Routine
Water Only When Dry
Check the top inch of soil with your finger. If it feels dry, water. If it feels moist, wait. This simple test prevents overwatering. Peace lilies like a brief dry period between drinks. The finger test is the core habit when troubleshooting flood for peace lily.
Use the Finger Test Daily
Insert your index finger up to the first knuckle. Feel for moisture. Dry soil means it is time to water. Wet soil means hold off. Do this every few days. It becomes a habit quickly. Daily checks keep you ahead of floods when troubleshooting flood for peace lily.
Set a Seasonal Schedule
Water roughly once a week in summer. In winter cut back to every two weeks. Adjust for your home’s humidity and light. A consistent routine reduces guesswork and stops floods. Seasonal adjustments are crucial when troubleshooting flood for peace lily.
Use Room‑Temperature Water
Cold water shocks roots. Let tap water sit overnight to reach room temperature. This also lets chlorine evaporate. Warm water absorbs better. Using proper water temperature supports healthy roots when troubleshooting flood for peace lily.
Avoid Watering the Leaves
Water at the soil level only. Wet leaves invite fungal spots. Use a narrow spout or a watering can with a long spout. Keeping foliage dry reduces disease risk. This tip is often overlooked when troubleshooting flood for peace lily.
Preventing Future Flooding Events
Monitor Humidity
High humidity slows evaporation. Use a hygrometer to track levels. If humidity stays above seventy percent, increase airflow. A small fan on low can help dry the soil surface. Managing humidity is a preventive measure when troubleshooting flood for peace lily.
Avoid Saucers Full of Water
Empty the saucer after each watering. Standing water re‑enters the pot through the holes. A dry saucer keeps the root zone aerated. This small step stops many floods. Saucer management is a simple habit when troubleshooting flood for peace lily.
Rotate the Plant Weekly
Turn the pot a quarter turn each week. Even light exposure promotes even growth. Even growth uses water uniformly. Uniform use reduces wet spots that can become floods. Rotation is an easy practice when troubleshooting flood for peace lily.
Group Plants Wisely
Do not crowd peace lilies with thirsty plants. Different water needs create uneven soil moisture. Give each plant its own space. Proper spacing improves airflow and drying. Smart grouping prevents hidden floods when troubleshooting flood for peace lily.
Use a Moisture Meter
A cheap moisture meter gives a numeric reading. Insert it near the root zone. Readings below three mean it is time to water. Meters remove guesswork. Using a meter is a tech aid when troubleshooting flood for peace lily.
When to Seek Professional Help
Persistent Root Rot
If you trim roots and the plant still declines, the rot may be deep. A specialist can apply fungicide drenches. They can also test for pathogens. Professional care saves valuable specimens. Knowing when to call an expert is part of troubleshooting flood for peace lily.
Severe Leaf Drop
When most leaves fall and new growth does not appear, the plant may be beyond home rescue. A nursery can attempt a tissue culture rescue. This is a last resort for rare varieties. Recognizing the point of no return helps you decide when troubleshooting flood for peace lily.
Consult a Plant Specialist
Bring clear photos and a description of your care routine. The expert can spot hidden issues like pests or nutrient imbalance. Early expert advice often prevents total loss. Professional input can accelerate recovery when troubleshooting flood for peace lily.
Consider a Soil Test
A lab soil test reveals pH and nutrient levels. Imbalances can weaken roots and mimic flood symptoms. Correcting soil chemistry supports long‑term health. Soil testing is an advanced step when troubleshooting flood for peace lily.
Join a Plant Community
Online forums and local clubs share real‑world tips. Members often post photos of similar problems. Community advice can confirm your diagnosis. Peer support is a valuable resource when troubleshooting flood for peace lily.
Conclusion
Flooding is a common problem for peace lilies. You can fix it with quick action and better habits. Remove standing water, check roots, and repot in a draining mix. Water only when the soil is dry. Keep saucers empty and watch humidity. Follow these steps and your peace lily will thrive again. Remember, troubleshooting flood for peace lily is a skill you can master. Happy growing.
Frequently Asked Questions
What causes a peace lily to flood?
Overwatering, pots without drainage holes, heavy soil, and high humidity are the main causes of flooding.
How can I improve drainage for my peace lily?
Use a pot with multiple holes, add a layer of gravel at the bottom, and choose a light, airy potting mix.
Is it okay to mist a peace lily daily?
Misting raises humidity but does not replace proper watering; mist sparingly and ensure the soil dries between waterings.
Can I use tap water for my peace lily?
Tap water is fine if it is not heavily chlorinated; let it sit overnight to reduce chlorine before use.
What are the signs of root rot in a peace lily?
Brown, mushy roots, a foul odor, and wilting leaves despite wet soil indicate root rot.
When should I repot a peace lily after a flood?
Repot immediately after removing excess water and trimming damaged roots, using fresh well‑draining soil.