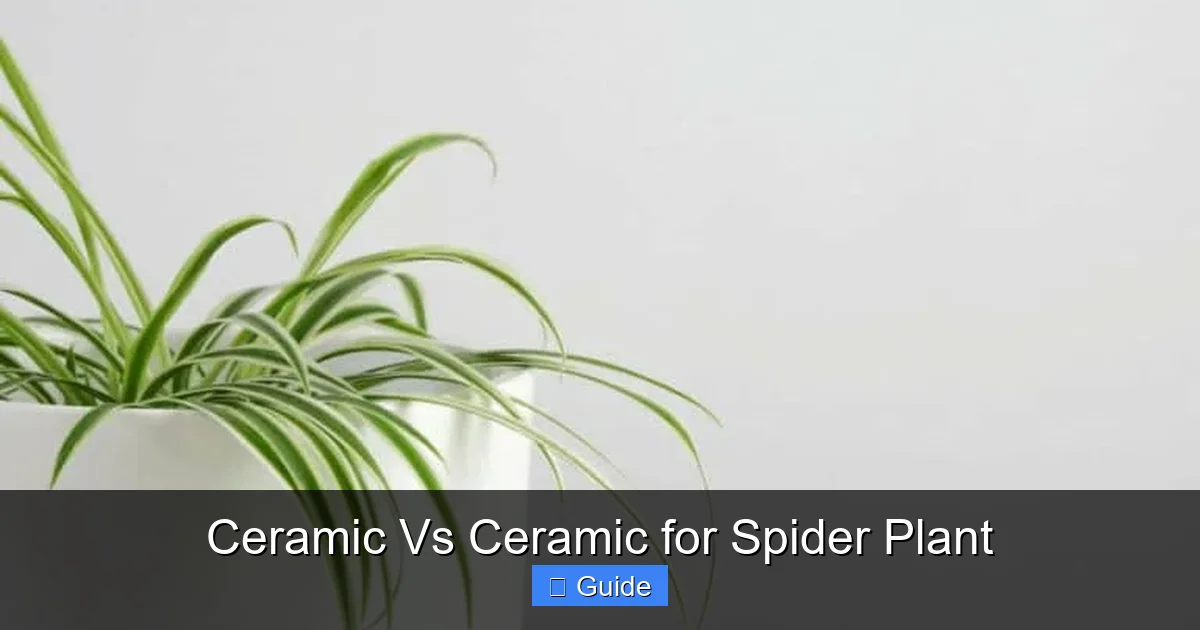
Ceramic Vs Ceramic for Spider Plant
Choosing the right ceramic pot for your spider plant makes a big difference in its health and growth. Glazed ceramic retains moisture longer while unglazed terracotta allows better airflow to roots. Both work well if you match the pot type to your watering habits and home environment.
So you’ve got a spider plant and you’re staring at the garden center shelf wondering which ceramic pot to bring home. I get it. The choices can feel overwhelming. Glazed, unglazed, big, small, with saucers, without saucers. Here’s the thing though – ceramic vs ceramic for spider plant really comes down to understanding how each type interacts with your plant’s roots and your own watering habits.
Spider plants (Chlorophytum comosum) are famously forgiving. They’ll survive in almost anything. But if you want those gorgeous arching leaves and abundant baby plantlets, the pot you choose plays a bigger role than most people realize. I’ve killed my share of spider plants over the years – usually from picking the wrong pot for my watering style. Let me save you that heartache.
Key Takeaways
- Glazed ceramic holds water longer: Ideal for forgetful waterers or dry climates but risks root rot if overwatered.
- Unglazed terracotta breathes better: Promotes healthy root airflow and prevents soggy soil but requires more frequent watering.
- Drainage holes are non-negotiable: Every ceramic pot needs holes to prevent standing water and root rot.
- Pot size matters more than material: Choose a pot 1-2 inches larger than the root ball for optimal growth.
- Weight affects placement options: Heavy ceramic pots stay put but are hard to move; consider plant caddies for large specimens.
- Match pot to your care style: Busy plant parents do better with glazed ceramic; attentive growers can use terracotta.
- Decorative cachepots work too: Use a plastic nursery pot inside a decorative ceramic pot for best of both worlds.
Quick Answers to Common Questions
Can I use a ceramic pot without drainage holes for my spider plant?
No, never use a pot without drainage holes directly. Use it as a cachepot with a plastic nursery pot inside, or drill holes yourself.
How often should I water a spider plant in a terracotta pot?
Check every 2-3 days in summer, weekly in winter. Water when top 1-2 inches of soil feel dry. Terracotta dries faster than glazed ceramic.
Do spider plants prefer deep or shallow ceramic pots?
Shallow, wide pots (azalea style) work best. Spider plant roots spread horizontally more than vertically.
Why is my terracotta pot turning white on the outside?
That’s mineral buildup from fertilizer and tap water evaporating through the porous clay. It’s harmless – soak in vinegar water to clean.
Can I put my ceramic spider plant pot outside in summer?
Yes, but acclimate gradually. Terracotta dries extremely fast in outdoor heat and wind. Glazed ceramic can overheat roots in direct sun.
📑 Table of Contents
- Understanding Spider Plant Root Needs
- Glazed Ceramic: The Moisture Keeper
- Unglazed Terracotta: The Breathable Classic
- Specialized Ceramic Variations
- Size and Shape Considerations
- Matching Pot to Your Watering Personality
- Practical Setup Tips
- Troubleshooting Common Issues
- Budget Considerations
- Creative Display Ideas
- Long-Term Care for Ceramic Pots
- Conclusion
Understanding Spider Plant Root Needs
Before we dive into ceramic types, let’s talk about what spider plants actually want. These plants have thick, fleshy roots that store water. They’re adapted to survive dry periods in their native South African habitat. But they also hate sitting in soggy soil. That combination – water storage plus rot sensitivity – is the key to everything.
The Root System Reality
Spider plant roots are tuberous and thick. They push against pot walls as they grow. A mature plant can fill a 10-inch pot with a dense root mass. Those roots need oxygen. When soil stays wet too long, oxygen gets displaced and roots suffocate. That’s when rot sets in. The right ceramic pot helps manage this moisture-oxygen balance.
Moisture Preferences
Spider plants like to dry out slightly between waterings. Not bone dry – just the top inch or two of soil. In a perfect world, you’d water thoroughly, let excess drain, then wait until the top soil feels dry before watering again. Your pot choice either helps or hinders this cycle.
Glazed Ceramic: The Moisture Keeper
Glazed ceramic pots are the colorful, shiny ones you see everywhere. They’re fired at high temperatures with a glass-like coating that seals the clay. That coating changes everything about how the pot behaves.
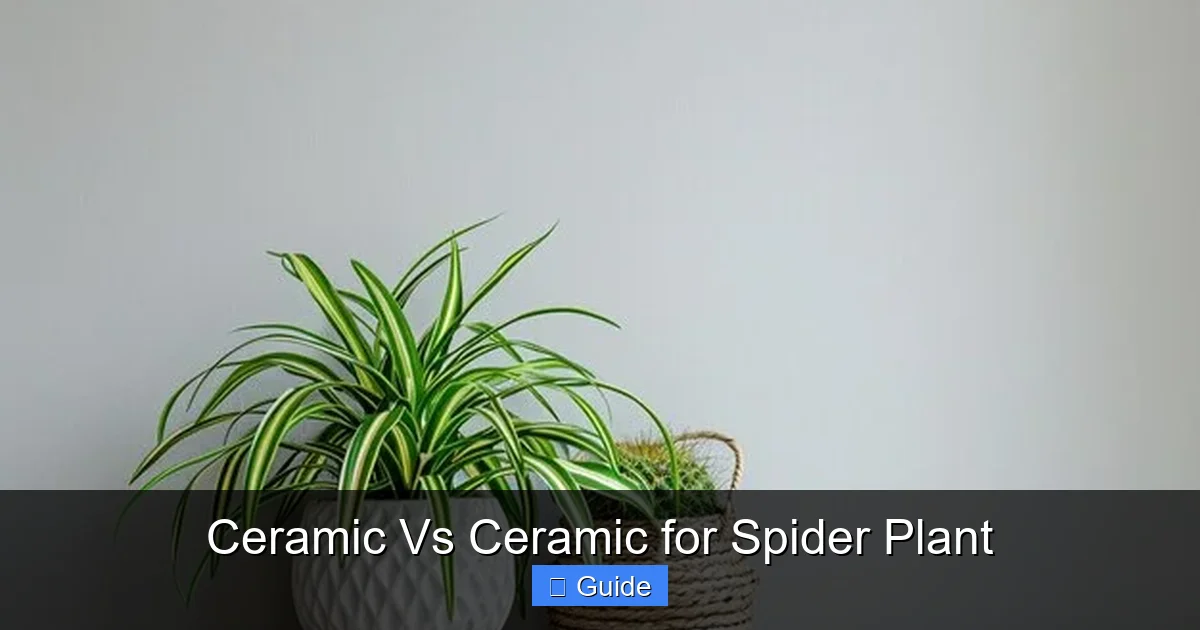
Visual guide about Ceramic Vs Ceramic for Spider Plant
Image source: img.freepik.com
How Glazing Affects Moisture
The glaze creates a waterproof barrier. Water can only escape through the drainage hole (if there is one) or the soil surface. This means soil stays moist significantly longer – sometimes twice as long as in unglazed pots. For spider plants, this can be good or bad depending on your situation.
When Glazed Ceramic Shines
If you live in a dry climate, run heating systems in winter, or simply forget to water for weeks at a time, glazed ceramic is your friend. The moisture buffer gives you a wider safety margin. Your spider plant won’t crisp up if you miss a watering by a few days.
Glazed pots also work well in bright, hot windows where evaporation happens fast. The glaze slows that moisture loss, keeping roots happier between waterings.
The Overwatering Trap
Here’s where people get in trouble. That same moisture retention becomes a liability if you water on a schedule instead of checking soil. “Water every Tuesday” in a glazed pot often means soggy soil and rotting roots. I learned this the hard way with a beautiful blue glazed pot that claimed three spider plants before I wised up.
Glazed Ceramic Pros and Cons
- Pros: Holds moisture longer, huge color/style variety, easy to clean, protects surfaces from water marks
- Cons: Higher rot risk, heavier than plastic, can be expensive, no root airflow through walls
Unglazed Terracotta: The Breathable Classic
Terracotta means “baked earth” in Italian. These are the classic orange-brown clay pots. No glaze, no sealant – just fired clay. They’ve been used for thousands of years for good reason.
How Terracotta Breathes
The porous clay allows air and water vapor to move through the pot walls. This creates a subtle but constant airflow around the root zone. Excess moisture wicks out through the sides, not just the bottom. For spider plants with their rot-sensitive roots, this is huge.
The Evaporation Effect
Terracotta pots develop a patina over time – that white mineral crust on the outside. That’s actually fertilizer salts and minerals being pulled out of the soil as water evaporates through the clay. It’s a self-regulating system. The soil dries more evenly from all sides, not just top-down.
When Terracotta Works Best
If you’re an attentive plant parent who checks soil regularly, terracotta rewards you with healthier roots. It’s also ideal for humid climates where evaporation is naturally slower. The pot helps compensate for muggy air.
Terracotta shines for people who tend to overwater. The pot forgives heavy hands by wicking away excess. Your spider plant’s thick roots get the oxygen they crave.
The Frequent Watering Trade-off
You will water more often. In summer heat, a spider plant in terracotta might need water every 2-3 days versus once a week in glazed ceramic. If you travel frequently or have dozens of plants, this adds up. The pots also stain surfaces – those mineral deposits transfer to shelves and tables.
Terracotta Pros and Cons
- Pros: Excellent root airflow, self-regulates moisture, affordable, natural look, forgiving of overwatering
- Cons: Dries out fast, stains surfaces, fragile (cracks in freeze/thaw), limited colors, mineral buildup on exterior
Specialized Ceramic Variations
Beyond basic glazed and unglazed, there are ceramic variations worth knowing about. Each tweaks the moisture-air balance differently.
Partially Glazed Pots
Some ceramic pots have glazed exteriors but unglazed interiors (or vice versa). An unglazed interior with glazed exterior gives you breathability for roots while protecting your furniture from moisture stains. It’s a clever compromise, though harder to find.
Ceramic with Built-in Saucers
Many decorative ceramic pots come with attached saucers. Convenient, but risky. Water that drains into the saucer can wick back up into the soil if the pot sits in it. Always empty saucers within 30 minutes of watering. Better yet, water in the sink, let drain fully, then return to the saucer.
Double-Walled Ceramic
These have an air gap between inner and outer walls. They insulate roots from temperature swings – great for drafty windows or hot patios. But they’re heavy, expensive, and the inner pot often lacks drainage. Check before buying.
Raku and Specialty Fired Ceramics
Raku firing creates unique crackled glazes. Beautiful, but those micro-cracks can affect moisture retention unpredictably. Treat them like glazed ceramic but monitor more closely at first. Other specialty firings (wood-fired, salt-glazed) vary widely – ask the potter about porosity.
Size and Shape Considerations
Material matters, but size and shape matter more. A perfectly chosen material in the wrong size will still cause problems.
The Goldilocks Pot Size
Spider plants like to be slightly root-bound. A pot 1-2 inches larger in diameter than the current root ball is perfect. Too large, and the excess soil holds water the roots can’t reach – hello, rot. Too small, and you’re watering daily.
For a typical starter spider plant in a 4-inch nursery pot, move to a 5-6 inch ceramic pot. For a mature plant with multiple crowns, 8-10 inches works well. Don’t jump from 4 inches to 10 inches in one go.
Depth vs Width
Spider plant roots grow more horizontally than vertically. Wide, shallow pots often work better than deep, narrow ones. Azalea pots (wider than tall) are ideal. Standard pots work fine too. Just avoid super deep pots where the bottom soil stays wet forever.
Drainage Hole Non-Negotiables
I cannot stress this enough: your ceramic pot must have drainage holes. One hole minimum, several holes better. No holes = no oxygen at the bottom = guaranteed rot eventually. Decorative pots without holes are cachepots, not plant pots. Use them as outer sleeves only.
If you fall in love with a hole-less ceramic pot, drill holes yourself (diamond drill bit, go slow, keep wet) or use it as a cachepot with a plastic nursery pot inside.
Matching Pot to Your Watering Personality
This is the real secret. The best ceramic pot for your spider plant is the one that matches how you actually care for plants, not how you wish you cared for them.
The Forgetful Waterer
You mean well. You really do. But weeks go by between waterings. Get a glazed ceramic pot. The moisture buffer saves your plant from your schedule. Choose a lighter glaze color (reflects heat) and avoid tiny pots that dry fast even when glazed.
The Overwaterer
You love your plants. You show it with water. Often. Daily sometimes. Terracotta is your salvation. It wicks away your excess enthusiasm. Your spider plant will thank you with thick white roots and abundant babies.
The Consistent Checker
You check soil every few days. You water when dry. You adjust for seasons. Congratulations – you can use either type successfully. Pick based on aesthetics, weight, or budget. Your spider plant will thrive in both.
The Traveler
You’re gone for weeks at a time. Glazed ceramic plus a watering spike or self-watering insert. Or group plants in a bathtub with a few inches of water (pots on bricks, not sitting in water). Terracotta will be crispy when you return.
Practical Setup Tips
You’ve picked your ceramic pot. Now set it up for success.
Potting Mix Matters
Even the best pot fails with bad soil. Spider plants need well-draining mix. Standard potting soil plus perlite or orchid bark (1:1 ratio) works great. Or use a cactus/succulent mix with added peat or coco coir. Avoid moisture-control soils with water-retaining crystals – they defeat your pot’s purpose.
The Cachepot Strategy
This is my favorite approach for decorative ceramic pots. Keep your spider plant in its plastic nursery pot (which has great drainage). Slip that into the decorative ceramic pot. Water in the sink, drain fully, return to cachepot. You get:
- Perfect drainage every time
- Easy plant removal for root checks
- Seasonal pot changes without repotting stress
- No drilling holes in expensive ceramics
Elevate for Airflow
Pot feet, plant caddies, or even bottle caps under the pot allow air under the drainage hole. This prevents the “sealed bottom” effect where the hole sits flush against a surface and can’t drain. Especially important for terracotta on wood surfaces.
Seasonal Adjustments
Your pot’s behavior changes with seasons. Terracotta in summer = daily watering. Terracotta in winter = maybe every 2 weeks. Glazed ceramic in winter = dangerously slow drying. Adjust your checking frequency, not just your watering amount.
Troubleshooting Common Issues
Even with the right pot, things go wrong. Here’s how to diagnose and fix.
Brown Leaf Tips
Usually low humidity or fertilizer burn, not pot related. But if your terracotta pot dries too fast, chronic underwatering shows as tip burn. Increase humidity (pebble tray, humidifier) and check soil more often.
Yellowing Lower Leaves
Classic overwatering sign. In glazed ceramic, this happens fast. Check roots – if brown and mushy, repot in fresh mix, trim rot, and consider switching to terracotta or watering less.
Stunted Growth, No Babies
Pot too small, or roots too crowded. Or pot too large with soggy bottom soil. Check root ball. If circling densely, pot up one size. If lots of loose wet soil, pot down.
White Crust on Terracotta
That’s mineral buildup. Harmless to plant, ugly on pot. Soak empty pot in vinegar water (1:4) overnight, scrub with brush. Or embrace the patina – it’s a badge of honor.
Cracked Ceramic
Terracotta cracks in freezing temps. Glazed ceramic cracks from thermal shock (hot pot, cold water) or impact. Hairline cracks in glazed pots can leak. If crack goes through to soil, repot. Surface crazing (glaze crackle) is usually fine.
Budget Considerations
Ceramic pots range from $5 to $500. Price doesn’t always correlate with plant performance.
Inexpensive Options ($5-20)
Basic terracotta from hardware stores. Standard glazed pots from big box retailers. These work perfectly. Watch for quality issues: terracotta that crumbles, glazed pots with pinholes in the glaze, uneven bottoms that wobble.
Mid-Range ($20-60)
Better glazes, thicker walls, more consistent firing. Often from local potters or better garden centers. Worth it for statement plants you’ll see daily.
Investment Pieces ($60+)
Hand-thrown, artist-made, specialty glazes. Buy these for beauty, not plant performance. Your spider plant grows just as well in a $12 pot. But a beautiful pot brings joy every time you water.
Where to Save vs Splurge
Save on: terracotta, basic glazed pots, cachepots, pots for propagating babies. Splurge on: statement pots for mature mother plants, pots in high-visibility spots, unique glazes you love.
Creative Display Ideas
Spider plants look amazing in ceramic. Their arching leaves and dangling babies create living sculpture.
Hanging Ceramic Planters
Glazed ceramic hanging pots show off babies beautifully. Ensure strong hardware – wet ceramic + soil + plant gets heavy. Use ceiling hooks rated for 50+ lbs. Water in place with a long-spout can, or take down for sink watering.
Tiered Stands
Group 3-5 spider plants in coordinating ceramic pots on a tiered stand. Mix glazed and terracotta in the same color family for visual interest. Vary heights for drama.
Macrame + Ceramic
Classic 70s look, still perfect. Simple glazed pot in a macrame hanger. The pot’s weight keeps the hanger stable. Choose a pot with a flat bottom (not tapered) for secure seating.
Wall-Mounted Ceramic Pockets
Flat-back ceramic pots mount on walls. Great for small spaces. Spider plant babies cascade down the wall. Ensure secure mounting into studs – these get surprisingly heavy when watered.
Long-Term Care for Ceramic Pots
Your ceramic pots last decades with basic care.
Cleaning Between Plants
When repotting, scrub pots with hot soapy water. For terracotta, soak in 10% bleach solution 10 minutes to kill pathogens, then rinse thoroughly and air dry completely. Glazed ceramic just needs soap and water.
Salt Buildup Removal
That white crust on terracotta (and sometimes glazed pot rims) is fertilizer salts. Soak in vinegar solution, scrub. For glazed pots, wipe with vinegar cloth. Don’t let it get thick – it can burn roots touching the pot sides.
Winter Storage
Empty terracotta pots stored outdoors in freezing temps will crack. Bring inside or store upside down, elevated, covered. Glazed ceramic handles cold better but can still crack if soil freezes inside. Empty all pots for winter if not in use.
Repairing Chips
Small glaze chips: food-safe epoxy. Terracotta chips: usually fine, just rough edges. Large cracks: retire as plant pot, use as garden art. Don’t risk expensive plants in compromised pots.
Conclusion
After all this, the ceramic vs ceramic for spider plant decision boils down to one question: how do you water? Glazed ceramic buys time for forgetful waterers. Terracotta buys safety for heavy-handed waterers. Both grow gorgeous spider plants when matched to your habits.
My current setup? A mature spider plant in a 10-inch terracotta azalea pot on a plant caddy by a bright window. I check it every 3 days. It’s pushing out babies like crazy. But my bathroom spider plant lives in a white glazed ceramic cachepot because I water it when I shower – sporadically at best.
Start with one pot. Watch. Learn. Adjust. Your spider plant will tell you what it needs through its leaves, its roots, its babies. The pot is just a tool. You’re the gardener. Trust yourself, check the soil, and enjoy those arching green-and-white stripes. They’re one of the most rewarding plants you’ll ever grow.
Frequently Asked Questions
What size ceramic pot should I get for a new spider plant?
Choose a ceramic pot 1-2 inches larger in diameter than the current root ball. For a typical 4-inch nursery pot, a 5-6 inch ceramic pot is ideal. Avoid jumping to a much larger pot as excess soil retains too much moisture.
Is glazed or unglazed ceramic better for spider plants in humid climates?
Unglazed terracotta is better for humid climates. Its porous walls allow excess moisture to evaporate, preventing the soggy conditions that cause root rot in high humidity.
How do I prevent my ceramic pot from staining my furniture?
Use pot feet, a caddy, or a waterproof saucer under the pot. For terracotta, seal the exterior with a breathable masonry sealer. Always empty saucers within 30 minutes of watering.
Can I paint or seal a terracotta pot for my spider plant?
You can paint the exterior with breathable paint, but don’t seal the interior or bottom. Sealing defeats terracotta’s breathability. Exterior-only paint is fine for aesthetics.
Why are my spider plant’s roots growing out of the ceramic pot’s drainage holes?
This means the plant is root-bound and needs repotting. Gently remove, loosen the root ball, and move to a pot 1-2 inches larger. This is a good sign – your plant is thriving.
Do spider plants need special ceramic pots for producing babies?
No special pot needed. Spider plants produce babies when mature, root-bound, and getting bright indirect light. A properly sized ceramic pot with good drainage supports this natural process.