How to Set Up Cotton for Pothos
Setting up cotton for pothos propagation is an easy way to grow new plants from cuttings. This method keeps nodes moist while allowing air flow for strong root development.
If you love houseplants, you probably know pothos. This trailing vine grows fast and forgives neglect. But did you know you can multiply your collection for free? Learning how to set up cotton for pothos propagation opens up a world of new plants. This method works great for beginners. It costs almost nothing. And it lets you watch roots grow day by day.
I started propagating pothos years ago. I tried water jars. I tried soil. I even tried sphagnum moss. But the cotton method won me over. It holds just the right amount of moisture. It breathes well. And it makes checking progress super easy. Today I want to share everything I know about this technique. Whether you have one vine or twenty, you will find value here.
Key Takeaways
- Use clean cotton: Sterile cotton balls or pads prevent mold and bacteria growth on your cuttings.
- Keep nodes covered: The cotton must touch the node area where roots will emerge.
- Maintain moisture: Cotton should stay damp but never soaking wet to avoid rot.
- Provide indirect light: Bright filtered light speeds up root growth without burning leaves.
- Watch for roots: Transfer to soil once roots reach 1-2 inches long for best results.
- Change water regularly: Fresh water every few days keeps oxygen levels high for healthy roots.
- Be patient: Most pothos cuttings root in 2-4 weeks depending on conditions.
Quick Answers to Common Questions
How long does it take for pothos to root in cotton?
Most pothos cuttings develop visible roots in 7-14 days when using the cotton method. Some varieties like Manjula or Pearls and Jade may take 3-4 weeks. Warmer temperatures and higher humidity speed up the process.
Do I need rooting hormone for cotton propagation?
No, rooting hormone is not required for pothos. These plants root readily on their own. However, using rooting hormone can speed up root development by a few days and increase success rates for difficult varieties.
Can I leave the cotton on the roots when potting?
It is best to remove as much cotton as possible before potting. Soak the root ball in water to loosen the cotton fibers. A few strands remaining will not harm the plant and will decompose naturally in the soil.
Why is my pothos cutting rotting in cotton?
Rot usually indicates the cotton is too wet or leaves are touching the moist cotton. Ensure cotton is damp but not dripping, keep leaves above the cotton line, and increase air circulation by poking more holes in the humidity cover.
What type of cotton works best for pothos propagation?
100% pure cotton balls or cotton pads work best. Avoid synthetic blends, medicated cotton, or cotton with added lotions. Organic cotton balls from a drugstore are inexpensive and effective for this method.
📑 Table of Contents
- Why Choose Cotton for Pothos Propagation
- Materials You Need
- Preparing Your Cuttings
- Step-by-Step: How to Set Up Cotton for Pothos
- Troubleshooting Common Issues
- Transitioning to Soil
- Advanced Tips for Better Results
- Seasonal Considerations
- Creative Uses for Your Propagated Pothos
- Frequently Asked Questions About Cotton Propagation
- Conclusion
Why Choose Cotton for Pothos Propagation
You might wonder why cotton works so well. The answer lies in balance. Pothos cuttings need moisture at the node. But they also need oxygen. Too much water causes rot. Too little causes drying out. Cotton solves this perfectly.
The Science Behind Cotton Propagation
Cotton fibers create tiny air pockets. These pockets hold water through capillary action. At the same time, they allow gas exchange. The node stays humid but not submerged. This mimics the natural environment where pothos grows as an epiphyte. In the wild, these plants climb trees. Their aerial roots grab moisture from humid air. Cotton replicates this condition beautifully.
Benefits Over Other Methods
Water propagation works but has drawbacks. Stagnant water breeds bacteria. Roots grown in water differ from soil roots. They often struggle during transition. Soil propagation hides the action. You cannot see if roots form or if rot sets in. Sphagnum moss works great but costs more. It also holds too much water for some varieties. Cotton hits the sweet spot. It is cheap. It is sterile when fresh. It lets you monitor progress. And transition to soil goes smoothly.
When to Use This Method
Cotton propagation shines in several situations. Use it when you have many cuttings at once. Use it for rare or valuable varieties where you want close monitoring. Use it in dry climates where water evaporates fast. Use it if you tend to overwater. The cotton self-regulates better than an open jar. Honestly, I use it for almost all my pothos now. Golden pothos, marble queen, neon, jade, manjula – they all respond well.
Materials You Need
Before we dive into how to set up cotton for pothos, gather your supplies. Preparation makes the process smooth. You likely have most items already.
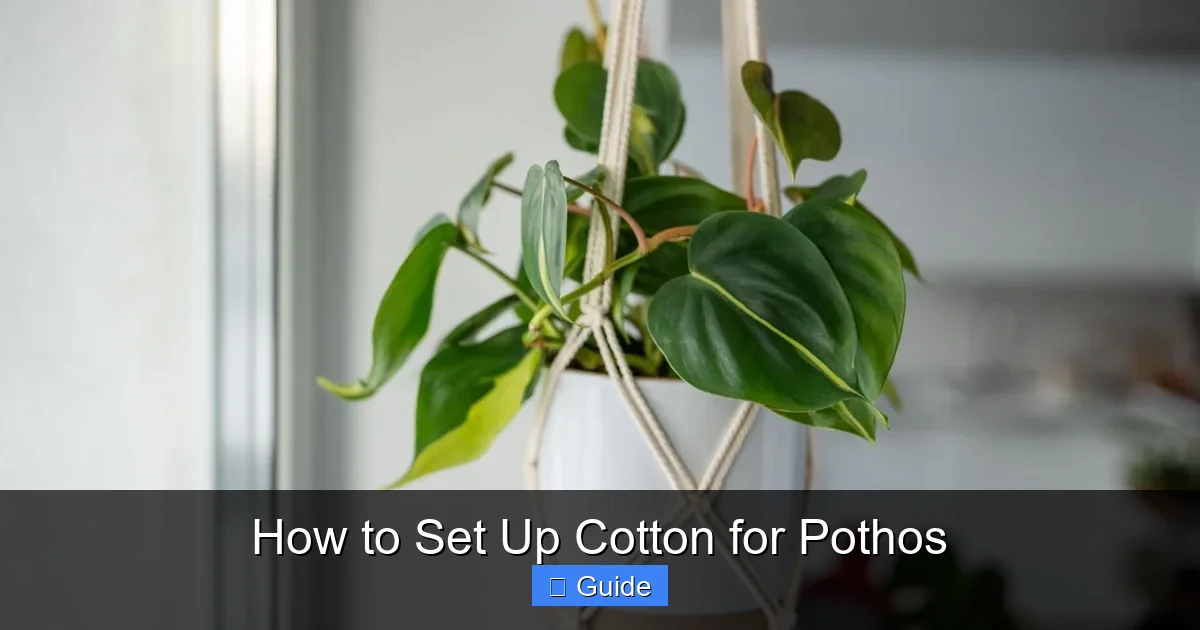
Visual guide about How to Set Up Cotton for Pothos
Image source: epicgardening.com
Essential Supplies
- Clean cotton balls or cotton pads (100% cotton, no synthetic fibers)
- Sharp scissors or pruning shears
- Small containers or cups (clear plastic works best)
- Filtered or distilled water
- Rooting hormone powder or gel (optional but helpful)
- Clear plastic bags or humidity domes
- Rubber bands or twist ties
- Labels and marker
Choosing the Right Cotton
Not all cotton works equally. Organic cotton balls from the drugstore work fine. Make sure they contain no added lotions or medicines. Cotton pads for makeup removal work great too. They lay flat and cover nodes evenly. Avoid cotton swabs. The stick gets in the way. Avoid synthetic “cotton” blends. They do not wick water the same way. If you want to splurge, medical-grade cotton rolls give you the most control. You can tear off exactly what each cutting needs.
Container Options
Clear plastic cups from the grocery store work perfectly. Shot glasses work for single cuttings. Small mason jars look nice. Deli containers with lids create mini greenhouses. The key is transparency. You want to see water levels and root growth without disturbing the setup. Containers should hold the cotton upright. They should not tip easily. Two to three inches tall works well. Wider bases add stability.
Water Quality Matters
Tap water varies by location. Chlorine and chloramine can slow root growth. Hard water leaves mineral deposits. Filtered water removes these issues. Distilled water works but lacks minerals. A good compromise: let tap water sit overnight. This allows chlorine to evaporate. Or use a simple pitcher filter. Room temperature water works best. Cold water shocks tropical plants. Warm water encourages bacteria. Aim for 68-72 degrees Fahrenheit.
Preparing Your Cuttings
Success starts with good cuttings. This step determines everything that follows. Take your time here. Rushed cuts lead to failed props.
Selecting the Best Vines
Choose healthy, actively growing vines. Avoid yellowing leaves. Avoid vines with pests. Avoid old, woody stems. The best cuttings come from the tips of vigorous growth. Look for stems with at least 3-4 leaves. Nodes should be visible. Aerial roots are a bonus but not required. Variegated varieties need enough green leaf area to photosynthesize. If a vine looks weak, let the mother plant recover first.
Making Clean Cuts
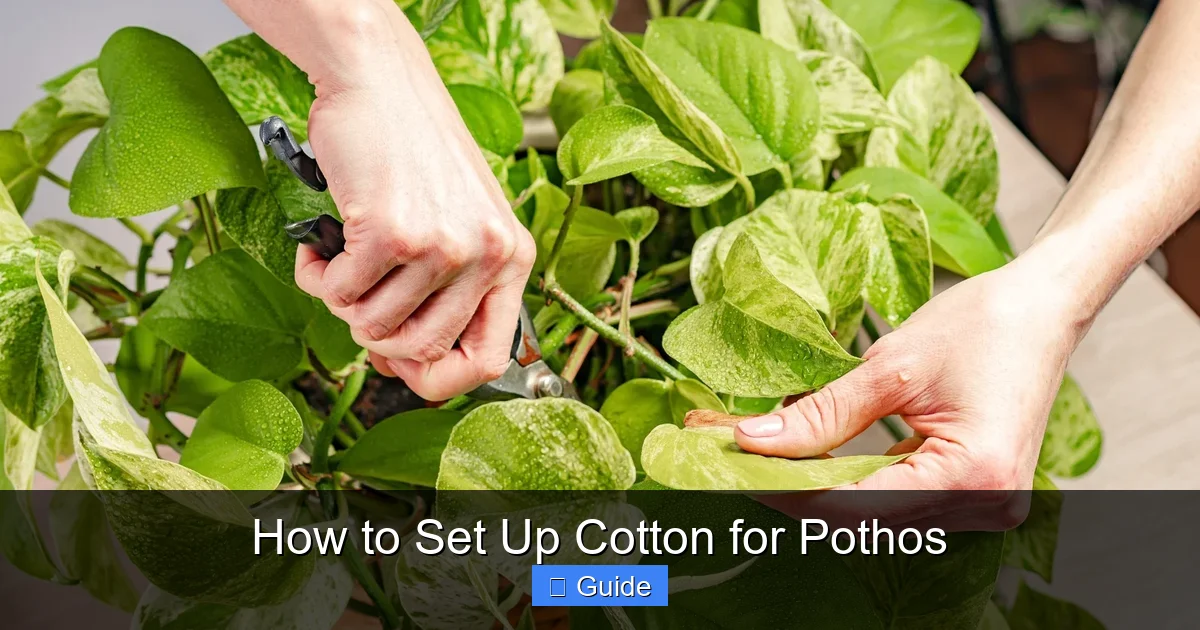
Sterilize your scissors with rubbing alcohol. This prevents disease transfer. Cut just below a node. The node is the bump where leaves attach. This area contains meristematic tissue. These cells can become roots. Make the cut at a 45-degree angle. This increases surface area for water uptake. Each cutting needs at least one node. Two nodes give you backup. Remove the bottom leaf. Leave the top leaves intact. They feed the cutting while roots form.
Optional: Rooting Hormone
Rooting hormone is not mandatory. Pothos roots easily without it. But it speeds things up. It also increases success rates for difficult varieties. Powder works well. Dip the cut end. Tap off excess. Gel works too. It adheres better. Liquid concentrates need dilution. Follow package directions. Too much hormone burns tissue. If you skip this step, no worries. Your cuttings will still root. It just might take an extra week.
Step-by-Step: How to Set Up Cotton for Pothos
Now for the main event. Here is exactly how to set up cotton for pothos propagation. Follow these steps in order. Do not skip any.
Step 1: Prepare Your Workspace
Clean your surface. Wash your hands. Gather all materials within reach. Label your containers now. Write the variety and date. Trust me, you will forget which is which. Set out your cotton. Tear cotton balls in half if using balls. This gives you thinner layers. Fluff them slightly. You want loose fibers, not compressed dense cotton. Air needs to circulate.
Step 2: Moisten the Cotton
Dip cotton in your prepared water. Squeeze gently. The cotton should feel damp like a wrung-out sponge. No dripping. No dry spots. If using pads, dip and squeeze the same way. Lay moistened cotton in the bottom of each container. Create a nest shape. The node will sit in this nest. Aim for about half an inch of cotton depth. Too thick stays too wet. Too thin dries out fast.
Step 3: Position the Cuttings
Place each cutting on its cotton nest. The node must contact the cotton. This is critical. Roots emerge from the node. No contact means no roots. If the cutting has two nodes, position so both touch. Gently press the stem into the cotton. Do not bury leaves. Leaves touching wet cotton rot quickly. Adjust until the cutting stands stable. The cotton should cradle the stem.
Step 4: Create Humidity
Pothos cuttings lack roots. They cannot replace lost water. High humidity prevents dehydration. Cover each container with a clear plastic bag. Secure with a rubber band. Or use a humidity dome if you have one. Poke a few tiny holes for air exchange. This prevents mold. Place in bright indirect light. No direct sun. Direct sun cooks cuttings in the bag. A north window works. Or a few feet back from east or west. Grow lights at low intensity work great too.
Step 5: Daily Care Routine
Check daily. This takes thirty seconds. Look at the cotton. Is it still damp? If dry spots appear, mist with a spray bottle. Do not pour water. Pouring disturbs the cutting. Look for condensation inside the bag. Some is good. Heavy dripping means too humid. Open the bag for an hour if needed. Check for mold. White fuzzy mold on cotton means too wet. Remove affected cotton. Replace with fresh. Green algae on container walls is harmless. Wipe if it bothers you.
Step 6: Monitoring Root Development
Roots usually appear in 7-14 days. They look like tiny white nubs at first. Then they elongate. Clear containers let you see this magic. Do not pull cuttings to check. You will damage fragile roots. Once roots reach half an inch, you can reduce humidity. Open the bag more each day. After three days of open bag, remove it entirely. Keep cotton moist during this transition. The cutting adapts to lower humidity gradually.
Troubleshooting Common Issues
Even with perfect technique, problems arise. Knowing what to look for saves cuttings. Here are the most common issues and fixes.
Rotting Stems
Black, mushy stems indicate rot. This usually means too much moisture. The cotton stayed soaking wet. Or leaves touched wet cotton. Cut above the rot if healthy tissue remains. Restart with fresh cotton. Use less water next time. Ensure better air flow. A small fan on low nearby helps. Rot spreads fast. Act immediately when you see it.
No Roots After Three Weeks
Some cuttings are stubborn. Check the basics first. Is the node actually touching cotton? Is the cotton staying moist? Is the temperature above 65 degrees? Is there enough light? Try adding rooting hormone if you skipped it. Try a heat mat set to 75 degrees. Bottom heat dramatically speeds rooting. Some varieties just take longer. Manjula and pearls and jade can take 4-6 weeks. Be patient.
Mold on Cotton
White or gray fuzz on cotton is mold. It competes with your cutting. It signals stagnant conditions. Remove the moldy cotton entirely. Rinse the container with diluted hydrogen peroxide (1 part peroxide to 10 parts water). Replace with fresh sterile cotton. Increase air flow. Poke more holes in the bag. Reduce watering slightly. A sprinkle of cinnamon on new cotton acts as natural antifungal.
Yellowing Leaves
One yellow leaf is normal. The cutting sacrifices old growth. Multiple yellow leaves signal stress. Usually too much light or too little humidity. Move to shadier spot. Increase bag closure. Check that cotton stays moist. Nutrient deficiency is unlikely this early. Do not fertilize unrooted cuttings. It burns the callus tissue.
Algae Growth
Green slime on container walls or cotton is algae. It is unsightly but not harmful. It thrives in light and moisture. Opaque containers prevent it. But then you cannot see roots. Compromise: wrap clear containers with paper. Leave a viewing window. Or accept it. Algae does not hurt the cutting. It just looks messy.
Transitioning to Soil
Rooted cuttings need soil eventually. Cotton cannot support long-term growth. The transition is where many people fail. Do it right and your plants thrive.
When to Pot Up
Wait until roots are 1-2 inches long. Multiple roots are better than one long root. The root system should look substantial. White, firm roots are healthy. Brown, mushy roots are dead. Trim any dead roots before potting. If roots circle the container bottom, it is past time. Do not wait for perfect. Good enough works.
Choosing the Right Soil Mix
Pothos needs well-draining soil. Standard potting mix works but holds too much water. Mix your own: two parts potting soil, one part perlite, one part orchid bark. This drains fast but retains some moisture. Add a handful of worm castings for gentle nutrition. Moisten the mix before using. It should clump when squeezed but crumble when poked.
The Potting Process
Fill a small pot with your mix. Make a hole in the center. Gently remove the cutting from cotton. The cotton may cling to roots. Do not pull. Soak the cotton in water if needed. It will release easily. Place roots in the hole. Backfill with soil. Press gently to remove air pockets. The node should sit at soil level. Not buried deep. Not exposed high. Water thoroughly until it drains out bottom.
Aftercare for Newly Potted Cuttings
Keep soil evenly moist for two weeks. Not wet. Not dry. The roots are used to constant moisture. They need time to adapt. High humidity helps. Keep the plastic bag for a few days. Open it gradually. Bright indirect light continues. No fertilizer for one month. The soil mix has enough nutrients. Watch for new leaf growth. That signals successful transition.
Advanced Tips for Better Results
Once you master the basics, try these pro techniques. They increase success rates and speed up the process.
Multiple Cuttings Per Container
You can root several cuttings in one container. Use a wider cup. Create separate cotton nests. Space them an inch apart. Label each with a tag on the stem. This saves space. It also creates a microclimate. The grouped cuttings humidify each other. Just ensure air flow between them. Thin crowded leaves if needed.
Using a Heat Mat
Bottom heat is a game changer. Pothos roots fastest at 75-80 degrees soil temperature. A seedling heat mat provides this. Place containers on the mat. Use a thermostat to prevent overheating. Check cotton moisture more often. Heat increases evaporation. This single tool can cut rooting time in half.
Water Propagation Hybrid
Some growers start in cotton then move to water. Once roots appear, transfer to a jar of water. The cotton-started roots adapt better than direct water roots. They branch more. They handle soil transition better. Try this if you struggle with soil transition. It adds a step but improves outcomes.
Propagation Box Setup
For serious propagators, build a prop box. Use a clear storage bin. Add an inch of perlite on bottom. Wet the perlite. Set containers on top. Close the lid. This maintains perfect humidity. Open daily for air exchange. Add a small USB fan for circulation. Grow lights on top complete the system. You can root dozens at once.
Labeling System That Works
Masking tape on containers falls off when wet. Sharpie on plastic rubs off. Use plastic plant tags. Write with pencil or paint pen. Bury the tag in the cotton. Or tie a tag to the stem with twist tie. Include variety, date, and any treatments used. Your future self will thank you.
Seasonal Considerations
Seasons affect propagation success. Adjust your approach accordingly.
Spring and Summer
Prime time. Long days. Warm temperatures. Active growth. Cuttings root in 10-14 days. Mother plants recover fast. You can take more cuttings. Higher light levels mean faster photosynthesis. Just watch for overheating in prop boxes. Summer sun through glass gets intense.
Fall and Winter
Slower but doable. Shorter days. Cooler temps. Rooting takes 3-4 weeks. Use a heat mat. Supplement with grow lights. Take fewer cuttings per mother plant. The plant needs energy to survive winter. Reduce watering frequency. Cotton stays moist longer in cool air. Watch for mold more carefully.
Holiday Propagation
Want pothos gifts? Start 6-8 weeks before. Christmas gifts need November starts. Valentine’s Day needs January starts. Mother’s Day needs March starts. Factor in potting time. New growth after potting makes a fuller gift plant. A single vine in a pot looks sparse. Three cuttings per pot creates instant fullness.
Creative Uses for Your Propagated Pothos
Now you have many baby pothos. What next? Here are ideas beyond keeping them all.
Gifting
Potted cuttings make thoughtful gifts. Cheap. Personal. Living. Add a care card with watering instructions. Use cute pots from the dollar store. Paint terracotta pots for extra charm. A trio of varieties in one pot looks impressive. Golden, marble queen, and neon together create a color show.
Creating Full Mother Plants
Your original plant gets leggy over time. Propagate the long vines. Pot 5-7 cuttings back into the mother pot. This fills in the base. The plant becomes bushy again. Do this annually for specimen plants. It rejuvenates the whole plant.
Living Wall Projects
Rooted cuttings start living walls. Pocket planters need established roots. Cotton-propagated plants transition perfectly. Plan your design. Root the varieties you need. Install when roots are strong. Living walls purify air and look stunning.
Trading and Selling
Plant swaps love pothos. Rare varieties trade well. Manjula, pearls and jade, global green, n’joy – these command good trades. Local plant groups on Facebook facilitate swaps. Some people sell rooted cuttings. Check local regulations first. But trading builds community.
Frequently Asked Questions About Cotton Propagation
These questions come up constantly in plant groups. Here are the real answers.
Can I reuse cotton?
No. Used cotton harbors bacteria and fungi. It breaks down structurally. It costs pennies. Use fresh cotton every time. Compost the old cotton if it is 100% natural.
What if my cutting has no visible nodes?
Every pothos leaf attaches at a node. Sometimes nodes are tight together. Look closely at the stem. Feel for bumps. If truly no nodes, that piece will not root. You need at least one node. Internodal cuttings (between nodes) do not work for pothos.
Do I need to change the water in the cotton?
You do not change water like in a jar. You remoisten the cotton. If cotton gets grimy, replace it. Usually cotton lasts the whole rooting period. If it smells bad or looks moldy, swap it out.
Can I propagate leafless stem sections?
Yes, if they have nodes. These are called wet sticks. They root slower. They need higher humidity. They have no leaves to photosynthesize. Keep them warm. Be extra patient. They work but take 6-8 weeks.
Why are my roots growing into the cotton?
Roots follow moisture. They will grow into cotton fibers. This is fine. When potting, soak the cotton. It releases easily. Do not tear roots free. Some cotton fibers in the root ball are harmless. They decompose in soil.
Can I use this method for other plants?
Absolutely. Philodendrons, monsteras, syngoniums, hoyas – many aroids work. Even some non-aroids like tradescantia and peperomia. The principle is the same. Nodes need moisture and air. Adjust timing for each species.
Conclusion
Learning how to set up cotton for pothos changes your plant game. You turn one plant into dozens. You save money. You share joy. You understand your plants deeper. The method is forgiving. The materials are cheap. The results are visible. What more could you want?
Start small. Try three cuttings. Watch them root. Pot them up. Gift one. Keep two. Repeat. Before long, you will be the person bringing pothos to every gathering. Your friends will ask for cuttings. You will smile knowing exactly how easy it is. The cotton method demystifies propagation. It puts the power in your hands.
Remember the keys: clean cotton, node contact, consistent moisture, bright indirect light, patience. Everything else is refinement. Master the basics first. Then experiment. Try heat mats. Try prop boxes. Try hybrid methods. Each variation teaches you more.
Your pothos collection is about to explode. In the best way possible. Happy propagating.
Frequently Asked Questions
How often should I check the moisture level of the cotton?
Check the cotton daily by looking at it and gently touching the surface. It should feel consistently damp like a wrung-out sponge. Mist with a spray bottle if you see dry spots, but avoid making it soaking wet.
Can I propagate pothos in cotton during winter?
Yes, you can propagate pothos in cotton year-round. Winter propagation takes longer (3-4 weeks) due to lower light and cooler temperatures. Using a heat mat set to 75°F and supplemental grow lights significantly improves winter success rates.
Should I fertilize pothos cuttings while they are rooting in cotton?
No, do not fertilize unrooted cuttings. They have no root system to absorb nutrients, and fertilizer can burn the callus tissue where roots emerge. Wait until after potting in soil and new growth appears before applying diluted fertilizer.
What should I do if mold appears on the cotton?
Remove all moldy cotton immediately. Rinse the container with a 10% hydrogen peroxide solution. Replace with fresh sterile cotton. Increase ventilation by adding more holes to the humidity cover and reduce moisture slightly.
How many pothos cuttings can I put in one container?
You can root multiple cuttings in one container if they have adequate space. Use a wider container and create separate cotton nests spaced about one inch apart. Ensure good air circulation between cuttings to prevent mold issues.
When are the roots long enough to transfer to soil?
Transfer to soil when roots reach 1-2 inches in length and there are multiple roots visible. The root system should look substantial with white, firm roots. Trim any brown or mushy roots before potting in well-draining soil mix.