Planting Catmint ‘walker’s Low’
Planting catmint ‘Walker’s Low’ is simple when you choose a sunny spot, well‑drained soil, and space plants 18 inches apart. Follow the step‑by‑step guide below for healthy growth and abundant blooms.
Key Takeaways
- Sunlight: Plant in full sun for at least six hours each day.
- Soil: Use loose, well‑drained soil with a neutral pH.
- Spacing: Keep 18 to 24 inches between each plant for air flow.
- Watering: Water deeply after planting then let the top inch dry before the next soak.
- Pruning: Trim back after the first flush to encourage a second bloom.
- Division: Divide clumps every three years to maintain vigor.
Quick Answers to Common Questions
When is the best time to plant catmint ‘Walker’s Low’?
Early spring after the last frost or early fall when temperatures are mild.
How much sun does catmint ‘Walker’s Low’ need?
At least six hours of direct sunlight each day for optimal flowering.
What type of soil is ideal for this catmint?
Well‑drained, neutral pH soil amended with compost.
How often should I water newly planted catmint?
Water daily for the first three days, then every other day for a week, then weekly.
Can I grow catmint ‘Walker’s Low’ in containers?
Yes, use a pot with drainage holes, a light potting mix, and regular watering.
📑 Table of Contents
Getting Started with Planting Catmint ‘Walker’s Low’
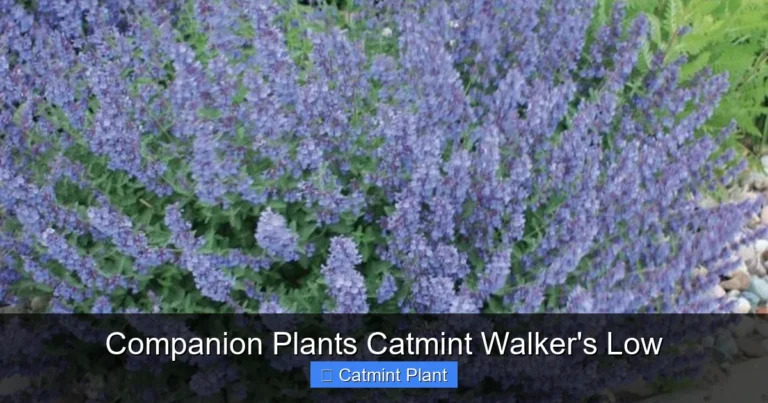
When you think about planting catmint ‘walker’s low’ you picture a low‑maintenance perennial that rewards you with lavender spikes all summer. This variety stays compact, reaching about 18 inches tall, and it spreads gently without taking over the bed. Choose a location that receives at least six hours of direct sun each day because the plant loves light and heat. A sunny spot also helps the foliage stay dry, which reduces the chance of fungal problems. Before you dig, walk the area and note any low spots where water might collect after rain. Good drainage is the single most important factor for success with planting catmint ‘walker’s low’.
Soil preparation comes next and it does not have to be complicated. Loosen the top twelve inches of earth with a garden fork or a tiller, then mix in a generous handful of compost or well‑rotted manure. The organic matter improves texture, adds nutrients, and holds just enough moisture for the roots. If your native soil is heavy clay, add coarse sand or fine gravel to increase porosity. A quick pH test with a home kit will tell you if the soil sits near neutral, which is ideal for planting catmint ‘walker’s low’. Adjust with lime or sulfur only if the reading is far from 6.5 to 7.0.
Spacing is the final piece of the planning puzzle. Set each plant about 18 to 24 inches apart measured from center to center. This distance gives each clump room to expand and allows air to circulate freely around the leaves. Good airflow keeps the foliage dry and discourages powdery mildew, a common issue in crowded beds. Mark the positions with a handful of sand or a small stake before you start digging. Taking a few minutes to plan the layout saves you from having to transplant later, which can stress planting catmint ‘walker’s low’.
Extra Sunlight Considerations
Extra sunlight considerations help planting catmint ‘walker’s low’ thrive. Morning sun is gentle and dries dew fast. Afternoon sun can be intense in hot climates. Provide some shade during the hottest hour if leaves scorch. A light shade cloth works well for young plants. Observe the site for a full day before you plant. Note any shadows from trees or structures. Full sun for six hours is the minimum goal. More sun often means more flowers. Too much shade leads to weak stems. Adjust planting time if the site changes seasonally. Consistent light encourages compact growth. Watch for leaf burn on very hot days. Move pots if needed. Mulch helps keep roots cool. Water early to reduce heat stress. These steps keep planting catmint ‘walker’s low’ healthy.
Microclimate Awareness
Microclimate awareness improves planting catmint ‘walker’s low’ success. Small changes in elevation affect temperature. Low spots collect cold air at night. High spots warm faster in spring. Wind exposure can dry foliage quickly. A windbreak of shrubs reduces stress. Observe frost patterns in early spring. Plant after the last frost date for your zone. Soil temperature above 50°F signals safe planting. Use a soil thermometer for accuracy. Adjust planting depth if soil stays cool. These observations guide the best start. Record daily highs and lows in a notebook. Compare notes each year for trends. Share data with local garden groups. This habit refines planting catmint ‘walker’s low’ timing. Consistent records lead to better bloom cycles. Healthy plants reward careful watchers.
Preparing the Planting Hole
Digging the Right Size
Dig a hole that is twice as wide as the root ball and just as deep. A wide hole encourages the roots to spread outward rather than circling the bottom. Place the excavated soil on a tarp so you can easily backfill later. If the soil at the bottom of the hole feels compacted, loosen it with the fork before you set the plant. This extra step makes a big difference for planting catmint ‘walker’s low’ because the roots can penetrate quickly and establish a strong anchor.
Amending the Backfill
Mix the native soil you removed with an equal part of compost before you return it to the hole. The blended backfill supplies a steady stream of nutrients while maintaining good drainage. Avoid using straight fertilizer at planting time; a slow‑release organic amendment is safer for young roots. Gently firm the amended soil around the root ball, leaving a slight depression that will hold water during the first few irrigations. This technique gives planting catmint ‘walk low’ a stable start.
Setting the Plant at the Correct Depth
Position the plant so the top of the root ball sits level with the surrounding ground. Planting too deep can cause the crown to rot, while planting too high exposes roots to drying air. After you set the plant, backfill halfway, water lightly to settle the soil, then finish filling the hole. Tamp the soil gently with your hands to remove large air pockets. A final deep soak ensures the root zone is uniformly moist, which is critical for planting catmint ‘walker’s low’ during the first week.
Using Raised Beds
Using raised beds benefits planting catmint ‘walker’s low’ in wet areas. Build a frame at least twelve inches high. Fill with a mix of loam, compost, and coarse sand. The elevated soil drains faster after rain. Roots stay oxygenated and avoid rot. Raised beds also warm earlier in spring. Early warmth speeds up root growth. You can control soil texture more easily. Add a layer of mulch on top to conserve moisture. Check the bed level each season and top off as needed. This method reduces disease pressure. Combine with drip irrigation for steady water. Avoid overhead watering to keep leaves dry. These practices keep planting catmint ‘walker’s low’ vigorous. Monitor soil moisture weekly with a probe. Adjust watering as seasons change.
Amending Heavy Clay
Amending heavy clay helps planting catmint ‘walker’s low’ establish quickly. Clay holds water and compacts easily. Mix in coarse sand at a one to three ratio. Add compost to improve structure and nutrients. Gypsum can also break up tight particles. Work amendments into the top twelve inches. Test drainage by filling a hole with water. It should drain within an hour. If it stays longer, add more sand. Re‑test after each amendment. Proper texture leads to strong roots. Mulch the surface to reduce evaporation. Water deeply but infrequently after planting. These steps keep planting catmint ‘walker’s low’ healthy. Check root development after four weeks. Gently lift a corner to inspect. Healthy white roots indicate success.
Watering and Early Care
First Week Watering Schedule
Water the new planting every day for the first three days, then every other day for the next four days. Use a gentle stream at the base of the plant to avoid wetting the foliage. Consistent moisture helps the roots push into the surrounding soil without shock. After the first week, reduce watering to once a week unless a heat wave pushes temperatures above 90°F. Monitoring the soil with your finger is an easy way to gauge when planting catmint ‘walker’s low’ needs a drink.
Mulching for Moisture Retention
Apply a two‑inch layer of shredded bark, straw, or pine needles around the base, keeping the mulch a few inches away from the crown. Mulch conserves moisture, suppresses weeds, and moderates soil temperature. Organic mulch also breaks down slowly, feeding the soil over time. Refresh the mulch each spring to maintain its benefits for planting catmint ‘walker’s low’.
Fertilizing Lightly
Feed the plant with a balanced, slow‑release fertilizer in early spring when new growth appears. A single application at the recommended rate is usually enough for the whole season. Over‑fertilizing encourages lush foliage at the expense of flowers, which defeats the purpose of planting catmint ‘walker’s low’. If you prefer an organic route, a top‑dressing of compost in March works well.
Rainwater Harvesting
Rainwater harvesting supports planting catmint ‘walker’s low’ during dry spells. Install a barrel under a downspout. Use a screen to keep debris out. Collected water is free of chlorine. Water plants early in the morning with a hose. A soaker hose distributes moisture evenly. Mulch reduces evaporation from the soil surface. Check barrel level weekly in summer. Overflow can be directed to a garden bed. This system saves money and conserves resources. Add a timer for automatic watering. Set it to run for fifteen minutes. Adjust schedule after rain events. Consistent moisture helps planting catmint ‘walker’s low’ bloom longer. Inspect barrels for leaks each spring. Clean screens to maintain flow. A well‑maintained system lasts many years.
Monitoring Soil Moisture
Monitoring soil moisture guides watering for planting catmint ‘walker’s low’. Insert a finger two inches deep near the base. Feel for dampness before adding water. A moisture meter gives a numeric reading. Aim for a reading in the middle range. Water only when the top inch feels dry. Overwatering leads to root rot and fungal issues. Underwatering causes wilting and reduced flowers. Record observations in a garden journal. Patterns emerge that simplify future care. Check moisture after heavy rain as well. Adjust mulch thickness if soil stays soggy. These habits keep planting catmint ‘walker’s low’ thriving. Use a rain gauge to track natural input. Combine data with meter readings for precision. Consistent monitoring reduces guesswork.
Pruning and Deadheading
First Flush Pruning
After the initial bloom fades, usually in midsummer, shear the plant back by about one‑third. This cut stimulates a second wave of flowers and keeps the habit tidy. Use clean, sharp shears to make a clean cut just above a set of healthy leaves. Regular pruning also improves air circulation, which reduces disease pressure on planting catmint ‘walker’s low’.
Deadheading Spent Blooms
Pinch off individual spent flower spikes throughout the season if you prefer a neater look. Deadheading redirects energy from seed production back into new buds. It is a quick task that can be done while you stroll the garden. Consistent deadheading extends the flowering period of planting catmint ‘walker’s low’ well into autumn.
Fall Clean‑Up
In late fall, after the foliage turns brown, cut the stems down to a few inches above ground. Removing dead material eliminates overwintering sites for pests and diseases. A light layer of mulch over the crown protects the roots from freeze‑thaw cycles. This simple fall routine prepares planting catmint ‘walker’s low’ for a vigorous return next spring.
Tools for Clean Cuts
Tools for clean cuts make pruning planting catmint ‘walker’s low’ easy. Sharp bypass pruners give a smooth slice. Dull blades crush stems and invite disease. Clean the blades with alcohol between plants. A small hand saw helps with thick woody bases. Wear gloves to protect your hands from sap. Keep a bucket of water nearby to rinse tools. Store tools dry to prevent rust. Regular maintenance extends tool life. Good tools produce healthy regrowth. Sharpen blades at the start of each season. Oil moving parts to keep action smooth. A well‑cared tool set saves time. Replace any bent or broken blades immediately. Invest in a quality pruner for best results. Your plants will thank you.
Timing the Second Flush
Timing the second flush maximizes blooms on planting catmint ‘walker’s low’. Watch for the first flower fade in midsummer. Cut back stems to one third of their height. New buds appear within two weeks. Apply a light feed after pruning to support growth. Water consistently during the regrowth phase. Avoid heavy fertilizer that forces foliage over flowers. Deadhead any stray spent blooms promptly. The plant will reward you with a fresh wave. Enjoy color into early autumn. Mark the calendar for the next pruning cycle. Repeat the process each year for steady performance. Consistent timing builds a reliable bloom schedule. Note weather patterns that affect timing. Adjust cuts if a heat wave arrives early. Flexibility keeps planting catmint ‘walker’s low’ productive.
Propagation Techniques
Stem Cuttings in Early Summer
Take four‑inch cuttings from non‑flowering shoots in early summer. Strip the lower leaves, dip the cut end in rooting hormone, and insert the cutting into a pot of moist perlite. Cover the pot with a clear plastic bag to maintain humidity and place it in bright, indirect light. Roots typically form in three to four weeks, after which you can transplant the new plant into the garden. This method multiplies planting catmint ‘walker’s low’ quickly and reliably.
Division of Mature Clumps
Every three to four years, lift an established clump in early spring before new growth starts. Use a sharp spade to split the root mass into sections, each with several shoots and a healthy root portion. Replant the divisions at the same depth, water well, and mulch. Division rejuvenates the plant, prevents center die‑out, and gives you extra specimens of planting catmint ‘walker’s low’ for other beds.
Seed Sowing Basics
Although the cultivar comes true from division, you can also collect seeds after the flowers fade. Sow seeds indoors six weeks before the last frost, pressing them lightly onto a seed‑starting mix. Keep the medium moist and provide bottom heat around 70°F. Seedlings emerge in two to three weeks and can be hardened off before transplanting. Seed propagation is slower but adds genetic diversity to planting catmint ‘walker’s low’.
Rooting Hormone Options
Rooting hormone options improve success when propagating planting catmint ‘walker’s low’. Powdered hormone is easy to apply to cut ends. Gel formulations cling better in humid conditions. Liquid concentrates can be diluted for large batches. Choose a product with indole‑3‑butyric acid. Follow label rates to avoid burning tissue. Dip cuttings for five seconds then tap excess. Place cuttings in a sterile medium immediately. Keep humidity high with a clear dome. Roots usually appear in three weeks. Test a few cuttings with each type to compare. Record rooting time and vigor in a notebook. Select the best method for future batches. Store hormones in a cool dark place. Replace expired products each season. Proper storage keeps planting catmint ‘walker’s low’ propagation reliable.
Seed Stratification Tips
Seed stratification tips boost germination of planting catmint ‘walker’s low’. Cold treatment mimics winter conditions for the seeds. Place seeds in a moist paper towel inside a plastic bag. Refrigerate for four weeks at 40°F. Check moisture weekly and remoisten if dry. After stratification sow seeds on the surface of a light mix. Do not cover seeds; they need light to sprout. Keep the tray at 70°F with bright indirect light. Germination occurs in ten to fourteen days. Transplant seedlings when they have two true leaves. Label each tray with date and variety. Harden off seedlings before moving outdoors. Gradual exposure prevents shock. Water seedlings from the bottom to avoid damping off. Fertilize lightly after the first true leaf appears. These steps give planting catmint ‘walker’s low’ a strong start.
Design Ideas and Companion Plants
Border and Edge Plantings
Use the low, mounded habit of planting catmint ‘walker’s low’ to define the front of a sunny border. Its silver‑green foliage contrasts beautifully with dark‑leafed perennials such as heuchera or purple coneflower. The lavender spikes add a soft vertical accent that draws the eye along the edge. Plant in groups of three or five for a natural, drift‑like effect.
Rock Garden Integration
In a rock garden, tuck planting catmint ‘walker’s low’ among stones and gravel where drainage is excellent. The plant tolerates lean soil and thrives in the reflected heat from rocks. Pair it with sedum, thyme, and dwarf iris for a tapestry of texture and color that blooms from spring to fall.
Pollinator Garden Role
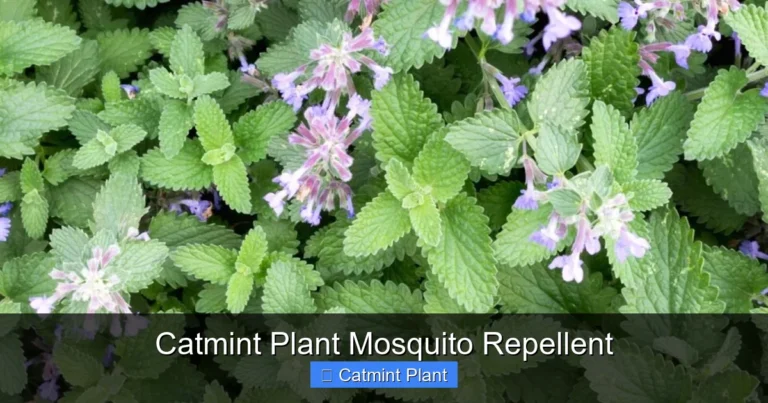
Bees, butterflies, and hummingbirds love the nectar‑rich flowers of planting catmint ‘walker’s low’. Include it in a pollinator strip alongside lavender, salvia, and bee balm to create a continuous food source. The long bloom season supports beneficial insects throughout the growing months, boosting overall garden health.
Container Groupings
Container groupings showcase planting catmint ‘walker’s low’ on patios. Choose a pot at least twelve inches wide. Use a well‑draining potting mix with perlite. Group three pots together for a mass effect. Add trailing lobelia for a soft edge. Include a tall ornamental grass for height contrast. Water containers daily in hot weather. Feed with a liquid fertilizer every two weeks. Rotate pots monthly for even light exposure. This arrangement creates a portable pollinator oasis. Place containers near a seating area for fragrance. Enjoy the scent while relaxing outdoors. Move pots indoors before frost for winter protection. Check drainage holes each spring for blockages. Refresh potting mix every two years. Consistent care keeps planting catmint ‘walker’s low’ thriving in pots.
Seasonal Color Pairings
Seasonal color pairings highlight planting catmint ‘walker’s low’ throughout the year. In spring pair with yellow coreopsis for bright contrast. Summer brings purple salvia that echoes the catmint hue. Autumn adds orange sedum for warm tones. Winter interest comes from evergreen boxwood nearby. Plan bloom sequences so something flowers each month. Use a garden journal to track color peaks. Adjust plant positions as clumps expand. This strategy creates a living tapestry. Visitors enjoy continuous visual appeal. Add early blooming bulbs like crocus for early color. Late season asters extend the show into November. Layer heights for depth and drama. Mulch with shredded leaves to enrich soil. Observe pollinator activity across seasons. A diverse palette supports planting catmint ‘walker’s low’ health.
Growing planting catmint ‘walker’s low’ rewards you with fragrant foliage, abundant lavender spikes, and a plant that asks for very little in return. By selecting a sunny, well‑drained site, spacing properly, and following the simple watering, pruning, and division schedule outlined above, you will enjoy a reliable perennial that brightens the garden from early summer to frost. Whether you use it as a border edger, a rock‑garden filler, or a pollinator magnet, this catmint cultivar proves that low maintenance does not mean low impact. Happy planting!
Frequently Asked Questions
Does catmint ‘Walker’s Low’ attract bees?
Yes, the lavender flowers are a strong nectar source for bees and other pollinators.
Is catmint ‘Walker’s Low’ deer resistant?
Deer generally avoid catmint because of its aromatic foliage.
How tall does this variety get?
It typically reaches 12 to 18 inches in height and spreads 18 to 24 inches wide.
Can I divide the plant in summer?
Division is best done in early spring or fall; summer division can stress the plant.
What pests commonly affect catmint?
Aphids and spider mites may appear, but they are easily managed with insecticidal soap.
Should I fertilize every year?
A single slow‑release feeding in early spring is sufficient; avoid heavy feeding.