Essential Cob for Orchid Health
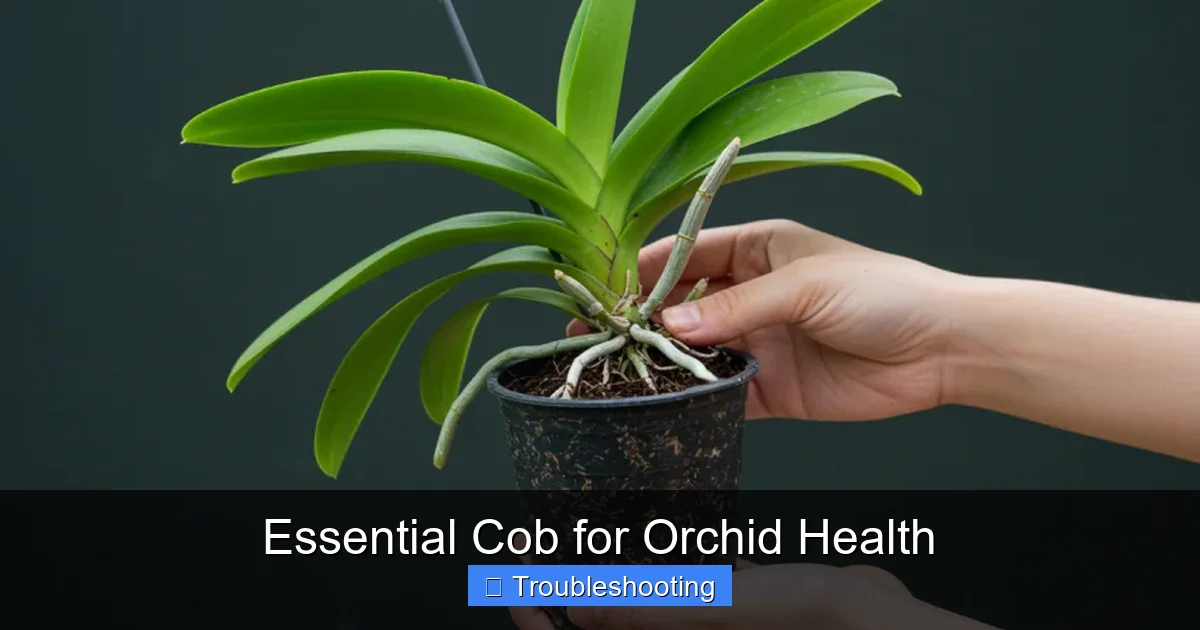
Essential COB for orchid health means using Chip-on-Board LED technology to deliver the precise light spectrum orchids need for photosynthesis, blooming, and strong root development. This guide covers everything from choosing the right COB setup to troubleshooting common lighting issues so your orchids flourish indoors.
If you have ever watched an orchid stretch toward a windowsill, leaves pale and stems weak, you know the frustration of insufficient light. I have been there too. My first Phalaenopsis sat on a north-facing shelf for months, refusing to bloom, until I discovered the game-changing power of essential COB for orchid health. Chip-on-Board LED technology changed everything. Suddenly, my orchids received the intense, full-spectrum light they craved, and the results spoke for themselves: glossy leaves, robust roots, and flower spikes that lasted for months.
This guide walks you through everything I learned on that journey. We will explore why COB LEDs outperform older lighting types, how to select the right fixture for your collection, the science of spectrum and intensity, practical mounting and scheduling tips, and how to troubleshoot common problems. Whether you grow a single moth orchid on a desk or manage a greenhouse full of Cattleyas, understanding essential COB for orchid health will transform your results. Let us dive in.
Key Takeaways
- COB LEDs provide intense, uniform light: Chip-on-Board technology packs multiple LED chips into a single module, creating a powerful light source that mimics natural sunlight better than traditional panels.
- Full spectrum is non-negotiable: Orchids need both blue light for vegetative growth and red light for flowering; quality COB fixtures deliver a balanced spectrum covering 400-700nm.
- Distance and duration matter as much as intensity: Even the best COB light burns leaves if placed too close or runs too long; most orchids thrive at 12-18 inches with 12-14 hour photoperiods.
- Heat management protects your investment: COB chips run hot; proper heatsinks, fans, and ventilation prevent light degradation and leaf scorch.
- PAR and PPFD measurements guide placement: Use a quantum meter to verify your orchids receive 100-300 µmol/m²/s (low light) or 300-500 µmol/m²/s (high light) depending on species.
- Supplemental lighting extends growing seasons: COB systems let you grow year-round, trigger off-season blooms, and rescue etiolated plants in dark corners.
- Regular maintenance keeps output consistent: Dust buildup, driver degradation, and thermal paste failure reduce efficiency; clean monthly and test output quarterly.
Quick Answers to Common Questions
What does COB stand for in grow lighting?
COB stands for Chip-on-Board, a technology where multiple LED chips are mounted directly onto a single substrate to create one high-intensity light source.
How far should a COB light be from my orchids?
Start at 18-24 inches above the canopy and adjust based on PPFD readings; most orchids thrive between 12-18 inches depending on species and wattage.
Can I use a regular household LED bulb instead of a COB grow light?
Household LEDs lack the intensity, spectrum balance, and thermal management needed for sustained orchid growth and flowering.
How many hours of COB light do orchids need daily?
Most orchids need 12-14 hours; low-light types do well with 12, while high-light genera like Vandas benefit from 13-14 hours in summer.
Do COB lights get hot enough to burn orchid leaves?
Yes, the fixture heatsink and concentrated beam can scorch leaves if placed too close; always maintain proper distance and use fans for airflow.
📑 Table of Contents
- Why COB Technology Matters for Orchids
- Understanding Light Spectrum for Orchid Health
- Choosing the Right COB Fixture for Your Collection
- Setting Up Your COB System: Placement, Timing, and Environment
- Troubleshooting Common COB Lighting Issues
- Advanced Tips for Maximizing COB Performance
- Species-Specific COB Strategies
- Maintaining Your COB Investment
- Conclusion
Why COB Technology Matters for Orchids
The Evolution of Grow Lighting
Orchid growers have tried fluorescent tubes, high-intensity discharge lamps, and early LED panels. Each had drawbacks. Fluorescents lack penetration. HID lamps run hot and guzzle electricity. First-generation LEDs often used widely spaced diodes that created hotspots and shadow zones. COB technology solves these problems by mounting dozens of tiny LED chips directly onto a single substrate. The result is a single, high-output light source that behaves more like a miniature sun than a string of Christmas lights.
Uniformity and Penetration
Because the chips are packed tightly, a COB array emits light from a small surface area. This creates a cohesive beam that penetrates deeper into the canopy. For orchids with layered foliage — think Dendrobiums or Oncidiums — that penetration means lower leaves receive usable photons instead of languishing in shade. Uniformity also prevents the “leggy” growth that happens when plants stretch toward bright spots.
Efficiency and Longevity
Modern COB modules achieve 130-180 lumens per watt. They convert more electricity into photosynthetically active radiation (PAR) and less into waste heat. A quality COB fixture rated for 50,000 hours can run 14 hours daily for nearly ten years before significant degradation. That longevity makes the higher upfront cost pencil out over time.
Understanding Light Spectrum for Orchid Health
Photosynthetically Active Radiation Basics
Plants use light between 400 and 700 nanometers. Within that range, chlorophyll absorbs blue (400-500nm) and red (600-700nm) most efficiently. Green and yellow light (500-600nm) penetrate deeper into leaf tissue and drive photosynthesis in lower chloroplasts. A balanced COB spectrum delivers all three regions.
Visual guide about Essential Cob for Orchid Health
Image source: nurserylady.com
Blue Light: Structure and Compact Growth
Blue photons inhibit stem elongation, promote thick leaves, and stimulate root initiation. For orchids, this means shorter, sturdier pseudobulbs and better anchor roots. Too much blue, however, can stunt flowering. Aim for 15-25% blue in your total output.
Red Light: Flowering and Biomass
Red light drives the phytochrome system that triggers bloom spikes. It also fuels carbohydrate production, building the energy reserves an orchid needs to sustain flowers. A strong red peak around 660nm is ideal. Target 60-70% red for most genera.
Far-Red and the Emerson Effect
Far-red (700-750nm) enhances photosynthesis when combined with red light — a phenomenon called the Emerson Effect. Some premium COB modules include a small far-red component to boost flowering in Phalaenopsis and Vandas. It is not essential, but it helps.
Green Light: The Unsung Hero
Green light reaches lower leaf layers and drives photosynthesis in shaded chloroplasts. It also improves human color rendering so you can spot pests and nutrient issues early. Quality COB chips naturally emit a broad white spectrum that includes green.
Choosing the Right COB Fixture for Your Collection
Wattage and Coverage Area
A single 50-watt COB module covers roughly 2×2 feet at 18 inches height for medium-light orchids. High-light genera like Vandas or Cattleyas may need 100 watts over the same footprint. Measure your growing area and match total wattage to square footage. A good rule: 30-40 watts per square foot for high light, 20-30 for medium, 15-20 for low.
Visual guide about Essential Cob for Orchid Health
Image source: blog.dutch-bulbs.com
Color Temperature and CRI
Look for fixtures rated 3500K-4000K with a Color Rendering Index (CRI) above 90. This “neutral white” blend balances blue and red while keeping foliage colors true. Avoid “blurple” grow lights with heavy red/blue ratios; they make inspection difficult and can cause nutrient lockout in some species.
Driver Quality and Dimming
The driver regulates current to the COB chip. Constant-current drivers with 0-10V or PWM dimming let you fine-tune intensity for different growth stages. Mean Well, Inventronics, and Philips drivers are reliable brands. Cheap unbranded drivers often flicker, stressing plants and shortening chip life.
Thermal Management
COB chips concentrate heat in a small area. A proper fixture includes a thick aluminum heatsink (at least 3mm base), thermal interface material, and often a quiet fan. Passive heatsinks work for lower wattages (<50W) in open air. For enclosed tents or multi-module arrays, active cooling is essential.
Form Factor: Boards, Bars, and Panels
- Single COB boards: Ideal for spotlighting a specimen plant or supplementing a dark corner.
- COB bars (2-4 modules): Great for shelving units; linear coverage matches orchid rows.
- Multi-COB panels (6+ modules): Best for larger collections; even canopy coverage across 4×4 feet or more.
Setting Up Your COB System: Placement, Timing, and Environment
Finding the Sweet Spot: Distance and PPFD
Photosynthetic Photon Flux Density (PPFD) measures usable light reaching the leaf. Use a quantum meter (Apogee, Li-Cor, or affordable UNI-T models) to map your canopy. General targets:
- Phalaenopsis, Paphiopedilum (low light): 100-200 µmol/m²/s
- Oncidium, Dendrobium, Cattleya (medium light): 200-400 µmol/m²/s
- Vanda, Ascocenda, Brassavola (high light): 400-600 µmol/m²/s
Start with the fixture 18-24 inches above the tallest leaf. Take readings at leaf level. Adjust height until the average matches your target. Remember: PPFD drops by the inverse square law. Every inch matters.
Photoperiod: Mimicking Nature
Most orchids evolved near the equator with 12-hour days year-round. A 12-on/12-off schedule works for many. For seasonal bloomers, adjust: 13-14 hours in summer, 11-10 in winter. Use a digital timer with battery backup. Consistency triggers flower spikes; erratic schedules confuse the plant.
Ramping and Sunrise Simulation
Sudden full-intensity light can shock sensitive species. If your driver supports dimming, program a 30-minute ramp-up at dawn and ramp-down at dusk. This mimics natural light transitions and reduces photoinhibition risk.
Air Movement and Temperature
COB fixtures warm the canopy. A gentle breeze (oscillating fan on low) prevents hot spots and strengthens stems. Keep leaf temperature within 5°F of ambient. If leaves feel hot to the touch, raise the light or increase airflow.
Humidity Considerations
Higher light increases transpiration. Monitor humidity; aim for 50-70% for most orchids. Group plants, use humidity trays, or run a humidifier if your COB setup dries the air. Dry air + high light = crispy leaf tips.
Troubleshooting Common COB Lighting Issues
Leaf Burn and Bleaching
Symptoms: White or brown patches on uppermost leaves, often with a sharp line where light intensity drops. Cause: Excessive PPFD or fixture too close. Fix: Raise light 3-6 inches, reduce photoperiod by 1-2 hours, or dim to 75%. Damaged tissue will not recover, but new growth will be normal.
Etiolation Despite High Light
Symptoms: Long, thin leaves; wide internodes; pale color. Cause: Spectrum imbalance (too much far-red or green), or light only from one direction causing directional stretching. Fix: Verify spectrum with a spectrometer app or manufacturer data. Add a second fixture from the opposite side. Rotate plants weekly.
Flower Bud Blast
Symptoms: Buds yellow, shrivel, and drop before opening. Cause: Sudden intensity change, heat stress, or dry air from increased transpiration. Fix: Maintain stable conditions during spike development. Do not move or re-light a spiking plant. Increase humidity to 65%+.
Algae and Cyanobacteria on Media
Symptoms: Green slime on bark or moss surface. Cause: High light + constant moisture + nutrients. Fix: Top-dress with coarse charcoal or LECA to shade media surface. Allow top layer to dry between waterings. Reduce photoperiod by 1 hour.
Driver Flicker and Failure
Symptoms: Visible strobe, plants show stress, fixture shuts off randomly. Cause: Cheap driver, overheating, or voltage mismatch. Fix: Replace with a quality constant-current driver matched to COB voltage and current specs. Ensure heatsink is clean and fan spins freely.
Gradual Output Decline
Symptoms: Leaves darken, growth slows, blooms diminish over 1-2 years. Cause: Normal LED lumen depreciation, dust on lens, thermal paste degradation. Fix: Clean lenses monthly with microfiber and isopropyl. Re-test PPFD quarterly. Plan fixture replacement at 70% rated hours (typically 35,000 hours).
Advanced Tips for Maximizing COB Performance
Supplemental Side Lighting
Even the best top-down COB leaves lower leaves in shadow. Add 10-15 watt LED strips vertically along shelf edges. This “side fill” boosts lower canopy PPFD by 30-50% without increasing top intensity.
Movable Light Rails
For long benches, mount COB bars on a light mover (e.g., LightRail). The slow traverse mimics sun movement, eliminates static shadows, and lets one fixture cover 2x the area. Orchids love the dynamic angles.
Spectral Tuning for Specific Goals
- Vegetative push: Increase blue to 30% for 4-6 weeks after repotting to accelerate root and leaf growth.
- Bloom induction: Shift to 70% red + far-red for 3-4 weeks when night temperatures drop (for cool-spike initiators).
- Rescue mode: Balanced white at low intensity (50 µmol/m²/s) for stressed or rootless plants to prevent photoinhibition while they recover.
Integrating with Natural Light
If your grow space receives morning sun, run COB from 11 AM to 11 PM to extend the day. Use a light sensor to auto-dim the COB when sunlight contributes significant PPFD. This saves electricity and prevents midday overdose.
Data Logging for Serious Growers
Connect a PAR sensor to a Raspberry Pi or Arduino. Log PPFD, temperature, and humidity every 15 minutes. Over months, you will see patterns — seasonal drift, dust accumulation, driver aging — that visual checks miss. Data drives better decisions.
Species-Specific COB Strategies
Phalaenopsis (Moth Orchids)
Low-light lovers. Target 120-180 µmol/m²/s. 12-hour photoperiod year-round. Neutral white 4000K COB at 18-24 inches. They bloom best with a slight night temperature drop (1-2°F) and stable light. Avoid intense red spikes; they trigger keikis instead of flowers.
Cattleya Alliance
Medium-high light. 300-450 µmol/m²/s. 13-hour summer, 11-hour winter. Strong red peak (660nm) encourages robust pseudobulbs and flower sheaths. Watch for leaf burn on new growth; it is tender. Side lighting helps mature back bulbs stay productive.
Vanda and Ascocenda
High light, high humidity. 500-600 µmol/m²/s. 14-hour days. These need intense, uniform light from all sides. Multiple COB modules on a frame surrounding the basket work best. Active cooling is mandatory — leaf temperature spikes fast in bare-root culture.
Paphiopedilum (Slipper Orchids)
Low light, terrestrial. 100-150 µmol/m²/s. 12-hour days. They dislike intense blue; it causes leaf stippling. Use a warmer 3500K COB with higher green content. Keep fixture higher (24+ inches) and ensure good air movement to prevent crown rot.
Dendrobium (Nobile and Phalaenopsis Types)
Seasonal needs. Nobile types need high light (400 µmol/m²/s) in summer, then a cool, dry, low-light rest (50 µmol/m²/s) in winter to set buds. Phalaenopsis-types want steady medium light (250 µmol/m²/s) year-round. A dimmable COB system handles both with schedule changes.
Maintaining Your COB Investment
Monthly Cleaning Routine
- Power off and unplug. Let cool 15 minutes.
- Remove dust from heatsink fins with soft brush or compressed air (low pressure).
- Wipe COB lens with microfiber cloth dampened with 90% isopropyl alcohol. No paper towels — they scratch.
- Check fan spin. Lubricate sleeve bearings with one drop lightweight oil if noisy.
- Inspect wiring for chafing, especially at hinge points on adjustable mounts.
Quarterly Performance Check
Measure PPFD at three fixed canopy points. Record values. Compare to baseline (first month readings). A drop >15% signals lens haze, driver drift, or chip degradation. Clean lens first. If still low, test driver output with multimeter. Replace driver or module as needed.
Annual Deep Maintenance
Once a year, dismount fixture. Remove COB module from heatsink. Clean old thermal paste with alcohol. Apply fresh high-quality paste (Arctic MX-6, Grizzly Kryonaut). Reseat evenly. Torque mounting screws to spec (usually 0.5-0.8 Nm). This restores thermal transfer and extends chip life significantly.
Spare Parts Strategy
Keep one spare driver and one spare COB module (same bin/flux rating) on hand. Downtime during bloom season costs flowers. Label spares with purchase date and test them annually.
Conclusion
Mastering essential COB for orchid health is not about buying the most expensive fixture. It is about understanding how light drives every aspect of orchid physiology — from root tips to flower lips — and matching that knowledge to your specific plants and space. Start with a quality full-spectrum COB, measure your PPFD, set a consistent schedule, and watch your orchids respond. The first time you see a reluctant Phalaenopsis throw a double spike, or a Cattleya pump out three sheaths instead of one, you will know the effort was worth it. Light is the engine of growth. Give your orchids the engine they deserve, and they will reward you with blooms that stop visitors in their tracks. Happy growing.
Frequently Asked Questions
What is the ideal PPFD for Phalaenopsis orchids under COB lighting?
Phalaenopsis thrive at 120-180 µmol/m²/s. Measure at leaf level with a quantum meter and adjust fixture height or dimming to hit this range consistently.
Can I run COB lights 24 hours a day for faster growth?
No. Orchids require a dark period for respiration and metabolic processes. Continuous light causes oxidative stress, leaf chlorosis, and bloom failure.
How do I know if my COB spectrum is balanced for orchids?
Check the manufacturer’s spectral power distribution chart. Look for peaks in blue (450nm) and red (660nm) with substantial green (500-600nm) output and a CRI above 90.
Is it better to use one large COB panel or several smaller modules?
Multiple smaller modules spaced across the canopy provide more uniform coverage and redundancy; if one fails, the others keep plants lit.
What humidity level should I maintain with COB lighting?
Aim for 50-70% relative humidity. Higher light increases transpiration, so monitor leaf tips for drying and add humidity trays or a humidifier if needed.
How often should I replace my COB grow light?
Quality COB modules rated for 50,000 hours last 8-10 years at 14 hours daily. Replace when output drops below 70% of original PPFD or color shift becomes noticeable.