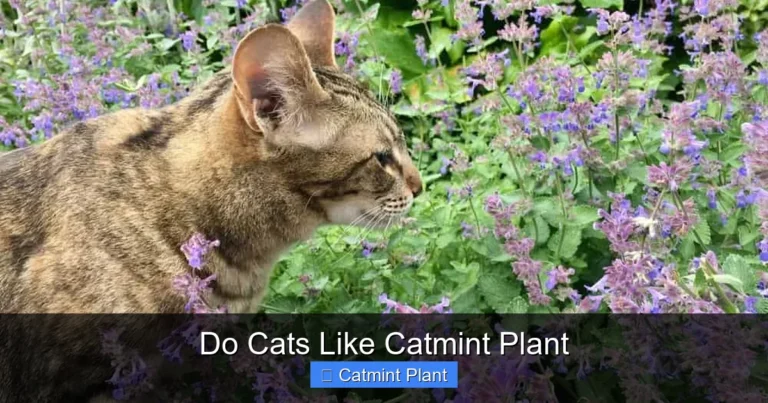
Can I Plant Catmint in the Fall
Yes, you can plant catmint in the fall and it often establishes better than spring plantings. Fall planting gives roots time to grow before winter dormancy, leading to vigorous spring growth and abundant blooms.
Key Takeaways
- Fall is ideal: Cool temperatures and warm soil promote strong root development before winter.
- Timing matters: Plant 6-8 weeks before your first hard frost for best results.
- Well-drained soil is essential: Catmint hates wet feet, especially in winter.
- Water consistently: Keep soil moist but not soggy until the ground freezes.
- Mulch for protection: A light layer of mulch insulates roots through winter.
- Skip fertilizer: Fall feeding encourages tender growth that winter will kill.
- Expect spring rewards: Fall-planted catmint often blooms earlier and fuller than spring plantings.
Quick Answers to Common Questions
Can I plant catmint in October?
Yes, in zones 6 and warmer, October planting works well. In zones 3-5, plant by mid-September for best root establishment before freezing.
Will fall-planted catmint bloom the first summer?
Yes, fall-planted catmint typically blooms heavily in its first summer because roots establish over winter and are ready to support full flower production.
Should I cut back catmint after fall planting?
No, do not cut back foliage after fall planting. The leaves photosynthesize and send energy to roots. Only remove spent flower spikes if the plant blooms.
What mulch is best for fall-planted catmint?
Shredded leaves, pine straw, or bark chips work best. Apply two inches, keeping it away from the crown. Avoid fine materials that mat down.
Can I plant catmint in fall in containers?
Yes, use a twelve-inch pot with gritty potting mix and extra perlite. Overwinter in a protected spot in zones 5 and colder. Water monthly if soil thaws.
📑 Table of Contents
- Why Fall Planting Works So Well for Catmint
- Understanding Your Planting Window
- Preparing the Perfect Spot
- The Planting Process Step by Step
- Watering and Care Through Fall
- What to Expect Next Spring
- Common Fall Planting Mistakes to Avoid
- Companion Planting with Fall Catmint
- Special Considerations by Climate
- Troubleshooting Fall-Planted Catmint
- Dividing and Propagating Your Fall Plantings
- Design Ideas for Catmint in the Landscape
- Conclusion
Why Fall Planting Works So Well for Catmint
You might wonder if fall is too late to add new plants to your garden. The short answer is no. In fact, fall is one of the best times to plant catmint. The soil stays warm from summer sun while air temperatures cool down. This combination creates perfect conditions for root growth. The plant puts energy into roots instead of flowers or leaves.
Catmint, also known as nepeta, is a tough perennial. It handles drought, poor soil, and neglect once established. But it needs time to get established. Fall gives it that time. By spring, your fall-planted catmint will have a head start. It will green up earlier and bloom stronger than anything you plant in April.
I have planted catmint in both spring and fall. The fall plantings always outperform the spring ones in their first year. They seem to wake up knowing exactly what to do. The roots have already explored the soil. They are ready to drink and eat the moment temperatures rise.
Understanding Your Planting Window
Know Your Frost Dates
The key to successful fall planting is timing. You want to plant catmint about six to eight weeks before your average first hard frost. A hard frost means temperatures drop below 28 degrees Fahrenheit for several hours. This kills tender growth. You can find your average frost date through your local extension office or a quick online search.

Visual guide about Can I Plant Catmint in the Fall
Image source: shuncy.com
If you live in zone 5, your first hard frost might come in mid-October. Plant in late August or early September. In zone 7, frost might not arrive until November. You can plant through October. In warmer zones 8 and 9, you can plant catmint well into November and even December.
Do not guess. Check your specific dates. Planting too late means roots cannot establish before the ground freezes. Planting too early in hot climates means heat stress. Both reduce survival rates.
Watch the Weather Forecast
Even with average dates, weather varies year to year. Check the ten-day forecast before you plant. Avoid planting right before a heat wave or cold snap. Ideal planting weather features cloudy days, mild temperatures, and light rain in the forecast. If a heat wave looms, wait. If an early freeze threatens, wait until spring.
I once planted catmint in early October during a beautiful stretch. Then a freak cold snap hit, dropping to 20 degrees overnight. The plants survived but struggled all next season. They never caught up to the ones I planted two weeks earlier during stable weather.
Preparing the Perfect Spot
Sun Requirements
Catmint loves full sun. It needs at least six hours of direct sunlight daily. Eight hours is even better. In hot southern climates, some afternoon shade helps prevent scorching. But in most regions, more sun equals more flowers and stronger stems. Shade makes catmint leggy and floppy. It also reduces essential oil production, which means less fragrance and fewer pollinators.
Choose a spot that gets morning sun for sure. Morning sun dries dew quickly, reducing fungal disease risk. If you must choose between morning and afternoon sun, pick morning.
Soil Preparation
Catmint is not fussy about soil fertility. It actually prefers lean soil. Rich soil makes it grow tall and floppy with fewer flowers. But it absolutely demands good drainage. Wet soil in winter kills catmint faster than cold.
Test your drainage. Dig a hole twelve inches deep and wide. Fill it with water. Let it drain. Fill it again. If the second fill drains in under four hours, drainage is good. If water sits for hours, you have a drainage problem.
Fix poor drainage by amending with coarse sand, fine gravel, or perlite. Mix it thoroughly into the top twelve inches. Do not just add it to the planting hole. That creates a bathtub effect where water collects around roots. Raise beds if your soil is heavy clay. Even a six-inch mound improves drainage dramatically.
Skip compost and manure unless your soil is pure sand or construction fill. Catmint thrives in gritty, low-nutrient soil. If you must improve soil structure, use a small amount of leaf mold or pine fines. These break down slowly and do not spike nitrogen.
Spacing for Airflow
Space catmint plants eighteen to twenty-four inches apart. Good air circulation prevents powdery mildew and other fungal issues. Crowded plants stay damp longer after rain. They also compete for light, becoming leggy.
If you are planting a hedge or mass planting, stagger them in a zigzag pattern. This looks more natural and gives each plant maximum space. For container planting, choose a pot at least twelve inches wide and deep. Use a gritty potting mix with extra perlite.
The Planting Process Step by Step
Before You Plant
Water your catmint thoroughly while it is still in the pot. Do this a few hours before planting. Moist root balls hold together better and suffer less transplant shock. If roots are circling the pot bottom, gently tease them apart. Do not be afraid to rough them up a bit. This encourages outward growth.
Gather your tools: a trowel or small shovel, a bucket of water, mulch, and gloves. Catmint stems can be brittle. Handle the plant by the root ball, not the stems.
Digging the Hole
Dig a hole twice as wide as the root ball but no deeper. The top of the root ball should sit level with or slightly above the surrounding soil. Planting too deep causes crown rot. The crown is where stems meet roots. It needs air.
If your soil is heavy, rough up the hole sides and bottom with your trowel. Smooth walls can act like a clay pot, trapping roots. Scarring the walls lets roots penetrate the native soil.
Placing and Backfilling
Set the plant in the hole. Check the level. Adjust by adding or removing soil from the bottom. Once level, backfill with the native soil you dug out. Do not amend the backfill. You want roots to grow into your real soil, not a pocket of perfect soil.
Firm the soil gently as you go. Use your hands, not your feet. You want to eliminate large air pockets without compacting the soil. Water halfway through backfilling to settle soil around roots. Finish backfilling. Water again thoroughly.
Mulching Done Right
Apply a two-inch layer of mulch around the plant. Keep mulch two inches away from the crown. Piling mulch against stems causes rot. Use shredded leaves, pine straw, or bark chips. Avoid fine materials like sawdust or grass clippings. They mat down and block air and water.
Mulch insulates soil temperature. It keeps soil warmer longer into fall, extending root growth. It also prevents frost heaving. Frost heaving happens when soil freezes and thaws repeatedly, pushing plants out of the ground. This exposes roots to killing cold.
Watering and Care Through Fall
Establishment Watering
Water deeply after planting. Then water every three to four days for the first two weeks if no rain falls. Check soil moisture by sticking your finger two inches deep. If dry, water. If moist, wait. Catmint hates wet feet more than dry feet.
After two weeks, reduce to weekly watering. Continue until the ground freezes. In mild climates where ground does not freeze, water monthly through winter if dry. The goal is moist but never soggy soil.
I use a soaker hose on a timer for new plantings. It delivers water slowly at soil level. This prevents fungal issues from wet foliage and ensures deep penetration. Overhead watering wastes water and promotes disease.
No Fertilizer Needed
Do not fertilize fall-planted catmint. Fertilizer stimulates tender new growth. This growth will not harden off before winter. It will die back, wasting the plant’s energy. Catmint does not need much fertilizer ever. A light top-dressing of compost in early spring is plenty.
If you planted in very poor soil, you can apply a slow-release, low-nitrogen fertilizer in early spring. But wait until you see new growth emerging. Fall fertilizer does more harm than good.
Dealing with Fall Growth
Your catmint may put on some new leaves after planting. This is fine. Do not pinch or prune it. Let the plant decide what it needs. The leaves photosynthesize and send energy to roots.
If the plant blooms in fall, enjoy it. But you can deadhead spent flowers to redirect energy to roots. Simply snip off faded flower spikes. Do not cut back foliage.
Winter Protection
In zones 3 and 4, add extra mulch after the ground freezes. Use straw, evergreen boughs, or shredded leaves. Apply four to six inches. This prevents freeze-thaw cycles. Remove extra mulch gradually in early spring as temperatures rise.
In zones 5 and warmer, the initial two-inch mulch layer is usually sufficient. Catmint is hardy to zone 3 once established. The danger is the first winter before roots anchor deeply.
What to Expect Next Spring
Emergence and Early Growth
Catmint is one of the first perennials to show green in spring. You will see fuzzy gray-green leaves pushing up through the mulch as soon as soil warms. This early start is a major benefit of fall planting. Spring-planted catmint sits dormant for weeks while fall-planted ones grow.
Remove any winter mulch gradually. Pull it back from the crown first. Then remove it entirely once nights stay above freezing. Do not rush. Late frosts can damage tender new growth.
First Year Blooms
Fall-planted catmint often blooms heavily in its first summer. Spring plantings may bloom sparsely or not at all their first year. The established root system supports full flower production.
Expect the main bloom flush in late spring to early summer. Shear the plant back by half after this first flush. This encourages a second, often larger, bloom in late summer. Use hedge shears or scissors. Cut to about six inches tall. Water well after shearing. New growth appears within days.
Long-Term Care
Once established, catmint asks for little. Water during extended droughts. Shear after each bloom flush. Divide every three to four years in early spring or fall to maintain vigor. Centers of old clumps die out. Division rejuvenates the plant and gives you free plants.
Catmint rarely needs staking. If it flops, it usually means too much shade, too much water, or too rich soil. Fix the conditions rather than staking.
Common Fall Planting Mistakes to Avoid
Planting Too Late
This is the number one mistake. Garden centers sell perennials late into fall. Just because they are for sale does not mean it is a good time to plant in your zone. If you buy late, heel them in. Heeling in means burying pots in a sheltered spot, mulching heavily, and planting properly in spring.
Overwatering
Fall rains often provide enough moisture. Check soil before watering. Soggy soil in cool weather causes root rot faster than anything else. Catmint roots need oxygen. Waterlogged soil has no oxygen.
Improving the Planting Hole Only
Amending just the planting hole creates a texture interface. Roots circle in the good soil instead of venturing into native soil. When summer heat hits, the small root ball cannot support the top growth. Amend the whole bed or nothing.
Skipping Mulch
Mulch is not optional for fall planting. It regulates soil temperature and moisture. It prevents frost heaving. It suppresses weeds that compete with establishing roots. Two inches. Not touching the crown. Every time.
Choosing the Wrong Variety
Not all catmint is created equal. Nepeta x faassenii cultivars like ‘Walker’s Low’ and ‘Six Hills Giant’ are the most reliable. Nepeta racemosa ‘Little Titch’ stays compact. Nepeta subsessilis tolerates more moisture. Species types like Nepeta cataria (true catnip) spread aggressively. Research your variety.
Companion Planting with Fall Catmint
Spring Bulbs
Plant catmint over spring bulbs like daffodils, tulips, and alliums. The catmint foliage emerges as bulb foliage fades. It hides the yellowing bulb leaves. The catmint roots occupy different soil depths than bulbs. They do not compete.
I plant ‘Walker’s Low’ catmint over ‘Purple Sensation’ alliums. The alliums bloom through the catmint in May. Then catmint takes over with its own purple spikes. It is a perfect succession.
Roses
Catmint is a classic rose companion. It covers bare rose canes. Its fragrance may deter some pests. The loose habit contrasts beautifully with stiff roses. Plant catmint eighteen inches from rose bases. This gives both room to breathe.
Other Mediterranean Herbs
Lavender, sage, thyme, and oregano share catmint’s love of sun and drainage. They create a cohesive, low-maintenance planting. Group them in a raised bed or sunny slope. They thrive on neglect.
Ornamental Grasses
Fine-textured grasses like blue fescue or Mexican feather grass contrast with catmint’s soft mounds. Both move beautifully in wind. Both need little water. Grasses provide winter structure when catmint dies back.
Special Considerations by Climate
Cold Climates Zones 3-4
Plant early. Late August is ideal. Choose the hardiest cultivars. ‘Walker’s Low’ and ‘Six Hills Giant’ are proven. Mulch heavily after ground freezes. Use straw or evergreen boughs. Do not use leaves alone. They mat down.
Consider planting in a protected microclimate. South-facing walls, windbreaks, and slopes that drain cold air all help. Snow cover is the best insulator. If your area gets reliable snow, catmint survives easily.
Hot Climates Zones 8-9
Fall planting extends into November and December. This is actually the best time. Spring planting in hot climates often fails due to summer heat stress before roots establish. Fall gives months of mild weather.
Provide afternoon shade in zone 9. Choose heat-tolerant varieties like Nepeta subsessilis or ‘Blue Wonder’. Mulch well to keep roots cool. Water more frequently until established.
Wet Climates Pacific Northwest, Gulf Coast
Drainage is everything. Plant on mounds or in raised beds. Add extra grit to soil. Space plants wider for airflow. Choose mildew-resistant varieties. ‘Walker’s Low’ has good resistance.
Plant early in fall while soil is still warm. This maximizes root growth before winter rains saturate soil. Avoid low spots where water collects.
Troubleshooting Fall-Planted Catmint
Yellowing Leaves
Yellow leaves usually mean overwatering or poor drainage. Check soil moisture. Reduce watering. If soil stays wet, consider lifting the plant and improving drainage. Yellow lower leaves with green tops can be normal aging. Remove yellow leaves to improve airflow.
Wilting Despite Moist Soil
This signals root rot. Roots cannot take up water because they are rotting. Dig up the plant. Inspect roots. Healthy roots are white and firm. Rotted roots are brown, black, or mushy. Trim rotted roots. Replant in better drainage. Dust cuts with cinnamon as a natural fungicide.
No Growth After Planting
Catmint may sit quietly for weeks. This is normal. It is growing roots. If no growth appears after three weeks in warm weather, check for root binding. Gently lift the plant. If roots are still a tight pot shape, tease them apart and replant.
Deer and Rabbit Damage
Catmint is generally deer and rabbit resistant due to its aromatic oils. But hungry animals eat anything. If browsing occurs, spray with repellent. Fencing works best. The good news: catmint recovers quickly from browsing.
Dividing and Propagating Your Fall Plantings
When to Divide
Divide catmint every three to four years. Spring division is traditional. But fall division works too, right after flowering ends. The plant has energy stored. Roots establish before winter. Divide on a cloudy day. Water well before and after.
How to Divide
Dig up the entire clump. Shake off excess soil. Pull or cut into sections. Each section needs roots and several shoots. Discard the woody center. Replant divisions immediately at the same depth. Water well. Mulch.
Stem Cuttings
Take softwood cuttings in late spring or early summer. Cut four-inch stems below a leaf node. Remove lower leaves. Dip in rooting hormone. Stick in moist perlite. Cover with a plastic bag. Roots form in two to three weeks. Pot up and grow on.
Seed Saving
Catmint seeds readily. But cultivars do not come true from seed. Species types do. If you want more of a specific variety, divide or take cuttings. If you want genetic diversity, let some flowers go to seed. Collect seeds when heads turn brown. Sow in fall or spring.
Design Ideas for Catmint in the Landscape
Edging and Borders
Catmint makes a fantastic soft edge along paths and driveways. It spills over hardscape, softening lines. Plant eighteen inches from the edge. It will grow to meet it. The fragrance releases when brushed. ‘Walker’s Low’ stays neat enough for formal edges. ‘Six Hills Giant’ needs more room.
Mass Plantings
Drifts of catmint create a sea of lavender-blue in early summer. Plant in odd-numbered groups of three, five, or seven. Space eighteen inches apart. The effect is meadow-like. Pair with contrasting colors like yellow coreopsis or orange butterfly weed.
Rock Gardens
Catmint thrives in the sharp drainage of rock gardens. It cascades over stones beautifully. Choose compact varieties like ‘Little Titch’ or ‘Blue Wonder’. Tuck them between rocks. They will root into crevices.
Pollinator Gardens
Bees, butterflies, and hummingbirds adore catmint. It blooms for months. Plant it in your pollinator patch. Combine with coneflowers, bee balm, and salvias for continuous nectar. Avoid pesticides. Catmint rarely needs them anyway.
Conclusion
So, can you plant catmint in the fall? Absolutely. Fall planting gives catmint a huge advantage. The roots establish in warm soil while the top stays cool and stress-free. By spring, you have a mature plant ready to explode with growth and flowers.
Remember the keys: plant six to eight weeks before hard frost, ensure excellent drainage, water consistently until freeze-up, mulch properly, and skip the fertilizer. Choose a sunny spot with good airflow. Pick a reliable variety for your zone.
I have grown catmint for twenty years. The fall plantings are always the stars of the garden. They ask for so little and give so much. That first flush of lavender spikes in late spring makes every bit of fall effort worth it.
Grab a pot of catmint this fall. Find a sunny, well-drained spot. Plant it with care. Then wait. Spring will bring the reward. Your garden and the bees will thank you.
Frequently Asked Questions
How late in fall can I plant catmint?
Plant catmint at least six to eight weeks before your average first hard frost date. This gives roots time to establish before the ground freezes. In warmer zones 7-9, you can plant through November.
Does catmint need winter protection after fall planting?
In zones 3-4, apply extra mulch (four to six inches of straw or evergreen boughs) after the ground freezes. In zones 5 and warmer, the initial two-inch mulch layer is usually sufficient for established plants.
Why is my fall-planted catmint turning yellow?
Yellowing usually indicates overwatering or poor drainage. Catmint prefers dry conditions. Check soil moisture two inches deep and only water when dry. Improve drainage if soil stays soggy.
Should I fertilize catmint when planting in fall?
No, never fertilize fall-planted catmint. Fertilizer stimulates tender growth that will not harden off before winter. Wait until early spring for a light compost top-dressing if needed.
Can I divide catmint in the fall?
Yes, divide catmint in early fall after flowering ends, at least six weeks before frost. Each division needs roots and several shoots. Water well and mulch after replanting.
What catmint variety is best for fall planting?
‘Walker’s Low’ and ‘Six Hills Giant’ (Nepeta x faassenii) are the most reliable and widely hardy. ‘Little Titch’ stays compact. Choose varieties rated for your USDA zone.