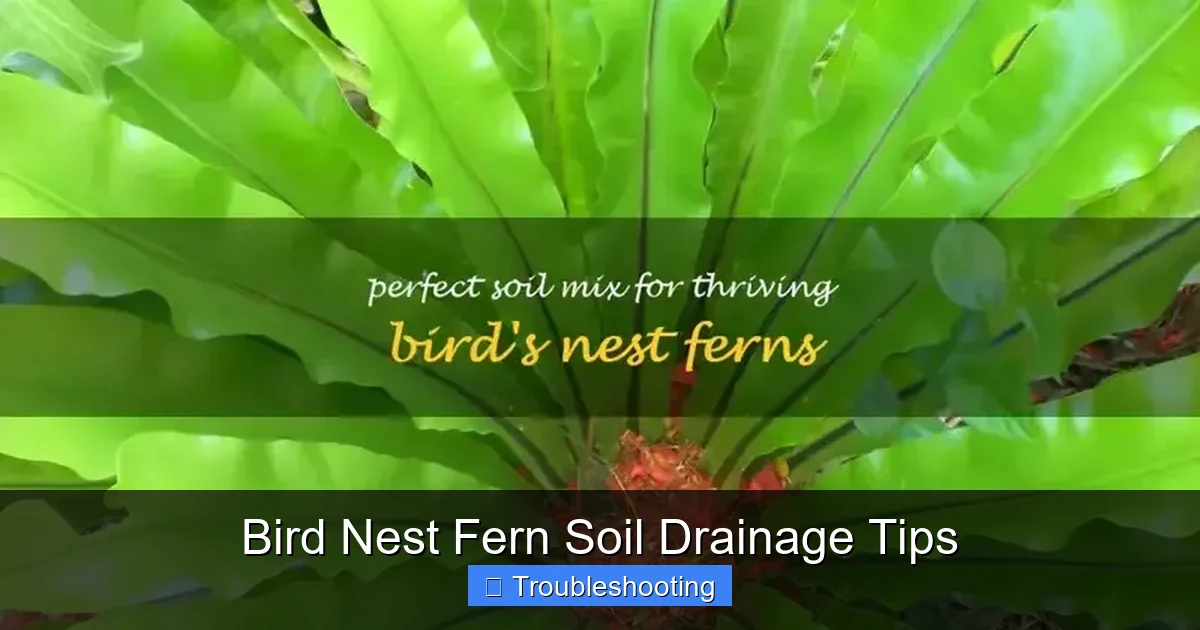
Bird Nest Fern Soil Drainage Tips
Proper drainage is the secret to a healthy bird nest fern. This guide covers the ideal soil mix, pot selection, and watering techniques to prevent root rot. Follow these bird nest fern soil drainage tips and your fern will reward you with lush, vibrant fronds for years to come.
If you have ever brought home a bird nest fern only to watch it turn yellow and mushy within weeks, you are not alone. These tropical beauties look tough with their glossy, wavy fronds, but they have a secret weakness: they hate wet feet. The number one killer of this plant is poor drainage. When water sits around the roots, oxygen gets cut off and rot sets in fast. The good news? You can fix this with a few simple changes. In this guide, we will walk through every bird nest fern soil drainage tip you need to keep your fern happy, healthy, and putting out new fronds like clockwork.
We will cover the best soil ingredients, the right pot, how to water without drowning the roots, and the subtle signs your plant sends when something is wrong. Whether you are a first-time plant parent or a seasoned collector, these practical steps will save you heartache and money. Let us dig in and get your drainage game on point.
Key Takeaways
- Use a chunky, well-aerated soil mix: Combine orchid bark, perlite, and peat moss for optimal drainage and moisture retention.
- Choose pots with drainage holes: Never use a pot without holes; excess water must escape to prevent root rot.
- Water only when the top inch feels dry: Stick your finger in the soil to check moisture before watering again.
- Empty the saucer after watering: Standing water in the saucer wicks back into the soil and suffocates roots.
- Repot every one to two years: Fresh soil restores aeration and prevents compaction that blocks drainage.
- Watch for yellowing fronds: Yellow leaves often signal poor drainage or overwatering; act fast to save the plant.
- Elevate the pot for airflow: Use pot feet or a stand to let air circulate beneath the container.
Quick Answers to Common Questions
What is the best soil mix for bird nest fern drainage?
A blend of 50% orchid bark, 25% perlite, and 25% peat moss or coco coir provides ideal drainage and aeration.
How often should I water my bird nest fern?
Water when the top inch of soil feels dry. This typically means every 3-4 days in summer and every 10-14 days in winter.
Can I use a pot without drainage holes?
No. Always use a pot with drainage holes. If using a decorative pot without holes, keep the plant in a nursery pot inside it.
Why are my bird nest fern fronds turning yellow?
Yellowing fronds usually indicate overwatering or poor drainage. Check roots for rot and adjust your watering habits.
Should I mist the crown of my bird nest fern?
Never mist directly into the crown. Water trapped there causes crown rot. Mist the surrounding air instead.
📑 Table of Contents
- Why Drainage Matters More Than You Think
- Building the Perfect Soil Mix
- Choosing the Right Pot
- Watering Techniques That Support Drainage
- Recognizing and Fixing Drainage Problems
- Long-Term Maintenance for Healthy Drainage
- Advanced Tips for the Obsessed Grower
- Common Myths Busted
- Putting It All Together: A Quick Reference Checklist
- Conclusion
Why Drainage Matters More Than You Think
Bird nest ferns grow as epiphytes in nature. That means they cling to tree trunks and rocks in humid rainforests. Their roots are exposed to air and rain, not buried in soggy soil. When we pot them in dense, water-retentive mix, we create an environment they never evolved to handle. The roots suffocate. Fungal pathogens move in. The plant declines fast.
Good drainage mimics their natural home. It lets water flow through quickly while holding just enough moisture for the roots to sip. It also keeps air pockets open so roots can breathe. If you remember one thing from this article, make it this: drainage is not optional, it is survival. Every bird nest fern soil drainage tip that follows serves this single goal.
The Science of Root Rot
Root rot is not just “too much water.” It is a lack of oxygen. Roots need oxygen to respire and take up nutrients. When soil pores fill with water, oxygen disappears. Anaerobic bacteria and fungi like Pythium and Phytophthora thrive in that environment. They attack the root tissue, turning it brown, mushy, and smelly. Once rot starts, it spreads up the stem and into the crown. The fronds yellow, wilt, and die. By the time you see symptoms above ground, the damage below is often severe.
How Epiphytes Differ From Terrestrial Plants
Most houseplants are terrestrial. They grow in soil. Their roots expect consistent moisture and nutrient-rich earth. Epiphytes like the bird nest fern are different. Their roots are adapted to grip bark and absorb moisture from humid air and brief rain showers. They dry out fast in nature. A heavy potting mix holds water too long. That is why standard “tropical plant soil” often fails them. You need a mix that drains in seconds, not minutes.
Building the Perfect Soil Mix
The foundation of every bird nest fern soil drainage tip is the mix itself. You want three things: rapid drainage, moisture retention, and aeration. No single ingredient does all three. You blend them. Here is the gold-standard recipe used by collectors and nurseries alike.
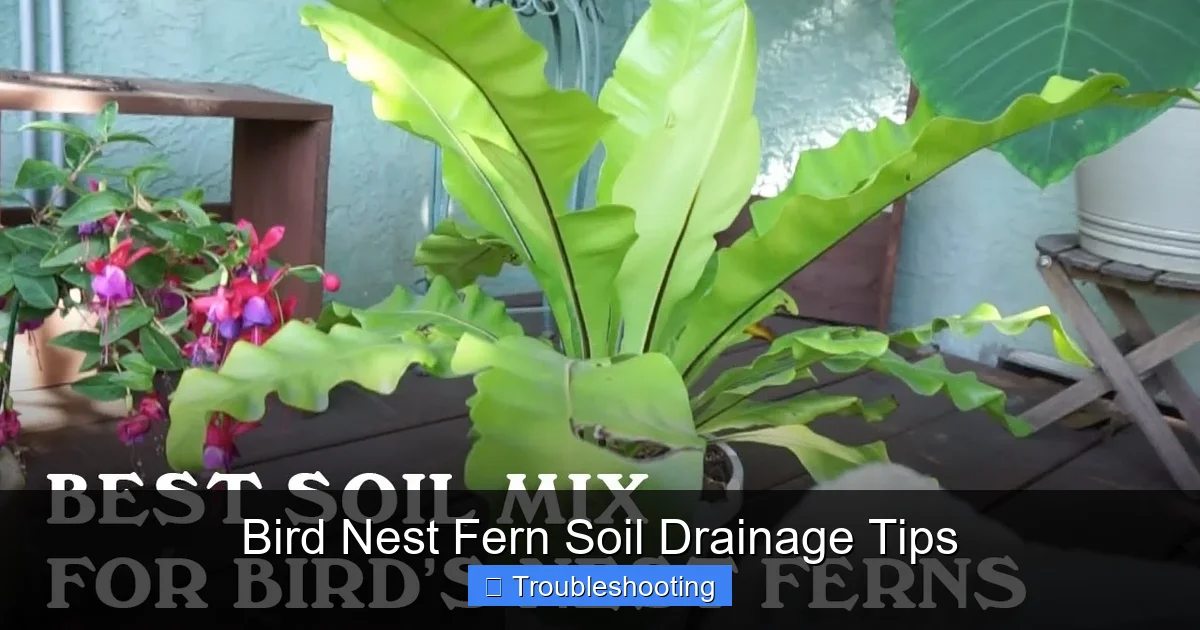
Visual guide about Bird Nest Fern Soil Drainage Tips
Image source: i.ytimg.com
Core Ingredients and Ratios
Start with a base of orchid bark. Use medium-grade fir bark. It creates large air pockets and breaks down slowly. Aim for 40 to 50 percent of the total volume. Next, add perlite. This volcanic glass keeps the mix light and prevents compaction. Use 20 to 30 percent. Finally, add a moisture-holding component. Peat moss or coco coir works well. Use 20 to 30 percent. If you use peat, wet it first. Dry peat repels water.
Optional boosters: Horticultural charcoal (5 percent) sweetens the mix and absorbs impurities. Worm castings (5 percent) add gentle nutrition. Sphagnum moss (a handful) can top-dress the surface to raise humidity around the crown.
Mixing Step by Step
Gather a clean tub or wheelbarrow. Measure ingredients by volume, not weight. A large yogurt container works as a “part.” Dump in your bark, perlite, and peat. Toss with your hands or a trowel until uniform. The mix should feel fluffy, not dense. Squeeze a handful. It should hold shape for a second then crumble. If it stays in a hard ball, add more perlite. If it falls apart instantly, add a touch more peat.
Store-Bought Alternatives
Short on time? Look for a bag labeled “orchid mix” or “epiphyte mix.” Avoid “moisture control” potting soils. Those contain water-retaining crystals that turn to gel and suffocate roots. If you must use a general houseplant mix, amend it heavily. Add one part perlite and one part orchid bark to one part bagged soil. That brings the drainage up to par.
Testing Your Mix Before Potting
Do a quick drainage test. Fill a clear plastic cup with your mix. Poke holes in the bottom. Pour water through. Time how long until water runs out the bottom. Ideal time: five to fifteen seconds. If it takes thirty seconds or more, the mix is too dense. Adjust and retest. This simple test saves you from repotting a struggling fern later.
Choosing the Right Pot
Even the best mix fails in the wrong pot. The container is half the drainage equation. Let us look at what works and what to avoid.
Drainage Holes Are Non-Negotiable
Every pot must have at least one hole. More is better. A single small hole can clog. Three to five holes spread across the bottom ensure water exits fast. If you fall in love with a decorative pot without holes, use it as a cachepot. Keep the fern in a plastic nursery pot with holes. Slip that into the pretty pot. Remove the inner pot to water. Let it drain fully before returning it.
Material Matters: Terracotta vs. Plastic vs. Ceramic
Terracotta is the gold standard for bird nest ferns. It is porous. Water evaporates through the walls. This pulls moisture from the soil and increases airflow to roots. The trade-off: you water more often. Plastic retains moisture longer. It is lighter and cheaper. Use plastic if you tend to underwater or live in a very dry climate. Glazed ceramic behaves like plastic but heavier. Ensure it has holes. Avoid metal pots. They heat up and cook roots.
Size Up, But Not Too Much
Bird nest ferns like to be slightly root-bound. A pot one to two inches wider than the root ball is perfect. A huge pot holds excess soil that stays wet. That is a rot trap. When repotting, go up one size only. Shallow pots are better than deep ones. The root system spreads wide, not deep. A shallow azalea pot or bulb pan works beautifully.
Pot Feet and Elevation
Set your pot on feet, pebbles, or a plant stand. This lets air circulate under the pot. It also prevents the drainage holes from sitting flat on a saucer or shelf, which can block flow. A quarter-inch gap makes a surprising difference.
Watering Techniques That Support Drainage
You have the mix. You have the pot. Now, how you water determines if drainage actually works. These bird nest fern soil drainage tips focus on technique.
The Finger Test
Forget schedules. Water when the top inch of mix feels dry. Stick your index finger in up to the first knuckle. If it feels cool and damp, wait. If it feels dry and dusty, water. In summer, this might be every three to four days. In winter, every ten to fourteen days. The plant tells you. Listen.
Thorough Soak, Then Full Drain
When you water, water deeply. Pour slowly until water streams from the bottom holes. This flushes salts and ensures the entire root ball is moist. Let the pot sit in the sink or tub for ten minutes. Let every drop escape. Never let the pot sit in a saucer of water. Empty the saucer immediately. Standing water wicks back up via capillary action.
Bottom Watering: Pros and Cons
Some growers swear by bottom watering. You set the pot in a tray of water and let the mix wick moisture up. This avoids wetting the crown, which prevents crown rot. However, it can leave the top of the mix dry while the bottom stays soggy. If you bottom water, do it for fifteen minutes max. Then remove and let drain. Top water once a month to flush salts.
Water Quality Counts
Bird nest ferns are sensitive to chemicals. Tap water with high chlorine, fluoride, or salts builds up in the mix. This damages roots and mimics drainage issues. Use filtered water, rainwater, or distilled water. If you must use tap, let it sit overnight to off-gas chlorine. Better yet, run it through a simple carbon filter.
Seasonal Adjustments
Growth slows in winter. Light drops. Temperatures dip. The plant uses less water. Cut frequency by half. Keep the same deep-soak method. Just wait longer between drinks. In spring, as new fronds emerge, ramp up gradually. Watch the new growth. It is the best indicator of proper hydration.
Recognizing and Fixing Drainage Problems
Even with perfect prep, things go wrong. Catch issues early and you save the plant. Here are the red flags and the fixes.
Yellowing Lower Fronds
Old fronds yellow and die naturally. But if multiple fronds yellow at once, starting at the base, suspect overwatering. Check the soil. Is it soggy days after watering? Does it smell sour? Pull the plant. Inspect roots. Healthy roots are white or tan and firm. Rotting roots are brown, black, mushy, and smelly. Trim all rot with sterile scissors. Repot in fresh mix. Hold water for a week. Then resume careful watering.
Brown, Crispy Tips
This usually means low humidity or underwatering. But it can also mean root damage from past overwatering. The roots cannot take up water even if the soil is wet. Check roots. If they look okay, raise humidity. Use a humidifier or pebble tray. If roots are damaged, treat as above.
Fungus Gnats
Tiny black flies hovering over the soil mean fungus gnats. They breed in constantly moist top layers. Let the top inch dry completely between waterings. Add a half-inch layer of sand or diatomaceous earth on top. Yellow sticky traps catch adults. Beneficial nematodes (Steinernema feltiae) kill larvae. Fix the moisture, fix the gnats.
Mold or Algae on Soil Surface
Green or white fuzz on the mix means it stays too wet too long. Scrape off the top layer. Replace with fresh mix. Increase airflow. Add a small fan on low nearby. Ensure the pot is elevated. Reduce watering frequency.
Crown Rot: The Silent Killer
The “nest” in the center collects water. If water sits there, the crown rots. The plant collapses from the middle. Never pour water into the crown. Water the soil only. If you mist, mist the air around the plant, not into the nest. If crown rot starts, you may lose the plant. Prevention is everything.
Long-Term Maintenance for Healthy Drainage
Drainage degrades over time. Bark breaks down. Perlite rises. Peat compacts. Roots fill the pot. Annual maintenance keeps the system running.
Annual Soil Refresh
Every spring, remove the top inch of mix. Replace with fresh blend. This removes salt buildup and adds new aeration. Do not disturb the roots. Just scrape and top-dress.
Full Repot Every One to Two Years
When roots circle the bottom or push the plant up, it is time. Spring is best. Gently remove the plant. Shake off loose old mix. Trim any dead roots. Place in fresh mix in a clean pot. Water lightly. Keep in shade for a week. Then return to normal care.
Flushing Salts
Fertilizer and tap water leave salts. Once a month, flush the pot. Run water through for two minutes. Let drain fully. This prevents salt burn which mimics drought stress.
Monitoring Tools
A moisture meter helps beginners. Probe the root zone. Read the dial. But trust your finger more. Meters can drift. A soil thermometer is fun but not needed. The best tool is observation. Look at the fronds. Feel the mix. Lift the pot. Light pot equals dry. Heavy pot equals wet. You will learn the weight language fast.
Advanced Tips for the Obsessed Grower
Once you master the basics, these next-level bird nest fern soil drainage tips push your results from good to great.
Mounting Instead of Potting
Mount the fern on a wood plaque or cork bark. Wrap roots in sphagnum moss. Secure with fishing line or pantyhose. Hang in bright shade. Mist daily. Soak weekly. This is how they grow in the wild. Drainage is perfect because there is no pot. The challenge: high humidity requirement. Best for greenhouse or bathroom growers.
Semi-Hydroponics (LECA)
Some growers use LECA (lightweight expanded clay aggregate). No soil. Roots grow in clay balls. A reservoir at the bottom wicks moisture up. Zero rot risk if managed right. Transition is tricky. Move a healthy plant. Wash all soil off roots. Place in LECA. Keep reservoir at one-third height. Flush monthly. This method eliminates soil drainage variables entirely.
Custom Blends for Your Climate
In humid Florida, increase bark and perlite. In dry Arizona, increase peat or coir. In cool Seattle, add more perlite for faster drying. Your local climate changes how the mix behaves. Keep a journal. Note mix ratios, watering frequency, and plant response. Adjust one variable at a time.
Using a Wick for Vacation Watering
Going away? Use a cotton rope wick. Bury one end in the soil near roots. Run the other end into a water jar below the pot. Water wicks up slowly. Test for a week before you leave. Ensure the jar is lower than the pot. This keeps the mix evenly moist without soggy bottom.
Common Myths Busted
Let us clear up misinformation that leads to dead ferns.
Myth: “Add Gravel at the Bottom for Drainage”
False. Gravel creates a perched water table. Water sits above the gravel line. The soil stays wetter. Skip the gravel. Use a good mix instead.
Myth: “Mist the Crown Daily”
Dangerous. Water in the crown causes rot. Mist the air around the plant if humidity is low. Never into the nest.
Myth: “Ferns Love Wet Soil”
They love humid air, not wet soil. Their roots need air. Constant moisture kills them.
Myth: “Bigger Pot Means Happier Plant”
Big pots hold too much water. Slightly tight is right.
Myth: “Yellow Leaves Mean Needs Fertilizer”
Yellow leaves usually mean root stress from water issues. Fix drainage first. Fertilize only when growing actively.
Putting It All Together: A Quick Reference Checklist
Print this. Tape it near your plants.
- Mix: 50% orchid bark, 25% perlite, 25% peat or coir.
- Pot: Terracotta with multiple holes, one size up.
- Elevate: Pot feet or stand.
- Water: Finger test, top inch dry.
- Soak: Water until it runs out, drain ten minutes.
- Saucer: Empty every time.
- Crown: Keep dry.
- Repot: Every 12-24 months in spring.
- Flush: Monthly.
- Observe: Daily glance, weekly finger check.
Follow this list and your bird nest fern will thrive. It really is that simple. The plant wants to live. You just have to get out of its way.
Conclusion
You now have a complete toolkit of bird nest fern soil drainage tips. From the perfect chunky mix to the right pot, from the finger test to the annual repot, every step serves one purpose: keeping oxygen at the roots. That is the secret. Not magic. Not luck. Just physics and biology working together.
Start with one change today. Maybe swap the soil. Maybe drill holes in that pretty cachepot. Maybe set a reminder to empty the saucer. Small actions compound. In a few months, you will see the difference. New fronds will unfurl glossy and green. The plant will sit upright, proud, and perky. And you will know exactly why.
Happy growing. Your fern thanks you.
Frequently Asked Questions
What causes root rot in bird nest ferns?
Root rot is caused by oxygen deprivation from waterlogged soil. When soil stays soggy, anaerobic fungi attack the roots, turning them brown and mushy.
Can I use regular potting soil for my bird nest fern?
Regular potting soil retains too much water. Amend it with equal parts orchid bark and perlite to improve drainage significantly.
How do I know if my bird nest fern needs repotting?
Repot when roots circle the pot bottom, push the plant upward, or when soil breaks down and drains slowly. Spring is the best time.
Is terracotta or plastic better for bird nest ferns?
Terracotta is ideal because its porosity wicks excess moisture and increases root airflow. Plastic works if you tend to underwater.
Can I bottom water my bird nest fern?
Yes, but limit to 15 minutes. Top water monthly to flush salts. Bottom watering keeps the crown dry but can leave the top soil too dry.
What water is best for bird nest ferns?
Filtered, rain, or distilled water is best. Tap water with chlorine, fluoride, or high salts can damage sensitive roots over time.