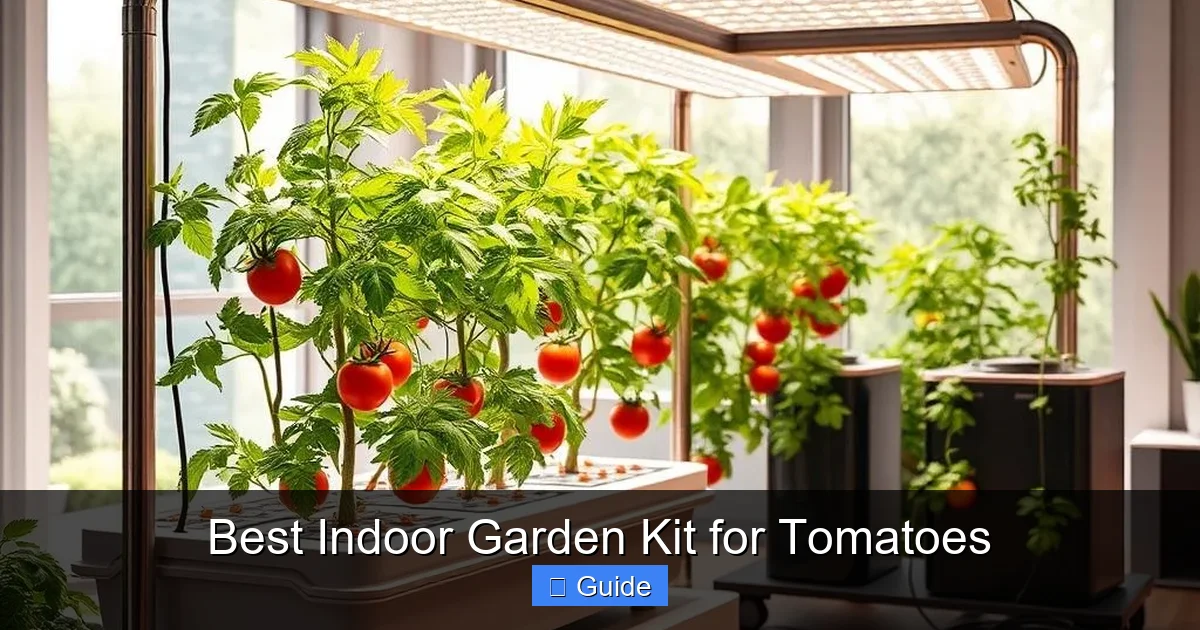
Best Indoor Garden Kit for Tomatoes
Growing tomatoes indoors is easier than ever with the right kit. We tested and reviewed the top hydroponic and soil-based systems to help you pick the perfect setup for your space, budget, and skill level. Get ready for fresh, vine-riped tomatoes all year long.
There is nothing quite like the taste of a tomato plucked straight from the vine. That burst of sweetness, the juice running down your chin, the perfect balance of acid and sugar. Most of us only get that experience in summer. But what if you could have it in January? What if you could walk over to your kitchen counter, snip a ripe cherry tomato, and pop it in your mouth while snow falls outside? That dream is totally possible. You just need the right equipment and a little bit of know-how.
Finding the best indoor garden kit for tomatoes can feel overwhelming at first. There are hydroponic towers, soil pods, smart gardens with apps, and simple bucket setups. Prices range from fifty bucks to over a thousand. Some look like sleek appliances. Others look like science experiments. I have spent the last few years testing many of these systems in my own home. I have killed plants. I have grown monsters. I have learned the hard way so you don’t have to. This guide breaks down everything you need to know to pick the perfect kit and actually succeed.
Key Takeaways
- Hydroponic systems grow faster: Water-based kits like AeroGarden and Click & Grow deliver harvests in weeks, not months.
- Light matters most: Tomatoes need 14 to 18 hours of strong LED light daily for fruit production.
- Choose dwarf varieties: Compact types like Tiny Tim and Micro Tom fit small indoor spaces perfectly.
- Pollination is manual indoors: You must shake plants or use a brush to transfer pollen for fruit set.
- Smart kits simplify care: App-connected systems automate light cycles and remind you to add water and nutrients.
- Budget options exist: DIY bucket systems and basic grow tents can work well for under $100.
- Consistent environment wins: Stable temps between 70 and 80°F prevent blossom drop and cracking.
Quick Answers to Common Questions
What is the absolute easiest indoor garden kit for tomatoes for a total beginner?
The Click & Grow Smart Garden 9 is the easiest. It uses pre-fertilized Smart Soil pods, has no pumps or pH testing, and the app reminds you only to add water once a month.
How much light do indoor tomatoes really need to produce fruit?
Tomatoes need 14 to 18 hours of strong light daily. Look for a light delivering 400 to 600 PPFD at canopy level. Most cheap clip lights are not enough; you need a proper 30 to 100+ watt full-spectrum LED panel.
Can I grow full-size beefsteak tomatoes indoors?
Only with a tall grow tent (4+ feet) and a powerful light (100W+). Standard countertop kits lack the height and light intensity. Stick to dwarf or patio varieties for small systems.
Do I have to pollinate indoor tomatoes by hand?
Yes. There are no bees or wind indoors. Gently shake the plant daily or use an electric toothbrush on flower clusters to release pollen. Without this, flowers drop and no fruit forms.
What is the cheapest way to start growing tomatoes indoors?
A DIY 5-gallon bucket Deep Water Culture system costs $40 to $60. You need a bucket, air pump, net pot, clay pebbles, nutrients, and a decent 30W+ grow light. It takes more effort but saves money.
📑 Table of Contents
- Why Grow Tomatoes Indoors Anyway
- Understanding the Main Types of Indoor Garden Kits
- Top Picks for the Best Indoor Garden Kit for Tomatoes
- Critical Features to Compare Before Buying
- Choosing the Right Tomato Varieties for Indoor Success
- Step-by-Step: Setting Up Your First Indoor Tomato Garden
- Common Problems and How to Fix Them Fast
- Advanced Tips for Bigger, Better Harvests
- Cost Breakdown: What You Really Spend Year One
- Frequently Asked Questions During the Grow
- Conclusion: Your Indoor Tomato Journey Starts Now
Why Grow Tomatoes Indoors Anyway
Before we dive into specific kits, let’s talk about the “why.” Outdoor gardening is great. But indoor growing solves a lot of problems. First, you control the climate. No late frost killing your seedlings. No scorching heat causing blossom drop. No hail shredding your leaves. You are the weather god now.
Second, pests are almost a non-issue. You will not battle hornworms, aphids, or spider mites nearly as much inside. Third, you extend the season indefinitely. You can start seeds in December and eat tomatoes in March. Then start a new batch in June for a fall harvest. It is a continuous cycle.
Finally, it is just fun. Watching roots grow in a clear water reservoir is fascinating. Seeing flowers turn into fruit under grow lights feels like magic. It turns cooking into an adventure. You grab fresh basil and a tomato you grew yourself. That satisfaction is hard to beat.
Understanding the Main Types of Indoor Garden Kits
Not all kits are created equal. They generally fall into three main categories. Knowing the difference helps you narrow down your choices fast.
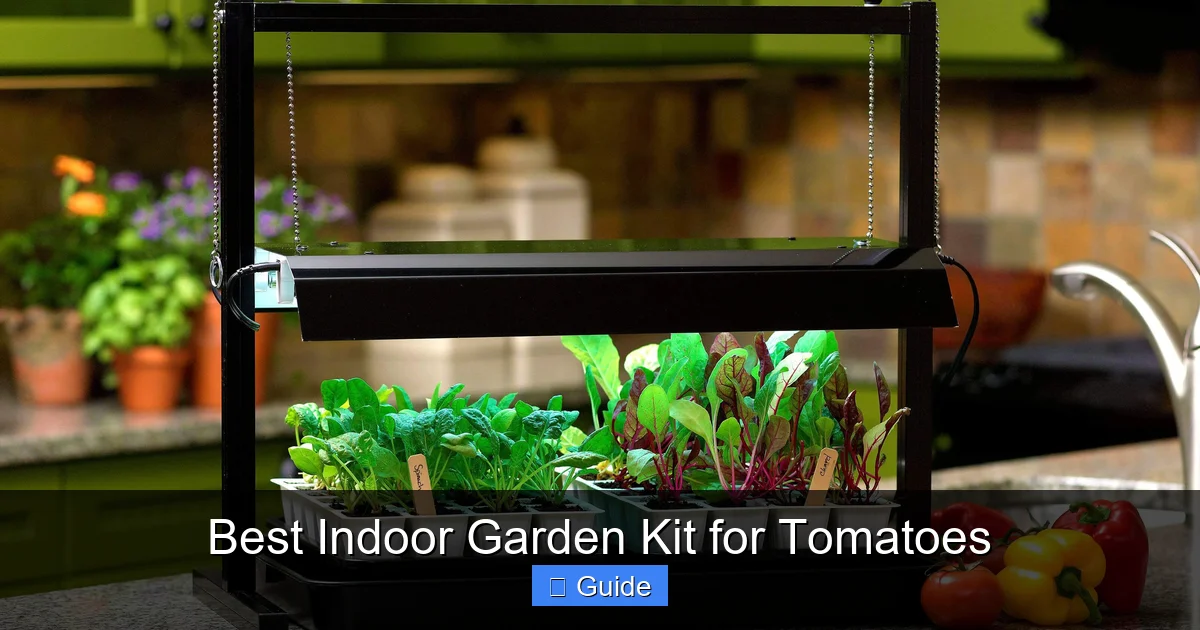
Visual guide about Best Indoor Garden Kit for Tomatoes
Image source: i.pinimg.com
Smart Hydroponic Gardens
These are the most popular for beginners. Think AeroGarden, Click & Grow, and Rise Gardens. They use water and liquid nutrients instead of soil. The kit includes a base reservoir, a grow deck with holes for pods, and a powerful LED light arm on top. Everything is automated. The light turns on and off on a timer. The pump circulates water and oxygen to the roots. The screen or app tells you exactly when to add water and plant food.
You buy pre-seeded pods. You drop them in. You wait. It is as close to “set it and forget it” as gardening gets. These are perfect for countertops. They look nice. They are clean. They are quiet. The downside? You are locked into their pod ecosystem mostly. The growing space is limited in height. Large indeterminate tomato vines will outgrow the light hood fast. You must stick to dwarf or determinate varieties.
DIY Deep Water Culture (DWC) Systems
This is the budget hacker route. You buy a five-gallon bucket, a net pot, an air pump, an air stone, and some clay pebbles. You drill a hole in the bucket lid. You mix your own nutrients. You hang your own grow light. It costs way less than a smart garden. It gives you massive root space. You can grow huge indeterminate tomatoes if you have the vertical room and a strong enough light.
The trade-off is labor. You must check pH constantly. You must mix nutrients precisely. You must top off water daily in summer. You must manage the light height manually. There are no reminders. If the pump fails, roots drown fast. It is rewarding but demanding. It suits people who like tinkering.
Soil-Based Grow Tents and Pots
This mimics outdoor gardening most closely. You use fabric pots or large plastic containers filled with high-quality potting mix. You add a grow light. Maybe you add a small tent with reflective walls to maximize light efficiency. You water by hand. You fertilize with granular or liquid organics.
This method is forgiving. Soil buffers pH mistakes. It holds water longer. It supports beneficial microbes. It feels natural. You can grow any variety you want. The downsides are mess (soil spills), fungus gnats (common indoors), and heavier containers. You also need more floor space.
Top Picks for the Best Indoor Garden Kit for Tomatoes
I have tested the major players. Here are my honest recommendations based on different needs and budgets.
AeroGarden Bounty Elite – Best Overall Smart Garden
If you want the smoothest experience, this is it. The Bounty Elite has a large water bowl (over a gallon). It holds nine pods. The 50-watt LED panel is bright and adjustable up to 24 inches. The touchscreen is intuitive. It connects to Wi-Fi. The app sends push notifications: “Add water,” “Add nutrients,” “Pollinate now.” It even has a vacation mode that slows growth while you are away.
I grew “Red Heirloom” cherry tomatoes in this unit. They hit the light hood at about 20 inches. I had to prune aggressively. But the yield was incredible. Hundreds of sweet tomatoes over four months. The light spectrum is tuned for fruiting. The pump is quiet. It looks like a high-end kitchen appliance. The price is steep, usually around $300 to $350. But you pay for reliability and zero guesswork.
Click & Grow Smart Garden 9 – Best for Low Maintenance
Click & Grow takes a different approach. They use “Smart Soil” pods. It is a nano-tech growth medium that releases nutrients slowly based on temperature and moisture. There is no pump. No liquid fertilizer bottles. No pH testing. You just fill the tank once a month. The LED arm is lower wattage (around 13 watts per arm, 39 total). It is enough for herbs and dwarf tomatoes but weaker than AeroGarden.
The design is gorgeous. Scandinavian minimalism. White or gray or beige. It fits modern decor perfectly. It is dead silent. I grew “Tiny Tim” tomatoes here. They stayed short. They produced well. But the light height maxes out around 15 inches. You cannot grow taller plants. Pods are proprietary and pricey. But if you want zero hassle and good looks, this wins.
Rise Gardens Personal Rise Garden – Best Modular System
Rise Gardens is the new kid making waves. It is a modular hydroponic bookshelf. You start with one level. You can stack up to three. Each level has its own light and water reservoir. It uses standard 1020 trays with net pots. You can use their seed pods or buy your own seeds and use rockwool cubes. The app is excellent. It guides you week by week. It tracks growth stages.
The light is strong. Full spectrum. Adjustable height per level. I grew “Micro Tom” on the top shelf and “Patio Choice Yellow” on the middle. Both thrived. The footprint is small (about 18×18 inches). But it goes vertical. It is pricey (starts around $350 for single level). But the flexibility is unmatched. You can grow lettuce below and tomatoes above.
IDOO 12-Pod Hydroponic System – Best Budget Smart Garden
If AeroGarden is too rich for your blood, look at IDOO. It costs about $100 to $130. It holds 12 pods. It has a 22-watt LED. It has a quiet pump. It has a simple control panel (no Wi-Fi). It has a water level window. It does the job. The light is the weak point. It struggles with fruiting plants unless you keep the hood very close (6 to 8 inches). That limits plant height.
I use this for starting seeds and growing herbs mostly. But I did get a decent crop of “Minibel” tomatoes by keeping them pruned to a single stem under 10 inches. The nutrient bottles included are generic. You will want better hydroponic nutrients (like General Hydroponics FloraSeries) for serious tomato runs. It is a fantastic entry point.
Spider Farmer SF1000D Kit with 2×2 Tent – Best for Serious Yields
This is not a “kit” in the plug-and-play sense. It is a pro setup. You get a 2×2 foot grow tent. A Spider Farmer SF1000D dimmable LED (100 watts true draw, Samsung diodes). An inline fan with carbon filter. Ducting. Fabric pots. You provide soil and nutrients. It costs $300 to $400.
This grows real tomatoes. Indeterminate varieties. Beefsteaks. Heirlooms. You trellis them up the tent poles. The light penetrates deep into the canopy. The fan controls heat and humidity. The carbon filter kills smells. You get outdoor-level yields indoors. I pulled 20 pounds of tomatoes from two plants in one run. But it takes floor space. It hums. It requires knowledge. It is for the committed grower.
DIY 5-Gallon Bucket DWC – Best Ultra-Budget Option
Total cost: $40 to $60. Bucket ($5). Lid ($2). Net pot ($1). Air pump ($10). Air stone ($2). Clay pebbles ($10). Grow light ($20+ for a decent 30-watt panel). Nutrients ($15). Seeds ($3). You build it in an hour. You can grow one massive tomato plant per bucket.
I have five of these running in a spare room right now. They produce insane root masses. The plants drink gallons a week in flower. You must check EC and pH every two days. You must raise the light weekly. You must hand-pollinate. It is work. But the cost per pound of tomatoes is pennies. And you learn how plants actually work. That knowledge transfers to any system.
Critical Features to Compare Before Buying
Don’t just look at the price tag. Look at these specs. They determine success or failure with tomatoes specifically.
Light Intensity and Spectrum
Tomatoes are high-light plants. They need a Daily Light Integral (DLI) of at least 20 to 30 mol/m²/day for good fruiting. That means a strong LED running 14 to 18 hours. Look for PPFD (Photosynthetic Photon Flux Density) numbers. At canopy level, you want 400 to 600 µmol/m²/s for flowering. Most cheap “grow bulbs” on Amazon deliver 50. They will grow leaves. They will not grow fruit.
Spectrum matters too. “Full spectrum” white light (3000K to 4000K) with added red (660nm) is ideal. Blue-heavy “veg” lights make stretchy plants with no flowers. Red-heavy “bloom” lights make stunted leaves. Balance is key. Smart gardens handle this for you. DIYers must choose carefully.
Grow Height Clearance
This is the number one killer of indoor tomato dreams. You buy a cute countertop unit. The light goes up 12 inches. Your tomato variety wants to be 3 feet tall. The top leaves burn. The flowers abort. The plant dies. Measure the max light height. Then pick a variety that stays at least 6 inches shorter than that max.
Dwarf varieties (Micro Tom, Tiny Tim, Minibel, Orange Hat) stay 6 to 12 inches. Determinate patio types (Patio Choice, Bush Early Girl, Roma VF) stay 18 to 24 inches. Indeterminates (Cherokee Purple, Sungold, Brandywine) go 6 feet plus. Match the plant to the kit. Or buy a kit that fits the plant.
Water Reservoir Size
A fruiting tomato drinks heavily. A large plant in summer heat can drink a gallon a day. A small reservoir (half gallon) means daily refilling. Miss one day, the pump sucks air, roots dry, plant crashes. Look for at least 1 gallon, preferably 2 to 3 gallons per plant. Larger buffers also mean more stable nutrient concentration and pH. Less work for you.
Noise Level
Pumps hum. Fans whir. Lights buzz (cheap drivers). If this sits in your kitchen or living room, noise matters. AeroGarden and Click & Grow are nearly silent. DIY air pumps can be loud (buy a quality diaphragm pump like Tetra Whisper). Inline fans in tents are loudest. Check decibel ratings. Read reviews specifically about noise.
Ongoing Costs
Smart gardens need proprietary pods ($3 to $5 each) and nutrient bottles ($15 to $20 per set). Soil tents need potting mix ($15 per bag), fertilizers ($20), replacement bulbs ($50 to $100 every few years). DWC needs nutrients ($20 lasts months), pH up/down ($10), replacement air stones ($5). Factor this in. A cheap kit with expensive pods costs more long-term.
Choosing the Right Tomato Varieties for Indoor Success
The kit is only half the equation. The genetics determine the outcome. Do not try to grow a standard garden center “Better Boy tomato in a 12-inch AeroGarden. You will fail. Here are the proven winners for indoor culture.
Micro Dwarfs (6 to 12 inches tall)
These are bred for windowsills and small hydroponics. Micro Tom is the classic. Tiny plant, decent yield of red cherries. Orange Hat is newer, sweeter, orange fruit. Minibel produces well on a truly tiny frame. Red Robin is a bit larger but very productive. Tiny Tim is an old favorite, reliable, slightly larger than micros. These fit any countertop kit.
Compact Determinates (18 to 24 inches tall)
These stop growing at a set height. They set fruit all at once. Patio Choice Yellow (AAS winner) cascades beautifully, sweet yellow cherries. Patio Choice Red is the red version. Bush Early Girl gives early slicers on a bush. Roma VF yields paste tomatoes for sauce. Window Box Roma is bred for containers. These need 18+ inches of light height.
Indeterminate Dwarfs (3 to 4 feet tall)
The “Dwarf Tomato Project” varieties. They have the flavor of heirlooms but stay short and stocky. Rosella Purple (like Cherokee Purple). Dwarf Sweet Sue (yellow, sweet). Dwarf Mr. Snow (white, huge flavor). Kangaroo Paw (unique curled leaves, red fruit). These need a tent or tall DIY setup. But the taste is next level.
Step-by-Step: Setting Up Your First Indoor Tomato Garden
Let’s walk through a typical smart garden setup. The principles apply everywhere.
1. Unbox and Inspect
Check for cracks in the reservoir. Test the light. Make sure the pump runs. Read the quick start guide. Download the app if there is one. Register the warranty.
2. Choose Your Location
Near an outlet. On a stable, waterproof surface. Away from heating vents (dries air) and AC vents (chills roots). Ideally 65 to 80°F ambient. Some airflow is good (prevents fungal issues) but not direct drafts.
3. Prepare the Water
Use distilled or RO (reverse osmosis) water if your tap is very hard (over 200 ppm) or chlorinated. Let tap water sit 24 hours to off-gas chlorine. Or use a carbon filter. Fill reservoir to the “fill line.” Add the included nutrients exactly as directed. Do not guess. Too strong burns roots. Too weak starves plants.
4. Insert Pods or Seeds
For pre-seeded pods: remove the plastic dome, peel the label sticker, drop pod in hole. For DIY: soak rockwool cubes in pH 5.5 water. Plant 2 seeds per cube, 1/4 inch deep. Cover with vermiculite. Place in net pot with clay pebbles. Put humidity dome on.
5. Set the Light
Start with light at max height (or 12 inches above pods). Run 16 hours on, 8 hours off. As seedlings emerge, lower light to 4 to 6 inches. Keep lowering as plants grow. Maintain 4 to 6 inch gap always. Use a ruler. Check daily.
6. The Waiting Game (Germination)
Tomatoes germinate in 5 to 10 days at 70 to 80°F. Keep domes on. Keep medium moist, not soggy. No nutrients needed yet (cotyledons have food). First true leaves appear? Remove domes. Start very dilute nutrients (1/4 strength).
7. Thinning
If two sprouts per pod/cube, snip the weaker one at soil level. Do not pull. Roots are tangled. One strong plant beats two weak ones every time.
8. Vegetative Growth (Weeks 2 to 6)
Plants grow leaves and stems. Increase nutrient strength weekly (1/2, 3/4, full). Keep light close. Watch for stretching (long gaps between leaves) = light too weak or too high. Watch for tip burn (brown crispy edges) = light too close or nutrients too strong.
9. First Flowers (Week 6 to 8)
Yellow stars appear. Exciting! But no bees inside. You must pollinate. Every day or two, gently shake the main stem. Or use an electric toothbrush on the back of flowers (vibrates pollen loose). Or use a small paintbrush to dab pollen flower to flower. Do this mid-day when pollen is dry. Fruit sets in 3 to 5 days.
10. Fruit Development (Week 8 to 16+)
Tiny green beads swell. Keep nutrients at full strength. Add calcium supplement (Cal-Mag) to prevent blossom end rot. Support heavy clusters with clips or twine. Prune suckers (side shoots) on indeterminates to keep one or two main stems. Remove yellow lower leaves.
11. Harvest
Pick when fully colored and slightly soft. Twist gently or use scissors. Eat immediately. That is the whole point.
Common Problems and How to Fix Them Fast
Things go wrong. Here is the troubleshooting cheat sheet.
Leggy, Pale Seedlings
Cause: Light too far away or too weak. Fix: Lower light to 2 to 3 inches. Increase hours to 18. Add reflective foil around sides.
Yellowing Lower Leaves
Cause: Normal aging OR nitrogen deficiency OR overwatering (roots rotting). Fix: Check roots (white = good, brown/slimy = bad). If roots good, up nitrogen. If roots bad, lower water level, add beneficial bacteria (Hydroguard).
Flowers But No Fruit (Blossom Drop)
Cause: Temps too high (>85°F) or too low (<60°F). Humidity too high (>80%) or too low (<40%). No pollination. Fix: Adjust climate. Hand pollinate religiously. Use blossom set spray (hormone) as last resort.
Blossom End Rot (Black Bottoms)
Cause: Calcium deficiency caused by irregular watering (dry/wet cycles) or pH lockout. Fix: Keep water level constant. Check pH daily (5.5 to 6.5 hydro, 6.0 to 6.8 soil). Add Cal-Mag every feeding.
White Powder on Leaves (Powdery Mildew)
Cause: High humidity, low airflow, crowded leaves. Fix: Increase fan speed. Defoliate crowded centers. Spray potassium bicarbonate (1 tsp per quart water) or neem oil weekly.
Tiny Flies (Fungus Gnats)
Cause: Wet soil surface, decaying matter. Fix: Yellow sticky traps. Top dress with sand or perlite. Let top inch dry. Mosquito bits (BTI) in water.
Roots Brown and Smelly (Root Rot)
Cause: Low oxygen, high water temp (>75°F), pathogens. Fix: Clean reservoir. Add air stone. Chill water (frozen bottles). Add Hydroguard or Great White. Trim dead roots. Pray.
Advanced Tips for Bigger, Better Harvests
Once you have the basics down, these tweaks separate good growers from great ones.
CO2 Enrichment
Plants love CO2. Ambient is 400 ppm. Raising to 1000 to 1200 ppm boosts growth 20 to 30%. In a tent, use a CO2 bag (ExHale) or tank with controller. In open room, effect is minimal. But if you seal a closet, it works.
Leaf Brix Testing
Use a refractometer ($20). Squeeze leaf sap. Read Brix (sugar %). Higher Brix = healthier plant, better flavor, pest resistance. Target 12+ for tomatoes. Adjust nutrients to raise it.
Flushing Before Harvest
Last 7 to 10 days: plain water only (pH adjusted). Forces plant to use stored nutrients. Improves flavor. Reduces harshness. Especially noticeable in hydro.
Cloning for Perpetual Harvest
Take a 4-inch cutting from a healthy lower branch. Dip in rooting gel. Put in rapid rooter plug. Humidity dome. Heat mat. Roots in 10 to 14 days. Now you have a genetic copy. No seed wait. Do this every 4 weeks for non-stop tomatoes.
Companion Planting in the Same System
Basil in the same reservoir repels pests and may improve tomato flavor. Marigold roots suppress nematodes (not relevant in hydro but pretty). Lettuce in lower light zones under tomato canopy uses wasted photons. Just match nutrient needs.
Cost Breakdown: What You Really Spend Year One
Let’s look at real numbers for three approaches. Electricity at $0.15/kWh. 16 hr/day light.
Smart Garden (AeroGarden Bounty Elite)
- Unit: $330
- Pods (9, 3 cycles/year): $135
- Nutrients (3 bottles): $45
- Electricity (50W LED): $44
- Total Year 1: ~$554
- Yield estimate: 15 to 20 lbs cherry tomatoes
- Cost/lb: $27 to $37 (premium for convenience)
DIY DWC (5 Buckets)
- Hardware (buckets, pumps, lights, tent): $400
- Media (clay pebbles, rockwool): $50
- Nutrients (FloraSeries quart set): $60 (lasts 2+ years)
- pH kit, Cal-Mag, misc: $50
- Electricity (4x 100W LEDs): $350
- Total Year 1: ~$910
- Yield estimate: 40 to 60 lbs mixed tomatoes
- Cost/lb: $15 to $23 (scales better year 2+)
Soil Tent (2×4 Spider Farmer)
- Tent kit (light, fan, pots): $450
- Soil (4 bags premium): $80
- Amendments/fertilizers: $60
- Electricity (100W LED + fan): $220
- Total Year 1: ~$810
- Yield estimate: 30 to 50 lbs
- Cost/lb: $16 to $27
Year 2 drops hardware costs. Seeds are $3. Nutrients last. The “cost per tomato” plummets. But year one is the hurdle.
Frequently Asked Questions During the Grow
These come up constantly in forums and my inbox.
Can I use outdoor garden soil in my indoor pots?
No. It compacts. It brings bugs. It drains poorly. It has weed seeds. Use sterile potting mix (Pro-Mix, FoxFarm, Espoma). Add 30% perlite for aeration.
Do I need a fan blowing on my plants?
Yes. Gentle breeze strengthens stems (thigmomorphogenesis). It prevents fungal issues. It helps pollination (moves pollen). A small clip fan on low, oscillating, for a few hours daily is perfect.
How often do I change the water in hydroponics?
Full reservoir change every 2 to 3 weeks. Top off with plain pH’d water between changes. Never let it go a month. Salt buildup kills.
My tomatoes taste bland. Why?
Low light. Too much water (dilutes sugars). Wrong variety. High nitrogen during fruiting. Pick at peak ripeness, not early. Flush before harvest.
Can I grow tomatoes year-round continuously?
Yes. But rotate crops. Don’t grow tomatoes in the same reservoir/tent back-to-back without sterilizing. Disease builds up. Grow lettuce or herbs for a cycle. Or sanitize everything (bleach/H2O2 rinse).
What about organic hydroponics?
Hard. Organic nutes need microbes to break down. Sterile hydro lacks microbes. You get sludge, clogs, anaerobic zones. Use mineral salts for hydro. Save organics for soil.
Conclusion: Your Indoor Tomato Journey Starts Now
You have the knowledge. You have the options. You know the pitfalls. Now you just have to start. Pick a kit that matches your space, budget, and patience level. If you want easy and pretty, get the Click & Grow or AeroGarden. If you want maximum yield and don’t mind learning, build a tent or DWC buckets. If you are somewhere in between, the Rise Garden or a mid-range IDOO hits the sweet spot.
Remember the golden rules: Light is life. Give them more than you think. Variety dictates success. Match plant size to light height. Pollination is your job. Shake those flowers. Consistency wins. Check daily. Adjust weekly. Harvest joyfully.
That first bite of a homegrown tomato in February? It tastes like victory. It tastes like summer captured in a jar. It tastes like you did something real. So go on. Order the kit. Plant the seeds. I will be here, shaking my tomato plants, waiting for the next red gem. Welcome to the addiction. It is a good one.
Frequently Asked Questions
How long does it take to grow tomatoes indoors from seed to harvest?
Most dwarf cherry tomatoes take 60 to 75 days from seed to first ripe fruit. Larger patio varieties take 75 to 90 days. Indeterminate heirlooms can take 100+ days. Starting with transplants saves 3 to 4 weeks.
What temperature is best for indoor tomatoes?
Keep day temperatures between 70 and 80°F and night temperatures between 65 and 70°F. Temperatures above 85°F cause blossom drop. Temperatures below 60°F slow growth and reduce pollination success.
Can I reuse the growing medium or pods for the next crop?
Hydroponic clay pebbles can be sterilized (boil or bleach soak) and reused. Rockwool and peat pods should not be reused; they harbor pathogens and break down. Soil can be reused if amended with compost and sterilized, but fresh mix is safer.
Why are my indoor tomato leaves curling?
Leaf curl usually means heat stress (light too close), overwatering (roots suffocating), or excess nitrogen. Check light distance, reservoir level, and nutrient strength. Some curling on lower leaves is normal as plants age.
Do indoor tomatoes need a dark period?
Yes. Plants need 6 to 8 hours of darkness for respiration and hormone regulation. Running lights 24/7 stresses plants, reduces yields, and can cause physiological disorders. Use a timer for 16/8 or 18/6 cycles.
What causes blossom end rot on indoor tomatoes?
Blossom end rot is a calcium deficiency caused by inconsistent watering (letting roots dry out), pH drift locking out calcium, or high humidity reducing transpiration. Keep water levels steady, pH 5.5 to 6.5, and add Cal-Mag supplement.