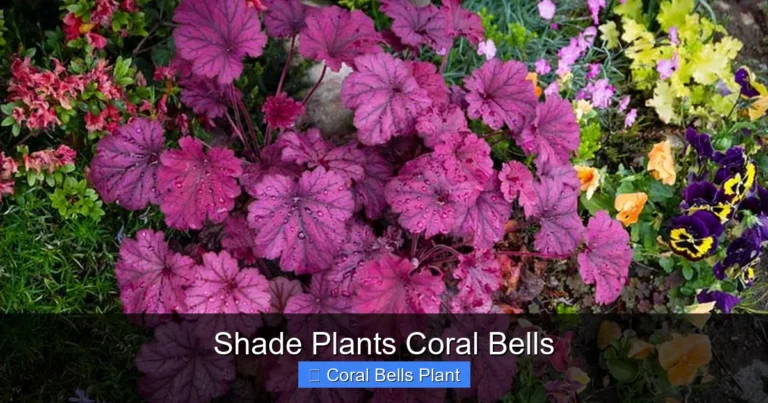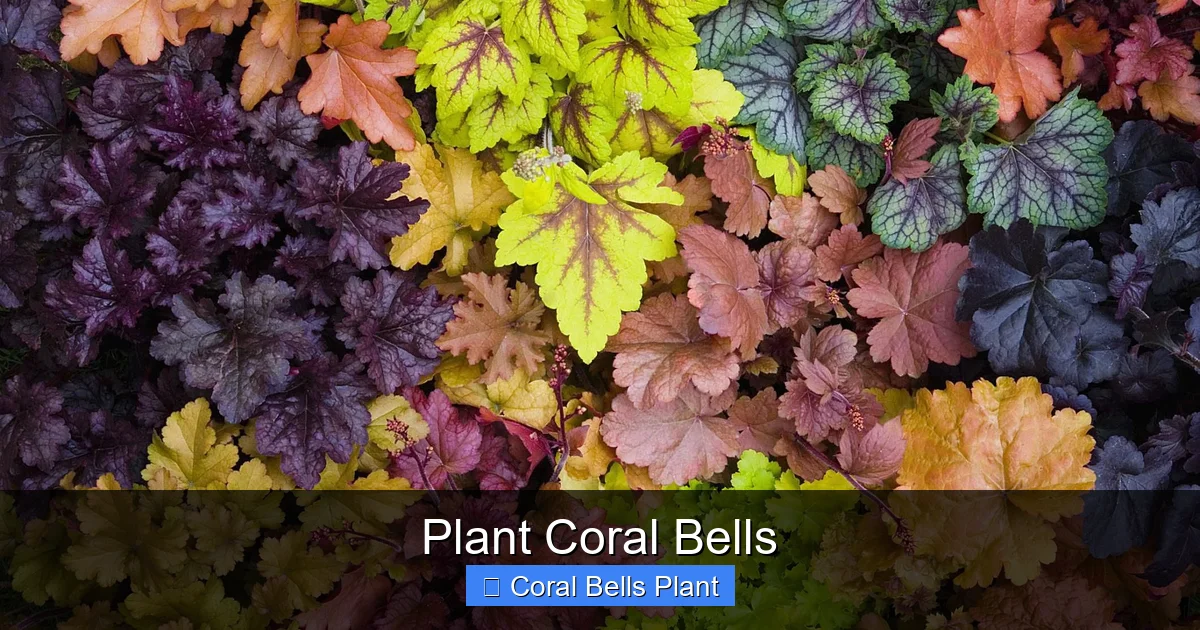
Plant Coral Bells
Plant coral bells for year-round foliage interest in shade gardens. These low-maintenance perennials offer incredible leaf colors from lime green to deep purple, plus delicate bell-shaped flowers that attract hummingbirds. Plant coral bells in well-draining soil with partial shade for the best performance and vibrant color all season long.
Key Takeaways
- Choose the right location: Plant coral bells in partial shade with morning sun and afternoon shade for optimal foliage color and plant health.
- Soil matters most: Well-draining, humus-rich soil with a slightly acidic to neutral pH (6.0-7.0) prevents root rot and promotes vigorous growth.
- Water consistently: Keep soil evenly moist but never soggy; established plants tolerate brief dry spells but perform best with regular moisture.
- Divide every 3-4 years: Regular division rejuvenates plants, prevents center die-out, and gives you free plants for other garden areas.
- Watch for heaving: In cold climates, frost can push crowns above soil level; mulch heavily in late fall to protect roots through winter.
- Select varieties for your zone: Choose heat-tolerant cultivars for southern gardens and cold-hardy types for northern regions to ensure success.
- Combine with companions: Plant coral bells alongside ferns, hostas, and astilbe for beautiful shade garden combinations with contrasting textures.
Quick Answers to Common Questions
What is the best time of year to plant coral bells?
Spring and early fall are ideal. Spring gives roots a full season to establish. Fall works in zones 6+ where roots grow before freezing.
How much sun do coral bells need?
Morning sun with afternoon shade is perfect. In cool climates they tolerate more sun; in hot climates they need more shade.
Why are my coral bells dying in the center?
This is natural aging. Divide every 3-4 years in early spring to rejuvenate the plant and prevent center die-out.
Can coral bells grow in containers?
Yes, they thrive in pots with good drainage. Use quality potting mix and water more frequently than in-ground plants.
Do coral bells come back every year?
Yes, they are hardy perennials in zones 4-9. Foliage may persist through winter in mild climates.
📑 Table of Contents
- Why Gardeners Love to Plant Coral Bells
- Understanding Coral Bells Basics
- Choosing the Perfect Spot to Plant Coral Bells
- Step-by-Step Guide to Plant Coral Bells
- Ongoing Care for Healthy Coral Bells
- Dividing and Propagating Coral Bells
- Designing with Coral Bells in the Garden
- Common Problems and Solutions
- Top Coral Bells Varieties to Consider
- Seasonal Care Calendar
- Frequently Asked Questions About Planting Coral Bells
- Conclusion
Why Gardeners Love to Plant Coral Bells
If you have ever walked through a shade garden and spotted mounds of ruffled leaves in shades of caramel, purple, lime, or silver, you have likely seen coral bells. These remarkable perennials have exploded in popularity over the past two decades, and for good reason. When you plant coral bells, you invest in a plant that delivers four seasons of interest with minimal fuss. The foliage stays attractive from spring through fall, and in milder climates, the leaves persist through winter too.
Botanically known as Heuchera, coral bells are native to North America. They grow naturally in woodlands, rocky cliffs, and alpine meadows from Canada to Mexico. This wide native range explains their adaptability. Modern breeding has expanded the color palette dramatically. Today you can plant coral bells in nearly every shade imaginable, from near-black to bright chartreuse, with veining, marbling, and ruffled edges adding even more visual texture.
Understanding Coral Bells Basics
What Are Coral Bells?
Coral bells belong to the Saxifragaceae family. They form low, mounding clumps of basal leaves that emerge from a central crown. The leaves are typically rounded or lobed with scalloped edges. In late spring to early summer, thin wiry stems rise above the foliage bearing clusters of tiny bell-shaped flowers. These blooms give the plant its common name. While the flowers are charming and attract pollinators, most gardeners plant coral bells primarily for their spectacular foliage.
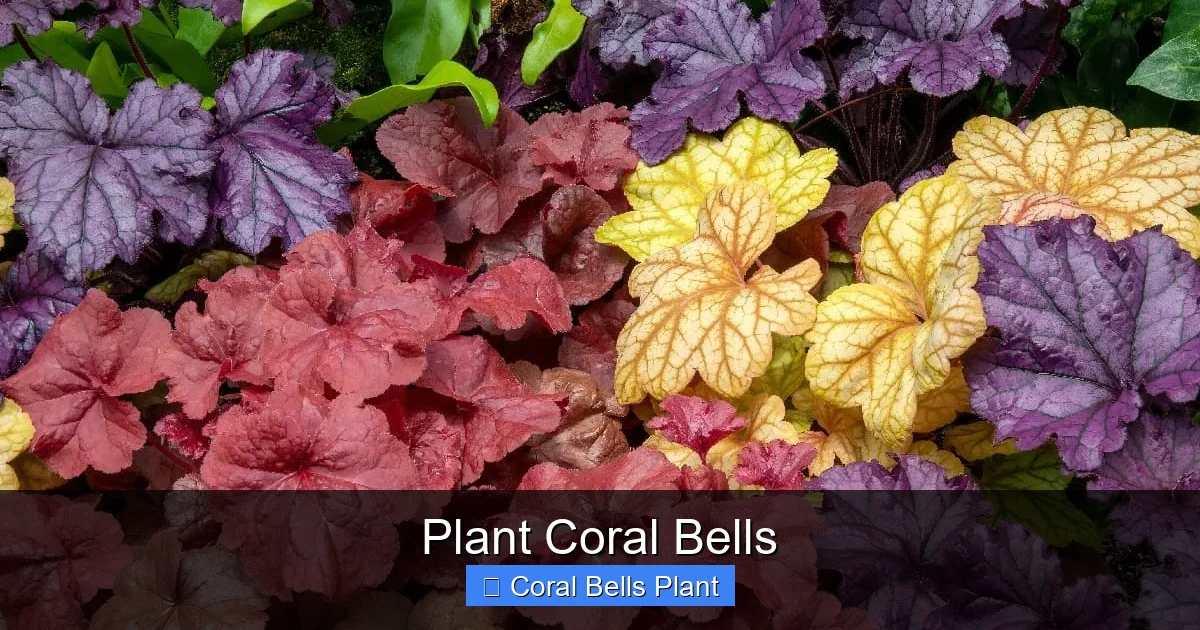
Visual guide about Plant Coral Bells
Image source: almanac.com
Growth Habit and Size
Most varieties reach 12 to 18 inches tall and wide when in leaf. Flower spikes can add another 12 to 24 inches of height during bloom time. The plants spread slowly by short rhizomes, forming tidy clumps that rarely become aggressive. This neat habit makes them perfect for edging paths, tucking into rock gardens, or massing as groundcover under trees.
Hardiness Range
Coral bells are remarkably cold hardy. Most cultivars thrive in USDA zones 4 through 9. Some selections handle zone 3 with good snow cover. In the hottest parts of zone 9, afternoon shade becomes essential. If you garden in a challenging climate, look for varieties bred specifically for heat tolerance or extreme cold. The right cultivar makes all the difference when you plant coral bells in marginal zones.
Choosing the Perfect Spot to Plant Coral Bells
Light Requirements
Light is the single most important factor for success when you plant coral bells. These plants evolved as woodland understory species. They want bright, dappled light or morning sun with afternoon shade. In cooler northern climates, they can handle more sun, often thriving in full sun if moisture is consistent. In hot southern regions, deep shade may be necessary to prevent leaf scorch and color fading.
Watch how sunlight moves across your garden through the day. A spot that gets gentle morning light until 11 AM, then shade for the rest of the day, is ideal. Avoid baking afternoon sun, especially in zones 7 and warmer. The intense rays bleach the vibrant pigments from the leaves, leaving them washed out and stressed.
Soil Conditions
When you plant coral bells, think “moist but well-drained.” Heavy clay that stays soggy after rain spells disaster. The crowns rot quickly in standing water. Sandy soil that drains too fast leaves plants thirsty. The sweet spot is loamy soil enriched with organic matter. Compost, leaf mold, or well-rotted manure worked into the planting area improves both drainage and moisture retention.
Soil pH between 6.0 and 7.0 suits them best. If your soil is very alkaline, incorporate elemental sulfur or pine needle mulch to lower the pH gradually. A simple soil test from your local extension service tells you exactly what you are working with.
Air Circulation
Good air flow helps prevent fungal diseases like powdery mildew and rust. Space plants according to their mature width, typically 12 to 18 inches apart. Avoid planting them flush against dense shrubs or walls where air stagnates. A little breeze keeps foliage dry and healthy.
Step-by-Step Guide to Plant Coral Bells
When to Plant
Spring and early fall are the best times to plant coral bells. Spring planting gives roots a full growing season to establish before winter. Fall planting works well in zones 6 and warmer, where roots can grow for several weeks before the ground freezes. Avoid planting during summer heat or when the ground is frozen. Container-grown plants from nurseries can technically go in the ground any time the soil is workable, but they will need extra attention during extreme weather.
Preparing the Planting Hole
Dig a hole twice as wide as the root ball and just as deep. Loosen the soil at the bottom and sides of the hole so roots can penetrate easily. Mix the excavated soil with compost at a ratio of roughly one part compost to two parts native soil. This amended backfill gives new roots a welcoming environment.
Removing the Plant from Its Pot
Gently squeeze the sides of the nursery pot to loosen the root ball. Tip the pot on its side and slide the plant out. If roots are circling the bottom, tease them apart with your fingers. This encourages them to grow outward into the surrounding soil rather than continuing to circle. Do not worry if a few roots break; the plant will recover quickly.
Setting the Crown at the Right Depth
This is critical. The crown, where stems meet roots, must sit at or slightly above soil level. Planting too deep smothers the crown and leads to rot. Planting too high exposes roots to drying air. Place the plant in the hole, check the depth, and adjust by adding or removing soil underneath until it is perfect.
Backfilling and Watering In
Fill the hole halfway with amended soil, then water gently to settle it. Finish backfilling, firm the soil lightly with your hands, and water thoroughly. A slow, deep soak eliminates air pockets and ensures good root-to-soil contact. Apply a two-inch layer of shredded bark, pine straw, or leaf mulch around the plant, keeping it a few inches away from the crown.
Ongoing Care for Healthy Coral Bells
Watering Practices
Consistent moisture is key, especially during the first growing season. Water deeply once or twice a week rather than light daily sprinkles. Deep watering encourages roots to chase moisture downward, making plants more drought resilient. Check soil moisture by sticking your finger two inches into the soil near the plant. If it feels dry at that depth, it is time to water.
Established plants tolerate short dry periods, but prolonged drought causes leaf edges to brown and crisp. In containers, coral bells dry out much faster. Check pots daily in hot weather. A drip irrigation system or soaker hose makes watering efficient and keeps foliage dry, reducing disease risk.
Fertilizing Needs
Coral bells are light feeders. A single application of balanced, slow-release granular fertilizer in early spring is usually sufficient. Scatter it around the drip line and scratch it lightly into the mulch. Avoid high-nitrogen formulas that push lush, soft growth susceptible to pests and disease. If your soil is rich in organic matter, you may not need fertilizer at all.
Container plants benefit from a half-strength liquid fertilizer monthly during the growing season. Stop fertilizing by late July so plants can harden off before winter.
Mulching Benefits
Maintain a two to three-inch mulch layer year-round. Mulch conserves moisture, suppresses weeds, moderates soil temperature, and slowly breaks down to feed the soil. Organic mulches like shredded leaves, pine needles, or bark chips are ideal. In winter, mulch prevents freeze-thaw cycles that heave plants out of the ground. Pull mulch back from the crown in early spring to allow new growth to emerge cleanly.
Deadheading and Pruning
Remove spent flower stalks at the base once blooms fade. This tidies the plant and redirects energy to foliage production. In late winter or early spring, before new growth starts, cut away any tattered or winter-damaged leaves. Use clean, sharp scissors or pruners. The fresh leaves will quickly fill in.
Dividing and Propagating Coral Bells
When and Why to Divide
Every three to four years, the center of a coral bells clump may become woody and die out, leaving a ring of healthy growth around a dead middle. This is your signal to divide. Division rejuvenates the plant, restores vigor, and gives you additional plants for free. Early spring, just as new growth emerges, is the optimal time. Fall division works in mild climates.
How to Divide
Dig up the entire clump with a garden fork, lifting gently to preserve roots. Shake or wash off excess soil so you can see the crown structure. Using a sharp knife or spade, cut the clump into sections, each with several healthy leaves and a good root system. Discard the woody, dead center. Replant divisions immediately at the same depth they were growing, water well, and mulch.
Growing from Seed
Species coral bells come true from seed, but named cultivars do not. Seedlings from hybrids show variable foliage color and form. If you enjoy experimentation, collect seed from dried flower stalks in late summer. Sow in a seed-starting mix, barely covering the tiny seeds. Keep moist and provide bright light. Germination takes two to eight weeks. Transplant seedlings to individual pots once they have true leaves.
Leaf Cuttings
Some gardeners propagate coral bells from leaf cuttings. Select a healthy leaf with a short piece of petiole attached. Dip the cut end in rooting hormone and insert into moist perlite or vermiculite. Cover with a clear plastic bag to maintain humidity. Place in bright indirect light. Roots and a tiny plantlet may form at the base in four to six weeks. This method is less reliable than division but can produce many plants from one leaf.
Designing with Coral Bells in the Garden
Shade Garden Combinations
Coral bells shine in shade gardens where their colorful foliage lights up dim corners. Pair purple-leaved varieties like ‘Palace Purple’ or ‘Obsidian’ with chartreuse hostas or golden Japanese forest grass for high contrast. Silver-leaved types such as ‘Silver Scrolls’ glow beside deep green ferns. The fine texture of coral bells complements bold hosta leaves beautifully.
Container Gardens
Their compact size and tidy habit make coral bells excellent container plants. Use a high-quality potting mix with added perlite for drainage. Combine them with trailing plants like creeping jenny or ivy, and upright accents like carex or heucherella. Containers let you move plants to optimal light through the seasons and bring them to eye level on patios and porches.
Rock Gardens and Slopes
Many species coral bells, especially Heuchera sanguinea and H. villosa, thrive in rocky, well-drained sites. Their natural affinity for cliffs makes them perfect for rock gardens, stone walls, and steep banks where other plants struggle. Plant them in crevices between stones where roots can run deep and cool.
Woodland Edges
At the transition between lawn and woods, coral bells create a naturalistic tapestry. Mix several varieties with different leaf colors and shapes for a collector’s garden effect. Add spring bulbs like daffodils and snowdrops that bloom before coral bells leaf out fully, then hide the bulb foliage as it dies back.
Common Problems and Solutions
Crown Rot
The number one killer of coral bells is crown rot caused by soil-borne fungi in wet conditions. Prevention is everything. Plant high, ensure excellent drainage, avoid overwatering, and never let mulch touch the crown. If a plant collapses suddenly with mushy, blackened stems at the base, remove it immediately and do not replant coral bells in that spot for a year or two.
Powdery Mildew
This fungal disease appears as a white powdery coating on leaves, usually in late summer when humidity is high and air circulation poor. Space plants properly, water at the base not overhead, and choose resistant cultivars. ‘Caramel’, ‘Citronelle’, and many villosa hybrids show good resistance. If mildew appears, remove affected leaves and improve air flow.
Rust
Rust shows as orange or brown pustules on leaf undersides, with yellow spots on top. It thrives in cool, wet weather. Remove infected leaves promptly. Avoid overhead watering. Some varieties are more susceptible than others. Good garden hygiene, cleaning up fallen leaves in autumn, reduces overwintering spores.
Heaving
In cold climates, repeated freezing and thawing pushes shallow-rooted plants out of the ground, exposing roots to drying wind and cold. This is called heaving. A thick winter mulch applied after the ground freezes prevents it. If you notice heaved plants in early spring, gently press them back into the soil and water well.
Pests
Coral bells have few serious pests. Black vine weevil larvae feed on roots, causing wilting and decline. Adults notch leaf edges at night. Beneficial nematodes applied to soil in spring control larvae. Slugs and snails may chew holes in leaves, especially in damp shade. Beer traps, diatomaceous earth, or iron phosphate baits manage them. Deer and rabbits occasionally browse flowers but usually leave the foliage alone.
Top Coral Bells Varieties to Consider
For Deep Shade
Varieties with darker foliage hold their color best in low light. ‘Obsidian’ offers shiny, near-black leaves that keep their intensity all season. ‘Black Pearl’ forms a dense mound of ruffled jet-black foliage. ‘Midnight Rose’ adds hot pink speckles on black leaves for a dramatic effect. These make stunning focal points in the darkest corners.
For Bright Color Accents
Chartreuse and gold varieties light up shade like lanterns. ‘Lime Rickey’ has ruffled lime-green leaves that stay bright all summer. ‘Citronelle’ offers glowing yellow-green foliage on a vigorous, heat-tolerant plant. ‘Electric Lime’ brings intense chartreuse with red veining in spring. Plant these where they catch dappled light for maximum glow.
For Warm Tones
Caramel, amber, peach, and copper tones blend beautifully with autumn palettes. ‘Caramel’ is a villosa hybrid with large, fuzzy leaves in soft apricot-caramel, exceptionally heat and humidity tolerant. ‘Georgia Peach’ shows peachy-orange leaves with a silver overlay. ‘Fire Alarm’ delivers true coral-red foliage that deepens in cool weather.
For Silver and Patterned Leaves
Silver-leaved varieties add sophistication. ‘Silver Scrolls’ has pewter-silver leaves with charcoal veining and purple undersides. ‘Rave On’ features silver leaves with dark green veins and bright pink flowers. ‘Berry Smoothie’ emerges rose-pink in spring, maturing to silver with rose undertones. These shimmer in evening light.
For Heat and Humidity
Gardeners in the Southeast need villosa hybrids. These descend from Heuchera villosa, native to the hot, humid Appalachians. ‘Autumn Bride’ is a tough, large-growing selection with fuzzy green leaves and white flowers in fall. ‘Brownies’ offers chocolate-brown foliage with a metallic sheen. ‘Mocha’ has deep coffee-colored leaves that tolerate southern summers.
For Cold Climates
Northern gardeners should look for sanguinea and micrantha hybrids. ‘Palace Purple’ is a classic micrantha selection with maple-shaped bronze-purple leaves, hardy to zone 3. ‘Ruby Bells’ (sanguinea) produces abundant red flowers over green leaves. ‘Snow Angel’ is a variegated micrantha with green leaves splashed white, very cold hardy.
Seasonal Care Calendar
Spring
Remove winter mulch from crowns as soon as new growth appears. Cut back any damaged leaves. Apply slow-release fertilizer. Divide overgrown clumps. Water new divisions regularly. Watch for slugs on emerging foliage.
Summer
Deadhead spent flower stalks. Water deeply during dry spells. Monitor for powdery mildew in humid weather. Enjoy the foliage show. Container plants need daily watering checks.
Fall
Plant new coral bells in early fall. Stop fertilizing. Clean up fallen leaves around plants to reduce disease carryover. Apply fresh mulch after ground freezes in cold zones.
Winter
In zones 6 and colder, ensure mulch is in place after hard freeze. Do not cut back foliage; it protects the crown. Brush heavy snow off gently if it weighs leaves down. Plan next year’s additions from catalogs.
Frequently Asked Questions About Planting Coral Bells
Can I plant coral bells in full sun?
In cool climates (zones 4-6), yes, with consistent moisture. In warmer zones, afternoon shade is essential to prevent leaf scorch and color loss. Morning sun with afternoon shade is the universal sweet spot.
How far apart should I space coral bells?
Space plants 12 to 18 inches apart, depending on the mature width of the variety. Check the plant tag for specific spacing. Good air circulation prevents disease.
Do coral bells spread aggressively?
No. They form slow-expanding clumps via short rhizomes. They are well-behaved garden citizens and never become invasive.
Why are my coral bells losing their color?
Too much sun bleaches pigments. Too much shade reduces color intensity in some varieties. Nutrient deficiency or root stress can also cause fading. Evaluate light conditions first.
Can I grow coral bells indoors?
They make poor houseplants. They need a winter dormancy period triggered by cold temperatures and short days. Without it, they decline and die.
Are coral bells deer resistant?
Generally yes. Deer may sample flowers but usually avoid the foliage. In severe winters with limited food, they may browse more heavily. Rabbits occasionally nibble young leaves.
Conclusion
When you plant coral bells, you add a versatile, long-lived perennial that asks little and gives much. Their incredible foliage diversity means there is a perfect coral bells for almost any shade garden situation. By choosing the right variety for your climate, providing well-drained soil and appropriate light, and following basic care practices, you will enjoy their colorful presence for years to come. Whether tucked into a rock crevice, massed under a maple tree, or starring in a patio container, coral bells bring texture, color, and life to the garden in every season. Start with a few varieties this spring, and you will quickly understand why these North American natives have captured the hearts of gardeners worldwide.
Frequently Asked Questions
What type of soil is best for coral bells?
Well-draining, humus-rich soil with a pH of 6.0-7.0 is ideal. Amend heavy clay with compost to improve drainage. Avoid soggy conditions that cause crown rot.
How often should I water coral bells?
Water deeply once or twice weekly during the first growing season. Established plants need water during dry spells. Check soil moisture 2 inches down; water when dry at that depth.
When should I divide my coral bells?
Divide every 3-4 years in early spring when new growth emerges. This prevents woody centers and rejuvenates the plant. Replant divisions immediately at the same depth.
Are coral bells deer resistant?
Generally yes. Deer rarely browse the foliage but may eat flowers. In harsh winters with limited food, they may sample more heavily. Rabbits occasionally nibble young leaves.
Can I grow coral bells from seed?
Species types come true from seed, but named cultivars do not. Seedlings from hybrids vary in color and form. Sow fresh seed in summer for spring germination.
What causes brown crispy edges on coral bells leaves?
Usually too much sun, drought stress, or fertilizer burn. Move to shadier spot, water deeply, and avoid high-nitrogen fertilizers. Some varieties are more sun-sensitive than others.