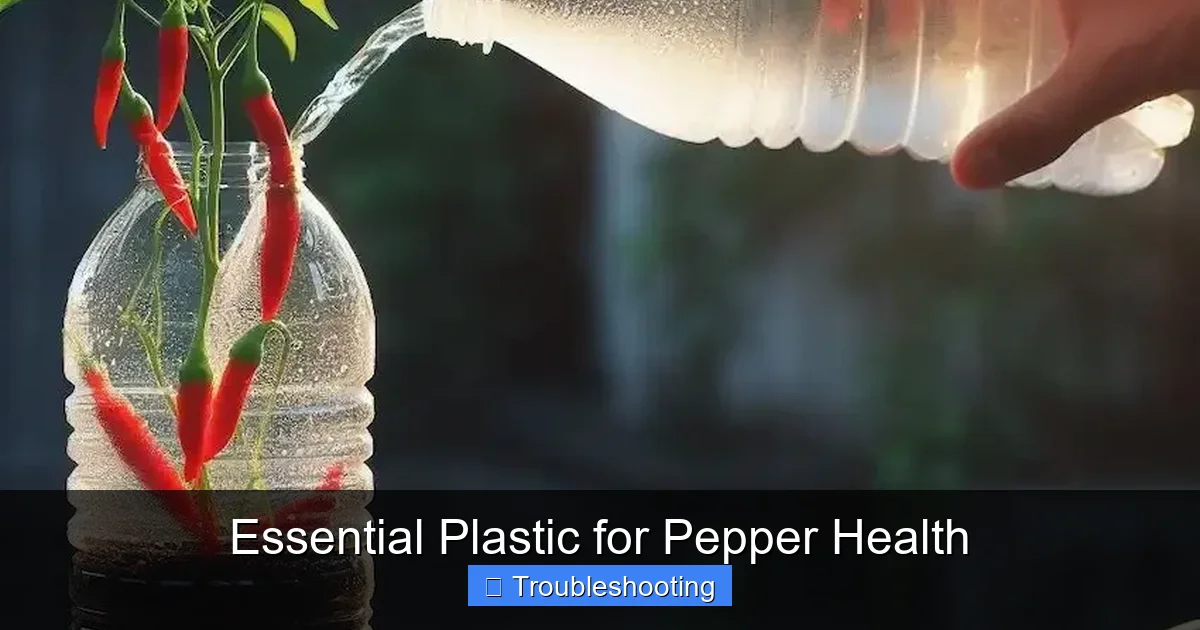
Essential Plastic for Pepper Health
Using the right plastic products can dramatically improve pepper plant health and yields. From black plastic mulch that warms soil and suppresses weeds to row covers that protect against pests and frost, these tools create ideal growing conditions. Learn which plastics work best for your climate and pepper varieties.
Key Takeaways
- Black plastic mulch warms soil: Raises soil temperature by 5-10°F, promoting faster root development and earlier harvests for heat-loving peppers.
- Silver reflective mulch deters pests: Confuses aphids, thrips, and whiteflies with reflected light, reducing virus transmission by up to 80%.
- Row covers extend seasons: Lightweight fabric protects young plants from frost down to 28°F while allowing 85% light transmission.
- Greenhouse film controls environment: UV-stabilized polyethylene maintains optimal humidity and temperature for year-round pepper production.
- Drip irrigation under plastic saves water: Delivers moisture directly to roots, reducing water use by 50% compared to overhead watering.
- Proper installation prevents problems: Secure edges, avoid punctures, and remove mulch at season end to prevent plastic pollution.
- Biodegradable options exist: Starch-based mulches break down naturally, eliminating removal labor and reducing environmental impact.
Quick Answers to Common Questions
What is the best plastic mulch color for peppers?
Black plastic mulch is best for most pepper growers because it warms soil 5-10°F and suppresses weeds. In hot climates (zones 9-10), use white-on-black to prevent overheating. Silver reflective mulch is best where aphids and virus diseases are severe.
Can I reuse plastic mulch for multiple seasons?
Standard 1-1.5 mil mulch is designed for one season. Thicker 3-4 mil landscape fabric or woven ground cover lasts 3-5 years. Greenhouse film lasts 4 years. Always remove and store dry. Discard any mulch from diseased plants.
When should I remove row covers from pepper plants?
Remove row covers when night temperatures stay consistently above 55°F and plants begin flowering. Peppers need pollinators for fruit set. In hot weather, remove earlier to prevent heat sterilization of pollen above 90°F.
Is biodegradable plastic mulch worth the extra cost?
Yes, if you value time and environmental impact. Biodegradable mulch eliminates removal labor and plastic waste. It costs 2-3 times more but performs comparably for one season. Choose certified soil-biodegradable products (EN 17033 standard).
How do I prevent drip irrigation clogs under plastic mulch?
Install a 150-mesh filter and 10-12 PSI pressure regulator at the water source. Flush the system monthly by opening the end cap and running water until clear. Use acid flush (1 cup vinegar per 50 gallons) annually for hard water areas.
📑 Table of Contents
- Why Plastic Matters for Pepper Plants
- Black Plastic Mulch: The Foundation of Warm Soil
- Reflective Mulches: Your Secret Weapon Against Pests
- Row Covers: Frost Protection and Pest Exclusion
- Greenhouse and High Tunnel Films
- Drip Irrigation: The Perfect Partner for Plastic
- Biodegradable and Eco-Friendly Alternatives
- Seasonal Strategies: Putting It All Together
- Common Mistakes and How to Avoid Them
- Budget-Friendly Options for Every Gardener
- Environmental Considerations
- Conclusion: Your Pepper Plastic Plan
Why Plastic Matters for Pepper Plants
If you have ever grown peppers, you know they can be picky. They want warm soil. They hate cold nights. They attract every aphid in the neighborhood. And they need consistent moisture to prevent blossom end rot. This is where essential plastic for pepper health comes into play. The right plastic products solve these problems without chemicals or constant attention.
I learned this the hard way. My first pepper patch struggled in cool spring soil. The plants sat there, yellow and stunted, while weeds took over. Then I tried black plastic mulch. The difference was shocking. Soil warmed fast. Weeds disappeared. Peppers took off. That season I harvested three times more fruit. Since then, I never plant peppers without some form of plastic assistance.
But not all plastic is created equal. Some types help. Others hurt. Some last one season. Others last years. The key is matching the plastic to your specific challenges: cold soil, pest pressure, water management, or season extension. This guide walks through every option so you can choose what works for your garden.
Black Plastic Mulch: The Foundation of Warm Soil
How Black Plastic Works
Black plastic mulch is the most common essential plastic for pepper health. It absorbs sunlight and transfers heat to the soil beneath. On a sunny spring day, soil under black plastic can be 10-15 degrees warmer than bare soil. For peppers, which need soil temperatures above 65°F for good root growth, this is huge.
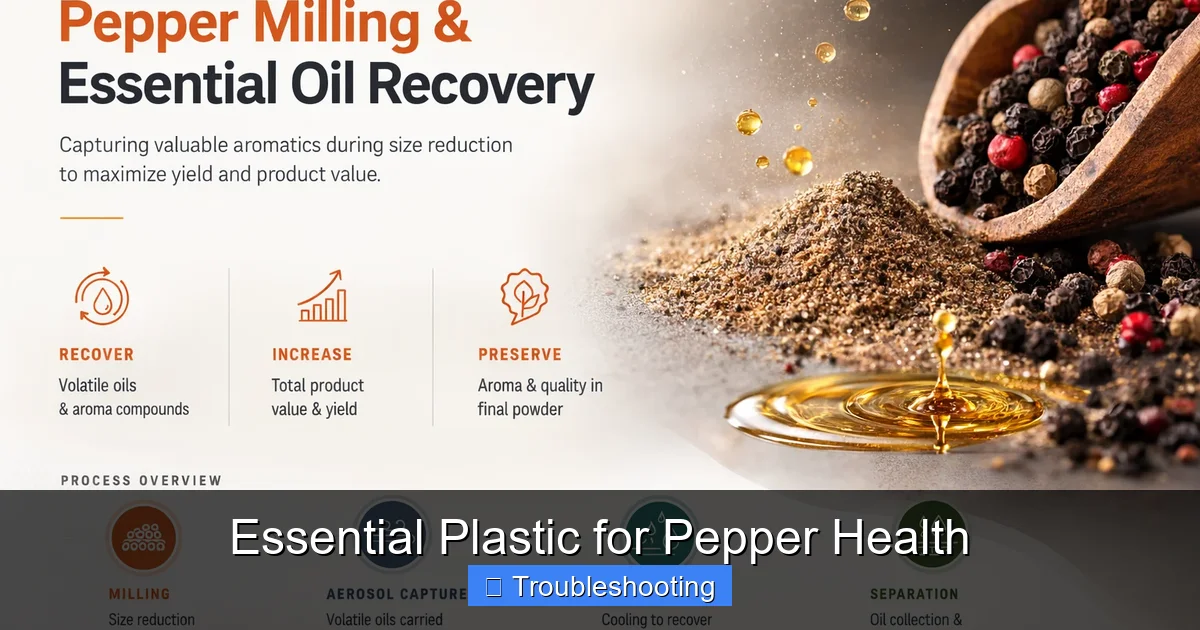
Visual guide about Essential Plastic for Pepper Health
Image source: dpmills.com
The plastic also blocks light, preventing weed germination. No weeds means no competition for water and nutrients. And because the soil stays covered, moisture evaporates slower. You water less often. The plastic creates a mini greenhouse effect right at soil level.
Choosing the Right Thickness
Black plastic comes in different thicknesses measured in mils (thousandths of an inch). For peppers, 1.0 to 1.5 mil is standard for one-season use. Thicker 2-4 mil plastic lasts multiple seasons but costs more. Embossed plastic has a diamond pattern that adds strength and reduces tearing during installation.
I prefer 1.25 mil embossed for annual beds. It installs easily, survives foot traffic, and removes cleanly in fall. For permanent beds where I grow peppers year after year, I invest in 3 mil reusable landscape fabric instead. It costs more upfront but pays off over three to five years.
Installation Tips for Success
Lay plastic on moist, prepared soil. Smooth the surface first. Rocks and clods tear plastic. Unroll the plastic and pull it tight. Bury edges 4-6 inches deep in soil trenches. This seals in heat and moisture while anchoring against wind. Cut planting holes with a sharp knife or hole burner. Space holes 18-24 inches apart for peppers.
Pro tip: Run drip irrigation tape under the plastic before securing edges. This delivers water directly to roots. You will use half the water of overhead sprinklers. And dry foliage means fewer fungal diseases like anthracnose and bacterial spot.
When Black Plastic Falls Short
In very hot climates, black plastic can overheat soil. Roots cook above 90°F. If you garden in zones 9-10, consider white-on-black plastic. The white top reflects heat while the black bottom still blocks weeds. Or use straw mulch over black plastic in midsummer to insulate.
Another issue: plastic prevents rainfall from reaching soil. You must irrigate. Forget to water for a few hot days and peppers stress fast. Set a timer on your drip system. Check soil moisture weekly by lifting a corner of plastic and feeling the soil.
Reflective Mulches: Your Secret Weapon Against Pests
Silver and Metallic Mulches
Silver reflective mulch is essential plastic for pepper health when virus-carrying insects are a problem. The shiny surface reflects ultraviolet light. This confuses flying insects like aphids, thrips, and whiteflies. They cannot locate the plants as easily. Studies show 50-80% reduction in aphid landings compared to black plastic.
Visual guide about Essential Plastic for Pepper Health
Image source: codagu.com
Less insect feeding means less virus transmission. Pepper mosaic viruses, spread by aphids, can ruin a crop. Reflective mulch is like a force field. It does not kill insects. It just makes your peppers harder to find. The reflected light also boosts photosynthesis in lower leaves, increasing yields 10-20% in some trials.
Red Mulch for Early Production
Red plastic mulch (often sold as SRM-Red) reflects specific red wavelengths that stimulate phytochrome, a plant pigment. This tricks peppers into thinking they have more space, reducing shade avoidance responses. Result: stockier plants, more branches, earlier fruit set. University trials show 10-15% yield increases for bell peppers on red versus black plastic.
Red mulch works best in northern regions with shorter seasons. In the deep south, the extra heat from red plastic can be too much. Test a small section first. Many gardeners use red for early plantings and switch to silver for summer pest pressure.
Installation Differences
Reflective mulches install like black plastic. But they tear more easily. Handle gently. The metallic coating scratches off if dragged over rough soil. Prepare beds extra smooth. Use a roller or board to press plastic down after laying. This ensures good soil contact for heat transfer.
One caution: reflective mulch can blind you on sunny days. Wear sunglasses when working around it. And avoid placing it where reflected light hits neighbors’ windows. The glare is intense.
Row Covers: Frost Protection and Pest Exclusion
Floating Row Cover Basics
Floating row cover is lightweight spunbonded polypropylene fabric, not solid plastic film. But it serves the same protective purpose. It “floats” over plants, supported by the plants themselves or wire hoops. For peppers, it provides 4-8 degrees of frost protection. This means you can transplant 2-3 weeks earlier in spring.
The fabric allows 85-90% light transmission. Rain and irrigation pass through. But insects cannot. This excludes cucumber beetles, flea beetles, and aphids during critical early growth. Remove covers when plants flower so pollinators can access blooms. Or hand-pollinate under cover for pure seed saving.
Weight Matters: Choosing the Right Grade
Row cover comes in weights from 0.5 to 2.0 ounces per square yard. For peppers:
- 0.5 oz (insect barrier): Maximum light, minimal heat. Best for summer pest exclusion.
- 0.9-1.0 oz (all-purpose): Good balance. 4°F frost protection. My go-to for spring.
- 1.5-2.0 oz (heavy frost): 6-8°F protection. Less light. Use for fall extension or very early spring.
I buy 1.0 oz in 83-inch widths. It covers a 30-inch bed with plenty of slack for growth. Cut to length with scissors. Secure edges with soil, sandbags, or landscape staples. Leave slack for plant expansion. Tight cover tears or lifts in wind.
Hoop Supported vs. Floating
For peppers, which grow 2-3 feet tall, hoop-supported covers work better than floating. Wire hoops (9-gauge, 65-inch length) create a low tunnel. Space hoops 4 feet apart. Drape cover over hoops. Clamp with snap clamps or clothespins. This prevents fabric from rubbing leaves, which causes abrasion and disease entry points.
Vent on warm days. Temperatures under cover can spike 20-30 degrees above ambient. Open ends or sides when forecast exceeds 75°F. Close before sunset to trap heat for cool nights. This daily routine takes two minutes but prevents heat stress and fungal buildup.
Combining Row Cover with Plastic Mulch
The power combo: black plastic mulch plus row cover. Mulch warms roots. Cover warms air. Together they create a 10-15 degree advantage over bare ground. I transplant peppers in early April in zone 6 using this system. Harvest starts in late June instead of August. That is two extra months of peppers.
Remove row cover when night lows stay above 55°F. Leave mulch all season. At season end, pull mulch, plant cover crop. Soil stays healthy. Plastic gets recycled or stored for next year.
Greenhouse and High Tunnel Films
Polyethylene Film Options
For serious pepper growers, greenhouse plastic film is essential plastic for pepper health year-round. Standard 6 mil UV-stabilized polyethylene lasts 4 years. It transmits 90% of photosynthetically active radiation. Diffused light films scatter light, reducing shadows and burning. This increases photosynthesis in lower canopy leaves.
Infrared (IR) blocking films reduce nighttime heat loss by 15-20%. This cuts heating costs in winter. Anti-condensate (AC) coatings prevent water droplets from forming on the inside. Droplets reflect light and drip on plants, spreading disease. AC film keeps light transmission high and foliage dry.
Sizing and Installation
Measure your structure. Add 2 feet extra on each dimension for attachment. Single layer works for seasonal high tunnels. Double layer with inflation blower adds R-value for winter growing. The air gap between layers insulates. Inflation fan runs 24/7 on minimal electricity.
Attach with wiggle wire and lock channel (poly lock) or batten tape and staples. Pull tight but not drum-tight. Plastic expands in heat, contracts in cold. Overtightening causes tears. Install on calm, warm day (60-70°F) for easiest handling.
Ventilation is Critical
Peppers hate humidity above 85%. Greenhouse film traps moisture. You need roll-up sides, roof vents, or exhaust fans. Automated vent openers (wax cylinder type) open at set temperatures. No electricity needed. They save crops on sunny spring days when you are at work.
Horizontal airflow (HAF) fans circulate air inside. This prevents cold spots, reduces disease, and strengthens stems. Aim for one air exchange per minute. Small 12-inch fans every 50 feet work well.
Drip Irrigation: The Perfect Partner for Plastic
Why Drip Under Plastic Wins
Plastic mulch blocks rain. You must water. Drip irrigation is the only sensible choice. Tape or tubing runs under plastic, emitting water at root zone. Foliage stays dry. Weeds between beds stay dry. Water use drops 50-70% versus sprinklers. And you can fertilize through the system (fertigation) for spoon-feeding nutrients.
For peppers, use 8-12 mil drip tape with 12-inch emitter spacing. Flow rate 0.45 GPM per 100 feet. Run time depends on soil and weather. Start with 30 minutes daily in cool weather. Increase to 60-90 minutes in heat. Check soil moisture at 6-inch depth. It should be moist, not soggy.
System Layout for Pepper Beds
One drip line per row of peppers. Place line 2-3 inches from plant stems, under plastic. Use landscape staples every 3 feet to hold tape in place. Connect to header pipe with barbed fittings. Install filter (150 mesh) and pressure regulator (10-12 PSI) at water source. Flush system monthly to prevent clogging.
Timer automates everything. Battery-operated timers cost $30-50. Set early morning run (5-7 AM). This reduces evaporation loss. And wet soil warms faster in morning sun, helping peppers grow.
Troubleshooting Common Issues
Clogged emitters: Hard water minerals build up. Acid flush (vinegar solution) annually. Or install water softener. Chewed tape: Mice and voles love drip tape. Bury header lines. Use hardware cloth around raised beds. Uneven watering: Pressure compensating tape solves this on slopes. Standard tape works fine on level ground.
Biodegradable and Eco-Friendly Alternatives
Starch-Based Mulch Films
If plastic removal and disposal bother you, biodegradable mulch is essential plastic for pepper health with a conscience. Made from corn starch, PLA (polylactic acid), or PBAT (polybutylene adipate terephthalate). These films perform like black plastic for one season. Then they break down into CO2, water, and biomass.
Certified soil-biodegradable mulches (EN 17033 or ASTM D5988) decompose 90% within 2 years in soil. No microplastics. No removal labor. You simply till them in after harvest. Cost is 2-3 times conventional plastic. But you save removal time and disposal fees.
Performance note: Biodegradable mulch degrades faster in hot, wet, biologically active soil. In cool northern soils, it may last 18 months. In southern heat, 3-4 months. Choose thickness based on your season length. 0.6-0.8 mil for short seasons. 1.0-1.2 mil for full season.
Paper and Fabric Mulches
Kraft paper mulch (creped, 30-40 lb weight) works for one season. It blocks weeds, warms soil moderately, and biodegrades completely. Cheaper than biodegradable plastic. But tears easily. Install on calm day. Overlap seams 6 inches. Secure with soil or staples.
Wool mulch mats and jute fabric are reusable for 2-3 years. They suppress weeds, retain moisture, and add organic matter as they break down. Less heat gain than black plastic. Better for warm climates where overheating is a risk.
Recycling Conventional Plastic
If you use standard polyethylene mulch, recycle it. Many agricultural extension offices host annual plastic recycling days. Clean mulch (shake off soil, remove staples) is accepted. Drip tape and greenhouse film often accepted too. Never burn agricultural plastic. It releases dioxins and furans.
Store used plastic dry and bundled. UV-degraded plastic shatters into microplastics. Remove mulch promptly after harvest. Do not leave in field over winter. This is the single biggest thing you can do to reduce plastic pollution from gardening.
Seasonal Strategies: Putting It All Together
Spring: Early Start System
March-April (zones 5-7): Lay black plastic mulch 2 weeks before transplanting. Soil warms. Install drip tape. Transplant peppers through holes. Cover with 1.0 oz row cover on hoops. Vent daily. Remove cover at flowering. Harvest begins late June.
This system gives you 60-day head start. Peppers establish strong roots in warm soil before summer heat. They flower and fruit earlier. Total yield increases 30-50% over unmulched, uncovered plants.
Summer: Pest Management Focus
June-August: Switch to silver reflective mulch for new plantings (fall crop). Or lay silver mulch strips between existing rows. The reflected light deters aphids and thrips during peak virus season. Keep drip irrigation running. Mulch conserves moisture in heat.
If spider mites appear (hot, dry weather), overhead mist midday. Mites hate humidity. But only if foliage dries before night. Otherwise you invite fungal disease. Silver mulch helps here too. Reflected light reduces mite populations.
Fall: Season Extension
September-October: Re-cover peppers with 1.5 oz row cover as nights cool. This adds 3-4 weeks of harvest. Peppers ripen better in cool weather. Flavor improves. Remove cover for hard freeze (below 28°F). Harvest all fruit. Pull plants. Remove plastic mulch. Plant cover crop.
In high tunnels, peppers produce into November. Add second layer of row cover inside tunnel for extra protection. Some growers harvest peppers in December in zone 6 tunnels.
Winter: Planning and Maintenance
Clean and store reusable plastics. Inspect greenhouse film for tears. Repair with greenhouse tape (not duct tape). Order new mulch for spring. Rotate pepper beds. Do not grow peppers in same soil year after year. Disease builds up. Use 3-year rotation minimum.
Common Mistakes and How to Avoid Them
Mistake 1: Laying Plastic on Dry Soil
Plastic seals in moisture. But it cannot create moisture. If soil is dry when you lay plastic, it stays dry. Water beds thoroughly 24 hours before laying mulch. Check with trowel. Soil should be moist to 6 inches. This one step prevents season-long water stress.
Mistake 2: Planting Too Early Under Cover
Row cover gives 4-8°F protection. But peppers still need 55°F soil for root growth. If soil is 45°F, cover only raises it to 50-53°F. Roots stall. Plants sit. Use soil thermometer. Wait for 60°F at 2-inch depth. Then transplant. Cover accelerates growth from there.
Mistake 3: Forgetting to Vent
Sunny spring day. 65°F outside. Under row cover: 95°F. Pepper flowers sterilize above 90°F. You lose fruit set. Vent covers by 10 AM. Close by 4 PM. Automate with vent openers if you work away. This is non-negotiable.
Mistake 4: Reusing Diseased Mulch
If peppers had bacterial spot, anthracnose, or phytophthora, do not reuse that mulch. Pathogens survive on plastic. Dispose of it. Solarize soil (clear plastic for 6 weeks in summer) before replanting peppers. Clean stakes, cages, tools with 10% bleach solution.
Mistake 5: Ignoring Soil Biology
Plastic mulch reduces soil biology by limiting air exchange and organic matter input. Compensate. Add compost before laying plastic. Use cover crops in off-season. Inject compost tea through drip system monthly. Healthy soil biology fights disease naturally.
Budget-Friendly Options for Every Gardener
Low Cost: DIY Solutions
Black contractor bags (3 mil, 42-gallon) split open make serviceable mulch for small beds. $20 for 20 bags covers 200 sq ft. Lasts one season. Landscape fabric from big box store ($30 for 3×50 ft roll) lasts 3-5 years. Heavier than ideal but works.
Old greenhouse film (from local nursery, often free) cut to size makes row cover hoops. Not UV stabilized. Lasts one season. But free is a good price. Paint white for summer use. Silver spray paint on black plastic makes DIY reflective mulch. Not as effective as real thing but helps.
Mid Range: Quality One-Season Products
1.25 mil embossed black mulch: $80-100 for 4×4000 ft roll. Covers large garden. Drip tape: $40 for 7500 ft. Row cover (1.0 oz, 83×250 ft): $120. Total ~$250 for serious pepper patch. Pays for itself in increased yield first year.
High End: Multi-Year Systems
Woven landscape fabric (3.2 oz, 15×300 ft): $200. Lasts 5+ years. IR/AC greenhouse film (6 mil, 24×100 ft): $180. Lasts 4 years. Pressure compensating drip tape: $60/1000 ft. Automated vent openers: $25 each. Total investment $500-800. But you harvest peppers 8-10 months per year.
Environmental Considerations
Microplastic Concerns
All polyethylene mulch sheds microplastics. UV degradation, mechanical stress, soil organisms fragment plastic. Studies find microplastics in agricultural soils worldwide. Long-term effects unknown. But precaution suggests minimizing plastic use and removing promptly.
Biodegradable mulches eliminate this concern. But they cost more. A compromise: use reusable landscape fabric for paths and perennial beds. Reserve single-use plastic for annual pepper beds only. Remove meticulously. Recycle religiously.
Carbon Footprint
Plastic is petroleum-based. Manufacturing and transport emit CO2. But plastic mulch increases yields 30-50%. More food per acre means less land cleared for agriculture. Drip irrigation saves water and pumping energy. Row covers reduce pesticide use. The net carbon balance often favors plastic use in intensive vegetable production.
Choose USA-made plastic when possible. Shorter transport. Stricter manufacturing standards. Support companies with take-back recycling programs. Some mulch manufacturers offer discounts for returning used film.
Conclusion: Your Pepper Plastic Plan
Essential plastic for pepper health is not about using more plastic. It is about using the right plastic at the right time for the right reason. Start simple. Black plastic mulch plus drip irrigation is the foundation. Add row cover for early planting. Upgrade to reflective mulch if viruses plague your patch. Invest in greenhouse film only if you want year-round harvests.
My current system: 1.25 mil black mulch on raised beds. Drip tape underneath. 1.0 oz row cover on hoops for first month. Silver mulch strips between rows in July for pest management. All plastic removed and recycled in November. Cover crop planted. Soil rests. Next spring, repeat.
This approach gives me 50+ pounds of peppers from 20 plants in a 4×20 foot bed. Six months of fresh peppers. Plus frozen, dried, and fermented peppers all winter. The plastic investment pays back in flavor, nutrition, and satisfaction.
Your garden is different. Your climate, pests, budget, and goals vary. But the principles remain: warm soil, exclude pests, conserve water, extend seasons. Match plastics to those needs. Start with one change this season. Observe. Adjust. Next year, add another. In three years, you will have a system that makes pepper growing feel easy.
Because peppers are not actually picky. They just want what every plant wants: warm roots, clean water, pest-free leaves, and time to ripen. Plastic gives you control over all four. Use it wisely. Your peppers will thank you.
Frequently Asked Questions
What thickness of black plastic mulch should I use for peppers?
For single-season use, 1.0-1.5 mil embossed black plastic mulch is ideal for peppers. It warms soil effectively, resists tearing during installation, and removes cleanly. For multi-season use, invest in 3-4 mil woven landscape fabric which lasts 3-5 years with proper care.
Does plastic mulch attract slugs and other pests?
Plastic mulch can create moist hiding spots for slugs, especially at edges. Check under plastic edges weekly and remove slugs. Diatomaceous earth or copper tape barriers at bed edges help. The benefits of weed suppression and soil warming generally outweigh this minor issue.
Can I use clear plastic mulch for peppers?
Clear plastic warms soil more than black (10-15°F vs 5-10°F) but does not suppress weeds. Weeds grow vigorously underneath. Clear plastic is used for soil solarization (6 weeks in summer to kill pathogens) but not as growing-season mulch for peppers.
How do I fertilize peppers growing under plastic mulch?
Apply slow-release organic fertilizer (like feather meal or composted poultry manure) before laying plastic. For additional feeding, use water-soluble fertilizer injected through drip irrigation (fertigation) every 2-3 weeks. Foliar feeds also work but avoid wetting fruit near harvest.
Will plastic mulch cause root rot in wet climates?
Plastic mulch can worsen drainage in heavy clay soils during prolonged rain. Solutions: use raised beds (8-12 inches high), choose well-draining soil mix, ensure plastic is tight with no depressions holding water, and monitor soil moisture. In very wet regions, consider permeable landscape fabric instead.
What is the difference between row cover and greenhouse plastic?
Row cover is lightweight spunbonded fabric (0.5-2 oz/yd²) that floats over plants or hoops, providing 4-8°F frost protection and insect exclusion. Greenhouse plastic is 6 mil UV-stabilized polyethylene film stretched over a frame, creating a permanent structure for year-round growing with full environmental control.