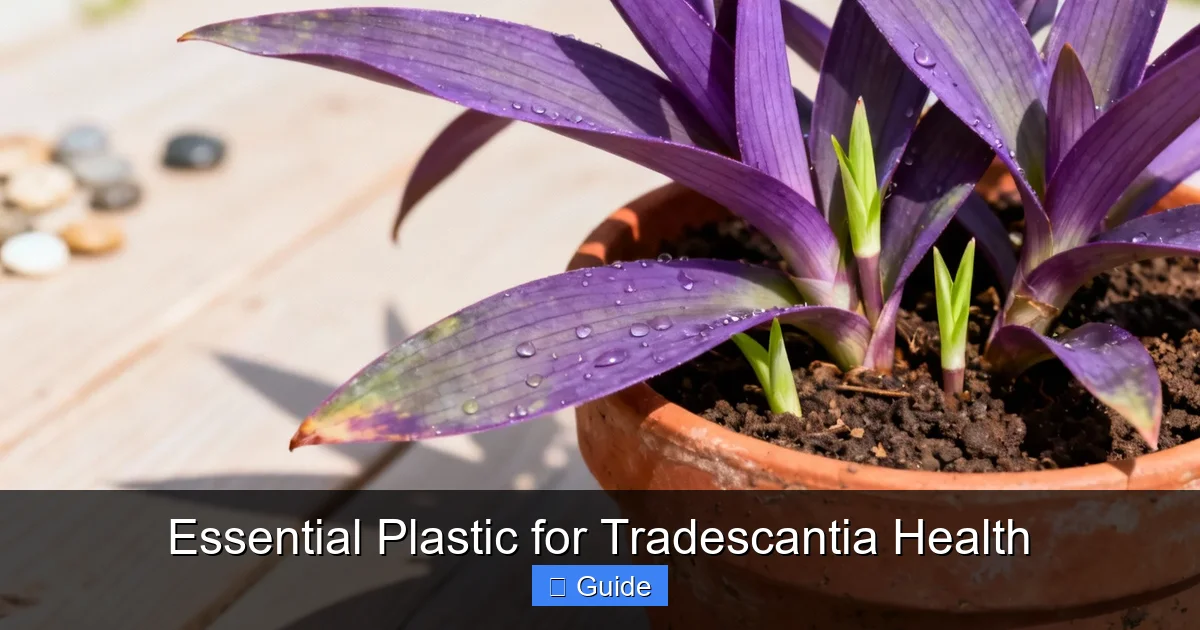
Essential Plastic for Tradescantia Health
Using the right plastic tools transforms tradescantia care. From humidity domes to propagation boxes, specific plastics create ideal microclimates that prevent crispy leaves and speed up root development. This guide reveals exactly which plastics work best and how to use them for lush, vibrant growth.
If you’ve ever watched a tradescantia cutting shrivel up before it could root, you know the frustration. These trailing beauties look tough with their succulent-like stems, but they’re actually drama queens about humidity. The secret weapon? Essential plastic for tradescantia health isn’t a fancy gadget. It’s simple, cheap plastic items you probably already own. I learned this the hard way after killing three purple heart cuttings in a row. Then I started using clear plastic storage boxes as humidity chambers. Every single cutting rooted within two weeks. No special equipment. No expensive misters. Just smart plastic use.
Tradescantias come from tropical and subtropical regions where humidity hangs heavy in the air. Our homes? Not so much. Central heating and air conditioning strip moisture faster than a spider plant sends out babies. That’s where plastic steps in. It creates microclimates. It traps humidity. It protects tender new roots. And it does all this for pennies. This guide walks you through every plastic tool that makes a real difference. You’ll learn which ones to buy, which to skip, and how to use each for maximum impact. Your tradescantias will thank you with faster growth, richer color, and zero crispy tips.
Key Takeaways
- Clear plastic bins create perfect propagation chambers: They maintain 80-90% humidity without molding cuttings.
- Plastic pots with drainage holes prevent root rot: They’re lighter than ceramic and allow easy root monitoring.
- Humidity domes from plastic containers boost new growth: They trap moisture for freshly potted divisions.
- Plastic sheeting on pebble trays raises ambient humidity: This mimics tropical conditions tradescantias love.
- Food-grade plastic labels track varieties: They withstand watering and won’t degrade like paper tags.
- Self-watering plastic planters reduce maintenance: They provide consistent moisture for busy plant parents.
- Avoid colored or opaque plastics for light-dependent tasks: Clear plastics allow proper light penetration for photosynthesis.
Quick Answers to Common Questions
What is the best plastic container for rooting tradescantia cuttings?
A clear plastic storage tote with a locking lid and ventilation holes creates the ideal humidity chamber for rooting multiple cuttings simultaneously.
Can I use regular plastic bags for humidity domes?
Yes, gallon ziplock bags work perfectly for single cuttings – just leave a small gap for airflow and prop the bag up so it doesn’t touch the leaves.
Why should I avoid colored plastic pots for tradescantias?
Colored or opaque plastic blocks light from reaching the root zone and prevents you from monitoring root health and soil moisture visually.
How do I prevent mold in plastic propagation boxes?
Drill ventilation holes in the lid, space cuttings for airflow, and remove the lid daily for air exchange – a small clip fan helps prevent stagnant conditions.
What thickness of plastic sheeting works best for humidity trays?
2-4 mil clear polyethylene sheeting (vapor barrier or greenhouse film) provides durability and 90%+ light transmission for effective humidity curtains.
📑 Table of Contents
- Why Plastic Matters For Tradescantia Care
- Choosing The Right Plastic Pots And Containers
- Creating Humidity Chambers With Plastic Storage Boxes
- Plastic Sheeting And Film For Humidity Trays
- Propagation Plastics: Boxes, Bags, And Bottles
- Labeling And Organization With Plastic Tags
- Advanced Plastic Techniques For Serious Growers
- Common Plastic Mistakes To Avoid
- Budget-Friendly Plastic Hacks
- Seasonal Plastic Strategies
- Troubleshooting Plastic-Related Issues
- Building Your Plastic Toolkit
- Conclusion
Why Plastic Matters For Tradescantia Care
The Humidity Gap In Modern Homes
Most homes sit around 30-40% humidity. Tradescantias want 60-80%. That gap causes brown tips, slow growth, and leaf drop. You could buy a humidifier. But humidifiers cost money, need cleaning, and can create mold on walls. Plastic solves this differently. It creates localized humidity zones right around your plants. A clear plastic box over a cutting maintains 85% humidity without affecting your whole room. This targeted approach works better for tradescantias than whole-room humidification. They only need high humidity at the leaf and root level.
Plastic Versus Other Materials
Glass works for humidity but breaks easily and gets heavy. Ceramic pots look pretty but weigh a ton and hide root problems. Terracotta wicks moisture away from roots – the opposite of what tradescantias need. Plastic hits the sweet spot. It’s lightweight, transparent, waterproof, and cheap. Clear plastic lets you monitor root development without disturbing the plant. You can spot rot early. You can see when cuttings are ready to pot up. This visibility alone makes essential plastic for tradescantia health worth using. Plus, plastic sterilizes easily with diluted bleach or hydrogen peroxide. Clean tools mean fewer fungal issues.
The Science Of Microclimates
When you cover a plant with clear plastic, you create a miniature greenhouse. Sunlight enters. Heat builds. Moisture evaporates from soil and leaves. That moisture condenses on the plastic walls. Then it drips back down. This cycle mimics the water cycle in nature. For tradescantias, this means constant hydration without waterlogged soil. The leaves absorb moisture directly from the air. The roots stay evenly moist. Growth accelerates. I’ve seen cuttings put out two inches of new growth in a week inside a plastic bin. The same cuttings in open air took a month. That’s the power of a well-managed plastic microclimate.
Choosing The Right Plastic Pots And Containers
Clear Plastic Pots For Root Monitoring
Clear plastic orchid pots changed my tradescantia game completely. You see roots. You see soil moisture. You catch problems before they kill the plant. Tradescantia roots are white and thick when healthy. They turn brown and mushy when rotting. In opaque pots, you only discover rot when the top growth collapses. By then it’s too late. Clear pots let you intervene at the first sign of trouble. Look for pots with plenty of drainage holes. Tradescantias hate wet feet. The best clear pots have slotted sides, not just bottom holes. This airflow prevents the anaerobic conditions that cause root rot.
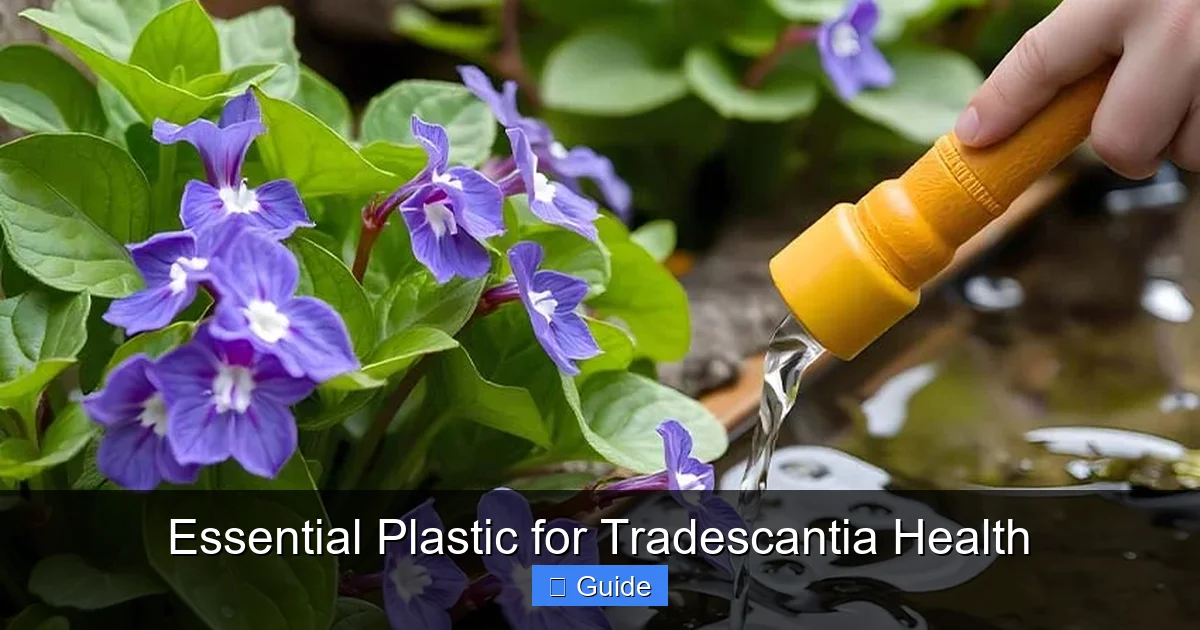
Visual guide about Essential Plastic for Tradescantia Health
Image source: blog.dutch-bulbs.com
Self-Watering Plastic Planters
If you travel or forget to water, self-watering planters save lives. These have a reservoir at the bottom. A wick pulls water up as soil dries. Tradescantias get consistent moisture. You refill weekly instead of daily. Choose models with water level indicators. This prevents overfilling. The reservoir should hold enough for 7-10 days. For a 6-inch tradescantia, that’s about 2 cups. Make sure the planting chamber has drainage holes into the reservoir. Standing water in the soil section defeats the purpose. These planters work especially well for thirsty varieties like Tradescantia zebrina and Tradescantia fluminensis.
Nursery Pots As Liners
Don’t throw away those black plastic nursery pots. They make perfect liners for decorative cachepots. The nursery pot drains well. The cachepot catches water. You lift the liner to check roots. You remove it for thorough watering in the sink. This system prevents the number one tradescantia killer: sitting in drainage water. Cachepots without drainage holes are death traps. The liner system gives you style and function. Plus, nursery pots are free with plant purchases. Sterilize them between uses. A 10-minute soak in 10% bleach solution kills pathogens. Rinse well. They’re ready for the next plant.
Pot Size Matters More Than Material
Tradescantias prefer being slightly root-bound. A pot 1-2 inches wider than the root ball is ideal. Oversized pots hold excess soil. Excess soil holds excess water. Excess water causes rot. Plastic pots come in every size. Match the pot to the plant, not your aesthetic wishes. When repotting, go up one size only. A 4-inch plant goes to a 6-inch pot. Not an 8-inch. This rule applies regardless of pot material. But plastic makes downsizing easy too. If you overpotted, just move to a smaller plastic pot. No heavy lifting. No broken ceramics.
Creating Humidity Chambers With Plastic Storage Boxes
The Clear Tote Method
A clear plastic storage tote is the ultimate propagation chamber. Get one with a locking lid. The 15-quart size works for most home propagators. Drill 4-6 small holes in the lid for air exchange. Without holes, you get mold. With too many holes, humidity drops. Start with four quarter-inch holes. Adjust based on condensation. You want light fog on the walls, not dripping walls. Place cuttings in small pots inside. Or root directly in perlite on the tote floor. Close the lid. Put in bright indirect light. Check weekly. This simple setup roots tradescantia cuttings in 10-14 days consistently.
Shoebox Size For Small Batches
Don’t need a big tote? Clear plastic shoeboxes work for 3-5 cuttings. They stack. They fit on windowsills. They cost a dollar each. The same principles apply. Ventilation holes. Bright indirect light. Weekly checks. I keep a stack ready for spontaneous propagation urges. When I prune my mother plants, the cuttings go straight into shoeboxes. No delay. No makeshift bags. The uniform environment means uniform results. Every cutting gets the same chance. This consistency helps when you’re comparing varieties or testing rooting hormones.
Managing Condensation And Airflow
Condensation tells you everything. Heavy droplets mean too much humidity. Remove the lid for an hour. No condensation means too dry. Mist the interior walls. Light fog means perfect. Adjust ventilation holes as seasons change. Winter heating dries air faster. You might need fewer holes. Summer humidity might need more. Watch your cuttings. Firm, upright leaves mean happy. Limp, curling leaves mean distress. The plastic box makes these signs visible. In open air, you might miss early stress signals. The enclosed space amplifies plant feedback.
Transitioning Out Of The Chamber
Don’t move rooted cuttings straight to open air. They’ll shock. Harden them off over a week. Day 1: lid off for 1 hour. Day 2: 2 hours. Day 3: 4 hours. Day 4: 8 hours. Day 5: lid off all day, on at night. Day 6: lid off completely. Day 7: pot up normally. This gradual exposure thickens leaf cuticles. It prepares stomata for lower humidity. Rushing this step causes the dreaded “propagation collapse” where perfect cuttings die after potting. The plastic chamber did its job. Now let the plant adapt. Patience here saves weeks of recovery time.
Plastic Sheeting And Film For Humidity Trays
DIY Humidity Trays That Actually Work
Pebble trays are classic advice. But they barely raise humidity 5%. Add plastic sheeting and you get 15-20% increase. Here’s how. Get a tray larger than your pot. Fill with pebbles. Add water to just below pebble tops. Cut clear plastic sheeting to drape over the back and sides. Leave the front open for air. The plastic traps rising moisture around the plant. It creates a humidity curtain. Your tradescantia sits in a moist microclimate while the room stays dry. This works beautifully for hanging baskets too. Drape plastic behind the basket. The trailing foliage gets bathed in humidity.
Choosing The Right Plastic Sheeting
Not all plastic film works. Cling wrap tears instantly. Painter’s drop cloths are too opaque. Get 2-4 mil clear polyethylene sheeting. It’s sold as vapor barrier or greenhouse film. Hardware stores carry it. It’s cheap, durable, and transmits 90%+ light. Cut pieces as needed. Tape edges with waterproof tape to prevent fraying. One $15 roll lasts years. Avoid colored or UV-resistant films for this purpose. They block light your plant needs. Clear is non-negotiable for photosynthesis. The essential plastic for tradescantia health must be transparent.
Seasonal Adjustments For Plastic Barriers
Winter needs full coverage. Summer needs gaps. Adjust your plastic sheeting with the seasons. November through March: drape three sides completely. April through October: leave bottom 6 inches open. This prevents overheating. Tradescantias tolerate heat but not steam-cooking. A thermometer in the tray helps. Keep it under 85°F. If it spikes, increase ventilation. The plastic is a tool, not a set-and-forget solution. Treat it like a thermostat. Adjust daily if needed. Your plants will show appreciation through vigorous growth.
Combining Plastic Trays With Other Methods
Plastic humidity trays work great alongside other techniques. Group plants on one large tray. The collective transpiration boosts humidity further. Add a small USB fan on low for air circulation. Stagnant humid air breeds fungus. Moving humid air promotes growth. Place the fan outside the plastic curtain. Blow across the top. This mimics natural breezes. The combination of plastic barrier, plant grouping, and gentle airflow creates near-ideal conditions. I’ve seen tradescantias double in size in a month with this setup.
Propagation Plastics: Boxes, Bags, And Bottles
Plastic Propagation Boxes With Dividers
Specialized propagation boxes exist. They have individual cells. Clear lids. Built-in vents. They’re nice but not necessary. A clear egg carton works. A muffin tin with plastic wrap works. The principle matters more than the product. Each cutting needs its own space. Roots shouldn’t tangle. The lid maintains humidity. Vents prevent mold. If buying a propagation box, get one with tall cells. Tradescantia cuttings need 3-4 inches of stem buried. Shallow cells force horizontal planting. Vertical planting roots faster. Check cell depth before purchasing.
Ziplock Bag Method For Single Cuttings
Got one special cutting? A ziplock bag is perfect. Pot the cutting. Water well. Slip the pot into a gallon bag. Seal 90%. Leave a 1-inch gap for air. Inflate slightly by blowing in. This creates a mini greenhouse. Stand it up with chopsticks if the bag collapses onto leaves. Leaf contact with wet plastic causes rot. The air gap prevents this. Place in bright indirect light. Roots appear in 2 weeks. This method is foolproof for beginners. Zero investment. High success rate. I still use it for rare varieties I can’t afford to lose.
Plastic Bottle Cloches
Cut the bottom off a 2-liter soda bottle. You have a free cloche. Place over a newly potted division. Push into soil for stability. Remove cap for ventilation. This protects individual plants in mixed arrangements. The clear plastic lets light through. The dome shape sheds condensation away from leaves. It’s perfect for that one tradescantia in a mixed planter that needs extra humidity. Remove gradually over a week. Same hardening-off process as the tote method. These cloches stack for storage. They’re virtually free. Every plant person should keep a few ready.
Water Propagation In Plastic Containers
Tradescantias root eagerly in water. Clear plastic cups let you watch roots develop. Narrow cups support cuttings upright. Wide mouths make removal easy. Use containers 3-4 inches tall. Shallow water encourages rot at the stem. Deeper water (2-3 inches) keeps the stem dry while nodes stay submerged. Change water every 3-4 days. Cloudy water means bacteria. Fresh water means oxygen. Add a tiny piece of activated charcoal to keep water clear longer. Once roots hit 2 inches, pot up. Water roots differ from soil roots. They’ll adapt but need gentle transition.
Labeling And Organization With Plastic Tags
Why Plastic Labels Beat Paper And Wood
Paper labels dissolve. Wood labels rot. Metal labels rust. Plastic labels endure. Waterproof. Fade-resistant. Reusable. Write with permanent marker or paint pen. They last years. When you have 15 tradescantia varieties, labels save sanity. Tradescantia zebrina looks like Tradescantia fluminensis ‘Variegata’ when not side-by-side. Labels prevent mix-ups. They track propagation dates. They note parent plants. This data improves future success. A 100-pack of plastic tags costs $5. Best $5 you’ll spend.
Color-Coding Systems
White tags work. Colored tags work better. Develop a system. Yellow for zebrina varieties. Pink for pallida types. Green for fluminensis. Blue for experimental crosses. Orange for cuttings awaiting ID. At a glance, you know what’s what. No reading required. This speeds up care routines. You water the pink-tagged plants differently if they need it. You group by color for photos. The system scales. Start simple. Add complexity as your collection grows. Plastic tags come in every color. Use them.
Information To Include On Labels
Don’t just write the name. Include: variety name, date acquired, source, propagation date, parent plant ID. Example: “T. zebrina ‘Burgundy’ | 03/15/24 | Etsy seller | Prop 04/01/24 | Mother #3”. This detail pays off. You track which sources send healthy plants. You learn your propagation timing. You identify strong mother plants. A label maker prints clean tags. Handwritten works fine too. Just use permanent ink. Pencil fades. Ballpoint smears. Sharpie or paint pen only.
Storing And Organizing Labels
Keep unused tags in a plastic box. Organized by color. With a marker inside. Ready when inspiration strikes. Attach tags to pots with plastic-coated wire. Not string. String rots. Wire lasts. Push tag into soil at pot edge. Not near stem. Stem contact damages delicate tissue. For hanging baskets, tie tag to hanger. Not to plant. The tag stays readable. The plant stays unharmed. This system survives watering, fertilizing, and moving. Years later, you still know what you’re growing.
Advanced Plastic Techniques For Serious Growers
Plastic Grow Tents For Collections
When you have 20+ tradescantias, a grow tent makes sense. These are fabric tents with reflective interiors. But the frame and vents are plastic. The clear plastic observation windows let you check plants without opening. The plastic floor tray contains spills. The plastic ducting ports connect fans and filters. A 2×2 tent holds 30 small pots. It creates a dedicated humidity zone. You control temperature, humidity, light, airflow. It’s a professional setup for serious hobbyists. Cost: $100-200. Worth it if you propagate commercially or obsessively.
Automated Misting With Plastic Tubing
Misting systems use plastic tubing, nozzles, and timers. They deliver precise humidity pulses. 30 seconds every 2 hours. Or 1 minute every 4 hours. You dial in exact needs. The tubing runs along shelves. Nozzles point at plants. A timer controls the pump. This eliminates manual misting. It maintains steady humidity. It prevents the wet-dry cycles that stress tradescantias. Use food-grade polyethylene tubing. It doesn’t leach chemicals. It resists algae. Clean annually with vinegar solution. This system transforms a shelf into a tradescantia factory.
Plastic Light Diffusers For Even Growth
Grow lights create hot spots. Plastic light diffusers spread light evenly. They’re sold as fluorescent light covers. Cut to fit your shelf. They clip onto light fixtures. The diffusion prevents leggy growth on edges. It reduces leaf burn in centers. All plants get equal light. Tradescantias grow compact and colorful. The plastic is heat-resistant. It won’t yellow quickly. Replace annually for best transmission. This simple addition improves every plant on the shelf. Especially valuable for variegated varieties that need high light to maintain patterns.
Hydroponic Systems With Plastic Components
Tradescantias thrive in passive hydroponics. Net pots. Clay pebbles. Plastic reservoirs. Air stones. Plastic tubing. No soil. No soil pests. No watering guesswork. Roots grow directly in nutrient solution. Growth explodes. A simple Kratky setup uses a plastic tote, net pot lids, and nutrient solution. No electricity. No pumps. Roots hang in solution. Air gap provides oxygen. Refill monthly. This method produces the fastest growth I’ve seen. But it’s not for beginners. Nutrient management requires learning. Start with soil. Graduate to hydro when ready.
Common Plastic Mistakes To Avoid
Using Opaque Or Colored Plastic
Black pots. Green totes. Blue sheeting. They block light. Tradescantias need bright light for color and compact growth. Dark plastic creates shade. Plants stretch. Variegation fades. Stems weaken. Always choose clear or translucent white. If you must use colored pots, ensure the plant gets extra light. But why compromise? Clear plastic costs the same. It works better. The essential plastic for tradescantia health is always transparent. This rule applies to pots, covers, sheeting, labels – everything.
Sealing Too Tightly
No airflow equals mold. Every plastic enclosure needs ventilation. Totes need holes. Bags need gaps. Bottles need open caps. Domes need vents. The only exception: newly stuck cuttings for 48 hours. Then ventilate. Mold spores are everywhere. They need stagnant moisture to germinate. Moving air prevents this. A tiny computer fan in a large tote works wonders. Battery-operated clip fans cost $10. They run weeks on AA batteries. This small addition prevents total crop loss. Don’t skip ventilation.
Ignoring Temperature Buildup
Clear plastic traps heat. Sunlight + plastic = oven. A tote in direct sun hits 100°F in minutes. Tradescantias cook. Always place plastic enclosures in indirect light. Bright shade. North window. Under grow lights with diffusion. Monitor temperature. A $5 thermometer saves plants. If it exceeds 85°F, ventilate more or move. Morning sun might be fine. Afternoon sun kills. Seasonal angle changes matter. A safe spot in January bakes in March. Check regularly.
Reusing Without Sterilizing
Plastic holds pathogens. Fungus. Bacteria. Viruses. Reusing pots, totes, labels without cleaning spreads disease. One infected cutting contaminates the whole batch. Sterilize everything between uses. 10% bleach soak for 10 minutes. Or 3% hydrogen peroxide spray. Rinse thoroughly. Dry completely. Store clean. This habit prevents heartbreak. I learned after losing 20 cuttings to a fungus that lived in a reused tote. Now I’m religious about cleaning. It takes 15 minutes. It saves months of work.
Budget-Friendly Plastic Hacks
Restaurant Takeout Containers
Clear plastic clamshells from salads, deli items, bakeries. Free propagation boxes. Wash well. Poke holes in lid. Perfect for 3-4 cuttings. They stack. They’re shallow but work for initial rooting. Once roots show, move to deeper containers. These containers are designed for food visibility. The plastic is crystal clear. Light transmission is excellent. They’re not UV stable long-term. But for 2-3 week rooting, they’re perfect. Save them. Stack them. Use them. Your wallet thanks you.
Produce Bags As Humidity Sleeves
Those thin produce bags from grocery stores? Slip one over a small pot. Secure with rubber band. Instant humidity dome. They’re thin so light passes easily. They’re free. They tear easily but last weeks. Perfect for single cuttings or newly divided plants. The bag creates a microclimate around one plant in a mixed display. No need to isolate the whole pot. Targeted humidity where needed. Replace when they degrade. Infinite supply from weekly shopping.
Plastic Cups And Bottles From Daily Life
Yogurt cups. Sour cream tubs. Water bottles. Soda bottles. All become plant tools. Cups = pots (add holes). Tub = water reservoirs. Bottles = cloches or propagation tubes. Large jugs = mini greenhouses (cut bottom off). The plastic is food-grade. Safe for plants. Free. Abundant. Before recycling, ask: “Can this help a tradescantia?” Usually yes. I have a shelf of clean containers ready for propagation emergencies. It’s a habit. See plastic. Save plastic. Use plastic.
Dry Cleaning Bags For Large Coverage
Those long clear bags from dry cleaners? They cover entire plant stands. Drape over a wire shelf unit. Tape edges. Instant walk-in humidity chamber. They’re thin. Light passes. They’re huge. One bag covers a 4-shelf unit. Cost: free with dry cleaning. Or ask cleaners for extras. They often have damaged ones they discard. These bags tear easily so handle gently. But for seasonal humidity boosts, they’re unbeatable. Winter dryness meets its match.
Seasonal Plastic Strategies
Winter: Maximum Protection
Winter is tradescantia danger season. Heating systems strip humidity. Days are short. Growth slows. Plastic saves them. Humidity trays on every plant. Totes for vulnerable varieties. Plastic sheeting behind hanging baskets. Cloches on new divisions. Grow tent for the collection. Monitor daily. Winter air changes fast. A cold snap drops humidity 20% overnight. Your plastic defenses adjust fast too. This vigilance prevents the spring recovery struggle. Plants that survive winter strong explode in spring.
Spring: Propagation Powerhouse
Spring is propagation season. Natural light increases. Temperatures rise. Tradescantias want to grow. Feed this urge. Fill every clear container with cuttings. Totes. Shoeboxes. Cups. Bottles. Bags. The plastic army deploys. Root dozens of cuttings. Share with friends. Sell at markets. Build your collection. Spring humidity is naturally higher. Your plastic enclosures need more ventilation. Watch condensation. Adjust daily. This is the fun season. Plastic makes it productive.
Summer: Heat Management
Summer brings heat risk. Plastic + sun = death. But summer air conditioning dries air. Balance needed. Use plastic humidity trays but skip enclosures. Open totes during day. Close at night if AC runs. Plastic sheeting only on shaded sides. Morning misting under plastic cloches. Remove by 10 AM. The goal: humidity without heat. Tradescantias love warmth but not cooking. Clear plastic amplifies light. In summer, that’s dangerous. Be extra vigilant. Thermometers everywhere.
Fall: Transition Preparation
Fall prepares for winter. Gradually increase plastic use. Start humidity trays in October. Add sheeting in November. Deploy totes for tender varieties. Propagate backups of prized plants. Winter losses happen. Fall propagation ensures replacements. Plastic makes this efficient. Root cuttings in totes. They establish before light drops. Strong roots survive winter better. This forward thinking separates casual growers from successful ones. The plastic tools serve year-round. Just differently each season.
Troubleshooting Plastic-Related Issues
Mold And Fungus In Enclosures
White fuzz on soil. Black spots on leaves. Powdery coating. Mold loves stagnant humidity. Immediate action: remove lid. Increase airflow. Wipe visible mold with hydrogen peroxide. Sprinkle cinnamon on soil – natural antifungal. Reduce watering. Add a fan. If severe, discard affected cuttings. Sterilize container. Start over. Prevention: ventilate from day one. Don’t overcrowd. Space cuttings for air movement. Check daily. Catch mold at first speck. Plastic makes mold easy to see. That’s an advantage. Use it.
Algae Growth On Plastic Surfaces
Green film on pot interiors. Slimy tote walls. Algae needs light, water, nutrients. Clear plastic provides all three. It’s mostly harmless but looks bad. Can compete for oxygen in water propagation. Solution: clean regularly. Scrub with brush. Rinse with vinegar water. Opaque containers prevent algae but block root viewing. Trade-off. For water propagation, use amber bottles or wrap clear cups in foil. For soil pots, algae on outside is fine. On inside, repot with fresh soil. Clean pot. Algae indicates excess moisture. Adjust watering.
Condensation Drip Damage
Water droplets fall from tote lid onto leaves. Leaves rot at contact points. Brown spots spread. Fix: angle the lid. Prop one corner up. Condensation runs down walls instead of dripping. Or wipe lid daily. Paper towel swipe takes 10 seconds. For bottles, ensure cap is off. Airflow prevents heavy condensation. For bags, inflate slightly. Curved top sheds drops to sides. This small attention prevents major losses. Check condensation pattern each morning. Adjust as needed.
Root Binding In Plastic Pots
Clear pots show roots circling. That’s root binding. Tradescantias tolerate it better than most. But eventually growth stalls. Water runs straight through. Nutrients deplete. Solution: repot. Or root prune. Remove plant. Trim circling roots. Fresh soil. Same pot or one size up. Clear pots make this decision easy. You see the problem before the plant suffers. Opaque pots hide it until decline. Another win for transparent plastic.
Building Your Plastic Toolkit
Starter Kit Under $20
New to tradescantias? Get: 3 clear 6-inch pots ($3), 1 clear 15-quart tote ($5), 1 roll 3-mil plastic sheeting ($7), 50 plastic labels ($3), 1 gallon ziplock bags ($2). Total: $20. This handles 90% of needs. Pots for mature plants. Tote for propagation. Sheeting for humidity trays. Labels for organization. Bags for single cuttings. Everything clear. Everything functional. Upgrade later. Start here.
Intermediate Kit Additions
Ready for more? Add: 10 clear 4-inch pots ($5), 5 shoebox totes ($5), 1 self-watering planter ($8), 1 small clip fan ($10), 1 digital hygrometer ($8). Total: $36. More propagation capacity. Humidity monitoring. Air circulation. Self-watering for vacations. The hygrometer is key. Guessing humidity fails. Knowing humidity succeeds. $8 ends guessing forever. Place one in each major growing area.
Advanced Kit For Collectors
Serious collection? Invest in: 2×2 grow tent ($120), misting system ($60), passive hydro setup ($80), light diffusers ($30), extra shelving ($100). Total: $390. This creates a tradescantia production facility. Consistent results. Scalable propagation. Year-round growing. The investment pays back in plant value. Rare tradescantias sell for $20-50 each. Ten successful propagations cover the tent. This is hobby-to-business territory. Plastic makes it possible.
Storage And Maintenance Of Plastic Tools
Plastic degrades. UV makes it brittle. Heat warps it. Chemicals weaken it. Store clean, dry, dark. Nest totes. Stack pots. Roll sheeting. Box labels. Coil tubing. Label storage bins. “Propagation Totes”. “Humidity Sheeting”. “Label Supplies”. Organized tools get used. Buried tools get forgotten. Clean after each use. Inspect for cracks. Replace damaged items. A cracked tote leaks humidity. A warped lid won’t seal. Maintain your kit. It maintains your plants.
Conclusion
Plastic isn’t glamorous. It’s not the star of Instagram plant photos. But it’s the backstage crew that makes the show possible. Every thriving tradescantia collection I’ve seen relies on smart plastic use. The clear tote that rooted 50 cuttings. The humidity tray that saved a crispy zebrina. The labels that prevented a variety mix-up. The self-watering pot that survived a two-week vacation. These aren’t accidents. They’re intentional choices. The essential plastic for tradescantia health is whatever plastic solves your specific problem. Start small. One tote. One humidity tray. One pack of labels. Watch what happens. Your plants will respond. Then add another tool. And another. Before long, you’ll have a plastic toolkit that makes tradescantia care almost effortless. The drama queens become reliable performers. The brown tips disappear. The colors deepen. The trails lengthen. All because you understood one simple truth: plastic creates the microclimates these tropical natives crave. Use it wisely. Use it consistently. Your tradescantias will reward you with growth that makes every clear container worth its weight in gold.
Frequently Asked Questions
How often should I ventilate my plastic propagation tote?
Check daily and ventilate whenever heavy condensation forms. Aim for light fog on walls, not dripping water. Open the lid for 30-60 minutes daily, or install permanent ventilation holes.
Can tradescantias grow permanently in plastic pots without drainage holes?
No, tradescantias require drainage to prevent root rot. Always use pots with drainage holes, or use nursery pots as liners inside decorative cachepots without holes.
Is it safe to reuse plastic containers for different plants?
Yes, but you must sterilize them first. Soak in 10% bleach solution for 10 minutes, or spray with 3% hydrogen peroxide, then rinse thoroughly and dry completely before reuse.
Why do my tradescantia cuttings rot in plastic bags?
Rot usually means insufficient ventilation or the bag touching wet leaves. Leave a 1-inch gap open, prop the bag away from foliage with stakes, and ensure cuttings aren’t overcrowded.
What size plastic pot is best for a mature tradescantia?
Choose a pot 1-2 inches wider than the root ball. Tradescantias prefer being slightly root-bound. A 6-inch pot suits most mature plants; go to 8-inch only when roots fill the 6-inch.
Can I use plastic sheeting to increase humidity for hanging tradescantia baskets?
Yes, drape clear plastic sheeting behind and slightly under the basket, leaving the front open. This creates a humidity curtain that bathes trailing foliage without trapping heat.