Freestanding Buying Guide for Spider Plant
This comprehensive freestanding buying guide for spider plant enthusiasts covers everything from selecting the perfect variety to choosing stylish stands and pots. You will learn essential care tips for light, water, and humidity. We also share solutions for common problems like brown tips and pests.
Welcome to the ultimate freestanding buying guide for spider plant lovers. If you want to add a touch of green elegance to your home, you have picked the right plant. Spider plants are famous for their arching leaves and easy-going nature. They look stunning on a dedicated plant stand. This guide will walk you through every step. We cover picking the best variety. We discuss choosing the right pot and stand. We also share pro tips for watering, light, and troubleshooting. Let us dive in and get your green thumb working.
Spider plants, or Chlorophytum comosum, are native to tropical Africa. They have adapted beautifully to indoor life. Their popularity has surged recently. People love them for air-purifying qualities. They are also non-toxic to pets. This makes them a top pick for families. A freestanding display elevates the plant literally and visually. It allows the cascading babies to dangle freely. It also improves air circulation around the foliage. This guide focuses specifically on the freestanding approach. We want your plant to be a statement piece.
Key Takeaways
- Spider plants thrive in bright indirect light: Place your freestanding display near east or north-facing windows for optimal growth without leaf scorch.
- Choose pots with drainage holes: Proper drainage prevents root rot, which is the number one killer of spider plants in freestanding setups.
- Select sturdy stands for mature plants: Large spider plants with babies become heavy; ensure your freestanding stand can support the weight.
- Water when the top inch of soil feels dry: Spider plants prefer slightly dry conditions between waterings rather than constantly wet soil.
- Propagate babies easily for new plants: Spider plantlets root quickly in water or soil, letting you expand your collection for free.
- Brown tips signal low humidity or fluoride: Use filtered water and increase humidity to keep foliage looking fresh and green.
- Rotate your freestanding plant regularly: Quarterly rotation ensures even growth and prevents the plant from leaning toward the light source.
Quick Answers to Common Questions
What is the best light for a freestanding spider plant?
Bright indirect light near an east or north window is ideal. Avoid harsh direct afternoon sun which burns the leaves.
How often should I water my spider plant on a stand?
Water when the top inch of soil feels dry. Stick your finger in the soil to check. Do not water on a fixed schedule.
Why are the tips of my spider plant turning brown?
Brown tips are usually caused by fluoride in tap water, low humidity, or over-fertilizing. Switch to filtered water and increase humidity.
Can I leave spider plant babies attached to the mother plant?
Yes, babies can stay attached indefinitely. They draw energy from the mother. Cut them if you want to propagate or if the mother looks stressed.
What type of stand is best for a large spider plant?
Choose a sturdy floor stand with a wide base (tripod or four legs) made of metal or solid wood. Ensure it can hold the weight of a wet 10-inch+ pot.
📑 Table of Contents
Why Choose a Freestanding Spider Plant?
A freestanding setup offers distinct advantages over a windowsill or shelf. First, it creates a focal point in any room. A tall stand with a cascading plant draws the eye upward. It makes ceilings feel higher. Second, it protects your plant from curious pets or toddlers. Cats love to bat at the dangling spiderettes. A tall stand keeps the foliage out of reach. Third, it ensures better light exposure. You can position the stand exactly where the light is best. You are not limited by window sill depth.
Design Versatility
Freestanding plant stands come in endless styles. You can find mid-century modern metal tripods. There are rustic wooden ladder shelves. Minimalist concrete pedestals exist too. This variety lets you match your decor perfectly. A spider plant in a woven basket on a bamboo stand screams boho chic. The same plant in a white ceramic pot on a black metal stand looks industrial. You can swap the pot or stand seasonally. This refreshes your space without buying new plants.
Health Benefits for the Plant
Elevating your spider plant improves its health. Air flows freely around all sides of the pot. This reduces the risk of fungal diseases. Fungal issues often start where leaves touch damp surfaces. On a stand, the long leaves hang freely. They do not get crushed against a wall or window pane. The spiderettes (babies) can grow long and strong. They won’t get tangled in curtains or blinds. This freedom encourages the plant to produce more offsets.
Mobility and Flexibility
A freestanding plant is easy to move. You can roll a stand on casters to catch seasonal light changes. In winter, move it closer to a south window. In summer, pull it back from intense rays. You can also rotate the stand weekly. This ensures the plant grows symmetrically. If you rearrange furniture, the plant moves with you. It is not anchored to a built-in shelf. This flexibility is key for renters or frequent decorators.
Understanding Spider Plant Varieties
Not all spider plants look the same. Knowing the varieties helps you pick the right look for your freestanding display. The classic green and white variegation is just the start. Different cultivars offer unique leaf shapes and colors. Some stay compact. Others grow huge. Your choice affects the stand size you need. It also changes the visual impact.
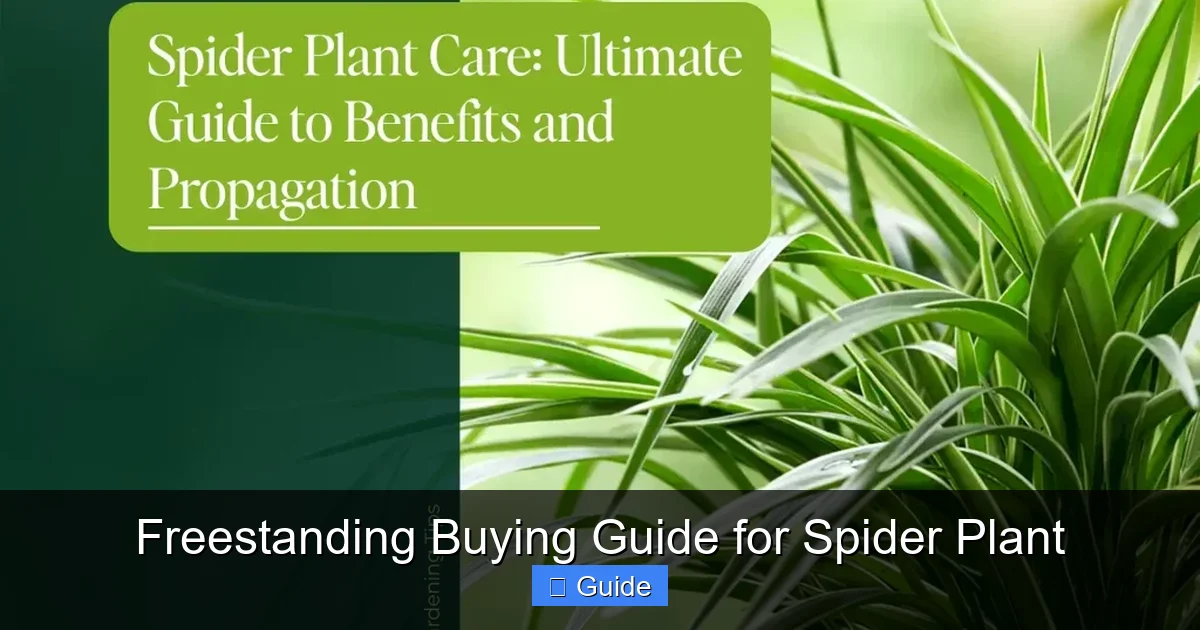
Visual guide about Freestanding Buying Guide for Spider Plant
Image source: theleafycare.com
Chlorophytum comosum ‘Vittatum’
This is the classic spider plant everyone recognizes. It has medium-green leaves with a broad central white stripe. The leaves arch gracefully. It produces many babies on long stems. It is vigorous and forgiving. This variety looks great on a mid-height stand. The white stripe brightens a dark corner. It is the most common type found in garden centers. If you want the traditional look, this is it.
Chlorophytum comosum ‘Variegatum’
This variety flips the color pattern. The leaves have green centers with creamy white or yellow margins. The contrast is striking. It tends to grow slightly slower than ‘Vittatum’. The variegation is more stable in lower light. On a freestanding stand, the edges catch the light beautifully. It adds a sophisticated touch to modern decor. It pairs well with solid green plants for contrast.
Chlorophytum comosum ‘Bonnie’ (Curly Spider Plant)
‘Bonnie’ is a showstopper. Its leaves curl and twist like curly hair. The variegation is similar to ‘Vittatum’. But the texture is totally different. It stays more compact than standard types. This makes it perfect for smaller stands or tabletop pedestals. The curly leaves create a dense, fountain-like effect. It looks very sculptural. Kids love the “funky” shape. It is a conversation starter.
Chlorophytum comosum ‘Hawaiian’
This newer cultivar starts with bold variegation. New leaves show cream and green stripes. As leaves mature, they turn solid deep green. This gives the plant a two-tone ombré effect. It is very vigorous. It grows large quickly. You will need a substantial floor stand for a mature ‘Hawaiian’. The transition from variegated to solid green is unique. It looks like two plants in one.
Solid Green Varieties
Some spider plants have no variegation at all. They are pure, rich green. These are often sold as Chlorophytum comosum ‘Green’ or ‘Shamrock’. They tolerate lower light better than variegated types. They grow faster and larger. They make a lush, tropical statement on a tall stand. If you want a jungle vibe without the fuss, go solid green. They are also great for offices with fluorescent light.
Choosing Based on Your Space
Match the variety to your stand and room. Small spaces suit ‘Bonnie’ or young ‘Vittatum’. Large living rooms handle mature ‘Hawaiian’ or solid green giants. Low light areas favor solid green or ‘Variegatum’. Bright spots allow any variety to shine. Consider the pot size too. A 6-inch pot fits a small stand. A 10-inch or larger pot needs a heavy-duty floor stand. Always check the mature size on the label.
Choosing the Right Pot and Stand
This is the core of the freestanding buying guide for spider plant success. The pot and stand work as a team. They must support the plant physically and aesthetically. Get this right, and maintenance becomes easy. Get it wrong, and you risk tipping, root rot, or an eyesore.
Pot Material Matters
Terracotta is a classic choice. It is porous. It wicks moisture away from the soil. This prevents overwatering. It is heavy, adding stability to a tall stand. However, it dries out fast in summer. You must water more often. Glazed ceramic retains moisture longer. It comes in endless colors. It is also heavy and stable. Plastic pots are light and cheap. They hold water well. But they can tip over on a lightweight stand. Use a cachepot (decorative outer pot) for style. Ensure the inner nursery pot has drainage.
Drainage Is Non-Negotiable
Spider plants hate wet feet. Root rot kills them fast. Every pot must have drainage holes. If your decorative pot lacks holes, use it as a cachepot. Keep the plant in its plastic nursery pot. Set the nursery pot inside the pretty pot. Empty the cachepot after watering. Never let the plant sit in standing water. A layer of pebbles at the bottom of a cachepot helps. It lifts the inner pot above any drained water.
Sizing the Pot Correctly
Spider plants like being slightly root-bound. They produce more babies when roots fill the pot. Do not jump to a huge pot too soon. Repot only when roots circle the bottom or push the plant up. Move up just one pot size (2 inches wider). A 6-inch plant goes to an 8-inch pot. A 10-inch goes to 12-inch. Large pots hold too much soil. That soil stays wet too long. This causes rot. A snug pot encourages flowering and offsets.
Stand Height and Stability
Match stand height to plant size and room scale. A small ‘Bonnie’ on a 3-foot stand looks lost. A giant spider plant on a 1-foot stool looks cramped. Aim for the foliage to start at eye level or slightly below. This shows off the cascade. The stand base must be wider than the pot base. A narrow stand with a heavy pot tips easily. Look for stands with a low center of gravity. Tripods are stable. Four legs are better. Cross-bracing adds rigidity.
Stand Material and Style
Metal stands (iron, steel) are strong and slim. They fit modern, industrial, or minimalist rooms. Powder coating prevents rust. Wood stands (bamboo, teak, oak) bring warmth. They suit boho, scandi, or rustic styles. Seal wood stands to resist water spills. Concrete or stone stands are ultra-stable. They anchor large plants permanently. They are hard to move. Wicker or rattan stands are light and airy. Best for small, light pots only.
Mobility Features
Consider stands with locking casters (wheels). This lets you rotate the plant for even light. You can move it for cleaning or parties. Ensure casters lock securely. A rolling plant stand on a sloped floor is a disaster. If the stand lacks wheels, use furniture sliders under the legs. These protect floors and make sliding easy. For very heavy setups, a plant caddy on wheels works well. The stand sits on the caddy.
Aesthetic Coordination
Treat the pot and stand as a design duo. A white ceramic pot on a black metal stand is timeless. A terracotta pot on a natural wood stand is earthy. A colorful glazed pot on a simple stand lets the pot shine. Match the stand finish to other furniture metals or woods in the room. Cohesion makes the plant look intentional. Mismatched pieces look cluttered. Step back and view the whole vignette.
Light and Location Requirements
Light is the engine of plant growth. Spider plants are adaptable but have preferences. The right spot on your freestanding stand makes all the difference. Too little light causes weak, pale growth. Too much direct sun burns the leaves. Finding the sweet spot ensures a lush, vibrant display.
Bright Indirect Light Is Best
Spider plants thrive in bright, indirect light. Think of the light under a sheer curtain. Or a few feet back from a south or west window. East-facing windows are perfect. They offer gentle morning sun. North windows work but growth slows. On a freestanding stand, you can place the plant exactly in this zone. You are not stuck on a sill. Use a light meter app on your phone if unsure. Aim for 10,000 to 20,000 lux for peak performance.
Signs of Light Stress
Watch your plant for clues. Bleached, white, or crispy patches mean too much direct sun. Move it back immediately. Long, spindly stems with small leaves mean too little light. The plant stretches toward the source. Variegated varieties lose their stripes in low light. They revert to solid green to photosynthesize more. Solid green types handle shade better. Rotate the stand a quarter turn weekly. This prevents leaning.
Seasonal Adjustments
Light intensity changes with seasons. In winter, the sun is lower and weaker. Move your freestanding plant closer to the window. Clean the glass to maximize transmission. In summer, intense afternoon sun can fry leaves. Pull the stand back or add a sheer curtain. The mobility of a freestanding setup shines here. You adapt the location to the season effortlessly. Mark ideal spots on the floor with tape for easy repositioning.
Artificial Light Options
No good natural light? Use grow lights. LED grow lights are cool and efficient. Clip a spotlight to the stand or use a floor lamp with a grow bulb. Aim for 12 to 14 hours of light daily. Use a timer for consistency. Full spectrum (white) lights look better than purple blurple lights. Position the light 12 to 18 inches above the foliage. This allows spider plants to thrive in windowless rooms. Offices and basements become viable spots.
Temperature and Drafts
Spider plants prefer 65 to 80 degrees Fahrenheit. They tolerate down to 50 degrees briefly. Avoid cold drafts from AC vents or exterior doors in winter. Avoid hot, dry air from heating vents. Both cause brown tips and leaf drop. A freestanding stand lets you position the plant away from vents. Keep it off cold floors in winter. A stand elevates the root zone. This protects roots from cold tile or concrete.
Humidity Considerations
Average home humidity (40 to 50 percent) is fine. Spider plants are not drama queens like calatheas. But higher humidity (60 percent plus) prevents brown tips. It encourages lush growth. Group plants together to create a microclimate. Use a pebble tray under the stand. Run a humidifier nearby in winter. Misting helps briefly but is not a substitute for ambient humidity. Bathrooms with windows with a spider plant monthly to clean leaves and boost humidity.
Watering and Care Essentials
Watering is where most people struggle. Spider plants store water in thick, fleshy roots. They are semi-succulent. This means they prefer a dry-down between drinks. Overwatering is the silent killer. Underwatering causes brown tips but recovers fast. This section of the freestanding buying guide for spider plant care focuses on a simple, effective routine.
The Finger Test Method
Forget schedules. Water based on soil moisture. Stick your index finger into the soil up to the second knuckle. If it feels dry at your fingertip, water thoroughly. If it feels cool or damp, wait two days and check again. This works for any pot size. It accounts for light, heat, and humidity changes. A moisture meter is a good backup. Aim for the “dry” zone on the meter before watering.
How to Water Thoroughly
When you water, do it right. Take the plant to a sink or tub. Or use a watering can with a long spout. Pour water slowly over the soil surface. Avoid wetting the crown (center) excessively. Water until it flows freely from drainage holes. This flushes out salts. Let it drain completely. Never leave the pot sitting in runoff. If the pot is too heavy to move, use a turkey baster to remove excess water from the cachepot.
Water Quality Matters
Spider plants are sensitive to fluoride and chlorine. Tap water often causes brown leaf tips. Use filtered water, rainwater, or distilled water. Let tap water sit out overnight to dissipate chlorine. Fluoride does not evaporate. A simple carbon filter pitcher removes both. If you see tip burn despite good watering, switch water sources. This one change often solves the issue completely.
Fertilizing Schedule
Feed lightly during active growth. Spring through early fall is the season. Use a balanced liquid fertilizer (10-10-10 or 20-20-20). Dilute to half the label strength. Apply once a month. Stop fertilizing in late fall and winter. The plant rests. Excess fertilizer builds up salts. This burns roots and causes brown tips. Flush the soil with plain water every few months. Run water through for several minutes.
Repotting Routine
Repot every 1 to 2 years. Spring is the best time. Signs it is time: roots circling the bottom, water runs straight through, plant dries out daily, or the pot cracks. Choose a pot 2 inches larger. Use a well-draining mix. A blend of 2 parts potting soil, 1 part perlite, and 1 part orchid bark works great. Gently loosen the root ball. Place in new pot at same depth. Water well. Keep out of direct sun for a week.
Grooming and Maintenance
Remove yellow or brown leaves at the base. Use clean scissors. Trim brown tips at an angle to mimic natural shape. Wipe leaves monthly with a damp cloth. Dust blocks light. Check for pests while cleaning. Spider mites love dry, dusty leaves. Mealybugs hide in leaf axils. A shower rinse every few months keeps foliage clean and pests away. Rotate the stand weekly for symmetry.
Common Problems and Solutions
Even with great care, issues arise. This troubleshooting section helps you diagnose and fix problems fast. Early action saves the plant. Most issues stem from water, light, or pests. The freestanding setup actually makes inspection easier. You can see all sides of the plant without moving heavy pots.
Brown Leaf Tips
This is the number one complaint. Causes include: low humidity, fluoride in water, over-fertilizing, underwatering, or dry air from vents. Fix: increase humidity, switch to filtered water, flush soil, water consistently, move away from heat sources. Trim existing brown tips. They will not turn green again. New growth will be clean if you fix the cause.
Yellowing Leaves
Yellow leaves usually mean overwatering. Check soil moisture. If soggy, stop watering. Improve drainage. Ensure the pot has holes. Empty the cachepot. Root rot may have started. Unpot and inspect roots. Healthy roots are white and firm. Rotten roots are brown, black, or mushy. Trim rot. Repot in fresh, dry mix. Yellow lower leaves can also be natural aging. The plant sheds old leaves.
Pale or Bleached Leaves
Too much direct sun. The chlorophyll is destroyed. Move the stand immediately. Sheer curtains diffuse harsh light. The damaged leaves won’t recover. Focus on protecting new growth. Acclimate slowly if moving to brighter light. An hour more sun per week is the rule. Freestanding mobility makes this easy.
Spider Mites
Tiny red or brown dots on leaf undersides. Fine webbing appears. Leaves look stippled or dusty. They thrive in dry, warm air. Fix: shower the plant thoroughly. Spray neem oil or insecticidal soap weekly for three weeks. Increase humidity. Isolate from other plants. Check nearby plants. Mites spread fast. A freestanding plant is easy to isolate in a shower or garage.
Mealybugs
White cottony masses in leaf joints and on roots. They suck sap. Leaves yellow and drop. Fix: dab with alcohol on a cotton swab. Spray neem oil weekly. Check roots during repotting. Systemic granules in soil work for heavy infestations. Quarantine new plants for two weeks. Inspect before adding to your display.
Fungus Gnats
Tiny black flies buzzing around soil. Larvae eat roots and fungus. Caused by constantly wet soil. Fix: let top 2 inches dry completely. Use yellow sticky traps for adults. Apply mosquito bits (Bti) to soil water. Top dress with sand or gravel. This prevents egg-laying. Bottom watering helps keep the surface dry.
No Babies (Spiderettes)
Mature plants not producing offsets. Causes: too young, too little light, pot too large, or stressed. Fix: ensure bright indirect light. Keep slightly root-bound. Fertilize monthly in season. Reduce stress. Some varieties produce fewer babies. ‘Bonnie’ and solid green types are prolific. Variegated types may produce less. Patience is key. Babies appear on long stems (stolons).
Root Bound Emergency
Pot cracks or plant pushes up. Roots fill every inch. Water runs straight through. Fix: repot immediately. Do not wait for spring if the pot breaks. Soak the root ball to soften. Tease roots apart gently. Use a sharp knife to score the bottom if very tight. Pot up 2 inches. Water well. The plant will bounce back fast.
Propagating Spider Plant Babies
One of the joys of spider plants is free plants. The babies (spiderettes) root easily. This lets you expand your freestanding collection. You can gift them. You can fill a large stand with multiple plants. Propagation is simple and satisfying. It is a great project for kids.
Water Propagation Method
Snip a baby with a clean cut. Leave a short stem. Place in a jar of water. Only the base (nodes) should be submerged. Leaves must stay dry. Change water every few days. Roots appear in 7 to 14 days. Wait until roots are 2 inches long. Then pot in soil. This method lets you watch roots grow. Kids love it. Use clear glass for visibility.
Soil Propagation Method
Pin the baby into a small pot of moist soil. Use a bent paperclip or floral pin. Keep the soil damp, not wet. Roots form in 2 to 3 weeks. Tug gently to check resistance. This skips the transplant step. The baby adapts faster. Less shock. You can pin multiple babies around the mother pot. This creates a fuller look instantly.
Stolon Layering (Natural Method)
Do not cut the baby. Lay a small pot next to the mother. Pin the baby into the new pot while still attached. The mother feeds it. Roots establish strongly. Cut the stolon after 4 to 6 weeks. This has the highest success rate. It mimics nature. The freestanding stand makes this easy. Place a small pot on the stand shelf or floor next to the main pot.
When to Propagate
Spring and summer are best. The plant is in active growth. Roots form fast. Fall works if you have grow lights. Winter is slow. Babies root but may rot in cold, damp soil. Wait for warmer days. Choose babies with visible root nubs (tiny brown bumps). These are ready. Very tiny babies without nubs struggle.
Potting Up New Plants
Use 3 or 4 inch pots. Small pots prevent overwatering. Use the same well-draining mix. Plant at same depth. Water gently. Place in bright indirect light. Do not fertilize for 3 months. The fresh soil has nutrients. Label the pot with date and variety. In a year, you have a mature plant for a new stand.
Creative Display Ideas
Group three small propagated plants on a tiered stand. Mix varieties for texture. Hang babies in macrame from a ceiling hook near the freestanding parent. Create a “spider plant family tree” display. Use matching pots for cohesion. Vary stand heights for dynamism. A propagated plant makes a thoughtful hostess gift. Wrap the pot in fabric and ribbon.
Conclusion
You now have a complete freestanding buying guide for spider plant mastery. We covered why freestanding displays shine. You learned to pick the perfect variety for your style. You know how to choose pots and stands that work together. You understand light, water, and feeding needs. You can troubleshoot common issues with confidence. You even know how to multiply your plants for free.
A spider plant on a beautiful stand is more than decor. It is a living sculpture. It cleans your air. It boosts your mood. It connects you to nature daily. The care routine becomes a mindful pause in a busy week. Watching new babies form is a quiet thrill. Sharing them spreads the joy. Start with one stand and one plant. See how it transforms a corner. Then add another. Your indoor jungle awaits.
Remember the key principles: bright indirect light, well-draining pots, water when dry, and rotate for symmetry. Avoid the temptation to overwater. Embrace the brown tip trim as routine grooming. Enjoy the arching foliage and cascading babies. Your freestanding spider plant will reward you for years. Happy planting.
Frequently Asked Questions
Do spider plants need big pots?
No, spider plants prefer to be slightly root-bound. They produce more babies when their roots fill the pot. Only repot when roots circle the bottom or push the plant up, moving up just 2 inches in pot diameter.
Are spider plants toxic to cats and dogs?
Spider plants are non-toxic to cats and dogs according to the ASPCA. However, eating large amounts may cause mild stomach upset or vomiting. The dangling babies are tempting toys for cats, so a tall freestanding stand helps keep them out of reach.
Can spider plants live in low light?
Spider plants tolerate low light but will not thrive. Growth slows, variegation fades, and the plant becomes leggy. Solid green varieties handle low light better than variegated ones. For best results, provide bright indirect light or use a grow light.
How do I make my spider plant bushier?
Give it bright indirect light and keep it slightly root-bound. Fertilize monthly at half strength during spring and summer. Pinch back long runners (stolons) to redirect energy into the main crown. Rotate the stand weekly for even growth.
Should I cut the brown tips off my spider plant?
Yes, trim brown tips with clean scissors. Cut at an angle to mimic the natural leaf shape. This improves appearance instantly. Address the underlying cause (water quality, humidity, fertilizer) to prevent new brown tips.
Can I put my freestanding spider plant outside in summer?
Yes, but acclimate it slowly. Start in full shade for a week. Then move to dappled morning light. Avoid direct sun. Bring it inside before night temps drop below 50°F. Check for pests before bringing it back indoors.