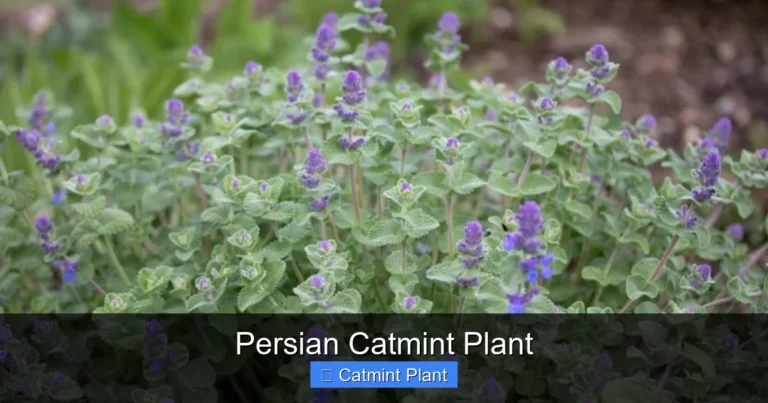
Trimming and Shapung Catmint Plant
Trimming and shaping catmint plant properly encourages bushier growth, prevents flopping, and triggers a second wave of flowers. This guide covers when to cut back, which tools to use, and step-by-step techniques for keeping your Nepeta tidy and blooming all season long.
Key Takeaways
- Timing matters most: Shear catmint after the first flush fades in early summer for a strong rebloom.
- Use clean, sharp tools: Bypass pruners or hedge shears prevent disease and make clean cuts.
- Cut back by one-third to one-half: This removes spent blooms and stimulates fresh basal growth.
- Shape into a mound: Rounded forms prevent center die-out and keep plants looking full.
- Deadhead regularly: Snipping individual faded spikes extends the flowering window.
- Divide every few years: Spring division rejuvenates woody centers and gives you free plants.
- Avoid late-fall heavy pruning: Leave foliage for winter protection; clean up in early spring.
Quick Answers to Common Questions
When is the best time to do the main trim on catmint?
Right after the first flush of flowers fades, typically late June to early July. This triggers a strong second bloom.
How far back should I cut catmint during the summer shear?
Cut the entire plant back by one-third to one-half its height. Leave several inches of green growth above the woody crown.
Can I use hedge trimmers on catmint?
Yes, manual hedge shears are ideal for the big summer cut. They shape the mound quickly. Avoid power trimmers — they tear soft stems.
Should I cut catmint to the ground in fall?
No. Leave dried stems standing through winter for crown protection and wildlife habitat. Clean up in early spring instead.
Why is my catmint flopping open in the middle?
This is the “donut effect” caused by heavy outer stems shading the center. Regular shearing after bloom and division every few years prevents it.
📑 Table of Contents
- Why Trimming and Shaping Catmint Plant Matters
- Understanding Catmint Growth Habits
- When to Trim Catmint for Best Results
- Tools and Preparation for Clean Cuts
- Step-by-Step: How to Trim and Shape Catmint Plant
- Shaping Techniques for Different Goals
- Common Mistakes and How to Avoid Them
- Companion Planting and Design Tips
- Troubleshooting: When Trimming Doesn’t Help
- Seasonal Care Calendar for Catmint
- Conclusion: Make Trimming a Ritual, Not a Chore
Why Trimming and Shaping Catmint Plant Matters
Catmint, or Nepeta, is one of those perennials that gives back tenfold for very little effort. But if you skip the shears, it can get leggy, flop open in the middle, and stop blooming by midsummer. Trimming and shaping catmint plant keeps it compact, encourages a second heavy flush of flowers, and maintains that tidy mound shape that looks great at the front of a border. Think of it like a haircut — regular trims keep the plant healthy and looking its best.
I learned this the hard way my first year growing ‘Walker’s Low.’ By July, it was a sprawling mess with bare stems in the center. A fellow gardener told me, “Shear it hard after the first bloom.” I did, and three weeks later it was a purple cloud again. That moment changed how I garden. Now I treat every Nepeta in my yard the same way — and they reward me with months of color.
Understanding Catmint Growth Habits
How Nepeta Grows Naturally
Catmint sends up dozens of soft, square stems from a central crown. Each stem carries aromatic gray-green leaves and spikes of lavender-blue flowers. In ideal conditions — full sun, lean soil, good drainage — it grows fast. A single plant can hit 24 to 30 inches tall and wide by June. But that speed has a downside. The outer stems grow longer and heavier, then flop outward. The center gets shaded, stops producing leaves, and turns woody.
This is the classic “donut effect” — a ring of growth around a dead middle. Trimming and shaping catmint plant prevents this by forcing energy back into the crown. New shoots emerge from the base, keeping the plant dense and floriferous. It’s not just cosmetic; it’s physiological. Removing the apical dominance — the tip of each stem — signals the plant to branch lower down.
Common Varieties and Their Needs
Most garden catmints are hybrids of Nepeta racemosa and Nepeta nepetella. ‘Walker’s Low’ is the gold standard — Perennial Plant of the Year in 2007 — but ‘Cat’s Meow,’ ‘Cat’s Pajamas,’ and ‘Junior Walker’ are more compact. ‘Six Hills Giant’ gets taller, up to 36 inches, and benefits from earlier pinching. Dwarf types like ‘Little Trudy’ need less severe cuts but still respond well to shaping.
All share the same basic response to pruning: cut back, get bushier, bloom again. The only difference is degree. Taller varieties need more aggressive shearing. Compact ones need lighter touches. Know your cultivar, but don’t overthink it — Nepeta is forgiving.
When to Trim Catmint for Best Results
The Big Shear: After First Bloom
The single most important cut happens in early to midsummer, right after the first heavy flush fades. In most zones, that’s late June to early July. Flowers turn brown, bees move on, and stems start to elongate. That’s your window. Shear the whole plant back by one-third to one-half. It looks drastic — like a buzz cut — but within days, fuzzy new growth appears at the base.
This timing aligns with the plant’s natural cycle. Nepeta blooms on new wood. By removing spent stems, you reset the clock. The plant puts energy into fresh foliage and flower buds instead of seed production. You’ll get a second show in August that often rivals the first. In long-season areas, a light third trim in late August can push blooms into October.
Spring Cleanup and Pinching
Early spring is for cleanup, not heavy shaping. Wait until you see green shoots at the base — usually March or April depending on zone. Cut dead stems to the ground. Don’t rush. Old foliage insulates the crown over winter. Removing it too early exposes tender buds to late freezes.
If you want a shorter, sturdier plant, pinch stems back by a few inches in May when they’re 8 to 12 inches tall. This delays bloom by a couple weeks but creates a denser framework that resists flopping. It’s optional, but useful for tall varieties in rich soil. I pinch my ‘Six Hills Giant’ every year. It stays upright without staking.
Fall and Winter: Hands Off
Resist the urge to cut catmint to the ground in autumn. Those dried stems and leaves protect the crown from freeze-thaw cycles. They also catch snow, adding insulation. Leave the plant standing until spring. The only exception: if powdery mildew hit hard, remove infected foliage to reduce spores. Otherwise, let it be. Winter interest is a bonus — frost on seed heads looks magical.
Tools and Preparation for Clean Cuts
Choosing the Right Shears
For the big summer shear, hedge shears are king. Long blades let you shape the whole mound in seconds. Look for bypass action — two curved blades that slide past each other like scissors. Anvil types crush stems, inviting disease. My favorite are lightweight aluminum-handled shears with non-stick coating. They glide through Nepeta’s soft stems without gumming up.
For deadheading individual spikes or spring detail work, bypass hand pruners are better. Needle-nose snips work great for tight spots. Keep a sharpening stone handy. Dull tools tear tissue, creating entry points for pathogens. A quick stroke before each session makes a difference.
Sanitation: The Step Everyone Skips
Wipe blades with 70% isopropyl alcohol between plants. It takes ten seconds and prevents spreading viruses, fungi, or bacteria. Catmint is tough, but why risk it? I keep a spray bottle and rag in my tool bucket. Spray, wipe, done. If you’re pruning diseased material, sanitize after every cut. It’s overkill for healthy plants, but good habit.
Gloves and Comfort
Catmint stems are soft, but the aromatic oils can irritate sensitive skin. Light nitrile-coated gloves give grip and protection without bulk. Long sleeves help if you’re reaching into a large clump. Kneel on a pad or sit on a garden seat — your knees will thank you after 20 minutes of shaping.
Step-by-Step: How to Trim and Shape Catmint Plant
The Summer Shear: Full Rejuvenation
Stand back and assess the plant. Note the overall height and where the freshest growth sits. Grab a handful of stems on one side. Cut straight across at 12 to 18 inches above ground — or halfway down, whichever is higher. Work around the plant, rotating as you go. Keep the top slightly domed, not flat. A rounded shape sheds water and encourages even light penetration.
Don’t worry about individual nodes. Nepeta breaks buds all along the stem. But try to cut just above a visible leaf pair if you can. It looks neater. Drop cuttings into a tarp or bucket as you go. Cleanup is faster. When finished, the plant should look like a neat green mound, roughly half its former height. Water deeply if soil is dry. Apply a light side-dressing of compost. That’s it.
Deadheading for Continuous Color
Between major shears, snip individual spent spikes. Trace the flower stem down to the first set of healthy leaves and cut just above them. This prevents seed set and redirects energy to side buds. Do it weekly during peak bloom. It takes five minutes and extends the show. I do this with my morning coffee — meditative and productive.
If you miss a week and brown spikes dominate, just do the full shear early. No guilt. The plant recovers fast. Deadheading is a bonus, not a requirement. The big summer cut does the heavy lifting.
Spring Detail Work
In April, remove every dead stem at ground level. Use pruners for precision. Thin any crossing or inward-growing shoots to improve air flow. If the center is woody and sparse, cut a few of the oldest stems to the base. This opens the crown to light and stimulates basal breaks. Shape the outer edge into a gentle dome. The goal: a clean, balanced framework ready for the season.
Shaping Techniques for Different Goals
Round Mound: The Classic Look
This is the default for border edges and mass plantings. Shear to a uniform dome, wider at the base than the top. Think half-sphere. The slight taper lets light reach lower leaves, preventing bare legs. Use hedge shears in a sweeping motion. Step back often. Eye symmetry. A lopsided mound bugs me all season.
For large drifts, shear the whole group as one unit. It reads as a single textural block. This is how professional gardens get that cohesive, designed look. Individual plants blur into a river of lavender. Stunning.
Contained Edging: Tight and Low
Along paths or bed edges, you may want a lower profile. Shear harder — down to 8 to 10 inches — and more frequently. Every four to six weeks during active growth. This creates a neat hedge effect. ‘Junior Walker’ and ‘Cat’s Pajamas’ excel here. They naturally stay compact, so less work for you.
Use hand shears for precision along curves. Follow the bed line. A string line helps for straight runs. The result: a crisp green border that blooms for months and smells amazing when brushed.
Naturalistic Drifts: Loose and Flowing
In meadow or cottage gardens, precision feels wrong. Shear less often, less uniformly. Cut back by one-third after first bloom, but vary the height. Leave some stems taller for seed heads and winter structure. Let adjacent plants intermingle. The shape follows the land’s contour.
This approach supports pollinators longer. Goldfinches eat the seeds. Beneficial insects overwinter in hollow stems. It’s ecologically richer. I use this style in my back border. It feels alive in a way manicured beds don’t.
Common Mistakes and How to Avoid Them
Cutting Too Late in Summer
Shearing after early August in cold climates risks tender new growth getting zapped by frost. The plant wastes energy on shoots that die. Rule of thumb: last major cut six to eight weeks before first frost. In zone 5, that’s early August. Zone 7, late August. Adjust for your dates. If you’re unsure, skip it. Better a leggy fall plant than winter kill.
Shearing Into Woody Stems
Old wood near the crown often lacks viable buds. Cutting into it leaves dead stubs. Always leave several inches of green growth. If the center is all wood, don’t force it. Instead, divide the plant in spring (more on that below). Renewal comes from the base, not the middle.
Neglecting Division
Even with perfect trimming, catmint declines after three to five years. The crown gets woody, flower count drops, center dies. Division fixes this. Dig the clump in early spring. Tease or cut into fist-sized pieces with roots and shoots. Replant the best. Compost the rest. You get vigorous new plants and solve the donut problem permanently.
Over-Fertilizing After Pruning
Nepeta thrives in lean soil. High nitrogen after shearing pushes weak, floppy growth that attracts aphids. Compost or a light balanced organic feed is plenty. Skip the Miracle-Gro. I top-dress with an inch of leaf mold in spring. That’s all my catmint gets. They bloom like crazy.
Companion Planting and Design Tips
Best Neighbors for Trimmed Catmint
The soft lavender-blue of catmint pairs beautifully with warm tones. Try it with yellow coreopsis, orange butterfly weed, or red hot poker. The contrast pops. For a cooler palette, combine with white shasta daisies, blue salvia, and pink coneflowers. Silver foliage like artemisia or lamb’s ear echoes catmint’s leaves.
Grasses add movement. ‘Karl Foerster’ feather reed grass behind a catmint drift creates vertical rhythm. Low sedums in front hide any bare ankles. Think layers: groundcover, mound, vertical. Catmint is the perfect middle layer.
Using Shape to Guide the Eye
A row of domed catmint leads the gaze along a path. A massed drift draws attention to a focal point — a bench, sculpture, or specimen tree. Repeated mounds create rhythm. Vary the height slightly for a natural feel. The shape you choose — tight or loose — sets the garden’s mood. Formal? Tight. Wild? Loose. You decide.
Troubleshooting: When Trimming Doesn’t Help
No Rebloom After Shearing
If you cut back and get leaves but no flowers, check three things. Sun: Nepeta needs six-plus hours. Shade reduces blooms. Soil: Too rich? Excess nitrogen favors foliage. Water: Drought stress after shearing can stall bud set. Water deeply once a week if dry. Fix the cause, and the next cycle should flower.
Flopping Despite Pruning
Some varieties just get tall. ‘Six Hills Giant’ and ‘Walker’s Low’ can hit 30 inches. If pinching in May and shearing in July aren’t enough, stake early. Use grow-through grids or bamboo stakes with twine. Install in April before stems lengthen. The plant grows through the support, hiding it. Invisible structure.
Center Die-Out Persists
If the donut returns every year despite shaping, the clump is too old. Division is the only cure. Spring or fall. Replant vigorous sections with roots. Space new divisions 18 to 24 inches apart. They’ll fill in fast. Problem solved for another three to five years.
Seasonal Care Calendar for Catmint
March to April: Wake Up
- Remove winter mulch gradually
- Cut dead stems to ground
- Thin crowded centers
- Pinch tall varieties at 10 inches (optional)
- Apply compost top-dressing
May to June: First Flush
- Deadhead weekly for neatness
- Monitor for aphids on new growth
- Water only in drought
- Enjoy the bee parade
July: The Big Cut
- Shear back by half after bloom fades
- Shape into dome
- Water deeply
- Light compost side-dress
August to September: Second Show
- Deadhead if desired
- Light trim only if needed
- Stop fertilizing
- Watch for pollinators
October to February: Rest
- Leave stems standing
- No pruning
- Mulch after ground freezes (cold zones)
- Plan spring divisions
Conclusion: Make Trimming a Ritual, Not a Chore
Trimming and shaping catmint plant isn’t maintenance — it’s a conversation with your garden. Each cut says, “Grow here, not there. Bloom now, not later.” The plant listens. It responds with fresh stems, more flowers, tighter form. You get beauty. The bees get nectar. The hummingbirds get territory. Everyone wins.
Start small. Shear one plant this July. Watch what happens. Take photos. Note the dates. Next year, you’ll know exactly when and how. Your catmint will be the envy of the block — not because you’re a master gardener, but because you showed up with shears at the right time. That’s the secret. Show up. Snip. Step back. Smile.
And if you forget? Catmint forgives. It always comes back. That’s why we love it.
Frequently Asked Questions
How often should I trim catmint during the growing season?
One major shear after the first bloom (early summer) is essential. Optional light deadheading weekly extends flowering. A second light trim in late August works in long-season areas. Spring cleanup is not a trim — just dead stem removal.
Will trimming catmint make it spread less?
Trimming controls height and shape, not spread. Catmint spreads slowly by crown expansion, not runners. To limit width, divide the clump every three to five years in spring and replant only what you want.
Can I trim catmint in the rain?
Better to wait for dry foliage. Wet stems tear more easily, and damp conditions promote fungal diseases on fresh cuts. If you must trim damp growth, sanitize tools meticulously and ensure good air flow afterward.
What if I accidentally cut into the woody center?
Don’t panic. Catmint is resilient. The plant may be slower to regrow from that spot, but surrounding green stems will fill in. Avoid cutting that low next time. If the center is mostly wood, plan a spring division instead.
Do all catmint varieties need the same trimming?
The principle is the same — shear after bloom — but intensity varies. Tall types like ‘Six Hills Giant’ need harder cuts and may benefit from May pinching. Dwarfs like ‘Cat’s Pajamas’ need only light shaping. Observe your plant and adjust.
Can I propagate catmint from trimmings?
Summer cuttings root easily. Take 4-inch stem tips from the June shear, strip lower leaves, dip in rooting hormone, and stick in moist perlite. Cover with a bag. Roots form in two to three weeks. Free plants from your pruning debris!