How to Propagate Parlor Palm
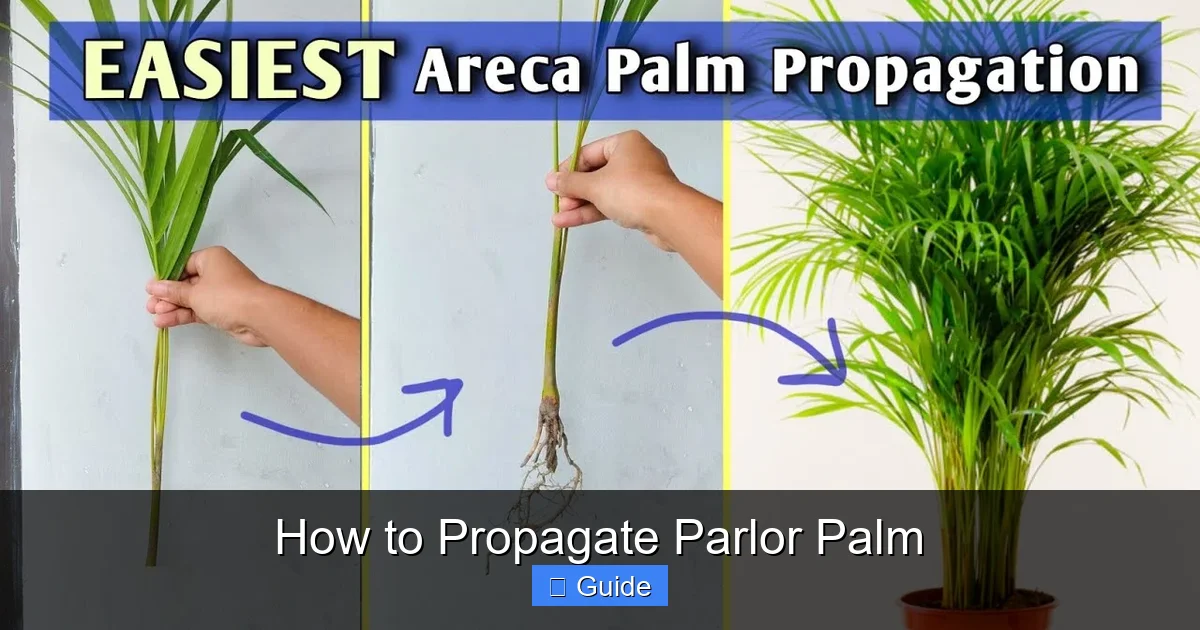
Propagating parlor palm is simple and rewarding. The most reliable method is division during repotting, where you separate healthy clumps with roots attached. With proper care, your new plants will thrive and bring tropical beauty to any indoor space.
If you love houseplants, you probably know the parlor palm. This graceful plant has been a favorite since Victorian times. Its feathery fronds add instant elegance to any room. Best of all, it is one of the easiest palms to grow indoors. But did you know you can multiply your collection without spending a dime? Learning how to propagate parlor palm is a skill every plant parent should have. It is easier than you might think.
In this guide, we will walk through everything you need to know. We will cover the two main methods: division and seed propagation. You will learn when to do it, what tools you need, and how to care for your new baby plants. We will also share common mistakes to avoid. By the end, you will feel confident creating new plants from your existing one. Let us dive in and get your hands dirty.
Key Takeaways
- Division is the best method: Separating clumps during repotting gives you the highest success rate and fastest results.
- Timing matters: Spring and early summer are ideal for propagation when the plant is actively growing.
- Each division needs roots: Every new plant must have its own root system to survive independently.
- Use well-draining soil: A mix of peat, perlite, and sand prevents root rot in newly propagated plants.
- Keep humidity high: New divisions need extra moisture while they establish their root systems.
- Patience with seeds: Seed propagation takes months but lets you grow many plants at once.
- Watch for pests: Spider mites and mealybugs love stressed new plants, so inspect regularly.
Quick Answers to Common Questions
Can you propagate parlor palm in water?
No, parlor palms cannot be propagated in water. They require soil for root development. Divisions placed in water will rot before roots form. Always use well-draining potting mix.
How long does it take for a divided parlor palm to recover?
Most divided parlor palms show new growth within 4-6 weeks. Full recovery and vigorous growth typically take 2-3 months depending on conditions and division size.
Can I propagate a parlor palm from a single stem cutting?
No, single stem cuttings without roots will not survive. Parlor palms do not root from stem cuttings like some houseplants. Each division must have its own established root system.
Why are the tips of my new parlor palm turning brown?
Brown tips usually indicate low humidity, underwatering, or fertilizer burn. Increase humidity, check soil moisture, and avoid fertilizing new divisions for the first 2-3 months.
How many new plants can I get from one mature parlor palm?
A mature parlor palm with multiple clumps can yield 3-8 divisions depending on size. Each division should have at least 3-5 stems with healthy roots for best survival rates.
📑 Table of Contents
Understanding Parlor Palm Propagation Basics
Before we jump into the how-to, let us talk about the plant itself. The parlor palm, or Chamaedorea elegans, is native to the rainforests of Guatemala and Mexico. In nature, it grows in clumps on the forest floor. This clumping habit is the key to propagation. The plant naturally produces offshoots, or pups, from its base. Each pup develops its own root system over time. This makes division the most natural and successful method.
Why Propagate Your Parlor Palm
There are many reasons to propagate. Maybe your plant has outgrown its pot. Maybe you want to share plants with friends. Or perhaps you just love the satisfaction of growing new life. Propagation is also a great way to rejuvenate an older plant. When you divide a crowded clump, the remaining plants often grow more vigorously. They have more space, more nutrients, and better air circulation. It is a win-win for everyone.
When Is the Best Time to Propagate
Timing can make or break your success. The absolute best time is spring. This is when the plant wakes up from winter dormancy. Energy reserves are high. New growth is just beginning. The plant can recover quickly from the stress of division. Early summer works well too. Avoid fall and winter. The plant is resting. Roots grow slowly. Cold temperatures and low light increase the risk of rot. If you must propagate in the off-season, provide extra warmth and light.
Tools and Materials You Will Need
Gather your supplies before you start. You do not need anything fancy. Here is a simple checklist:
- A healthy, mature parlor palm with multiple stems
- Clean, sharp knife or pruning shears
- Fresh potting mix (recipe below)
- New pots with drainage holes (one per division)
- Gloves to protect your hands
- Newspaper or tarp for easy cleanup
- Spray bottle for misting
- Rooting hormone (optional but helpful)
For the potting mix, parlor palms need excellent drainage. Mix two parts peat moss or coco coir with one part perlite and one part coarse sand. You can also use a high-quality palm mix from the garden center. Avoid heavy garden soil. It holds too much water and suffocates roots.
Propagation by Division: Step-by-Step Guide
Division is the most popular way to propagate parlor palm. It is fast. It is reliable. And you get decent-sized plants immediately. Let us break it down into easy steps.
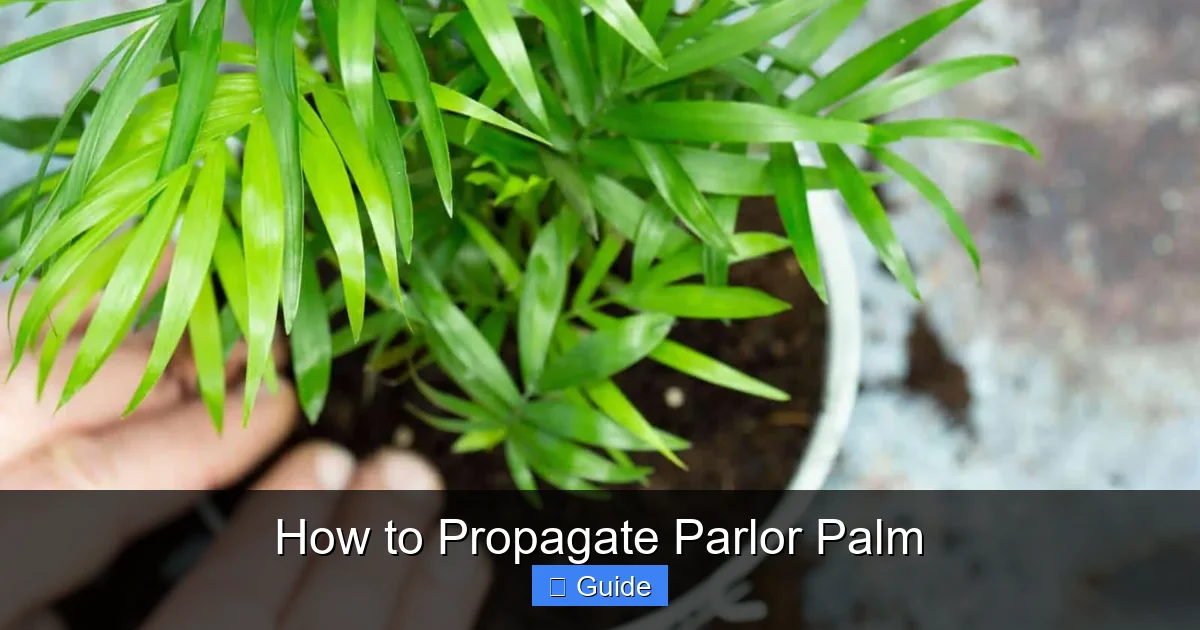
Visual guide about How to Propagate Parlor Palm
Image source: planetnatural.com
Step 1: Prepare Your Workspace
Lay down newspaper or a tarp. This catches soil and makes cleanup a breeze. Have your new pots ready. Fill each about one-third full with your potting mix. Lightly moisten the mix. It should feel damp, not soggy. Wash your hands and tools. Clean tools prevent disease transfer. A quick wipe with rubbing alcohol does the trick.
Step 2: Remove the Mother Plant
Gently tip the pot on its side. Tap the sides to loosen the root ball. If the plant is stuck, run a knife around the inside edge. Slide the plant out. Do not pull on the stems. You might break them. Support the base of the plant with one hand. Let gravity do the work. Once free, set the plant on your workspace.
Step 3: Examine the Root Ball
Take a good look at the roots. Healthy roots are firm and white or light tan. Mushy, dark, or smelly roots indicate rot. Trim any bad roots with clean scissors. Now, look for natural divisions. You want to find where stems separate at the base. Each clump should have at least three to five stems. More stems mean a fuller plant faster. Each division must have its own roots. This is non-negotiable. A stem without roots will not survive.
Step 4: Separate the Divisions
This is the moment of truth. Gently tease the roots apart with your fingers. Work slowly. Be patient. Some roots will tear. That is okay. Try to keep as many intact as possible. If the root ball is very tight, use your clean knife. Cut straight down between the clumps. Make decisive cuts. Sawing back and forth damages more tissue. Each division should have a good root mass and several healthy stems.
Step 5: Pot Up Your New Plants
Place each division in its prepared pot. The base of the stems should sit at the same level as before. Not deeper. Not shallower. Fill in around the roots with potting mix. Tap the pot gently to settle the soil. Do not pack it down hard. Roots need air pockets. Leave about an inch of space at the top for watering. Water each pot thoroughly until water drains from the bottom. This settles the soil around the roots and eliminates air gaps.
Step 6: Provide Aftercare
Your new plants are in shock. They need TLC. Place them in bright, indirect light. No direct sun. It will scorch the stressed leaves. Keep the soil evenly moist but not wet. Check daily. Mist the leaves frequently. High humidity reduces water loss through the leaves. A clear plastic bag over the plant creates a mini greenhouse. Just prop it up with sticks so it does not touch the leaves. Remove the bag for an hour each day for air circulation. In four to six weeks, you should see new growth. That is your sign of success.
Propagation by Seed: The Long Game
Seed propagation is less common but totally doable. It is how commercial growers produce thousands of plants. For home growers, it is a fun experiment. Just know it takes patience. Lots of patience. From seed to a decent-sized plant can take two to three years. But you get the joy of watching the entire life cycle.
Getting Viable Seeds
This is the tricky part. Parlor palms rarely flower indoors. They need specific conditions: high humidity, consistent warmth, and maturity. Most indoor plants never bloom. If yours does, you will see small yellow flowers followed by black berries. Each berry contains one seed. You can also buy seeds online. Look for reputable sellers. Fresh seeds germinate best. Viability drops quickly after a few months. If buying, check the harvest date.
Preparing Seeds for Planting
Fresh seeds have a fleshy fruit coating. This must be removed. It contains germination inhibitors. Soak the seeds in warm water for two to three days. Change the water daily. The fruit will soften. Rub the seeds against a screen or between your fingers to remove the pulp. Rinse well. Now soak the clean seeds in warm water for another 24 hours. This hydrates the embryo and jumpstarts germination. Some growers nick the hard seed coat with a file. This is called scarification. It helps water penetrate. Be careful not to damage the embryo inside.
Sowing the Seeds
Use a shallow tray or small pots. Fill with a sterile seed-starting mix. Moisten it well. Press each seed about half an inch deep. Space them an inch apart. Cover lightly with mix. Cover the tray with a clear dome or plastic wrap. This keeps humidity at 100%. Place on a heat mat set to 80-85°F (27-29°C). Bottom heat is crucial. Without it, germination can take six months or more. With heat, you might see sprouts in four to eight weeks. Keep the medium moist but not waterlogged. Mist daily.
Caring for Seedlings
When the first leaf emerges, it looks like a blade of grass. This is the cotyledon. True leaves follow later. They will have the classic split shape. Once seedlings have two true leaves, transplant them into individual small pots. Use the same well-draining mix as for divisions. Handle by the leaves, never the delicate stem. Keep them warm, humid, and in bright indirect light. Fertilize with half-strength liquid fertilizer once a month after the first three months. Growth is slow. Celebrate every new frond.
Caring for Newly Propagated Parlor Palms
Whether you divided or grew from seed, the early care is similar. Your goal is to help the plant establish a strong root system. Roots are the foundation. Everything above ground depends on them.
Light Requirements
Parlor palms are famous for tolerating low light. But “tolerate” does not mean “thrive.” For propagation success, give them bright, indirect light. An east-facing window is perfect. North-facing works too. South or west windows need a sheer curtain. Direct sun burns the tender new leaves. If you only have low light, the plant will survive but grow slowly. Leggy, stretched stems mean it needs more light. Rotate the pot weekly for even growth.
Watering Wisdom
Overwatering is the number one killer. Parlor palms like moist soil, not wet soil. The top inch should dry out between waterings. Stick your finger in the soil. If it feels dry at your first knuckle, water. If it feels damp, wait. Water thoroughly until it drains out the bottom. Empty the saucer. Never let the pot sit in water. Roots need oxygen. Soggy soil pushes air out. This leads to root rot. Underwatering is safer than overwatering. The plant will tell you it is thirsty by drooping slightly. It perks up fast after a drink.
Humidity and Temperature
These are tropical plants. They love humidity. Aim for 50% or higher. Your home is probably drier, especially in winter. Group plants together. Use a pebble tray. Run a humidifier. Mist daily. All these help. Temperature should stay between 65-80°F (18-27°C). Avoid cold drafts from doors and windows. Avoid hot blasts from heating vents. Sudden temperature changes stress the plant. Stressed plants are vulnerable to pests and disease.
Fertilizing Young Plants
Wait. Do not fertilize newly divided plants for at least two months. They need to recover first. The fresh potting mix has nutrients anyway. For seedlings, wait three months. After that, use a balanced liquid fertilizer at half strength. Once a month during spring and summer. Stop in fall and winter. Too much fertilizer burns roots. It also causes weak, leggy growth. Less is more.
Common Problems and How to Fix Them
Even with perfect technique, issues can arise. Knowing what to look for saves your plants. Here are the most common problems with propagated parlor palms.
Transplant Shock
Almost every division goes through shock. Leaves may yellow. Tips may brown. Growth stops. This is normal. The plant is redirecting energy to root repair. Do not panic. Do not overwater. Do not fertilize. Keep conditions stable. High humidity helps immensely. Most plants bounce back in four to six weeks. If a frond turns completely brown, trim it off. This redirects energy to healthy growth.
Root Rot
This is the big one. Yellowing lower leaves. Mushy stems at the base. A foul smell from the soil. Black, slimy roots. If you suspect rot, act fast. Unpot the plant. Wash all soil off the roots. Trim every bit of rot with sterile scissors. Dip healthy roots in a fungicide solution or cinnamon powder. Repot in fresh, dry mix in a clean pot. Do not water for a few days. Then water sparingly. Increase air circulation. Prevention is easier: well-draining soil, pots with holes, and careful watering.
Pest Infestations
Spider mites love dry, stressed plants. Look for fine webbing and tiny specks on leaf undersides. Leaves look stippled or dusty. Mealybugs hide in leaf axils. They look like tiny cotton balls. Scale insects look like small brown bumps on stems. For all pests, start with a strong spray of water. Knock them off. Follow with insecticidal soap or neem oil. Treat weekly for three weeks to catch hatchlings. Isolate infected plants. Check neighbors. Quarantine new plants for two weeks before introducing them to your collection.
Nutrient Deficiencies
Pale new leaves often mean iron deficiency. This happens in alkaline soil or with hard water. Use chelated iron supplement. Yellowing between leaf veins on older leaves suggests magnesium deficiency. Epsom salts (magnesium sulfate) at one teaspoon per gallon helps. Brown leaf tips usually, though, deficiencies in new plants are actually root problems. Fix the roots, and the leaves follow.
Advanced Tips for Propagation Success
Once you master the basics, these pro tips will boost your success rate even higher.
Use Rooting Hormone
Rooting hormone powder or gel contains synthetic auxins. These stimulate root formation. Dip the cut ends of divisions before potting. It is especially helpful for smaller divisions with fewer roots. It is inexpensive and lasts a long time. Tap off excess. Too much can actually inhibit rooting.
Try Air Layering for Large Specimens
If you have a very large, old plant, air layering is an option. This creates a new plant while still attached to the mother. Choose a healthy stem. Make a small upward cut halfway through the stem, about six inches from the tip. Insert a toothpick to keep it open. Dust with rooting hormone. Wrap moist sphagnum moss around the wound. Cover with plastic wrap. Secure with twist ties. Keep moss moist. In a few months, roots will grow into the moss. Cut below the new roots and pot up. The mother plant barely notices.
Create a Humidity Chamber
For the first few weeks, a humidity chamber works wonders. Use a clear plastic storage bin. Place pots inside. Mist the sides. Close the lid most of the way. Open daily for fresh air. This maintains 80-90% humidity effortlessly. It is like a mini greenhouse. Your divisions will root faster and lose less water through transpiration.
Label Everything
It sounds obvious. But months later, you will forget which pot is which. Use plant tags. Write the date and method. “Division – March 15” or “Seed – April 1.” Track progress in a notebook or phone app. Note when you water, fertilize, and see new growth. This data helps you refine your technique over time.
Long-Term Care for Your Propagated Plants
Your new plants are established. Now what? They need ongoing care to become the lush specimens you envision.
Repotting Schedule
Parlor palms like being slightly root-bound. Repot only when roots circle the pot or grow out drainage holes. Usually every two to three years. Spring is best. Go up only one pot size. Too large a pot holds excess water. Fresh soil refreshes nutrients. It also lets you check root health. Divide again if the clump is crowded. The cycle continues.
Pruning and Grooming
Remove dead or yellowing fronds at the base. Use clean scissors. Cut close to the soil. Do not pull. You might damage the crown. Wipe leaves with a damp cloth monthly. Dust blocks light. Clean leaves photosynthesize better. It also lets you spot pests early. Never use leaf shine products. They clog pores.
Seasonal Adjustments
In winter, growth slows. Water less. Stop fertilizing. Keep away from cold windows. Provide extra humidity. Heating systems dry the air. In spring, resume normal care. Watch for flower spikes. They are rare but exciting. If you get berries, you have seeds for the next generation.
Sharing the Wealth
One of the joys of propagation is sharing. Pot up a division in a pretty container. Add a care tag. Give it to a friend. It is a living gift that keeps growing. You are not just giving a plant. You are giving clean air, beauty, and a connection to nature. Plus, you make room for more plants yourself. It is the gift that truly keeps on giving.
Conclusion
Learning how to propagate parlor palm opens up a world of possibilities. You can fill your home with lush greenery. You can share plants with loved ones. You can even start a small side business selling your divisions. The methods are simple. Division gives quick results. Seeds offer a long-term project. Both are deeply satisfying.
Remember the keys to success. Choose a healthy mother plant. Time it right in spring. Use clean tools and fresh, well-draining soil. Give each division plenty of roots. Provide high humidity and bright indirect light. Water wisely. Be patient. Plants operate on their own timeline. Trust the process.
Your first attempt might not be perfect. That is okay. Every propagation teaches you something. Each new plant is a victory. Soon, you will be the one friends come to for advice. You will have a home filled with the gentle, arching fronds of parlor palms you grew yourself. There is nothing quite like it. So grab your gloves, find a nice mature plant, and start dividing. Your indoor jungle awaits.
Frequently Asked Questions
What is the easiest way to propagate a parlor palm?
Division during repotting is the easiest and most reliable method. Simply separate the natural clumps, ensuring each has roots attached, and pot them in fresh soil.
Can you grow parlor palm from cuttings?
No, parlor palms cannot be propagated from stem or leaf cuttings. They only propagate through division of rooted clumps or from seeds produced by mature flowering plants.
When should I divide my parlor palm?
Spring is the ideal time to divide parlor palms. The plant is entering active growth season, which helps divisions establish roots quickly and recover from transplant shock.
How often should I water newly propagated parlor palms?
Keep the soil consistently moist but not soggy. Check daily and water when the top inch feels dry. High humidity reduces watering frequency needs for new divisions.
Do parlor palms need rooting hormone for propagation?
Rooting hormone is not required but can improve success rates, especially for smaller divisions with fewer roots. It stimulates faster root development and reduces transplant shock.
How long does it take to grow a parlor palm from seed?
Growing parlor palm from seed to a mature plant takes 2-3 years. Germination alone takes 4-8 weeks with bottom heat, and seedlings grow slowly for the first year.