How Deep to Plant Wild Ginger Roots
Plant wild ginger roots just 1 to 2 inches deep in rich, moist soil with the growing tips barely covered. This native woodland perennial spreads slowly to form a beautiful ground cover in shade gardens.
If you have a shady corner in your garden that feels impossible to fill, wild ginger might be the answer you have been looking for. This native woodland plant goes by the botanical name Asarum canadense. It is not related to the culinary ginger you buy at the grocery store. Instead, it is a low-growing perennial with heart-shaped leaves that hug the ground. The flowers are curious little jug-shaped blooms that hide right at soil level. They are pollinated by beetles and flies rather than bees.
Gardeners love wild ginger because it solves the dry shade problem. It forms a dense carpet that chokes out weeds once established. The foliage stays attractive from spring through fall. In autumn, the leaves often turn a soft yellow before dying back. But here is the thing. Success with this plant starts the moment you put the roots in the ground. Getting the depth right makes all the difference between a plant that thrives and one that struggles. Let us walk through everything you need to know about how deep to plant wild ginger roots and how to give them the best start possible.
Key Takeaways
- Planting depth matters: Wild ginger roots should sit 1 to 2 inches below the soil surface with growing tips pointing up.
- Shade is essential: This plant thrives in full to partial shade and will scorch in direct afternoon sun.
- Rich, moist soil wins: Amend planting areas with compost and leaf mold to mimic forest floor conditions.
- Space for spread: Set plants 12 to 18 inches apart to allow rhizomes to colonize naturally over time.
- Water consistently: Keep soil evenly moist but not soggy during the first growing season.
- Mulch helps: Apply 2 inches of shredded leaves or bark to retain moisture and suppress weeds.
- Patience pays off: Wild ginger establishes slowly but forms a durable, weed-suppressing mat once settled.
Quick Answers to Common Questions
How deep should I plant wild ginger rhizomes?
Plant wild ginger rhizomes 1 to 2 inches deep with the growing tips facing up and barely covered by soil.
Can wild ginger tolerate full sun?
No, wild ginger requires full to partial shade and will scorch in afternoon sun. Morning sun is acceptable.
How far apart should I space wild ginger plants?
Space wild ginger rhizomes 12 to 18 inches apart to allow for natural spreading over time.
When is the best time to plant wild ginger?
Early spring or fall are ideal planting times when soil is workable and temperatures are cool.
How long does wild ginger take to establish?
Wild ginger establishes slowly, typically taking 2 to 3 years to form a dense ground cover.
📑 Table of Contents
- Understanding Wild Ginger Root Structure
- How Deep to Plant Wild Ginger Roots
- Preparing the Planting Site
- Step-by-Step Planting Process
- Spacing and Layout for Natural Colonies
- First Season Care
- Common Planting Mistakes to Avoid
- Long-Term Maintenance
- Troubleshooting Poor Growth
- Wild Ginger Varieties and Their Needs
- Design Ideas for Wild Ginger
- Propagation Beyond Division
- Ecological Value
- Buying Healthy Plants
- Seasonal Timeline
- Conclusion
Understanding Wild Ginger Root Structure
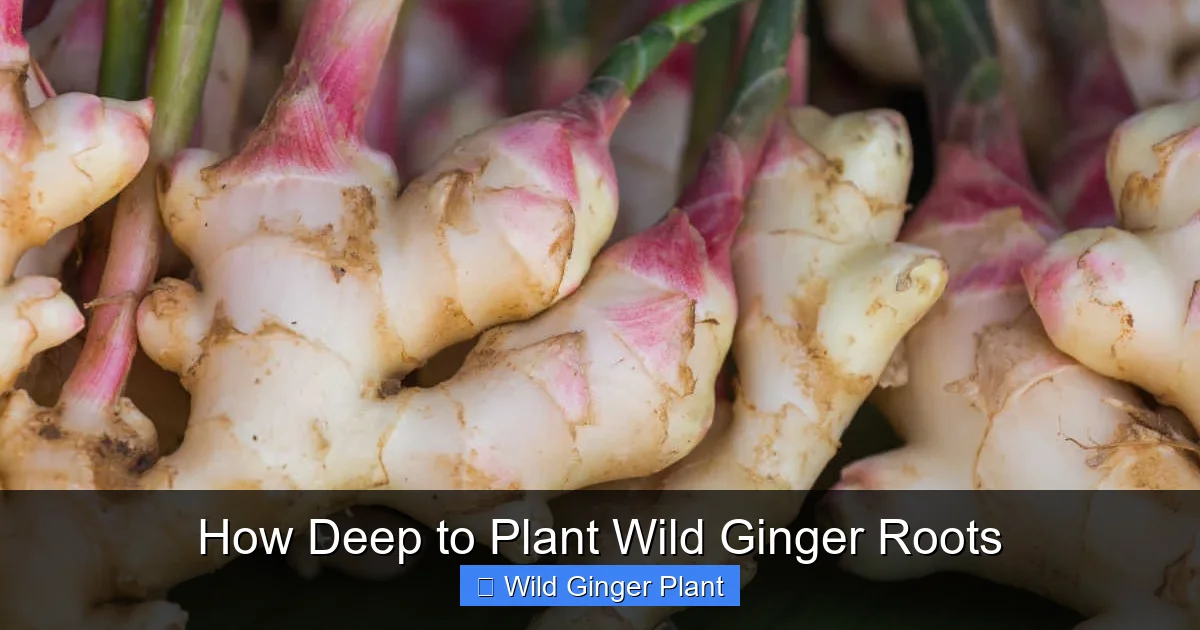
Before we talk about planting depth, it helps to understand what you are actually holding in your hand. Wild ginger grows from rhizomes. These are thick, horizontal stems that run just below the soil surface. They are not true roots. They are modified stems that store energy and send up new shoots. Each segment of rhizome has nodes. These are the points where leaves and roots emerge.
Rhizomes Versus Roots
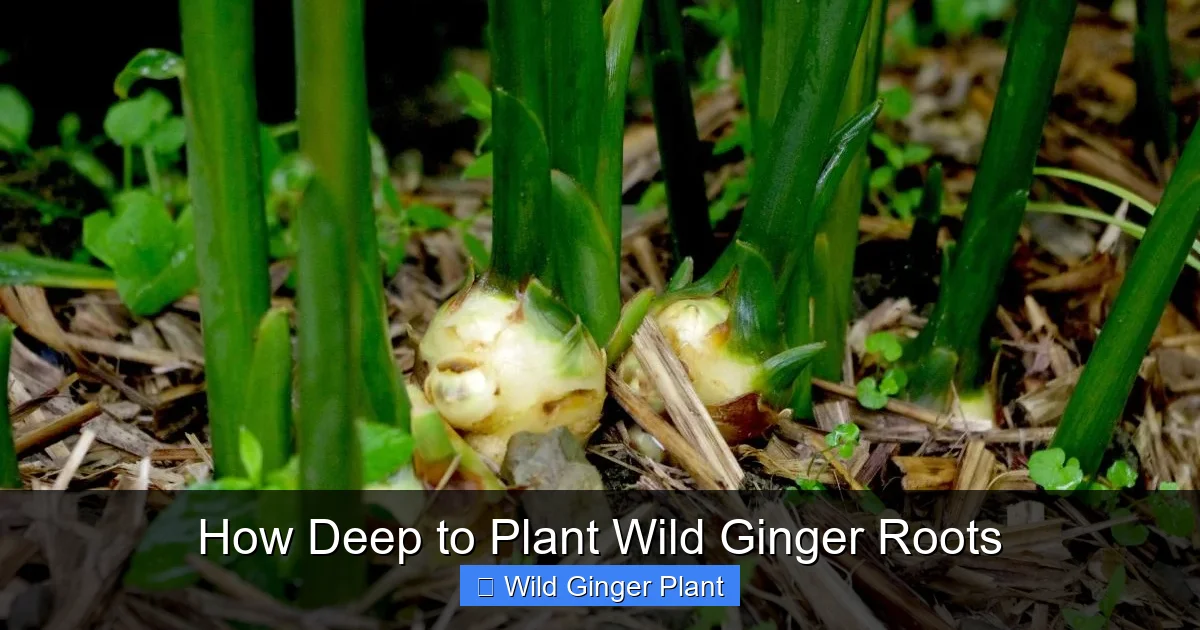
True roots grow downward. They anchor the plant and absorb water and nutrients. Rhizomes grow horizontally. They colonize new territory. When you buy wild ginger, you usually receive a piece of rhizome with some fibrous roots attached. The rhizome is the important part. It contains the buds that will become next year’s leaves. Those buds are often called eyes or growing tips. They look like small, pointed nubs on the upper surface of the rhizome.
Why Orientation Matters
You want those growing tips facing up. If you plant the rhizome upside down, the plant has to waste energy reorienting itself. It will still survive most of the time. But it will emerge later and grow weaker in its first season. Take a moment to examine each piece before it goes in the ground. The top side usually shows old leaf scars or visible buds. The bottom side shows root scars where fibrous roots were attached.
How Deep to Plant Wild Ginger Roots
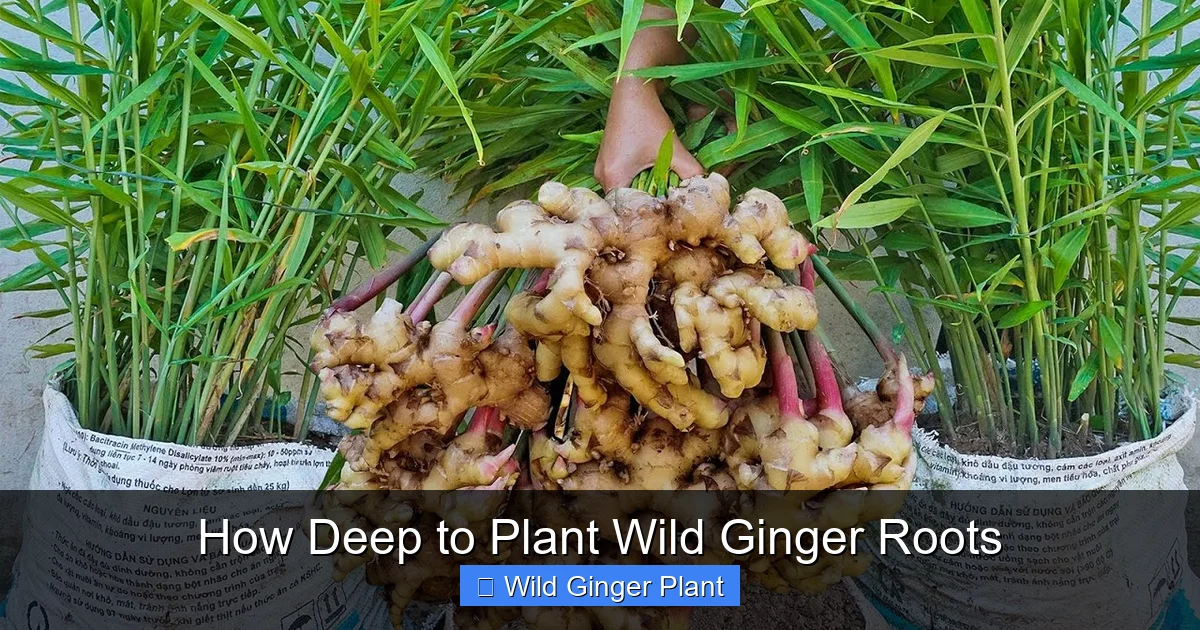
The short answer is one to two inches deep. That means the top of the rhizome should sit about an inch below the soil surface. The growing tips should be barely covered. If you plant deeper than two inches, the shoots may not have enough energy to reach the light. If you plant too shallow, the rhizome can dry out or get knocked around by frost heave.
Visual guide about How Deep to Plant Wild Ginger Roots
Image source: i.ytimg.com
The Goldilocks Zone
Think of it like tucking a child into bed. You want the blanket snug but not suffocating. The soil is the blanket. The rhizome is the child. One inch of soil over the top provides insulation. It holds moisture. It protects the buds from temperature swings. But it is thin enough that the emerging shoots push through easily in spring.
Measuring Without a Ruler
You do not need to carry a tape measure into the garden. Use your finger. Push the rhizome into the prepared soil until the top sits at your first knuckle. That is roughly one inch. Cover it gently. Firm the soil with your palm. Do not pack it hard. You want good soil contact but you do not want to compact the earth. Roots need air pockets to breathe.
Adjusting for Soil Type
In heavy clay soil, plant slightly shallower. Aim for three-quarters of an inch to one inch of cover. Clay holds moisture and can stay cold longer in spring. A shallower planting helps the soil warm faster. In sandy or very loose loam, you can go a full two inches. Sandy soil drains fast and warms quickly. The extra depth protects the rhizome from drying out.
Preparing the Planting Site
Depth is only one piece of the puzzle. The hole you dig and the soil you put back matter just as much. Wild ginger evolved on forest floors. That means rich, humusy soil that stays damp but drains well. It means dappled light. It means a blanket of decaying leaves every autumn.
Visual guide about How Deep to Plant Wild Ginger Roots
Image source: thegardeningcook.com
Choosing the Right Spot
Look for full shade to partial shade. Morning sun is okay. Afternoon sun is not. The leaves will scorch and turn crispy brown by July if they get blasted by hot afternoon rays. Under deciduous trees is perfect. The spring sun reaches the ground before the canopy leafs out. That gives wild ginger a photosynthesis boost early in the season. Then the tree leaves provide summer shade. North-facing walls and fences also work well.
Soil Amendment Strategy
Dig a hole twice as wide as the rhizome piece. Loosen the bottom with a fork. Mix in compost. A fifty-fifty blend of native soil and compost is ideal. If your soil is terrible, go heavier on the compost. Add a handful of leaf mold if you have it. Leaf mold is partially decomposed leaves. It mimics the forest duff layer. It holds water like a sponge and feeds beneficial fungi.
Drainage Test
Fill the hole with water. Let it drain. If it takes more than an hour, you have a drainage problem. Wild ginger likes moisture but it will rot in standing water. In that case, build a slight mound. Plant on the mound instead of in a hole. This raises the rhizome above the soggy zone.
Step-by-Step Planting Process
Now let us put it all together. You have your rhizomes. You have your prepared holes. You know the target depth. Here is the sequence.
Step One: Soak the Rhizomes
If the rhizomes look dry or shriveled, soak them in room temperature water for an hour before planting. This plumps them up. It wakes up the buds. Do not soak longer than a few hours. They can suffocate.
Step Two: Position the Rhizome
Lay the rhizome horizontally in the hole. Growing tips up. Roots down. If the piece is curved, follow the natural curve. Do not force it straight. The buds should be about one inch below the final soil line.
Step Three: Backfill Gently
Sift soil around the rhizome with your fingers. Work it under and around. Eliminate air pockets. But do not stomp. When the hole is full, the soil level should match the surrounding grade. The rhizome sits one to two inches down.
Step Four: Water In
Give the area a thorough soaking. This settles the soil. It ensures good contact between rhizome and earth. If the soil settles and exposes the rhizome, add a bit more soil and water again.
Step Five: Mulch
Apply two inches of shredded leaves, pine straw, or bark mulch. Keep the mulch pulled back slightly from the exact spot where the shoots will emerge. You do not want to smother them. The mulch conserves moisture. It moderates soil temperature. It breaks down into the organic matter wild ginger loves.
Spacing and Layout for Natural Colonies
Wild ginger is a slow spreader. A single rhizome might expand six to twelve inches in a year under ideal conditions. In average garden soil, expect less. This is not a plant that will take over your garden overnight. But it is persistent. Once established, it is there for decades.
Initial Spacing
Space rhizomes twelve to eighteen inches apart. This gives each plant room to develop a nice clump before they meet in the middle. If you want faster coverage, go with twelve inches. If you are patient or working with a limited budget, eighteen inches is fine. They will fill in eventually.
Planting in Drifts
Do not plant in straight lines. Wild ginger looks best in drifts or sweeps. Think of how it grows in nature. It forms loose colonies with irregular edges. Stagger the plants. Offset every other row. This creates a more natural appearance. It also improves air circulation between plants, which reduces disease risk.
Companion Planting
Wild ginger plays well with other shade lovers. Pair it with ferns like Christmas fern or maidenhair fern. The fine fern fronds contrast beautifully with the bold ginger leaves. Spring ephemerals like trillium, bloodroot, and Virginia bluebells bloom before the ginger fully leafs out. They disappear by summer. The ginger covers the bare ground they leave behind. Hostas work too, but choose smaller varieties. Giant hostas will shade out the ginger.
First Season Care
The first growing season is critical. The plant is building its root system. It is storing energy for future years. Your job is to remove stress so it can focus on establishment.
Watering Regimen
Check the soil every few days. Stick your finger in two inches deep. If it feels dry at that depth, water. Aim for consistently moist but never soggy. A soaker hose or drip irrigation works beautifully. Overhead watering is fine too, but do it in the morning so leaves dry before evening. Wet leaves overnight invite fungal problems.
Weed Management
Weeds are the enemy in year one. Wild ginger is small. It cannot compete with aggressive weeds. Hand pull weeds carefully. Do not use a hoe. The rhizomes are shallow. A hoe slice can sever them. The mulch you applied at planting helps enormously. Top it up if it breaks down.
Fertilizer? Usually Not Needed
If you amended with compost at planting, skip fertilizer the first year. Too much nitrogen produces lush, weak growth that is prone to damage. In subsequent years, a light top-dressing of compost in early spring is all they need. Or simply let the fallen leaves decompose in place. That is how they feed themselves in the wild.
Common Planting Mistakes to Avoid
Even experienced gardeners make these errors. Learn from them so you do not repeat them.
Planting Too Deep
This is the number one mistake. Three inches deep feels safe. It feels like you are really tucking them in. But the shoots may exhaust their stored energy before reaching the surface. Or they emerge weak and spindly. Stick to the one to two inch rule.
Planting in Full Sun
Some plant tags say “part shade.” Gardeners read that as “four hours of afternoon sun is fine.” It is not. Wild ginger needs protection from the hottest part of the day. If your only spot gets afternoon sun, choose a different plant. Or create shade with a taller companion or a shade cloth structure.
Letting Them Dry Out
Established wild ginger can handle some drought. First-year plants cannot. Their root systems are tiny. A week of hot, dry weather in July can kill them. Set a calendar reminder to check them during dry spells.
Disturbing the Rhizomes
Once planted, leave them alone. Do not dig around them to “check on them.” Do not divide them for at least three years. Do not plant annuals on top of them. The rhizomes are shallow. Any cultivation damages them.
Long-Term Maintenance
After the first year, wild ginger becomes remarkably self-sufficient. But a little attention keeps it looking its best.
Spring Cleanup
In early spring, before new growth emerges, remove any matted leaves or heavy debris that could smother the emerging shoots. Be gentle. The new shoots are fragile. A light raking with your fingers or a soft fan rake is enough.
Dividing Established Clumps
After three to five years, the center of a clump may become bare. The plant spreads outward in a ring. This is the time to divide. Dig up the whole clump in early spring or fall. Tease apart the rhizomes. Replant the vigorous outer pieces. Discard the woody, spent center. Water well. They will barely notice the disruption.
Fall Care
Let the leaves stay through winter. They protect the rhizomes. They feed the soil as they break down. If you are a tidy gardener and must clean up, wait until late winter. Then apply a fresh layer of shredded leaves as mulch. You are replacing what you removed.
Troubleshooting Poor Growth
Sometimes things go wrong. Here is how to diagnose the problem.
No Emergence in Spring
If nothing appears by mid-spring, gently dig around the planting spot. Feel for the rhizome. Is it firm? Are there buds? If it is mushy, it rotted. Too wet. If it is shriveled, it dried out. Too dry or planted too shallow. If it is firm with plump buds, it may just be slow. Some plants break dormancy later than others. Wait another few weeks.
Yellowing Leaves
Yellow leaves usually mean one of three things. Too much sun. Too much water. Or nutrient deficiency. Check the light first. If the site gets more sun than you thought, consider transplanting in fall. Check soil moisture. If it is soggy, improve drainage. If the soil is poor, top-dress with compost.
Holes in Leaves
Slugs and snails love wild ginger. They rasp holes in the leaves at night. Beer traps work. Diatomaceous earth works. Copper tape around the bed works. Or go out at night with a flashlight and pick them off. The damage is cosmetic. The plant will survive.
Wild Ginger Varieties and Their Needs
Most gardeners grow Asarum canadense, the native Canadian wild ginger. But there are other species worth knowing.
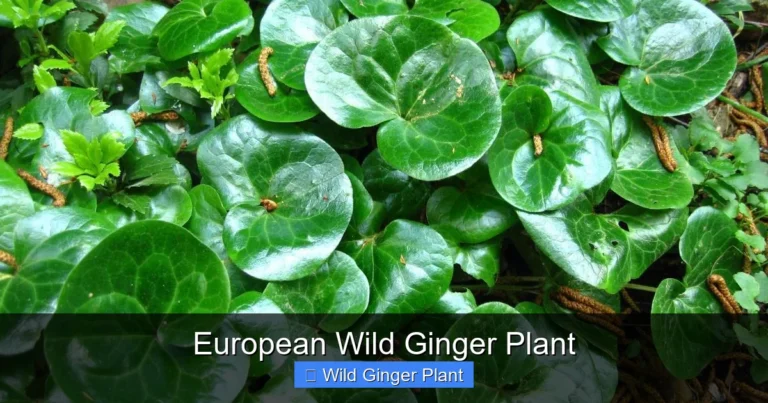
European Wild Ginger
Asarum europaeum has glossy, evergreen leaves. It is slower growing. It prefers slightly more alkaline soil. Planting depth is the same. One to two inches. It makes a tighter, more formal ground cover.
Asian Species
Asarum splendens, the Chinese wild ginger, has stunning silver-marked leaves. It is less cold hardy. Zone 6 or warmer. Same planting depth. It appreciates even more organic matter in the soil.
Little Brown Jugs
Asarum arifolium, native to the southeastern US, has arrow-shaped leaves with silver patterning. It is evergreen in mild winters. Planting depth unchanged. It tolerates slightly drier conditions once established.
Design Ideas for Wild Ginger
This plant is a design workhorse. Here are ways to use it.
Woodland Path Edging
Line a shady path with wild ginger. The low foliage defines the edge without blocking the view. It softens hard edges of stone or pavers. It tolerates occasional foot traffic better than you might think.
Understory Matrix
Plant it as a living mulch under shrubs and small trees. It suppresses weeds. It protects tree roots from mower damage. It creates a cohesive floor layer that ties the planting together.
Rain Garden Edges
Wild ginger handles periodic wet feet. Plant it on the upper edges of a rain garden where the soil stays moist but not flooded. It filters runoff. It stabilizes soil.
Container Culture
Yes, you can grow wild ginger in pots. Use a wide, shallow container. The rhizomes spread horizontally. A deep pot wastes soil. Use high-quality potting mix with extra compost. Keep it shaded. Water frequently. Repot every two years as the rhizomes fill the container.
Propagation Beyond Division
Division is the easiest way to get more plants. But you can also grow wild ginger from seed. It is a test of patience.
Seed Collection
The flowers pollinate and form a fleshy capsule. Ants disperse the seeds. They eat the elaiosome, a fatty attachment, and discard the seed. If you want to collect seeds, watch the capsules in early summer. When they split, harvest quickly. Sow immediately. The seeds need a warm period followed by a cold period to germinate. This is called double dormancy.
Seed Sowing
Sow in pots outdoors. Leave them. They may germinate the following spring. Or the spring after that. Do not give up. Once they sprout, grow them on for a year before transplanting. Seed-grown plants are genetically variable. You might get interesting leaf patterns.
Ecological Value
Planting wild ginger does more than look pretty. It supports life.
Pollinator Support
Those weird little flowers are pollinated by small flies and beetles. They are not showy. But they provide early season nectar and pollen when little else is blooming. The plant is a host for the pipevine swallowtail butterfly in some regions.
Wildlife Cover
The dense foliage shelters salamanders, toads, and insects. It creates a microhabitat at ground level. Birds forage in the leaf litter beneath it.
Erosion Control
The rhizomatous mat holds soil on slopes. It slows water runoff. It is a living erosion blanket.
Buying Healthy Plants
Start with good stock. It saves heartache later.
What to Look For
Buy from reputable native plant nurseries. Avoid big box stores unless you know the source. The rhizomes should feel firm, like a fresh carrot. They should have visible buds. Avoid any that are mushy, moldy, or smell fermented. The roots attached should be light colored and pliable, not brittle and dark.
Bare Root Versus Potted
Bare root plants are cheaper and establish faster if planted at the right time. Early spring or fall. Potted plants can go in anytime the ground is not frozen. They cost more. They may have circling roots that need teasing out. Both work fine.
Ethical Sourcing
Never dig wild ginger from the wild. It is slow to recover. Many populations are threatened by over-collection. Buy nursery-propagated plants. Ask the seller about their propagation methods. Good nurseries will tell you proudly.
Seasonal Timeline
A year in the life of wild ginger helps you know what to expect.
Early Spring
Shoots emerge. They look like tight fists pushing through the soil. They unfurl into heart-shaped leaves. Flowers appear at ground level. They are easy to miss. Get on your hands and knees to admire them.
Late Spring
Leaves reach full size. The patch looks lush and green. This is peak photosynthesis time. Keep watered if rain is scarce.
Summer
Growth slows. The plant stores energy. Leaves may look a bit tired in heat. This is normal. Do not fertilize. Just water.
Fall
Leaves yellow. They collapse. They become mulch. This is the plant feeding itself. Leave them.
Winter
Dormant. The rhizomes wait underground. Protected by soil and leaf litter. Dreaming of spring.
Conclusion
Knowing how deep to plant wild ginger roots is the foundation of success with this wonderful native plant. One to two inches. That is the number to remember. But depth alone is not enough. You need the right site. Shade. Rich, moist soil. You need patience. Wild ginger works on nature’s timeline, not a landscaper’s deadline. It takes a few years to form that gorgeous, weed-smothering carpet. But once it does, you have a ground cover that asks for almost nothing and gives back beauty, ecology, and resilience for decades.
Plant them right. Mulch them well. Water them faithfully the first year. Then step back and let them do their thing. In a few springs, you will push aside the leaf litter and find those tight fists emerging. You will see the strange little flowers at ground level. You will watch the patch expand, slowly, surely, inexorably. And you will know you did it right. That is the quiet satisfaction of gardening with native plants. You are not just decorating. You are restoring. One rhizome at a time.
Frequently Asked Questions
What type of soil does wild ginger prefer?
Wild ginger thrives in rich, humusy, well-draining soil that stays consistently moist. Amend planting areas with compost and leaf mold to mimic forest floor conditions.
Is wild ginger the same as culinary ginger?
No, wild ginger (Asarum canadense) is not related to culinary ginger (Zingiber officinale). It is a native woodland perennial with different growth habits and uses.
Do I need to fertilize wild ginger?
Wild ginger rarely needs fertilizer if planted in compost-amended soil. A light top-dressing of compost in early spring is sufficient for established plants.
Can I grow wild ginger in containers?
Yes, wild ginger grows well in wide, shallow containers with rich potting mix. Keep it shaded and water frequently since containers dry out faster than ground soil.
What pests affect wild ginger?
Slugs and snails are the primary pests, chewing holes in leaves at night. Damage is cosmetic and rarely threatens plant survival.
How do I divide established wild ginger clumps?
Divide in early spring or fall by digging up the clump, separating vigorous outer rhizomes from the woody center, and replanting at the same 1 to 2 inch depth.