Corner for Haworthia Cooperi Under $500
Transform any small space into a thriving Haworthia Cooperi sanctuary without breaking the bank. This complete guide walks you through lighting, shelving, containers, and decor choices to build a beautiful corner for Haworthia Cooperi under $500. You will learn practical tips to keep your succulents healthy and your wallet happy.
Key Takeaways
- Budget-friendly lighting works: Affordable LED grow lights provide the perfect spectrum for healthy growth without high electricity costs.
- Vertical shelving maximizes space: Tiered stands let you display more plants in a compact corner while ensuring each gets adequate light.
- Well-draining containers prevent rot: Terracotta pots with drainage holes are inexpensive and ideal for Haworthia Cooperi root health.
- Gritty soil mix is essential: A 50/50 blend of potting soil and perlite or pumice creates the fast-draining environment these succulents need.
- Temperature control matters: Keep your corner between 65-80°F and avoid cold drafts or intense afternoon sun through windows.
- Decor adds personality affordably: Decorative rocks, small figurines, and reclaimed wood shelves create visual interest without exceeding your budget.
- Regular maintenance keeps costs low: Proper watering and pest prevention avoid expensive plant replacements down the road.
Quick Answers to Common Questions
How much light does Haworthia Cooperi need in a corner setup?
Haworthia Cooperi needs bright indirect light — 1000-3000 foot-candles or 12-14 hours under full-spectrum LED grow lights positioned 12-18 inches above the plants.
What is the ideal soil mix for Haworthia Cooperi?
Use 40% potting soil, 30% perlite, and 30% pumice for a fast-draining mix that prevents root rot while retaining enough moisture for healthy growth.
Can I build a complete Haworthia Cooperi corner for under $300?
Yes, by shopping sales, using wire shelving, buying soil components in bulk, and starting with fewer plants, you can create a functional setup for $300-400.
How often should I water Haworthia Cooperi in a corner setup?
Water only when soil is completely dry — typically every 10-14 days in summer, monthly in winter. Always check by lifting the pot or using a wooden skewer test.
What are the best Haworthia Cooperi varieties for beginners?
Haworthia cooperi var. cooperi, var. obtusa, and var. truncata are most forgiving. They tolerate minor care mistakes and offset readily for propagation practice.
📑 Table of Contents
- Introduction
- Understanding Haworthia Cooperi Needs
- Planning Your Budget Breakdown
- Choosing the Perfect Location
- Essential Equipment and Supplies
- Designing Your Layout
- Plant Selection and Arrangement
- Installation and Setup Process
- Ongoing Care and Maintenance
- Troubleshooting Common Issues
- Expanding Your Collection Over Time
- Showcasing Your Creation
- Conclusion
Introduction
Creating a dedicated corner for Haworthia Cooperi under $500 is one of the most rewarding projects a plant lover can tackle. These charming little succulents with their translucent windowed leaves deserve a special spot where they can thrive and show off their unique beauty. The good news? You do not need a massive budget or a greenhouse to give them exactly what they need.
I have helped dozens of friends set up compact growing spaces for their succulent collections. The secret lies in smart choices rather than expensive ones. A well-planned corner for Haworthia Cooperi under $500 can actually outperform pricier setups because it forces you to focus on the fundamentals: proper light, excellent drainage, good airflow, and the right temperature range. Let me walk you through everything you need to know to build your own stunning succulent sanctuary.
Understanding Haworthia Cooperi Needs
Light Requirements for Healthy Growth
Haworthia Cooperi comes from South Africa where it grows tucked under rocks and in the shade of larger plants. This tells us everything we need to know about its light preferences. These plants want bright indirect light, not scorching direct sun. A north or east-facing window works beautifully. If you only have south or west windows, sheer curtains become your best friend.
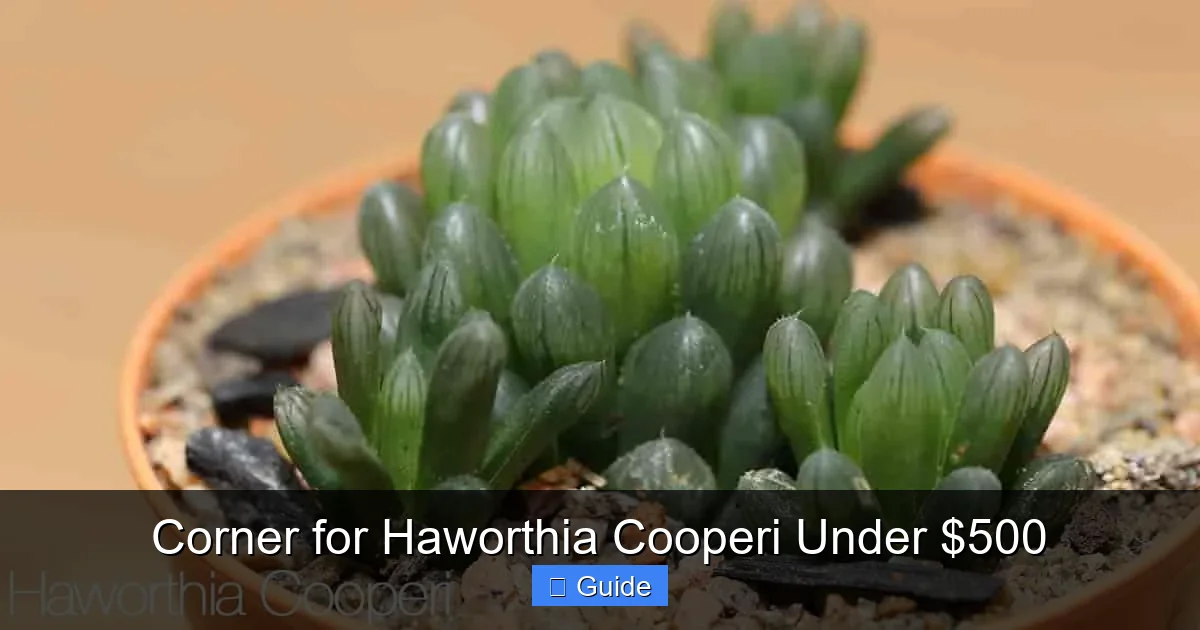
Visual guide about Corner for Haworthia Cooperi Under $500
Image source: i.pinimg.com
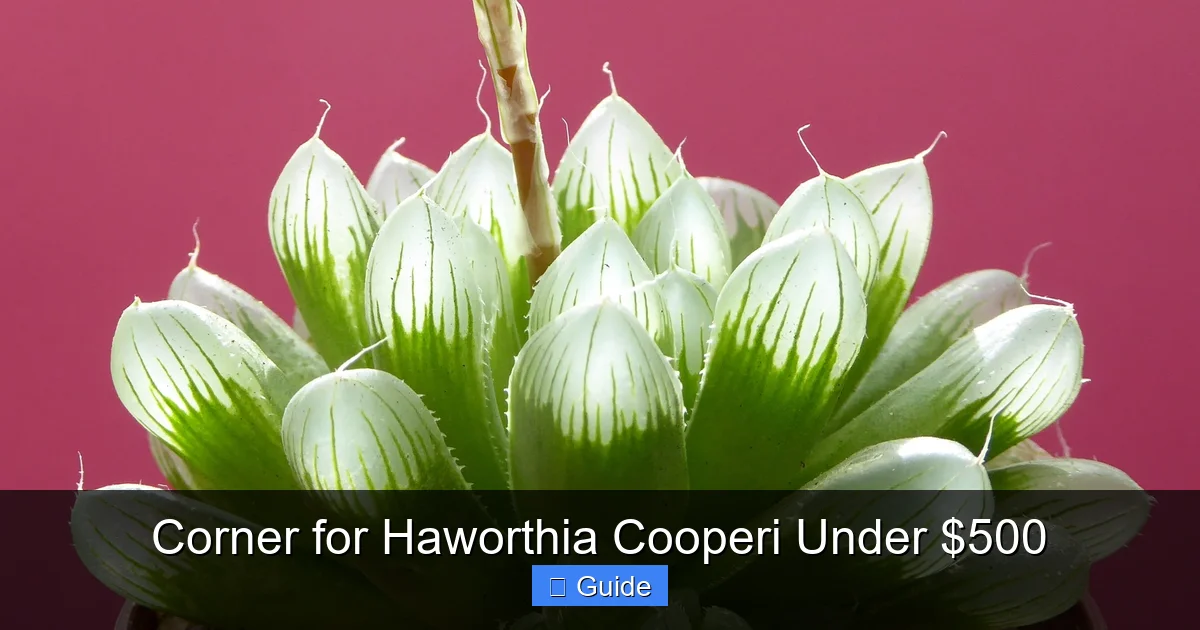
The translucent leaf tips act like little windows, allowing light to penetrate deep into the leaf tissue. This adaptation means they can photosynthesize efficiently in lower light than many other succulents. However, too little light leads to etiolation — that stretched, weak growth where leaves space out along elongated stems. Too much direct sun causes the leaves to turn brown, red, or white from sunburn.
Water and Humidity Preferences
The number one killer of Haworthia Cooperi is overwatering. These plants store water in their thick leaves and can go weeks between drinks. The soak-and-dry method works perfectly: water thoroughly until it runs out the drainage holes, then wait until the soil is completely dry before watering again. In summer this might mean every 10-14 days. In winter, once a month or even less.
Humidity is rarely an issue for these adaptable plants. Average home humidity between 30-50% is perfectly fine. Avoid misting — it does not help and can encourage fungal issues on the leaves. Good airflow around the plants matters more than humidity levels.
Temperature Range and Seasonal Changes
Haworthia Cooperi thrives in temperatures between 65-80°F (18-27°C). They can tolerate brief dips to 50°F (10°C) but will suffer if frozen. Keep them away from cold drafts near doors and windows in winter. Also avoid placing them directly above heating vents where hot, dry air can stress them.
These succulents have a subtle summer dormancy period where growth slows. During this time, reduce watering frequency slightly. They resume active growth in fall and spring, which are the ideal times for repotting, dividing offsets, or making changes to your corner setup.
Planning Your Budget Breakdown
Allocating Funds Across Categories
A successful corner for Haworthia Cooperi under $500 requires thoughtful budget allocation. Here is a realistic breakdown that leaves room for quality where it counts:
- Lighting ($120-180): This is your most important investment. Quality LED grow lights last years and use minimal electricity.
- Shelving ($80-150): Sturdy tiered stands or wall-mounted shelves hold your collection safely.
- Containers ($60-100): Terracotta pots in various sizes with matching saucers.
- Soil and amendments ($40-60): Quality potting mix, perlite, pumice, and top dressing.
- Plants ($80-150): Start with 5-8 healthy specimens including a few special varieties.
- Decor and accessories ($40-80): Decorative rocks, small art pieces, humidity tray, watering can.
- Contingency ($20-40): Always keep a little extra for unexpected needs or a special find.
Where to Splurge vs Save
Splurge on lighting and shelving — these form the foundation of your setup and need to last. Cheap grow lights often have poor spectrum coverage or fail within months. Flimsy shelves risk collapsing and damaging your plants.
Save on containers by shopping end-of-season sales, checking local marketplace apps, or visiting garden center clearance sections. Terracotta pots are often deeply discounted in fall. Soil components bought in bulk from landscape supply companies cost a fraction of bagged garden center prices.
Plants fall in the middle. Buy the healthiest specimens you can afford from reputable sellers. A $15 healthy plant beats a $5 struggling one every time. Look for firm leaves, good color, no signs of pests, and roots that hold the soil together when gently lifted from the pot.
Tracking Expenses as You Build
Keep a simple spreadsheet or notebook tracking every purchase. Include date, item, store, price, and category. This prevents accidental overspending and helps you refine future budgets. Photos of receipts work too if you prefer digital records.
Pro tip: Many items qualify for free shipping thresholds at online retailers. Consolidate orders to avoid shipping fees eating into your plant budget. Local pickup options at big box stores also eliminate delivery costs.
Choosing the Perfect Location
Evaluating Natural Light in Your Space
Before buying anything, spend a few days observing potential corners at different times. Note when direct sun hits, how long it lasts, and the intensity. A light meter app on your phone gives rough foot-candle readings. Haworthia Cooperi wants 1000-3000 foot-candles for optimal growth.
East-facing corners receive gentle morning sun — ideal for these plants. North-facing corners provide consistent bright indirect light all day. South and west corners work only with sheer curtains or by placing plants several feet back from the window.
Temperature Stability Considerations
Avoid corners near exterior doors, drafty windows, heating vents, air conditioning units, or radiators. Temperature fluctuations stress Haworthia Cooperi more than consistent slightly-suboptimal temperatures. An interior wall corner often provides the most stable environment.
If your only option is near a window, use a thermometer to monitor daily highs and lows for a week. Bubble wrap on the window glass at night adds insulation in winter. A small desk fan on low improves summer airflow without creating cold drafts.
Accessibility for Care and Enjoyment
Your corner for Haworthia Cooperi under $500 should be easy to reach for watering, inspecting, and simply enjoying. Leave enough space to comfortably maneuver a watering can between shelves. If the corner is behind furniture, you will neglect the plants.
Consider sight lines from your favorite chair or desk. A beautiful succulent display brings daily joy when visible. Position the most visually striking plants at eye level. Reserve lower shelves for larger pots and upper shelves for smaller specimens that benefit from being closer to lights.
Essential Equipment and Supplies
Grow Lights That Deliver Results
For a corner for Haworthia Cooperi under $500, full-spectrum LED panels or bars offer the best value. Look for lights with adjustable intensity and timer functions. The Mars Hydro TS600, Spider Farmer SF1000, or similar 100-watt actual draw panels cover a 2×2 foot area beautifully and cost $80-120 each.
If you prefer a more modular approach, 4-foot LED shop lights (4000K-5000K) mounted under each shelf work well and cost $25-35 per fixture. Use two per shelf for even coverage. Avoid purple blurple lights — they make plants hard to assess for health issues and look unappealing in living spaces.
Mount lights 12-18 inches above the plants. Use adjustable hangers or shelf-mounted arms so you can raise them as plants grow. Run lights 12-14 hours daily. A $15 digital timer automates this perfectly.
Shelving Systems for Vertical Space
Metal wire shelving units (48x18x72 inches) cost $70-100 and hold tremendous weight. The open design allows light penetration and airflow. Add shelf liners ($10-15) to prevent pots from tipping through wires.
Wooden plant stands offer warmer aesthetics. Look for bamboo or pine tiered stands with 3-5 levels ($60-120). Ensure each shelf has at least 12 inches vertical clearance for lights and plant height. Wall-mounted floating shelves ($20-40 each) create a custom look but require secure installation into studs.
Whichever system you choose, test stability before loading plants. A fully loaded shelf unit can weigh 100+ pounds. Anchor tall units to the wall for safety, especially in homes with pets or children.
Containers and Drainage Solutions
Terracotta pots remain the gold standard for Haworthia Cooperi. Their porous walls wick excess moisture, reducing rot risk. Buy a range: 2.5-inch for offsets, 3.5-inch for young plants, 4-5-inch for mature specimens. Expect $2-6 per pot.
Always use pots with drainage holes. Cache pots (decorative outer pots without holes) work if you remove the inner pot for watering and let it drain completely before returning it. Saucers protect furniture — clear plastic ones cost pennies and disappear visually.
For a cohesive look, stick to one material and color family. Unglazed terracotta develops a beautiful patina over time. If you prefer glazed ceramics, ensure they have drainage holes and use a very gritty soil mix to compensate for reduced evaporation.
Soil Mix Components for Success
Commercial cactus/succulent mixes almost always retain too much moisture. Make your own for a fraction of the cost and better results. The basic recipe: 50% potting soil, 25% perlite, 25% pumice or coarse sand. For Haworthia Cooperi, I increase drainage to 60% inorganic (30% perlite, 30% pumice) with 40% organic matter.
Buy ingredients in bulk: 4 cubic feet potting soil ($15), 4 cubic feet perlite ($20), 2 cubic feet pumice ($25). This supplies dozens of repottings. Store extras in sealed bins to keep pests out.
Top dressing (decorative gravel, crushed granite, or pea gravel) costs $5-10 per bag and serves multiple purposes: it looks finished, prevents soil splash during watering, deters fungus gnats, and slightly stabilizes temperature at the soil surface.
Designing Your Layout
Creating Visual Hierarchy
A thoughtful layout transforms a plant collection into a designed display. Start with the largest, most structural plants as anchors — typically on the bottom shelf or center positions. Haworthia Cooperi varieties like ‘Truncata’ or ‘Obtusa’ make excellent focal points with their geometric rosettes.
Group plants by size and growth habit. Upright varieties together, clustering types together. This creates rhythm and makes care easier since similar plants have similar needs. Leave breathing room between pots — at least 2-3 inches — for airflow and visual separation.
Color and Texture Coordination
Haworthia Cooperi offers surprising variety: translucent green, blue-green, reddish tones under stress, variegated forms with cream or yellow stripes. Arrange to highlight these differences. Place a variegated specimen next to a deep green one for contrast. Cluster similar tones for harmony.
Pot color matters too. Terracotta’s warm orange complements green beautifully. If using glazed pots, choose a unified palette — all whites, all muted blues, all earth tones. Mixing too many pot colors creates visual chaos.
Incorporating Decorative Elements
Small decorative touches elevate your corner for Haworthia Cooperi under $500 from functional to magical. A few ideas that cost little but add much:
- Interesting rocks or crystals collected on walks (clean thoroughly first)
- Small ceramic or wooden animals tucked between pots
- Driftwood pieces as natural sculptures
- Miniature fairy garden accessories
- Framed botanical prints on the wall behind
- A small mirror to reflect light and visually expand the space
Less is more. Three to five well-chosen pieces have more impact than a cluttered collection. Rotate decor seasonally to keep the display fresh.
Plant Selection and Arrangement
Must-Have Haworthia Cooperi Varieties
Start your collection with these reliable, beautiful varieties that showcase the species’ diversity:
- Haworthia cooperi var. cooperi: The classic form with plump, translucent-tipped leaves in tight rosettes. Forgiving and readily available.
- Haworthia cooperi var. truncata: Flat-topped leaves with incredible windowed leaves that look like tiny green jewels. Slightly slower growing but stunning.
- Haworthia cooperi var. obtusa: Rounded, balloon-like leaves with deep windows. Very prolific offsetter.
- Haworthia cooperi ‘Variegata’: Cream-striped leaves add bright accents. More light-sensitive — protect from direct sun.
- Haworthia cooperi ‘Pilifera’: Bristly leaf margins add unique texture. Compact growth habit.
Budget $10-25 per plant depending on size and rarity. Local succulent societies, reputable Etsy sellers, and specialty nurseries offer better quality than big box stores. Join online communities for group buys and trades.
Complementary Succulents for Variety
While your corner focuses on Haworthia Cooperi, a few companion plants add interest without competing for care requirements. Excellent choices include:
- Haworthiopsis attenuata (Zebra Plant): Similar care, striking white stripes
- Gasteria species: Tongue-shaped leaves, shade tolerant
- Sempervivum (Hens and Chicks): Cold hardy, endless variety
- Echeveria (rosette types only): Similar form, more color range — but need brighter light
Limit companions to 20% of your display. Too many different genera create a disjointed look and complicate care routines.
Spacing for Airflow and Growth
Proper spacing prevents fungal issues and lets each plant develop its best form. Minimum 2 inches between pot rims. More for offset-heavy varieties that will fill in quickly. Plan for mature sizes, not current sizes.
Rotate pots quarterly so all sides receive equal light. This prevents leaning and promotes symmetrical growth. A lazy Susan on each shelf makes rotation effortless — $10-15 each and worth every penny.
Installation and Setup Process
Assembling Your Shelving System
Follow manufacturer instructions carefully. For wire shelving, use the included leveling feet to compensate for uneven floors. A carpenter’s level ensures each shelf sits perfectly horizontal — critical for even watering and light distribution.
If wall-mounting shelves, use a stud finder and heavy-duty anchors. Each shelf must support at least 50 pounds (pots + wet soil + plants). When in doubt, over-engineer the mounting. A collapsed shelf destroys months of growth in seconds.
Arrange shelves with 14-16 inches vertical spacing. This accommodates 12-inch light-to-plant distance plus plant height. Bottom shelf can sit 6-8 inches off the floor for easier access and better airflow.
Mounting and Positioning Lights
Hang lights before placing plants. Test coverage by turning them on in a dark room — you want even illumination across the entire shelf surface with minimal dark corners. Adjust height and angle as needed.
Run power cords neatly using adhesive cable clips ($5 for a pack). A single power strip with surge protection ($15) mounted to the shelving unit keeps everything organized. Label each plug with masking tape for easy troubleshooting.
Set timers to match your daily rhythm. Lights on at 7 AM, off at 9 PM mimics natural cycles and lets you enjoy the display in the evening. Adjust seasonally if desired — 14 hours in summer, 12 in winter.
Potting and Placing Your Plants
Water plants lightly a day before repotting — moist soil holds together better. Gently remove from nursery pots, loosen circling roots, and remove any dead lower leaves. Place a coffee filter or mesh square over the drainage hole to prevent soil loss.
Fill pot 1/3 with soil mix, position plant at same depth as before, fill around roots, and tap gently to settle. Do not pack soil tightly. Top with 1/4 inch decorative gravel. Wait 3-5 days before first watering to let any damaged roots heal.
Arrange pots on shelves according to your layout plan. Step back frequently to assess balance. Adjust until it feels right. Place saucers under each pot. Fill a few saucers with pebbles and water to create localized humidity zones if your air is very dry.
Ongoing Care and Maintenance
Watering Schedule and Techniques
Develop a routine rather than a rigid schedule. Check plants weekly by lifting pots — light pots need water, heavy ones do not. Or use a wooden skewer inserted deep into soil; if it comes out clean and dry, water. If soil clings, wait.
Water at the base, not on leaves. Use a narrow-spout watering can ($10-15) for precision. Water until it flows freely from drainage holes. Let drain 15 minutes, then empty saucers. Never let pots sit in standing water.
Track watering in a simple notebook: date, which plants watered, any observations. Patterns emerge that help you anticipate needs. Winter watering might be monthly. Summer could be weekly. Your specific conditions determine the rhythm.
Fertilizing for Optimal Health
Haworthia Cooperi are light feeders. Use a balanced liquid fertilizer (10-10-10 or 20-20-20) diluted to 1/4 strength. Apply during active growth (spring and fall) every 4-6 weeks. Skip summer dormancy and winter entirely.
Alternatively, incorporate slow-release fertilizer pellets into soil at repotting time. One application lasts 6-9 months. Osmocote Plus or similar succulent-formulated products work well. Less frequent attention required.
Flush soil with plain water every 3-4 months to prevent salt buildup from fertilizer. Water thoroughly 2-3 times in succession, letting drain completely each time.
Pest Prevention and Management
Prevention beats treatment. Inspect new plants thoroughly before introducing them. Quarantine for 2 weeks if possible. Check leaf undersides, crown centers, and soil surface weekly during watering.
Common pests: mealybugs (white cottony clusters), spider mites (fine webbing, stippled leaves), fungus gnats (tiny flies around soil). Isolate affected plants immediately.
For mealybugs: dab with 70% isopropyl alcohol on a cotton swab. Repeat weekly until gone. For spider mites: increase humidity, spray with neem oil weekly. For fungus gnats: let soil dry completely, use yellow sticky traps, apply mosquito bits to soil.
A $20 jeweler’s loupe (10x magnification) makes early detection easy. Worth owning for any serious succulent grower.
Seasonal Adjustments
Your corner for Haworthia Cooperi under $500 needs subtle seasonal tweaks:
- Spring: Repot root-bound plants. Resume fertilizing. Increase watering frequency. Check light levels as sun angle changes.
- Summer: Reduce fertilizing. Monitor for heat stress. Ensure good airflow. Watch for sunburn if natural light increases.
- Fall: Prime growth season. Fertilize. Propagate offsets. Adjust timers for shorter days if using only artificial light.
- Winter: Minimal watering. No fertilizer. Protect from cold drafts. Consider supplemental heat if corner drops below 60°F.
Troubleshooting Common Issues
Etiolation and Light Problems
Stretched, pale growth with wide gaps between leaves means insufficient light. Solutions: lower lights closer to plants, increase daily light hours, add supplemental lighting, or move to brighter location. Affected leaves will not revert, but new growth will be compact once light improves.
Sunburn appears as bleached white, brown, or red patches on upper leaf surfaces. Move plants further from lights or window. Add sheer curtain. Damaged leaves eventually dry and can be gently removed.
Rot and Overwatering Signs
Translucent, mushy leaves that fall off at a touch indicate rot. Black or brown soft spots at base confirm it. Immediately unpot, remove all rotted tissue with sterile knife, dust cuts with cinnamon (natural fungicide), let callus 3-5 days, then repot in fresh dry mix. Do not water for a week.
Prevention: always err on the side of underwatering. Haworthia Cooperi survives drought far better than flood. When in doubt, wait three more days.
Color Changes and Stress Responses
Red or purple tinges often indicate healthy stress from bright light — actually desirable in many varieties. Uniform deep red across the plant suggests too much light or cold stress. Pale yellowing suggests nutrient deficiency or root issues.
Variegated forms losing variegation need more light. All-green growth on a variegated plant will outcompete the variegated sections. Remove all-green offsets to preserve the cultivar’s character.
Expanding Your Collection Over Time
Propagating from Offsets
Haworthia Cooperi readily produces offsets (pups) around the base. Once an offset has its own roots and is at least 1/3 the mother plant’s size, it can be separated. Gently brush away soil to find the connection point. Cut with a clean, sharp knife. Let both cut surfaces callus 2-3 days before potting.
This is the most economical way to expand your corner for Haworthia Cooperi under $500. One mature plant can yield 5-10 offsets annually. Trade extras with other collectors for varieties you don’t have.
Leaf Propagation Techniques
Leaf propagation works but is slower for Haworthia than for Echeveria. Select plump, healthy leaves. Remove cleanly by rocking gently side to side — include the base where meristem tissue lives. Let callus 3-5 days. Lay on barely moist gritty mix. Mist lightly every few days. Roots and tiny plantlets appear in 4-12 weeks.
Success rates vary by variety. Truncata types propagate more readily from leaves than cooperi types. Offset propagation remains more reliable.
Budget-Friendly Acquisition Strategies
Grow your collection without growing your spending:
- Join local succulent society — plant swaps, bulk orders, knowledge sharing
- Follow reputable sellers on Instagram for flash sales
- Buy “ugly” discounted plants and rehabilitate them
- Split large multi-headed plants with friends
- Grow from seed (long-term project, very inexpensive)
- Ask nurseries for damaged-but-viable plants they’ll discount
Patience builds the best collections. A thoughtfully curated corner developed over two years surpasses an instantly filled but haphazard one.
Showcasing Your Creation
Photography Tips for Plant Photos
Document your corner for Haworthia Cooperi under $500 journey. Morning light (9-11 AM) provides the most flattering natural illumination. Use a white foam board as a reflector to fill shadows. Get down to plant level for intimate portraits. A clip-on macro lens for your phone ($15) reveals incredible leaf window details.
Share progress photos in online communities. The feedback and encouragement keep you motivated. Plus, you’ll inspire others to start their own budget-friendly succulent corners.
Sharing with the Community
Host a plant swap party. Bring offsets, extra pots, soil mix. Trade stories and tips. These gatherings build local plant networks that become invaluable resources. You’ll find mentors, trading partners, and friends who understand your obsession.
Consider donating extra plants to community gardens, school programs, or plant therapy groups. Sharing the joy of Haworthia Cooperi multiplies its value far beyond your corner.
Planning Future Upgrades
As your skills grow, you might want: automated watering systems, environmental controllers, higher-end lights, custom-built shelving, rare variegated specimens. Keep a wish list with estimated costs. Your original corner for Haworthia Cooperi under $500 proves you can create magic on a budget — future upgrades are just icing.
Conclusion
Building a corner for Haworthia Cooperi under $500 teaches you that constraints breed creativity. Every choice — from the $15 timer to the $80 grow light to the rescued terracotta pot — reflects care and intention. Your plants respond to that care with plump, windowed leaves that catch the light like living jewels.
Remember: the perfect corner evolves. Start with the essentials. Observe daily. Adjust thoughtfully. Enjoy the process as much as the result. That quiet corner in your home becomes more than a plant display — it becomes a daily reminder that beautiful things grow with patience, attention, and a little bit of knowledge.
Your Haworthia Cooperi collection will outlive many more expensive purchases. The satisfaction of nurturing these fascinating plants in a space you designed yourself? That is priceless. Happy growing.
Frequently Asked Questions
Can Haworthia Cooperi survive in a windowless corner with only artificial light?
Yes, Haworthia Cooperi thrives under full-spectrum LED grow lights alone. Provide 12-14 hours of light daily from lights positioned 12-18 inches above plants. Many collectors grow them successfully in basements and interior rooms with no natural light.
Why are my Haworthia Cooperi leaves turning brown and mushy?
Brown mushy leaves indicate rot from overwatering or poor drainage. Immediately unpot the plant, remove all rotted tissue with a sterile knife, dust cuts with cinnamon, let callus for 3-5 days, then repot in fresh dry gritty mix. Wait a week before watering.
Do I need to fertilize Haworthia Cooperi in a budget corner setup?
Light fertilizing during spring and fall active growth improves health. Use balanced liquid fertilizer at 1/4 strength every 4-6 weeks, or mix slow-release pellets into soil at repotting. Skip fertilizing entirely in summer dormancy and winter.
How do I prevent pests in my Haworthia Cooperi corner?
Inspect new plants thoroughly before adding them. Quarantine for 2 weeks if possible. Check weekly during watering. Use a 10x loupe for early detection. Good airflow, proper watering, and clean growing conditions prevent most infestations.
Can I mix other succulents with Haworthia Cooperi in the same corner?
Yes, but choose companions with similar light and water needs. Haworthiopsis, Gasteria, and some Sempervivum work well. Avoid mixing with high-light succulents like Echeveria or cacti that need different conditions. Limit companions to 20% of your display.
What is the minimum budget needed for a functional Haworthia Cooperi corner?
A basic functional setup costs $200-300: $50 for shop lights, $60 for wire shelving, $30 for pots, $25 for soil components, $40 for 4-5 starter plants, $15 for timer and accessories. The $500 budget allows higher quality components and a larger, more diverse collection.