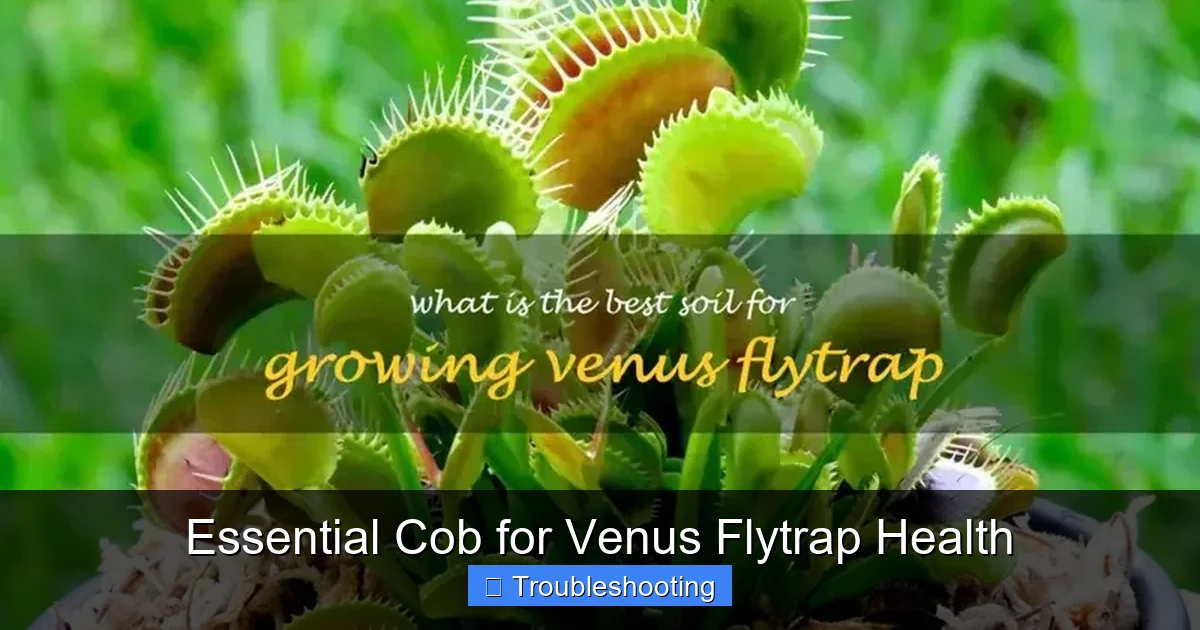
Essential Cob for Venus Flytrap Health
COB LED grow lights provide the intense, full-spectrum light Venus flytraps need for photosynthesis and trap production. This guide covers everything from choosing the right wattage and color temperature to positioning, timing, and troubleshooting common lighting issues for vibrant, healthy plants.
If you have ever tried growing a Venus flytrap on a windowsill, you know the struggle. The traps stay small. The leaves stretch long and pale. The plant looks sad, and eventually, it gives up. You water it with distilled water. You use the right soil mix. You even feed it the occasional bug. But something is still missing. That something is almost always light. And not just any light. These carnivorous plants are sun worshippers. They evolved in open bogs with zero shade. They want intense, direct sun for twelve to sixteen hours a day. Most indoor setups cannot provide that. This is where COB LED technology changes the game.
COB stands for Chip on Board. It is a packaging technology where multiple LED chips are mounted directly onto a single substrate. The result is a single, powerful light source that acts like one giant LED. This design produces incredible intensity and uniformity. For a Venus flytrap, that intensity is the difference between survival and thriving. Standard LED strips or panels often spread light too thin. They lack the punch to trigger strong trap production. A quality COB grow light delivers the photosynthetic photon flux density (PPFD) these plants crave. In this guide, we will walk through everything you need to know. We will cover spectrum, wattage, hanging height, photoperiod, and troubleshooting. By the end, you will know exactly how to build or buy the essential COB setup for Venus flytrap health.
Key Takeaways
- COB LEDs offer superior intensity: Chip-on-Board technology delivers concentrated light penetration that mimics natural sunlight better than standard LED panels.
- Target 4000K-5000K color temperature: This neutral white spectrum balances blue for vegetative growth and red for flowering and trap development.
- Provide 12-16 hours of light daily: Venus flytraps need long photoperiods during active growth, with adjustments for seasonal dormancy.
- Position lights 6-12 inches above plants: Proper distance prevents light burn while ensuring sufficient PPFD (photosynthetic photon flux density) for trap formation.
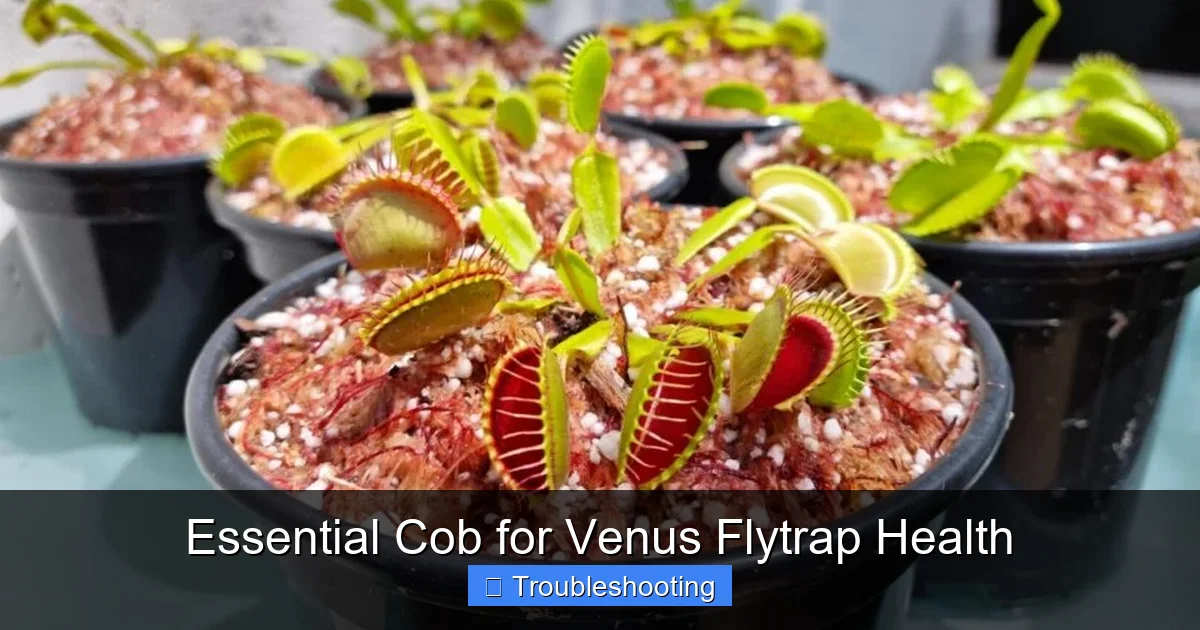
- Monitor for stress signals: Red traps indicate good light; pale, elongated leaves mean insufficient light; crispy edges suggest too much intensity.
- Combine with proper watering and soil: Even the best COB setup fails without distilled water, nutrient-free soil, and appropriate humidity levels.
- Invest in quality drivers and heat sinks: Reliable components ensure consistent output and longevity, protecting your investment and your plants.
Quick Answers to Common Questions
What does COB stand for in grow lighting?
COB stands for Chip on Board, a technology where multiple LED chips are packaged together as one lighting module for high intensity and uniform output.
How many hours of COB light do Venus flytraps need daily?
Venus flytraps need 14-16 hours of light during active growth (spring/summer) and 8-10 hours during winter dormancy.
What is the best color temperature for Venus flytrap COB lights?
A neutral white COB in the 4000K-5000K range provides the ideal balance of blue and red wavelengths for trap development and coloration.
How far should a COB light be from my Venus flytraps?
Start at 12 inches for a 50W COB and 18 inches for a 100W COB, then adjust based on plant response (compact growth = good; stretching = too far; burning = too close).
Can I use a COB light for Venus flytrap dormancy?
Yes, but reduce intensity to 50-100 µmol/m²/s and photoperiod to 8-10 hours, or skip lights entirely and provide a cold (35-45°F) dark dormancy period.
📑 Table of Contents
- Understanding Venus Flytrap Light Requirements
- Choosing the Right COB LED for Your Flytraps
- Building vs. Buying Your COB Setup
- Setting Up Your COB Light for Optimal Growth
- Troubleshooting Common COB Lighting Issues
- Integrating COB Lighting with Overall Care
- Advanced COB Strategies for the Dedicated Grower
- Conclusion
Understanding Venus Flytrap Light Requirements
Why Light Is the Limiting Factor
Venus flytraps (Dionaea muscipula) are native to a tiny region in the Carolinas. They grow in open, wet savannas and bogs. There are no trees overhead. There is no shade cloth. They bake in full sun from dawn until dusk. In cultivation, light is the number one reason plants fail. A south-facing window in the northern hemisphere might give you four to six hours of direct sun. That is not enough. The plant uses light to photosynthesize. It creates energy to grow traps, produce nectar, and snap shut. Without high light, the plant enters a slow decline. It makes fewer traps. The traps get smaller. The petioles (leaf stems) elongate desperately searching for photons. This is etiolation. It is a death spiral. You cannot fix etiolation with fertilizer. You cannot fix it with more water. You fix it with photons. Lots of them.
Photosynthetic Photon Flux Density (PPFD) Targets
Growers talk about PPFD. It measures how many photosynthetically active photons hit a square meter every second. The unit is micromoles per square meter per second (µmol/m²/s). For Venus flytraps, you want a minimum of 300 µmol/m²/s at the leaf level for maintenance. For vigorous growth and large traps, aim for 500 to 800 µmol/m²/s. Full outdoor sun hits 1500 to 2000 µmol/m²/s. You do not need to match the sun exactly. But you need to get close. A typical 50-watt COB LED at twelve inches can deliver 500 to 700 µmol/m²/s in a small footprint. That is perfect for a few plants. Standard T5 fluorescents or weak LED panels often struggle to break 200 µmol/m²/s at the same distance. That is why COB is essential. It packs the punch.
Daily Light Integral (DLI) Matters Too
PPFD is instantaneous. DLI is the total photons delivered over a full day. It is measured in moles per square meter per day (mol/m²/d). Venus flytraps want a DLI of at least 15 to 20 mol/m²/d during active growth. If you run a light at 500 µmol/m²/s for 12 hours, you get 21.6 mol/m²/d. That is in the sweet spot. If you run it for 16 hours, you get 28.8 mol/m²/d. That is excellent. If your light only puts out 200 µmol/m²/s, you would need 20+ hours to hit the minimum DLI. That leaves no dark period for respiration. COB lights let you hit high DLI numbers in a reasonable photoperiod. This keeps your plants on a natural rhythm.
Choosing the Right COB LED for Your Flytraps
Color Temperature: The 4000K to 5000K Sweet Spot
Color temperature is measured in Kelvin (K). It describes the visual “warmth” or “coolness” of white light. Lower K (2700K-3000K) is warm white, heavy in red. Higher K (6500K) is cool white, heavy in blue. Venus flytraps need both. Blue light drives compact, sturdy growth and thick leaves. Red light encourages flowering and trap pigmentation. A neutral white COB in the 4000K to 5000K range gives you a balanced spectrum. It mimics midday sun. Many growers swear by 4000K for vegetative growth. It has enough blue to prevent stretching. It has enough red to color up traps. Avoid “blurple” grow lights (heavy red/blue mix) unless you are supplementing. They make it hard to inspect plants for pests. They look weird in your living space. Neutral white COBs are pleasant to live with and perfect for plants.
Visual guide about Essential Cob for Venus Flytrap Health
Image source: epicgardening.com
CRI and R9 Values: Seeing True Colors
CRI stands for Color Rendering Index. It measures how accurately a light reveals colors compared to sunlight. A CRI of 100 is perfect. Most cheap LEDs are 70-80 CRI. High-quality COBs hit 90+ CRI. For carnivorous plants, high CRI matters. You want to see the true color of your traps. You want to spot early signs of fungus, aphids, or nutrient issues (rare but possible). Look for a high R9 value specifically. R9 measures deep red rendering. This helps you judge trap coloration. A COB with 95 CRI and high R9 is a joy to work under. It makes your growing area look like a sunlit greenhouse.
Wattage and Coverage Area
COB wattage determines coverage and intensity. A single 50-watt COB (actual draw, not “equivalent” marketing watts) covers roughly a 12×12 inch area at high intensity. A 100-watt COB covers 18×18 inches. For a typical windowsill shelf with four to six adult flytraps, a 50W to 100W COB is ideal. If you are lighting a larger rack, use multiple COBs spaced evenly. Do not buy based on “HID equivalent” claims. Look at actual power draw. Look at the PPFD map provided by the manufacturer. Reputable brands like Citizen, Cree, Bridgelux, or Samsung publish real data. Avoid generic Amazon “1000W” lights that draw 100 watts from the wall. They are misleading. A true 100W COB draws 100 watts. It runs warm. It needs a real heat sink.
Driver Quality and Dimming Capability
The driver is the power supply. It converts AC wall power to DC for the COB. A cheap driver fails fast. It flickers. It creates electromagnetic interference. It can kill your COB. Mean Well is the gold standard for drivers. Inventronics is excellent too. Look for a driver rated for the voltage and current of your specific COB. Constant current drivers are mandatory. Dimmable drivers are a huge plus. They let you dial intensity for seedlings, acclimation, or seasonal adjustments. 0-10V dimming or PWM dimming are common protocols. Some drivers have built-in potentiometers for manual dimming. This flexibility is worth the extra ten to twenty dollars. It extends the life of your COB by running it cooler at lower power.
Building vs. Buying Your COB Setup
The DIY Route: Maximum Control, Lower Cost
Building your own COB light is rewarding. You pick the exact COB, the exact driver, the exact heat sink. You save money versus pre-built fixtures. A basic DIY kit includes a COB holder, thermal paste, wires, a driver, a heat sink, and a frame. You need a soldering iron (or solderless connectors), a drill, and basic hand tools. Safety first: always unplug before wiring. Match the driver output voltage to the COB forward voltage. Match the driver current to the COB max current (or underdrive for longevity). Apply thermal paste thinly. Mount the COB firmly to the heat sink. Screws with nylon washers prevent shorts. Wire the driver to the COB observing polarity. Positive to positive, negative to negative. Test before final assembly. DIY lets you customize spectrum. You can mix a 4000K COB with a 6500K COB. You can add a few 660nm deep red supplemental LEDs. You build exactly what your space needs.
Visual guide about Essential Cob for Venus Flytrap Health
Image source: shuncy.com
Pre-Built Fixtures: Convenience and Warranty
Not everyone wants to solder. Pre-built COB fixtures are plug-and-play. Brands like HLG (Horticulture Lighting Group), ChilLED, and Timber offer excellent COB-based lights. They use top-bin COBs and Mean Well drivers. They come with warranties (usually 3-5 years). They are certified safe (UL/ETL listed). The downside is cost. You pay a premium for assembly and support. You are locked into their spectrum choice. For a beginner, a pre-built 100W or 200W quantum board or COB fixture is a fantastic start. It removes variables. You know it works out of the box. If you scale up later, you can always DIY expansion lights. Start simple. Get growing.
Heat Management: The Silent Killer
COBs are efficient, but they still produce heat. Roughly 60-70% of input power becomes heat. A 100W COB puts out 60-70 watts of heat. That is a lot in a small package. Without a heat sink, the COB will hit 100°C+ in seconds and die. The heat sink must be aluminum. It must have fins. It must be sized for the wattage. A rule of thumb: 50-100 square centimeters of fin surface area per watt. For 100W, you need a substantial chunk of aluminum. Active cooling (a fan) allows a smaller heat sink. Passive cooling is silent but bulky. Mount the COB in the center of the heat sink. Use thermal paste. If using a fan, blow air *across* the fins, not just at the COB. Monitor temperature. The COB case temperature should stay under 85°C ideally. Cooler is better for lifespan and efficiency. Heat also rises. If your light is in a closed tent, you need exhaust. Heat stresses plants too. Keep the growing area under 85°F (29°C).
Setting Up Your COB Light for Optimal Growth
Hanging Height and Light Spread
Height is your intensity knob. Closer equals more intense. Further equals wider spread but lower intensity. For a 50W COB, start at 12 inches above the tallest trap. For a 100W COB, start at 18 inches. Use a PAR meter if you have one. If not, watch the plants. Compact growth with deep red traps? Perfect. Elongated petioles, pale green? Lower the light. Crispy leaf margins, bleached traps? Raise the light. COBs have a narrow beam angle (often 90-120 degrees with a reflector/lens). The intensity drops fast at the edges. Center your plants under the hotspot. Rotate pots weekly for even exposure. If using multiple COBs, overlap the beam edges for uniformity. A light mover (slowly moving the light on a rail) creates incredible uniformity. It mimics the sun moving across the sky. It eliminates hotspots. It lets you run lights closer without burn. It is a pro move for serious growers.
Photoperiod: Mimicking the Seasons
Venus flytraps are temperate perennials. They need seasonal cues. In spring and summer (active growth), run 14 to 16 hours of light. This matches long summer days. In fall, taper down to 10 to 12 hours. In winter (dormancy), they need 8 to 10 hours of dim light, or total darkness in a cold fridge (35-45°F / 2-7°C). A simple mechanical timer works. Digital timers with battery backup are better (power outages won’t reset them). Smart plugs let you adjust from your phone. Consistency is key. Erratic photoperiods confuse the plant. It may skip dormancy or break dormancy early. Both weaken the plant long-term. During dormancy, if keeping under lights, drop intensity to 50-100 µmol/m²/s. Just enough to keep the rhizome alive. The plant will look rough. Traps will die back. This is normal. Do not panic. Do not feed. Just wait for spring.
Acclimating New or Weak Plants
Never blast a new plant with full COB power. A flytrap from a hardware store “death cube” has been in low light for months. A tissue culture plant has never seen real sun. Sudden high light causes photoinhibition. The chlorophyll gets destroyed faster than it can be rebuilt. Leaves bleach white. Traps burn. The plant may die. Acclimate over two weeks. Week one: 25% power (or double the hanging height) for 8 hours. Week two: 50% power for 10 hours. Week three: 75% power for 12 hours. Week four: Full power, full photoperiod. Watch closely. If you see any stress (whitening, crisping), pause the ramp-up. Hold at the previous level for a few more days. Patience here saves months of recovery. A strong, acclimated plant handles full intensity like a champ.
Troubleshooting Common COB Lighting Issues
Signs of Insufficient Light
This is the most common problem. The plant looks “leggy.” Petioles are long, thin, and floppy. Traps are tiny, maybe half the size they should be. Color is pale lime green. No red pigmentation inside traps. The plant may not snap shut vigorously. It might not produce traps at all, just photosynthetic leaves. Growth is slow. The rhizome may shrink. Fix: Lower the light. Increase photoperiod. Add a second COB. Check driver output (is it dimming?). Clean the lens (dust cuts 10-20% output). Move reflective material (Mylar, white paint) around the grow area to bounce light back. Do not fertilize. Fertilizer in low light creates weak, susceptible tissue. Light first. Always light first.
Signs of Excessive Light / Light Burn
Less common with COBs if you respect distance, but happens. Leaf margins turn brown and crispy. Traps develop bleached, white, or yellow patches that turn necrotic. The plant looks “sunburned.” New growth may be stunted, thick, and curled. The plant stops growing. Fix: Raise the light immediately. Dim the driver if possible. Increase humidity (burn is worse in dry air). Ensure the plant is well-hydrated (transpiration cools leaves). A gentle fan blowing across leaves helps dissipate heat. Damaged leaves won’t recover. Trim them if they are mostly dead. New growth will be adapted. If you just got the light, you likely started too close. Back off.
Flickering, Driver Failure, and Electrical Safety
Flicker stresses plants. It can be invisible to the eye but show on camera (phone video in slow motion). Cheap drivers flicker at 100/120Hz (mains frequency). Good drivers have low ripple (<5%). If your light flickers, replace the driver. Do not risk fire. Driver failure signs: light won't turn on, turns off randomly, dims significantly, smells like burning electronics. Unplug immediately. Check connections. Check driver specs vs COB specs. Did you overdrive the COB? Is the heat sink adequate? Overheating kills drivers fast. Mount drivers *outside* the grow tent if possible. Heat kills them. Use surge protectors. Use GFCI outlets near water. Water + electricity = danger. Keep cords tidy. Use drip loops so water runs off cords, not into outlets.
Spectrum Issues: Too Blue or Too Red
If you chose a 6500K COB, growth may be extremely compact, almost stunted. Leaves are thick, dark green, but traps are small. The plant looks “hard.” It lacks energy for trap expansion. If you chose a 3000K COB, petioles stretch. Traps are large but floppy. Color is poor. The plant looks “soft.” Fix: Swap COB or supplement. Add a 660nm red strip to a cool white COB. Add a 450nm blue strip to a warm white COB. Or just buy a 4000K COB next time. Spectrum balance is subtle but real. Most growers settle on 4000K-5000K and stay there. It works for everything from seedlings to flowering.
Integrating COB Lighting with Overall Care
Water Quality and Light Intensity
High light drives high transpiration. The plant pulls water fast. In a bog garden outdoors, water is unlimited. In a pot under a COB, the media dries quickly. You must use pure water. Distilled, reverse osmosis (RO), or clean rainwater only. Tap water kills flytraps. Minerals build up. High light accelerates this. Check moisture daily. Keep the soil wet but not soupy. A tray method works well: sit pots in 1-2 cm of water. Let the tray dry slightly between refills to aerate roots. High light + pure water + airy media = explosive growth. Neglect any one, and the system fails.
Soil Mix and Root Health Under High Light
Standard mix: 1:1 peat moss and perlite (or silica sand). No fertilizer. No compost. No potting soil. High light means the plant photosynthesizes hard. It sends sugars to roots. Roots need oxygen. Compacted, broken-down peat suffocates roots. Repot annually in late winter (dormancy). Fresh media renews aeration and acidity. A deep pot (6+ inches) buffers temperature and moisture. Shallow pots dry too fast under COBs. White pots reflect heat. Black pots absorb it. In a hot grow tent, white pots keep roots cooler. Healthy roots are white and crisp. Brown, mushy roots mean rot. Usually from bad water or anaerobic soil. High light cannot fix root rot. Fix the roots first.
Feeding: Light Makes the Trap, Bugs Fuel the Plant
Photosynthesis makes carbon skeletons (structure). Insects provide nitrogen and phosphorus (nutrients). You need both. Under high COB light, your plant will produce many large traps. It *can* catch more. If indoors, you must feed. One bug per trap per month is plenty. Freeze-dried bloodworms (rehydrated) work great. Live flies, mealworms, crickets work. Do not feed meat, cheese, candy. Trigger hairs must be stimulated twice within 20 seconds to close. Then struggle stimulates sealing and digestion. Do not trigger empty traps for fun. It costs the plant energy. A well-lit, well-fed plant divides. It produces offshoots. You get more plants. That is the sign of success.
Humidity and Airflow: The Invisible Partners
COBs heat the air. Warm air holds more moisture. Relative humidity drops. Flytraps like 50-70% RH. Low humidity causes trap margins to crisp, even without light burn. High humidity with no airflow causes fungal diseases (botrytis, rhizome rot). You need both. A humidifier (ultrasonic, with RO water) raises RH. A clip fan (oscillating) provides airflow. Aim for gentle leaf movement. Not a hurricane. The fan also strengthens petioles (thigmomorphogenesis). It prevents fungal spores from settling. It exchanges CO2 at the leaf surface. In a tent, use an inline fan for exhaust. Pull fresh air in. Exhaust hot, humid air out. This controls temperature, humidity, and CO2 all at once. A 4-inch inline fan with a carbon filter is standard for a 2×4 or 3×3 tent.
Advanced COB Strategies for the Dedicated Grower
Supplemental UV and Far-Red
Sunlight has UV-A, UV-B, and far-red (730nm). Standard COBs lack these. UV-B (280-315nm) stresses plants slightly, triggering protective compounds. In flytraps, this may enhance red coloration and nectar production. Far-red triggers shade avoidance (stretching) but also the Emerson Effect (boosts photosynthesis efficiency when combined with red). Some advanced growers add UV-B fluorescent tubes (reptile bulbs) for 1-2 hours midday. Others add 730nm far-red LEDs at end of day (15 mins) to promote sleep/dormancy signals. These are experiments. Not essential. But fun for optimization. Start with a great 4000K COB. Master the basics. Then tinker.
Light Movers: The Sun Simulator
A light mover (like Light Rail) slowly moves your COB along a rail. 6-10 feet over 10-20 minutes. This eliminates the “hotspot” directly under the light. It lights lower leaves. It lets you run the light closer (higher average PPFD) without burning the top. It mimics the sun’s arc. Plants grow more symmetrical. Internodal spacing tightens. Yield (trap count/size) increases 15-30% in many crops. For a display shelf, a 6-foot rail covers 4-6 large pots beautifully. It is a mechanical device. It needs maintenance. It makes noise. But the results speak. If you have the space and budget, it is the ultimate COB upgrade.
Multi-Spectrum Arrays: Tuning for Stage
Some DIYers build arrays with multiple COBs on one large heat sink. Example: Two 4000K COBs + one 6500K COB + one 3000K COB. Each on its own driver channel. This lets you tune spectrum by growth stage. Spring: Boost 6500K (blue) for compact vegetative growth. Summer: Balance all for trap production. Fall: Boost 3000K (red) for energy storage. Winter: Dim all, run 3000K only at low power for dormancy maintenance. This requires a multi-channel dimmer (like a 0-10V controller with 4 channels). It is overkill for most. But it shows the flexibility of COB technology. You are not locked into one spectrum forever.
Monitoring with PAR Meters and Data Loggers
Guessing light levels is like guessing water pH. You can do it, but a meter is better. A quantum PAR meter (Apogee, UNI-T, or budget options like the PPFD meter apps with a diffuser) lets you map your canopy. You see exactly where 500 µmol/m²/s ends. You adjust height scientifically. Data loggers (temperature, humidity, VPD) track environment over days. You spot trends. Night temps too high? Day VPD too low? Light turns on late? Data drives decisions. It turns growing from art into reproducible science. For a hobbyist, a $100 PAR meter pays for itself in saved plants and optimized growth within one season.
Conclusion
Growing Venus flytraps indoors is one of the most rewarding challenges in horticulture. These plants are not “hard.” They are just specific. They want what they evolved for: intense sun, pure water, nutrient-poor soil, and a cold winter rest. For the indoor grower, the sun is the hardest part to replicate. Windows fail. Fluorescents fall short. Standard LEDs lack punch. COB LED technology bridges that gap. It delivers the high PPFD and DLI these plants demand in a compact, efficient, long-lasting package. Whether you build a custom 50W COB for a single prized cultivar or hang a 200W pre-built fixture over a rack of fifty plants, the principle is the same. Match the spectrum (4000K-5000K). Manage the heat. Set the photoperiod for the season. Acclimate slowly. Watch the plants. They will tell you everything you need to know. Red traps, short petioles, vigorous snapping? You nailed it. Pale, stretched, struggling? Adjust the light. It is a dialogue. With a quality COB setup, you hold up your end of the conversation. Your flytraps will thank you with the most alien, beautiful, snap-happy growth you have ever seen. Welcome to the bright side of carnivorous plant growing.
Frequently Asked Questions
Do Venus flytraps absolutely require COB LEDs, or will other grow lights work?
Other lights can work if they deliver sufficient PPFD (500+ µmol/m²/s), but COB LEDs achieve this intensity most efficiently in small spaces. Standard LED panels, T5 fluorescents, or CFLs often fall short unless used in large arrays very close to plants.
How do I know if my COB light is the actual wattage advertised?
Check the actual power draw (watts from the wall) with a kill-a-watt meter. Reputable manufacturers list “actual power draw” vs “HID equivalent.” A true 100W COB draws ~100W. Cheap “1000W” lights often draw only 100-150W.
Should I run my COB light at 100% power all the time?
No. Use a dimmable driver. Run at 50-75% for acclimation, seedlings, or hot summer days. Full power is for mature, acclimated plants in peak growth. Dimming extends COB lifespan and reduces heat.
Can COB lights cause my Venus flytraps to skip dormancy?
Yes, if you maintain long photoperiods (14+ hours) and warm temperatures year-round. You must manually shorten the photoperiod to 8-10 hours and lower temperatures (35-50°F) in winter to induce proper dormancy.
Is it safe to build a DIY COB light if I have no electrical experience?
It carries risk. Use solderless connectors (Wago lever nuts) instead of soldering. Follow wiring diagrams exactly. Use a pre-tested driver-COB combo kit. If unsure, buy a pre-built fixture from a reputable brand like HLG or ChilLED.
Why are my Venus flytrap traps staying green instead of turning red under my COB light?
Red coloration requires both sufficient light intensity (500+ µmol/m²/s) AND a spectrum with adequate red wavelengths (660nm). A 6500K COB may lack red. Switch to 4000K or add a 660nm supplemental strip. Also ensure the plant is mature; seedlings often lack pigment.