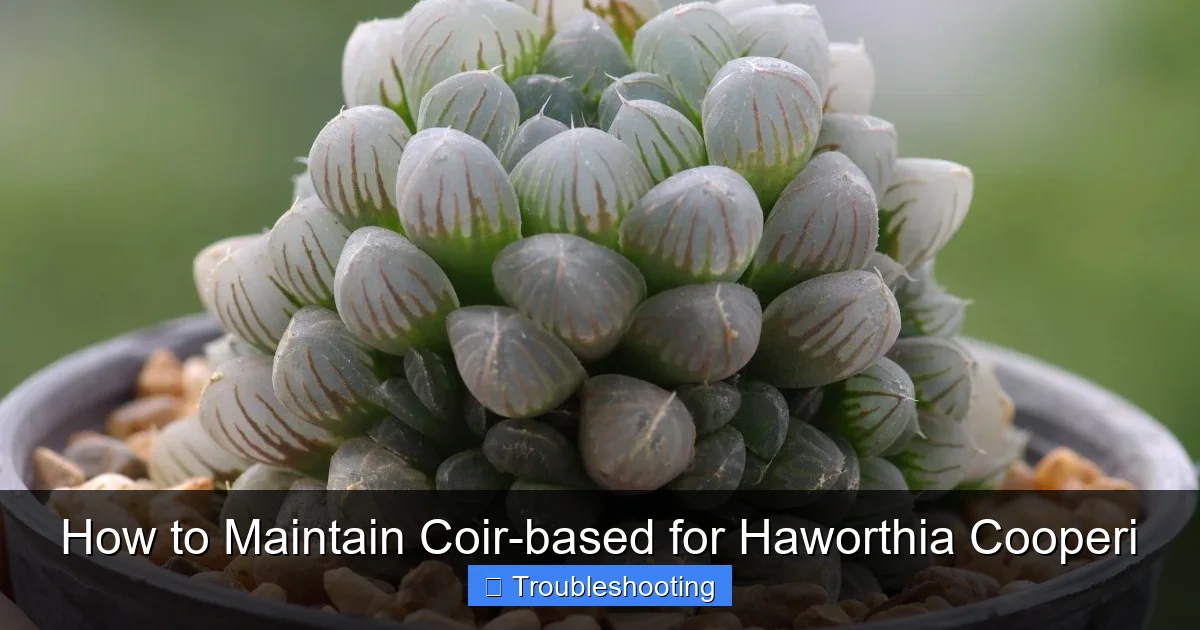
How to Maintain Coir-based for Haworthia Cooperi
Master the art of maintaining coir-based for Haworthia Cooperi with this comprehensive guide covering watering schedules, drainage optimization, and troubleshooting common issues like root rot and salt buildup. Discover why coconut coir makes an excellent growing medium for these stunning succulents and how to keep your plants thriving year-round.
Key Takeaways
- Coir retains moisture well: Coconut coir holds water longer than traditional succulent mixes, so water less frequently to prevent root rot.
- Rinse before use: Always rinse new coir thoroughly to remove excess salts that can damage sensitive Haworthia roots.
- Mix with gritty amendments: Combine coir with 40-50% perlite, pumice, or coarse sand for optimal drainage and aeration.
- Monitor for compaction: Coir can compact over time; gently loosen the top layer monthly to maintain airflow to roots.
- Watch for salt buildup: Flush the medium every 2-3 months with distilled water to prevent mineral accumulation from fertilizer.
- Adjust seasonally: Reduce watering significantly during winter dormancy when Haworthia Cooperi growth slows naturally.
- Repot every 1-2 years: Refresh coir-based mix annually or biennially as it breaks down and loses structural integrity.
Quick Answers to Common Questions
How often should I water Haworthia Cooperi in coir?
Water when the top 1-2 inches of coir feel dry – typically every 7-10 days in spring/fall, every 14-21 days in summer, and every 3-4 weeks in winter. Always check with your finger or a skewer rather than following a strict calendar.
Do I need to rinse coconut coir before using it for Haworthia?
Yes, absolutely. Rinse coir at least three times to remove excess salts that can damage Haworthia roots. Even pre-washed coir benefits from additional rinsing. Buffered coir still needs rinsing, just less thoroughly.
What’s the best coir mix ratio for Haworthia Cooperi?
Use 50% rinsed coir, 25% coarse perlite, 15% pumice, and 10% coarse sand or poultry grit. This balances moisture retention with the sharp drainage these succulents require.
Why is my coir mix turning green on top?
Green algae on the surface indicates the coir is staying too wet for too long. Let the top half-inch dry completely between waterings, increase airflow, and top-dress with coarse pumice or grit to create a dry barrier.
When should I repot Haworthia Cooperi in coir mix?
Repot every 12-18 months in spring, or when water runs through instantly, roots circle densely, or the mix looks broken down. Fresh coir mix prevents compaction and salt buildup issues.
📑 Table of Contents
- Why Coir Works Wonders for Haworthia Cooperi
- Understanding Your Haworthia Cooperi’s Needs
- Creating the Perfect Coir-Based Mix
- Watering Coir-Based Haworthia Cooperi Correctly
- Preventing and Solving Common Coir Problems
- Fertilizing in a Coir Medium
- Repotting and Long-Term Coir Maintenance
- Troubleshooting Specific Scenarios
- Advanced Tips for Coir Success
- Conclusion: Your Coir Journey Starts Now
Why Coir Works Wonders for Haworthia Cooperi
If you’ve ever struggled with keeping your Haworthia Cooperi happy, you’re not alone. These beautiful little succulents with their translucent windowed leaves can be surprisingly picky about their growing conditions. I remember when I first started growing them – I lost three plants in my first year because I just couldn’t get the soil right. That’s when I discovered coconut coir, and honestly, it changed everything for my collection.
Coir-based for Haworthia Cooperi has become increasingly popular among succulent enthusiasts, and for good reason. This natural fiber, extracted from coconut husks, offers a unique balance of moisture retention and aeration that these particular plants seem to love. Unlike peat moss, which can become hydrophobic when dry, coir rewets easily. Unlike pure gritty mixes, it doesn’t dry out so fast that your Haworthia shrivels between waterings. It’s really the sweet spot for these window-leaved beauties.
But here’s the thing – coir isn’t a magic bullet you can just dump in a pot and forget about. It has its quirks. It can hold too much water if you’re not careful. It can compact over time. It often comes with salt residue from processing. And if you don’t amend it properly, you’ll end up with the exact problems you were trying to avoid. This guide walks you through everything you need to know to make coir work for your Haworthia Cooperi, not against it.
Understanding Your Haworthia Cooperi’s Needs
The Natural Habitat Clues
Before we dive into the specifics of coir maintenance, let’s talk about what Haworthia Cooperi actually wants. These plants come from the Eastern Cape of South Africa, where they grow tucked between rocks and in the shade of larger shrubs. They get seasonal rainfall, but their roots are never sitting in soggy soil. The rock crevices provide excellent drainage, while the surrounding vegetation and rock cover keep things from baking dry instantly.
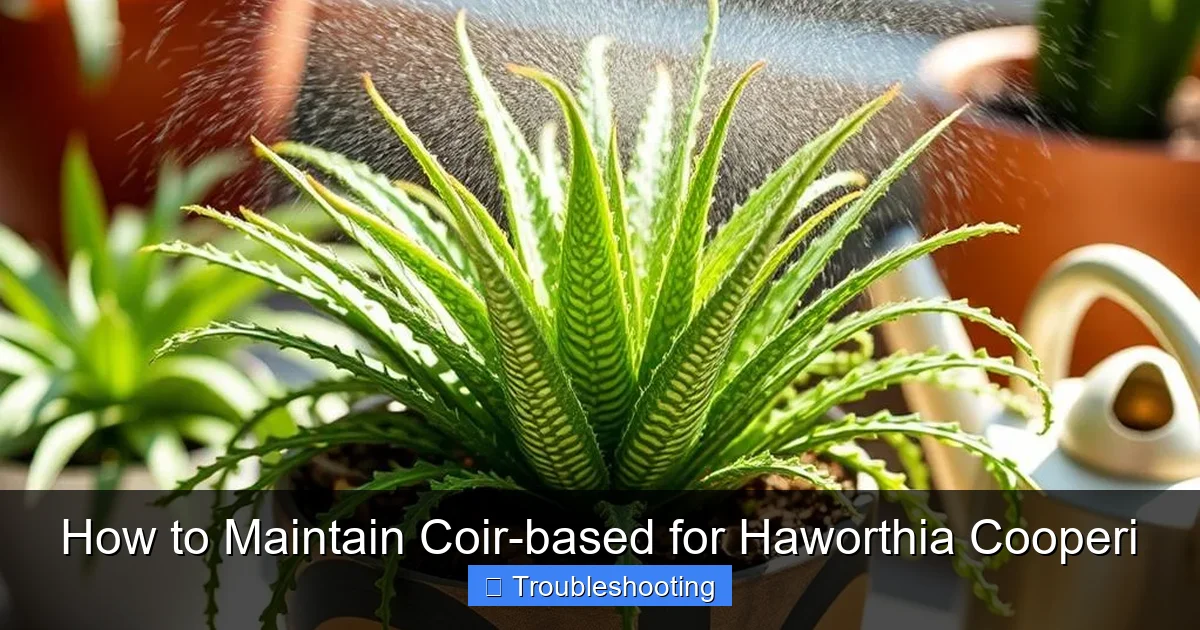
Visual guide about How to Maintain Coir-based for Haworthia Cooperi
Image source: goodhomegarden.com
This tells us three critical things about their preferences. First, they need sharp drainage – water should move through the medium quickly. Second, they appreciate some moisture retention – they don’t want to go bone dry for weeks like a cactus might. Third, they prefer slightly acidic to neutral pH, typically around 6.0 to 7.0. Coir naturally sits in this range, which is another point in its favor.
Root Structure Matters
Haworthia Cooperi has a fascinating root system. They develop thick, fleshy storage roots that can hold water for dry periods, plus finer feeder roots that absorb moisture and nutrients. This dual root system is why they’re so susceptible to rot – those thick storage roots have no defense against fungal pathogens when they stay wet too long. But it’s also why they can handle short dry spells beautifully.
When you’re maintaining coir-based for Haworthia Cooperi, you’re essentially trying to create an environment where the feeder roots can access moisture regularly, but the storage roots never sit in stagnant water. It’s a balancing act, and your coir mix composition is the fulcrum.
Seasonal Growth Patterns
These plants have a distinct growth cycle. They actively grow in spring and fall when temperatures are mild. Summer heat often triggers a semi-dormancy where growth slows or stops. Winter brings another slowdown, especially if temperatures drop below 50°F (10°C). Your coir maintenance routine needs to shift with these seasons – same mix, totally different watering approach.
Creating the Perfect Coir-Based Mix
Starting with Quality Coir
Not all coir is created equal. You’ll find it sold as compressed bricks, loose bags, or pre-mixed products. For Haworthia Cooperi, I strongly recommend starting with high-quality buffered coir bricks. “Buffered” means the manufacturer has pre-treated it with calcium nitrate to displace excess sodium and potassium – a crucial step since Haworthia are salt-sensitive. If you can’t find buffered coir, you’ll need to do this yourself (more on that in a moment).
Look for coir labeled as “low EC” or “washed.” EC stands for electrical conductivity, which measures salt content. Lower is better. Avoid coir sold for reptile bedding or worm bins – these often have higher salt levels and may contain additives you don’t want near your succulents.
The Essential Rinse and Buffer Process
Even with quality coir, don’t skip the rinse. Here’s my process: break off a chunk of the brick, soak it in a bucket of water until fully expanded (usually 15-20 minutes), then drain through a fine mesh sieve. Repeat this rinse-drain cycle three times. This removes the bulk of residual salts. If you’re using unbuffered coir, add a tablespoon of calcium nitrate per gallon of water for the first soak, then rinse three times with plain water.
Let the rinsed coir drain until it’s moist but not dripping – what gardeners call “field capacity.” It should hold together when squeezed but crumble easily when poked. This is your base medium, ready for amendments.
Amendment Ratios That Work
Straight coir holds too much water for Haworthia Cooperi. You need to create air pockets and drainage channels. After years of experimentation, here’s the ratio that consistently works for me:
- 50% rinsed, buffered coir
- 25% coarse perlite (3-6mm grade, not the fine dusty stuff)
- 15% pumice or crushed lava rock (2-5mm)
- 10% coarse sand or fine poultry grit (not play sand – too fine)
This mix gives you the moisture retention of coir with the drainage of a gritty mix. The perlite creates macro-pores for air. The pumice adds weight and mineral content while maintaining pore space. The sand/grit prevents the perlite from floating to the top over time and adds stability.
Optional Additions for Long-Term Health
I like to incorporate a handful of worm castings per gallon of mix – about 5% by volume. This provides slow-release nutrients and beneficial microbes without the burn risk of synthetic fertilizers. Some growers add a pinch of dolomite lime per gallon to buffer pH long-term, though coir’s natural pH usually stays stable enough on its own.
Skip the charcoal, despite what some tutorials suggest. In a well-draining mix, charcoal just takes up pore space without providing meaningful benefits. And avoid water-retention crystals or polymers – they defeat the purpose of creating a fast-draining medium.
Watering Coir-Based Haworthia Cooperi Correctly
The Finger Test Method
Forget calendar watering. With coir-based for Haworthia Cooperi, you need to water based on actual moisture levels. The coir surface can look dry while the bottom of the pot is still quite wet. Stick your finger in up to the second knuckle. If it feels cool and damp, wait. If it feels barely cool or room temperature, it’s time to water.
For smaller pots where finger testing is awkward, use a wooden skewer or chopstick. Push it to the bottom, leave it for 30 seconds, then pull it out. If it comes out with dark, damp coir clinging to it, wait. If it’s mostly clean or just has dry fibers, water.
Seasonal Watering Frequency
During active growth (spring and fall), my Haworthia in coir mixes typically need water every 7-10 days. But this varies wildly with your conditions – humidity, pot size, light levels, air movement. In summer semi-dormancy, I stretch to every 14-21 days, watering just enough to prevent severe shriveling. Winter might be every 3-4 weeks, or even less if your plants are cool and dark.
The key principle: water thoroughly when you do water. Run water through until it streams from drainage holes. This flushes accumulating salts and ensures the entire root zone gets moistened. Then don’t water again until the mix has dried appropriately. This wet-dry cycle is healthier than frequent light sprinkles.
Water Quality Considerations
Haworthia Cooperi dislikes hard water and high mineral content. If your tap water has high TDS (total dissolved solids) above 200 ppm, consider using rainwater, distilled water, or RO (reverse osmosis) water. Coir doesn’t buffer minerals the way soil does – whatever’s in your water goes straight to the roots. I collect rainwater in barrels and use it exclusively for my Haworthia collection. The difference in root health is noticeable.
Bottom Watering vs. Top Watering
Both work, but they affect coir differently. Top watering flushes salts downward and out – good for preventing buildup. Bottom watering (setting the pot in a tray of water for 10-15 minutes) encourages deeper root growth and prevents coir surface crusting. I alternate: top water most times, bottom water every 3rd or 4th watering. This gives the benefits of both approaches.
If you bottom water, don’t leave pots sitting in water longer than 20 minutes. Coir acts like a sponge and will oversaturate. And always dump the tray water – don’t let it get reabsorbed.
Preventing and Solving Common Coir Problems
Salt Buildup: The Silent Killer
This is the number one issue with coir-based for Haworthia Cooperi. Fertilizer salts, minerals from water, and residual coir salts all accumulate over time. You’ll see white crust on the pot rim, on the coir surface, or even on the plant’s lower leaves. Roots become brown and crispy instead of white and firm. Growth stalls despite proper care.
The fix is simple but requires discipline: flush monthly during growing season. Take the pot to a sink and run 3-4 pot volumes of distilled or RO water through the mix. Let it drain completely. Do this instead of a regular watering. If you see heavy crusting, do a double flush – wait an hour, then flush again. This single practice prevents 90% of coir-related Haworthia problems.
Compaction and Hydrophobicity
Over time, coir fibers break down and settle. The once-airy mix becomes dense, water runs straight down the sides without penetrating (hydrophobicity), and roots suffocate. You’ll notice water pooling on top or running out drainage holes instantly without wetting the center.
Prevent this by gently aerating the top inch monthly with a chopstick or fork – just loosen, don’t stab roots. Top-dress with fresh coir-perlite mix annually to refresh the upper layer. And repot completely every 12-18 months. When repotting, shake off as much old mix as possible without damaging roots. The old coir makes great compost or garden mulch – just don’t reuse it for succulents.
Fungus Gnats and Algae
Coir’s moisture retention can attract fungus gnats, especially if the surface stays damp. You’ll see tiny black flies around the pot. Their larvae feed on organic matter and sometimes root hairs. Algae (green slime on the surface) indicates similar over-moist conditions.
Solutions: let the top half-inch dry completely between waterings. Top-dress with 1/4 inch of coarse pumice or poultry grit – this creates a dry barrier adults won’t lay eggs in. Yellow sticky traps catch adults. For active infestations, water with mosquito bits (Bacillus thuringiensis israelensis) dissolved per package directions – safe for plants, deadly for larvae.
Root Rot Recognition and Recovery
Even with perfect coir maintenance, rot happens. Signs: leaves turning translucent and mushy (not the normal window translucency), black/brown mushy roots, plant feeling loose in the pot, foul smell from the mix. If you catch it early – just a few affected roots – unpot, trim all dark/soft roots with sterile scissors, dust cuts with cinnamon or sulfur powder, let callus 24 hours, then repot in fresh, drier mix. Hold water for a week.
If rot is advanced (most roots gone, stem affected), you’re in propagation territory. Behead above the rot, let the top callus, root in barely damp coir-perlite. It’s heartbreaking but Haworthia Cooperi propagates readily from leaf cuttings too. Don’t give up.
Fertilizing in a Coir Medium
Less Is Definitely More
Coir has virtually no nutrient content, so you must fertilize. But Haworthia Cooperi are light feeders, and coir holds fertilizer salts efficiently – a dangerous combination. I use 1/4 strength balanced fertilizer (like 20-20-20 or a dedicated succulent formula) every 3rd watering during active growth only. That’s roughly monthly. Zero fertilizer in summer heat or winter cold.
Choosing the Right Fertilizer
Avoid high-nitrogen formulas – they promote soft, etiolated growth that’s prone to rot and pests. Look for lower nitrogen, higher phosphorus and potassium (like 2-7-7 or similar). Organic options like diluted fish emulsion or seaweed extract work well but can smell. If using synthetic, choose one with micronutrients including calcium and magnesium – coir doesn’t supply these.
The Flush-Fertilize-Flush Rhythm
Here’s my proven schedule: Week 1 – plain water flush. Week 2 – plain water. Week 3 – fertilize at 1/4 strength. Week 4 – plain water flush. Repeat. This prevents salt accumulation while providing steady nutrition. If you see any leaf tip burn (brown crispy tips), skip the next fertilizer cycle and do an extra flush.
Slow-Release Alternative
If liquid fertilizing feels like too much tracking, incorporate 1/2 teaspoon of Osmocote Plus 15-9-12 (6-month formula) per gallon of mix at repotting time. This feeds gently for the season. But you lose the ability to adjust or stop feeding quickly, so only do this if you’re confident in your watering and flushing routine.
Repotting and Long-Term Coir Maintenance
When to Repot
Haworthia Cooperi in coir-based mixes typically need repotting every 12-18 months. Signs it’s time: water runs through instantly without wetting the center, the plant has outgrown the pot (rosettes touching the rim), roots are circling the bottom densely, or the mix looks broken down and dark. Spring is ideal – the plant enters active growth and recovers fastest.
The Repotting Process Step by Step
Water the plant 2-3 days before repotting – moist coir releases roots better than bone-dry or soaking-wet. Gently squeeze the pot sides to loosen. Tip upside down, supporting the plant, and slide the pot off. Don’t pull on the leaves.
Examine roots. Healthy ones are pale, firm, with white tips. Trim any dead, mushy, or circling roots. Shake off old mix – I use a soft brush for the last bits. Don’t wash roots; the coir dust helps protect root tips.
Choose a pot only 1 inch wider than the root mass. Haworthia prefer snug pots. Ensure drainage holes – at least three for a 4-inch pot. Add a mesh square over holes (prevents mix loss, keeps pests out). Add a shallow layer of plain pumice at the bottom – this creates a drainage reservoir, not a “drainage layer” (which science shows doesn’t work).
Position the plant at the same depth it was growing. Fill with fresh mix, tapping the pot to settle – don’t pack. The crown should sit slightly above the mix surface to prevent water pooling in the center. Wait 3-5 days before watering to let root wounds callus.
Pot Material Matters with Coir
Terracotta is my top choice for coir-based Haworthia. It breathes, wicking excess moisture from the mix sides. Plastic works fine if you’re disciplined about watering – just know the mix stays wet longer. Glazed ceramic is the riskiest – no breathability, often only one drainage hole. If using glazed, add extra perlite to your mix and be extra cautious with water.
Pot depth: Haworthia Cooperi roots grow mostly horizontally. Shallow pots (depth equals width or less) work better than deep ones. Deep pots leave a wet zone at the bottom the roots never reach – a rot trap.
Post-Repot Care
Place newly repotted plants in bright indirect light, not direct sun, for 2 weeks. No fertilizer for 4-6 weeks – fresh mix has enough nutrients. Watch for new root growth (white tips visible at drainage holes) as your signal that the plant has settled. Then resume normal care.
Troubleshooting Specific Scenarios
Scenario: Leaves Turning Red/Brown at Tips
This usually means one of three things: too much direct sun, fertilizer burn, or salt buildup. If the plant gets more than 2-3 hours direct sun, move it. If you fertilized recently, flush heavily. If neither, check your water quality and flush monthly. Coir shows salt stress faster than soil because there’s no buffering capacity.
Scenario: Plant Looks Shriveled Despite Regular Watering
Check roots. If they’re healthy, your coir may have gone hydrophobic – water runs around the dry center. Submerge the pot in water for 10 minutes to rewet fully. Then aerate the surface and consider repotting if the mix is old. If roots are dead/rotted, the plant can’t uptake water regardless of mix moisture – follow rot recovery steps.
Scenario: White Crust on Pot Rim and Mix Surface
Classic salt buildup. Flush immediately with 4-5 pot volumes of distilled water. Review your fertilizer strength and frequency. Switch to rainwater or RO water if using tap. Scrape off the top 1/4 inch of crusty mix and replace with fresh. This is preventable with monthly flushing – don’t wait for visible crust.
Scenario: Mold or Mushrooms on Mix Surface
Surface mold (white fuzzy patches) is usually harmless saprophytic fungi breaking down organic matter. Scrape it off, increase airflow, let surface dry more between waterings. Mushrooms indicate the same – decaying organic matter. Remove them, same treatment. Neither hurts the plant directly, but both signal overly damp surface conditions.
Scenario: Slow Growth, Pale Color
Could be under-fertilizing, insufficient light, or pH drift. Coir pH can drift slightly acidic over time. Test with a soil pH meter (probe type, not strips). If below 5.5, top-dress with 1 teaspoon dolomite lime per 4-inch pot, water in. If light is low (etiolated, stretched growth), move to brighter spot gradually. If neither, try a weak fertilizer application and observe for 2 weeks.
Advanced Tips for Coir Success
Customizing for Your Climate
In humid climates (Florida, Southeast Asia, UK), increase gritty amendments to 60% total – more perlite, pumice, grit. Coir stays wet too long in humidity. In arid climates (Arizona, inland Australia), you can go to 60% coir – the air pulls moisture fast. In temperate zones with distinct seasons, the 50/50 split works year-round with watering adjustments.
Using Coir for Propagation
Coir excels for Haworthia leaf propagation. Use 70% fine coir (the dust/small fibers sifted from your main batch), 30% fine perlite. Moisten barely. Lay leaves on surface, don’t bury. Cover with clear dome or bag for humidity. Vent daily. Roots appear in 3-6 weeks. The coir holds steady moisture without rotting the leaf base – better than pure perlite or soil for this purpose.
Mixing Large Batches Efficiently
If you have multiple Haworthia, mix in bulk. Use a large storage tote. Hydrate several coir bricks, rinse in batches in a wheelbarrow with drainage holes drilled. Mix amendments on a tarp – fold the tarp over itself to blend thoroughly. Store in sealed containers, slightly moist. Label with date and ratio. This saves enormous time and ensures consistency across your collection.
Monitoring with Technology
Soil moisture meters (the probe type) work surprisingly well in coir. Calibrate by testing known dry and known wet spots. Aim for “3-4” on a 1-10 scale at watering time for active growth. Bluetooth sensors that log data to your phone are great for tracking drying patterns – you’ll learn your exact intervals for each pot size and location.
Conclusion: Your Coir Journey Starts Now
Maintaining coir-based for Haworthia Cooperi isn’t complicated, but it does require attention and adaptation. The rewards are worth it – I’ve seen my plants develop thicker roots, better color, and more vigorous offset production since switching to a well-managed coir mix. They just seem happier in a medium that mimics the moisture-retentive-yet-draining rock crevices of their homeland.
Start with one plant if you’re unsure. Convert a single Haworthia to the 50/25/15/10 mix, follow the watering and flushing schedule, and observe for a few months. Compare it to your other plants. Take photos. Keep notes. You’ll quickly see whether this approach works for your conditions.
Remember: every grower’s environment is different. Your humidity, light, water quality, and temperature create a unique combination. The principles stay the same – sharp drainage, regular flushing, seasonal watering adjustments – but the exact timing and ratios may need tweaking. Trust your observations over any schedule, mine included.
And most importantly, enjoy the process. There’s something deeply satisfying about mastering a growing medium, about understanding the dialogue between plant and substrate. Your Haworthia Cooperi will teach you what they need if you pay attention. The coir is just the language they speak particularly well.
Happy growing, and may your windows stay translucent and your roots stay white.
Frequently Asked Questions
Can I use straight coconut coir without amendments for Haworthia Cooperi?
No, straight coir retains too much moisture and lacks adequate aeration for Haworthia Cooperi’s sensitive roots. Always amend with at least 40-50% gritty materials like perlite, pumice, and coarse sand to create proper drainage and prevent root rot.
How do I know if my Haworthia Cooperi has root rot in coir?
Signs include mushy translucent leaves (beyond normal window transparency), black or brown soft roots, a loose/wobbly plant in the pot, and a foul sour smell from the mix. Healthy roots are firm and pale with white tips.
Is bottom watering better than top watering for coir-based Haworthia?
Both methods have benefits. Top watering flushes salts out; bottom watering encourages deeper roots and prevents surface crusting. Alternate between them – top water most times, bottom water every 3rd-4th watering for best results.
What fertilizer should I use for Haworthia Cooperi in coir?
Use a low-nitrogen, balanced fertilizer at 1/4 strength every 3rd watering during active growth only (spring/fall). A 2-7-7 or similar ratio works well. Always flush with plain water monthly to prevent salt buildup in the coir.
Why does my coir mix get hard and compacted over time?
Coir fibers break down and settle, reducing pore space. Prevent this by gently aerating the surface monthly with a chopstick, top-dressing annually with fresh mix, and repotting completely every 12-18 months before compaction becomes severe.
Can I reuse old coir mix when repotting Haworthia Cooperi?
It’s not recommended. Old coir has broken-down structure, accumulated salts, and potential pathogen buildup. Discard used mix (it’s great for garden beds or compost) and start fresh with new rinsed, buffered coir and amendments for optimal plant health.