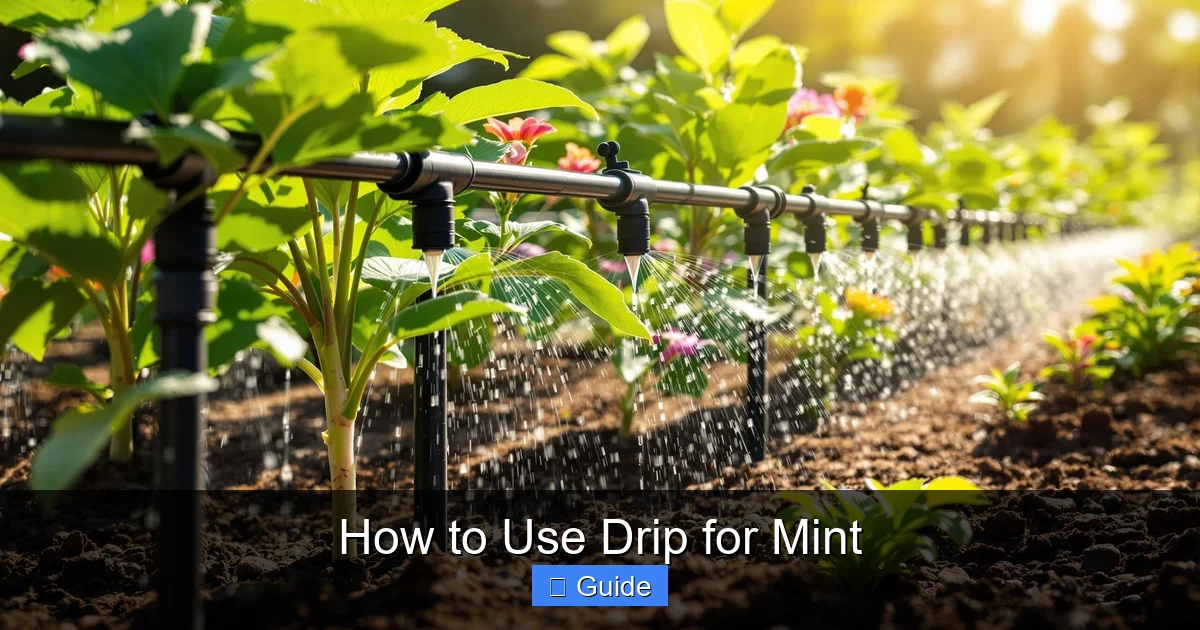
How to Use Drip for Mint
Drip irrigation is the most efficient way to water mint, delivering moisture directly to roots while keeping foliage dry. This guide walks you through system selection, installation, scheduling, and maintenance so you can grow lush, flavorful mint with minimal water waste and effort.
Key Takeaways
- Drip irrigation saves water: Uses 30-50% less water than sprinklers by targeting root zones directly
- Prevents fungal diseases: Keeps mint leaves dry, reducing powdery mildew and rust risk
- Consistent moisture is key: Mint thrives with steady soil moisture — drip systems automate this perfectly
- Timer automation saves time: Set schedules based on season and climate for hands-free watering
- Regular maintenance prevents clogs: Flush lines monthly and check emitters each season
- Mulch enhances efficiency: Organic mulch over drip lines reduces evaporation by up to 70%
- Adjust for container vs. ground: Container mint needs more frequent, shorter cycles than in-ground plantings
Quick Answers to Common Questions
How often should I run drip irrigation for mint in summer?
In hot summer weather, run drip irrigation for mint 20-30 minutes daily or every other day. Adjust based on soil moisture — the top 3 inches should stay evenly moist like a wrung-out sponge.
Can I use drip irrigation for mint in containers?
Yes, container mint benefits greatly from drip. Use 1/4-inch micro-tubing with 0.5-1 GPH emitters per pot. Run short cycles (10-15 minutes) 1-2 times daily in summer since containers dry faster than ground beds.
What emitter spacing is best for mint beds?
12-inch emitter spacing on inline drip tubing works well for mint. The shallow, spreading roots will colonize the moist zones between emitters. For heavy clay soil, 6-inch spacing with 0.5 GPH emitters improves lateral water spread.
How do I prevent clogged emitters in my mint drip system?
Install a 150-200 mesh filter at the head assembly. Flush lines monthly by removing end caps and running water for 2-3 minutes. Clean the filter screen every 4-6 weeks. Use pressure-compensating emitters if you have hard water.
Should I bury drip tubing for mint or leave it on the surface?
Leave tubing on the soil surface and cover with 2-3 inches of organic mulch (straw, shredded leaves, wood chips). This protects tubing from UV damage, reduces evaporation by 70%, and keeps emitters accessible for inspection. Do not bury — it makes clog detection and repair difficult.
📑 Table of Contents
- Why Drip Irrigation Works Perfectly for Mint
- Understanding Mint Water Needs Before You Start
- Choosing the Right Drip System for Your Mint
- Planning Your Mint Drip Layout
- Step-by-Step Installation Guide
- Programming Your Watering Schedule
- Maintenance: Keep Your System Running Clean
- Troubleshooting Common Mint Drip Issues
- Advanced Tips for Maximum Mint Quality
- Cost Breakdown: What to Expect
- Environmental Impact: Why Drip Matters Beyond Your Garden
- Conclusion: Your Mint Will Thank You
Why Drip Irrigation Works Perfectly for Mint
If you have ever grown mint, you know it has a reputation. It spreads aggressively, tolerates neglect, and bounces back from drought like a champion. But here is the thing — mint grown with inconsistent watering produces tough, bitter leaves with less essential oil content. The flavor suffers. The texture suffers. And honestly, so does your harvest.
Drip irrigation changes the game completely. Instead of guessing when to water or drowning the plant one day and forgetting it the next, you give mint exactly what it wants: consistent, even moisture at the root zone. No wet leaves. No runoff. No wasted water. Just steady hydration that produces tender, aromatic leaves all season long.
I switched to drip for my mint beds three years ago, and the difference was immediate. The plants stayed lush through July heat waves. Powdery mildew — my old nemesis — virtually disappeared. And I spent less time dragging hoses around. Whether you are growing mint in raised beds, containers, or a dedicated herb patch, this guide will walk you through everything you need to know to set up and run a drip system that works.
Understanding Mint Water Needs Before You Start
Mint Prefers Consistently Moist Soil
Mint (Mentha species) is native to stream banks and damp meadows. Its roots sit close to the surface, spreading horizontally just inches below ground. This shallow root system means the plant cannot reach deep moisture reserves during dry spells. It needs the top 4-6 inches of soil to stay evenly moist — not soggy, not bone dry.
Visual guide about How to Use Drip for Mint
Image source: i.ytimg.com
When soil moisture fluctuates wildly, mint responds by concentrating essential oils as a stress response. A little stress can intensify flavor, but chronic drought stress makes leaves small, tough, and bitter. On the flip side, waterlogged soil suffocates roots and invites root rot. The sweet spot is soil that feels like a wrung-out sponge when you press a finger into it.
Container Mint Has Different Demands
If you are growing mint in pots — which is smart, given its invasive nature — the soil volume is limited. Containers dry out faster, especially in wind or full sun. A 12-inch pot in July heat might need water every day. Drip irrigation handles this beautifully because you can run short, frequent cycles that keep the root ball uniformly moist without waterlogging.
Seasonal Adjustments Matter
Spring growth is vigorous and thirsty. Summer heat increases evaporation. Fall slows growth, and winter dormancy (in colder zones) means almost no water needed. A good drip system with a timer lets you adjust run times monthly or even weekly to match these shifts. We will cover scheduling in detail later.
Choosing the Right Drip System for Your Mint
Inline Drip Tubing vs. Individual Emitters
For mint beds, inline drip tubing (also called emitter tubing) is usually the best choice. This tubing has emitters built in at regular intervals — typically 6, 12, or 18 inches apart. You lay it along the row or snake it through the bed, and every emitter waters a small zone. Mint roots will find each wet spot and colonize the area between them.
Individual emitters (button drippers, flag emitters) work well for container mint or widely spaced plants. You punch a hole in the main supply line, insert a barbed connector, and run 1/4-inch micro-tubing to each pot. This gives precise control but takes more setup time.
Emitter Flow Rates Explained
Emitters are rated in gallons per hour (GPH). Common options:
- 0.5 GPH: Slow, gentle application. Best for clay soil, slopes, or containers where water needs time to soak in laterally.
- 1 GPH: The sweet spot for most loamy garden soils and raised beds.
- 2 GPH: Faster output. Good for sandy soil that drains quickly, but can cause runoff on heavier soils.
For mint in typical garden soil, 1 GPH emitters spaced 12 inches apart is a reliable starting point. If your soil is heavy clay, drop to 0.5 GPH and run longer. If it is sandy, 2 GPH with shorter runs works better.
Pressure Compensating vs. Non-Compensating
Pressure-compensating (PC) emitters deliver the same flow rate regardless of pressure changes along the line. If your mint bed is on a slope or you run a long line (over 100 feet), PC emitters are worth the extra cost. They ensure the emitter at the end of the line puts out the same water as the one at the start.
Non-compensating emitters are cheaper and fine for level beds under 50 feet with good pressure. Most inline drip tubing sold for home gardens is non-compensating. Check the packaging.
Drip Tape: The Budget Option
Drip tape is thin-walled, flat tubing with tiny slits or emitters. It is inexpensive, lays flat, and works great for annual vegetable rows. For perennial mint? Less ideal. It is fragile, easily damaged by tools or foot traffic, and typically lasts 1-2 seasons. If you are growing mint as a permanent planting, spend a little more on 1/2-inch polyethylene drip tubing. It lasts 7-10 years buried under mulch.
Planning Your Mint Drip Layout
Map Your Bed First
Before buying parts, sketch your mint area. Note dimensions, water source location, slope, and any obstacles. Mint spreads, so plan for the bed’s mature size, not just current plant spacing. A typical mint bed might be 3-4 feet wide. Run a header line (1/2-inch mainline) along one long edge, then run inline drip tubing perpendicular across the bed every 12-18 inches.
For a 4×8-foot raised bed, you would need:
- 8 feet of 1/2-inch mainline for the header
- Four 8-foot runs of inline drip tubing (spaced 12 inches apart = 32 feet total)
- Fittings: 1/2-inch tee, elbows, end caps, and barbed connectors for each drip line
- Stakes to hold tubing in place (one every 2-3 feet)
Container Mint Layout
For pots, run 1/2-inch mainline along a shelf, bench, or the ground behind containers. At each pot, install a 1/4-inch barbed tee or elbow, run micro-tubing to the pot, and terminate with a stake-mounted emitter or a small loop of 1/4-inch inline drip tubing circled on the soil surface. One 0.5-1 GPH emitter per 10-12 inch pot is usually sufficient.
Zoning for Different Needs
If you grow mint alongside other herbs with different water needs (rosemary, thyme, lavender prefer drier conditions), put mint on its own zone with its own timer program. A simple 2-zone timer costs $30-50 and saves you from overwatering drought-tolerant neighbors.
Step-by-Step Installation Guide
Gather Your Tools and Parts
You will need:
- 1/2-inch polyethylene mainline tubing
- Inline drip tubing (1/2-inch with built-in emitters) or 1/4-inch micro-tubing with individual emitters
- Barbed fittings: tees, elbows, couplers, end caps (match tubing size)
- Hole punch tool (for 1/2-inch tubing) or a small nail/awl
- Tubing stakes (wire or plastic, 6-8 inches long)
- Scissors or tubing cutter
- Backflow preventer (required by code in many areas)
- Pressure regulator (15-30 PSI for most drip systems)
- Filter (150-200 mesh) to prevent clogs
- Timer (battery-operated or smart WiFi)
- Hose thread adapter to connect to spigot
Pro tip: Buy 10-15% more tubing than your sketch shows. Mistakes happen, and extra length lets you adjust emitter placement.
Assemble the Head Assembly (At the Spigot)
Connect components in this order from the faucet outward:
- Timer (if battery-operated, install batteries first)
- Backflow preventer (anti-siphon valve)
- Filter (install with arrow pointing toward system)
- Pressure regulator
- Hose-to-1/2-inch tubing adapter
Hand-tighten plus a quarter turn with pliers. Do not overtighten plastic threads — they strip easily.
Lay Out the Mainline
Unroll 1/2-inch mainline along your planned header route. Let it warm in the sun for 30 minutes — warm tubing is flexible and easier to work with. Cut to length. Attach the hose adapter to the end connecting to the head assembly. Cap the far end with an end cap (flush it first by running water through briefly).
Install Drip Lines
For inline drip tubing: Punch holes in the mainline at your planned spacing (every 12-18 inches for a bed). Insert a barbed connector into each hole. Push the drip tubing onto each connector. Run drip lines across the bed. Cap the far end of each drip line with a flush valve or simple end cap (fold the end over and secure with a zip tie or figure-8 clamp).
For container emitters: Punch holes at each container location. Insert 1/4-inch barbed connectors. Run micro-tubing to each pot. Secure with stakes.
Secure Everything
Stake mainline every 3-4 feet. Stake drip lines every 2-3 feet and at every curve. Keep emitters positioned over the root zone, not against plant crowns. Mint stems can rot if constantly wet at the base.
Test and Flush
Before burying or mulching, run the system. Check every emitter for flow. Walk the lines looking for leaks at connections. Flush end caps by opening them briefly to clear debris. Once satisfied, close end caps.
Cover with Mulch
This step is non-negotiable for efficiency. Apply 2-3 inches of organic mulch (straw, shredded leaves, wood chips) over the drip lines. Mulch reduces evaporation, keeps soil temperature stable, suppresses weeds, and protects tubing from UV degradation. Leave a small gap around plant crowns.
Programming Your Watering Schedule
Start With a Baseline
There is no universal schedule. Your soil, climate, sun exposure, and season all matter. But here is a solid starting point for established mint in loamy soil with 1 GPH emitters spaced 12 inches apart:
- Spring (active growth): 20-30 minutes, 3-4 times per week
- Summer (hot, full sun): 20-30 minutes, daily or every other day
- Fall (slowing growth): 15-20 minutes, 2-3 times per week
- Winter (dormant, above freezing): 10 minutes, once a week or off
Container mint in summer: 10-15 minutes, 1-2 times daily.
The Finger Test — Your Best Calibration Tool
Two hours after a watering cycle ends, stick your finger 3 inches into the soil near an emitter. It should feel evenly moist — like a wrung-out sponge. Not muddy. Not dry and crumbly. Adjust run time up or down in 5-minute increments until you hit that sweet spot.
Cycle and Soak for Slopes or Clay
If water runs off before soaking in, split the run time into two or three shorter cycles spaced 30-60 minutes apart. Example: Instead of 30 minutes once, run 10 minutes, wait 45 minutes, run 10 minutes, wait 45 minutes, run 10 minutes. This lets water infiltrate between cycles. Most digital timers support multiple start times per day.
Smart Timers and Weather Integration
WiFi-enabled timers (Rachio, Orbit B-hyve, Rain Bird) connect to local weather data and automatically adjust schedules based on rain, temperature, and evapotranspiration. They cost $100-180 but can save 20-30% more water than a fixed schedule. If you travel or want truly hands-off management, they are worth it.
Maintenance: Keep Your System Running Clean
Monthly Flush Routine
Mineral buildup, algae, and sediment clog emitters over time. Once a month during the growing season:
- Remove end caps from each drip line.
- Run the system for 2-3 minutes at full pressure.
- Watch for clear water flowing out.
- Replace end caps.
This simple habit prevents 90% of clogging issues.
Filter Cleaning
Check the filter screen every 4-6 weeks. Unscrew the filter housing (relieve pressure first!), remove the screen, rinse under a hose, and reassemble. If your water is high in iron or sediment, clean more often.
Inspect Emitters Each Spring
Before the growing season, run the system and visually confirm every emitter is flowing. Clogged emitters can sometimes be cleared by removing them and soaking in vinegar for an hour, then rinsing. But inline emitter tubing cannot be unclogged emitter-by-emitter — if a section fails, replace that tubing run.
Winterizing in Cold Climates
If your ground freezes, you must drain the system before winter. Turn off the water supply. Remove the timer and store indoors (batteries can leak in freezing temps). Open all end caps. Use compressed air (low pressure, 30-40 PSI) to blow out remaining water, or simply let gravity drain if lines are sloped. Disconnect the head assembly and store. Mulch over the tubing left in place — it will be fine buried.
Repairing Leaks and Damage
Shovel cuts, rodent chews, and freeze cracks happen. Keep a repair kit handy: couplers, extra tubing, goof plugs (for accidental holes), and a hole punch. To repair: cut out the damaged section, insert a coupler on each end, and secure. Takes 2 minutes.
Troubleshooting Common Mint Drip Issues
Problem: Mint Leaves Yellowing, Stems Soft at Base
Cause: Overwatering or poor drainage. Crown rot.
Fix: Reduce run time or frequency. Ensure mulch is not piled against stems. Check that soil drains — amend heavy clay with compost. Move emitters 4-6 inches away from plant crowns.
Problem: Leaves Small, Curling, Flavor Harsh
Cause: Underwatering / inconsistent moisture.
Fix: Increase run time or add a cycle. Check for clogged emitters. Mulch if not already done. Container mint may need daily watering in heat.
Problem: Powdery Mildew on Leaves
Cause: Wet foliage from overspray, high humidity, poor air flow.
Fix: Drip should not wet leaves. Check for emitter misalignment or leaks spraying upward. Thin crowded plants. Water early morning so any incidental moisture dries fast.
Problem: Uneven Growth — Some Plants Huge, Others Stunted
Cause: Pressure drop at end of line, clogged emitters, or uneven spacing.
Fix: Verify all emitters flow equally. Switch to pressure-compensating tubing if run exceeds 100 feet or bed is sloped. Add a second feed line from the middle for long beds.
Problem: Water Pooling on Surface, Not Soaking In
Cause: Hydrophobic dry soil, compaction, or emitter rate too high for soil type.
Fix: Use cycle-and-soak. Lightly cultivate soil surface (careful of shallow roots). Switch to lower GPH emitters. Apply wetting agent (yucca extract-based) if chronic.
Advanced Tips for Maximum Mint Quality
Fertigate Wisely
Drip systems can deliver liquid fertilizer directly to roots (fertigation). Use a fertilizer injector (siphon mixer or Venturi injector) installed after the filter. For mint, apply a balanced organic liquid fertilizer (fish emulsion, kelp) at half strength every 3-4 weeks during active growth. Stop fertilizing 6 weeks before first frost. Flush lines with clean water after each fertigation to prevent biofilm buildup.
Use Soil Moisture Sensors
For precision, bury a capacitive soil moisture sensor in the root zone and connect to a smart timer. The timer waters only when moisture drops below your set threshold. This eliminates guesswork entirely. Sensors cost $15-40 each.
Harvest Timing and Water
For peak essential oil content, harvest mint mid-morning after dew dries but before heat peaks. Reduce watering 24-48 hours before a planned large harvest — slight drought stress concentrates oils. Resume normal schedule after cutting.
Companion Planting Considerations
Mint repels cabbage moths, aphids, and ants. Plant it near brassicas, tomatoes, or peppers — but keep it contained! Run a separate drip zone for mint so you can water it more than its drought-tolerant companions. A 2-zone timer handles this elegantly.
Cost Breakdown: What to Expect
Here is a rough estimate for a 4×8-foot raised bed with inline drip tubing:
- Head assembly (timer, backflow, filter, regulator, adapter): $45-85
- 1/2-inch mainline (20 ft): $8
- Inline drip tubing 1 GPH 12-inch spacing (50 ft roll): $18
- Fittings kit (tees, elbows, caps, connectors): $15
- Stakes (20 pack): $6
- Tools (punch, cutter): $12 (one-time)
- Mulch (3 cu ft bag): $6
- Total first season: ~$110-150
- Ongoing annual cost: ~$10-15 (filter screen, occasional tubing repair, mulch top-up)
Container setups cost less — $60-90 for 6-8 pots. Smart timers add $60-100 but pay back in water savings within 1-2 seasons in many regions.
Environmental Impact: Why Drip Matters Beyond Your Garden
Residential outdoor water use accounts for nearly 30% of total household consumption in the U.S., and up to 60% in arid regions. Sprinklers lose 30-50% to evaporation and wind drift. Drip irrigation operates at 90%+ efficiency. For a typical herb bed, switching from hand-watering or sprinklers to drip saves 1,500-3,000 gallons per growing season.
That is water left in aquifers and rivers. Less energy used for pumping and treatment. Less runoff carrying fertilizers into waterways. And because drip keeps foliage dry, you need fewer fungicide sprays — another win for beneficial insects and soil microbes.
If your municipality offers rebates for drip conversion (many do), the system pays for itself even faster. Check your water provider’s website.
Conclusion: Your Mint Will Thank You
Setting up drip irrigation for mint takes a Saturday morning and a modest investment. The payoff? Months of tender, aromatic leaves with a fraction of the water and effort. No more guessing. No more crispy edges in July. No more powdery mildew wiping out your mojito supply.
Start simple. A basic timer, inline tubing, and mulch will get you 90% of the benefits. Add a smart timer or moisture sensor later if you want. The most important step is just beginning — because every day you wait is another day of inconsistent watering.
Your mint wants steady moisture at its roots. Drip gives it exactly that. Hook it up, set the timer, and walk away. Come back to harvest. That is the garden dream, and it is completely achievable.
Frequently Asked Questions
Can I run fertilizer through my mint drip system?
Yes, you can fertigate mint using a fertilizer injector (siphon mixer or Venturi) installed after the filter. Use half-strength organic liquid fertilizer every 3-4 weeks during active growth. Always flush lines with clean water afterward to prevent biofilm and clogs.
How do I winterize drip irrigation for mint in freezing climates?
Turn off water supply, remove and store the timer indoors, open all end caps, and blow out lines with low-pressure compressed air (30-40 PSI) or let gravity drain. Disconnect the head assembly. Mulch over in-ground tubing — it survives winter fine buried.
What pressure regulator do I need for mint drip irrigation?
Most drip systems operate best at 15-30 PSI. Choose a regulator matched to your flow rate (typically 3/4-inch for garden systems). If household pressure exceeds 60 PSI, a regulator is essential to prevent emitter blowouts and tubing damage.
Why is my mint getting powdery mildew with drip irrigation?
Drip should not wet foliage. Check for misaligned emitters spraying upward, leaks at connections, or overspray from nearby sprinklers. Thin crowded plants for airflow. Water early morning so any incidental moisture dries quickly.
Can I use soaker hose instead of drip tubing for mint?
Soaker hoses work but are less precise. They “weep” water along their entire length, making it harder to control application rate and leading to uneven watering on slopes. Drip tubing with defined emitters gives consistent output, lasts longer (7-10 years vs. 2-3), and uses water more efficiently.
How do I know if my mint drip system is watering enough?
Two hours after watering, insert your finger 3 inches deep near an emitter. Soil should feel evenly moist like a wrung-out sponge — not muddy, not dry. Adjust run time in 5-minute increments until you hit this target consistently across the bed.