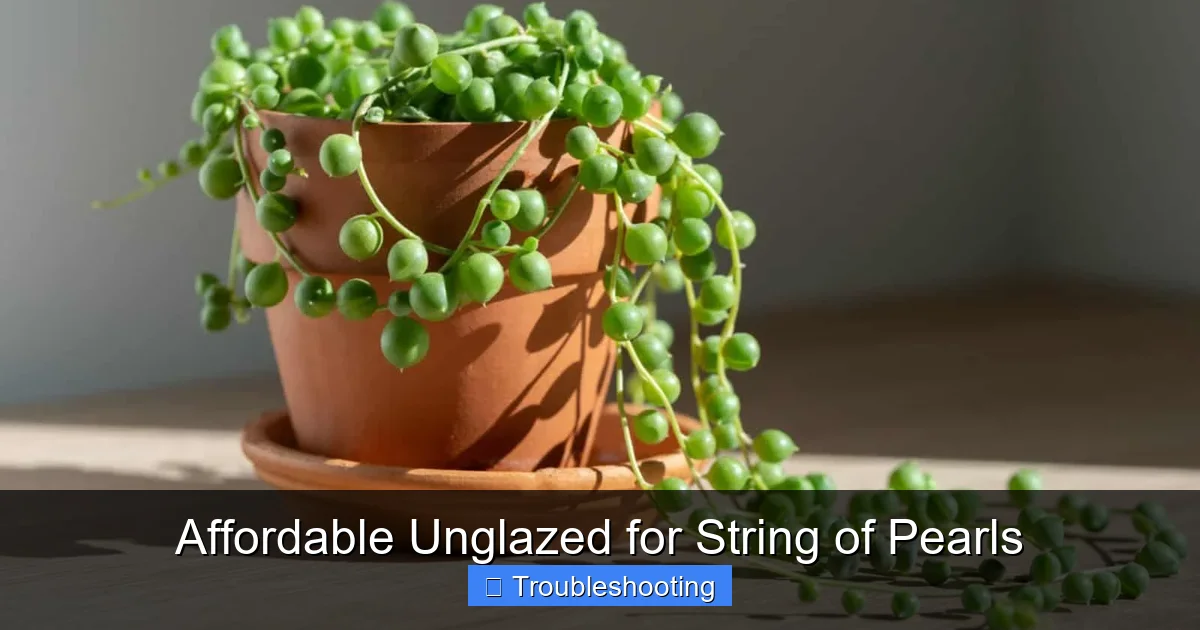
Affordable Unglazed for String of Pearls
Choosing the right pot is critical for String of Pearls health. Affordable unglazed terracotta and clay pots offer superior breathability and drainage compared to glazed or plastic options, significantly reducing the risk of root rot. This guide covers everything you need to know to select, prepare, and maintain the perfect budget-friendly unglazed home for your trailing succulent.
Key Takeaways
- Unglazed pots breathe: Terracotta and clay wick moisture away from the soil, preventing the soggy conditions that kill String of Pearls.
- Drainage holes are non-negotiable: Even the best unglazed pot fails without adequate holes; always verify before buying.
- Size matters more than you think: A pot only 1-2 inches wider than the root ball prevents excess soil from holding water.
- Affordable does not mean low quality: Basic terracotta from hardware stores often outperforms expensive decorative glazed ceramics for this plant.
- Pre-soak new pots: Submerging new unglazed pots in water for an hour prevents them from stealing moisture from the soil initially.
- Watch for mineral buildup: White crust on the exterior is normal; scrub it off annually to keep pores open.
- Elevate your pots: Using pot feet or a rack improves airflow underneath, maximizing the drying benefits of unglazed clay.
Quick Answers to Common Questions
Can I use a regular terracotta pot from the hardware store for String of Pearls?
Yes, standard hardware store terracotta pots are excellent and affordable. Choose a wide, shallow “azalea” shape over a deep standard shape, ensure it has drainage holes, and soak it overnight before planting.
Why are my String of Pearls rotting in a terracotta pot?
Rotting in terracotta usually means the soil mix is too water-retentive (too much peat/coir), the pot has no drainage holes, the pot sits in a water-filled saucer, or you are watering too frequently. Switch to a gritty mix and water only when the pot feels light.
Do I need to seal my terracotta pot?
No, sealing is optional. Sealing the exterior reduces the white mineral crust and staining on furniture but slightly slows evaporation. Never seal the interior — that defeats the purpose of using unglazed clay for drainage and breathability.
How often should I water String of Pearls in an unglazed pot?
There is no set schedule. Lift the pot; when it feels surprisingly light and the clay walls feel warm and dry, water thoroughly. This could be every 5-7 days in summer and every 3-4 weeks in winter. Always let the pot drain completely.
Can I put my terracotta pot inside a decorative cachepot?
Yes, but you must place pebbles or pot feet at the bottom of the cachepot so the terracotta pot never sits in drainage water. Remove the inner pot to water, let it drain fully in the sink, then return it to the cachepot.
📑 Table of Contents
- Why Your String of Pearls Begs for Unglazed Clay
- Understanding the Science: Porosity and Root Health
- Shopping Smart: Where to Find the Best Deals
- Critical Features: What to Look For (And Avoid)
- Prepping Your New Pot: The Steps You Cannot Skip
- The Perfect Soil Mix for Unglazed Pots
- Watering Strategy: Working With the Clay, Not Against It
- Troubleshooting Common Unglazed Pot Issues
- Creative Display Ideas That Maximize Plant Health
- Propagation Station: Cheap Pots for Free Plants
- Long-Term Care: Keeping Your Pots Alive for Decades
- Conclusion: Simple Clay, Spectacular Results
Why Your String of Pearls Begs for Unglazed Clay
If you have ever watched a String of Pearls turn into a string of mush, you know the heartbreak. This quirky succulent, with its pea-like leaves trailing over the edge of a pot, is notoriously picky about wet feet. The number one killer? Soggy soil. That is where the magic of an affordable unglazed for string of pearls setup comes into play. Unlike plastic or glazed ceramic, unglazed terracotta and clay are porous. They breathe. They pull excess moisture out of the potting mix and evaporate it into the air. It is like giving your plant a built-in safety net against overwatering.
Many plant parents assume they need fancy, expensive containers to keep succulents happy. The truth is often the opposite. A simple, inexpensive terracotta pot from the local garden center or hardware store is frequently the superior choice for this specific plant. The porous nature of the clay mimics the arid, well-draining environments these plants call home in Southwest Africa. In this guide, we will walk through why unglazed is best, how to pick the right one without breaking the bank, and the small preparation steps that make a massive difference in long-term plant health.
Understanding the Science: Porosity and Root Health
How Unglazed Clay Works
Think of an unglazed pot like a sponge made of rock. When you fire clay at relatively low temperatures without a glass-like glaze coating, you leave microscopic pores open throughout the material. Water molecules inside the damp soil are drawn to these dry pores through capillary action. Once the water reaches the outer surface of the pot, it evaporates. This creates a constant, gentle wicking effect. The soil dries from the outside in, creating an oxygen-rich environment around the roots. String of Pearls roots need oxygen just as much as they need water. Without it, they suffocate and rot.
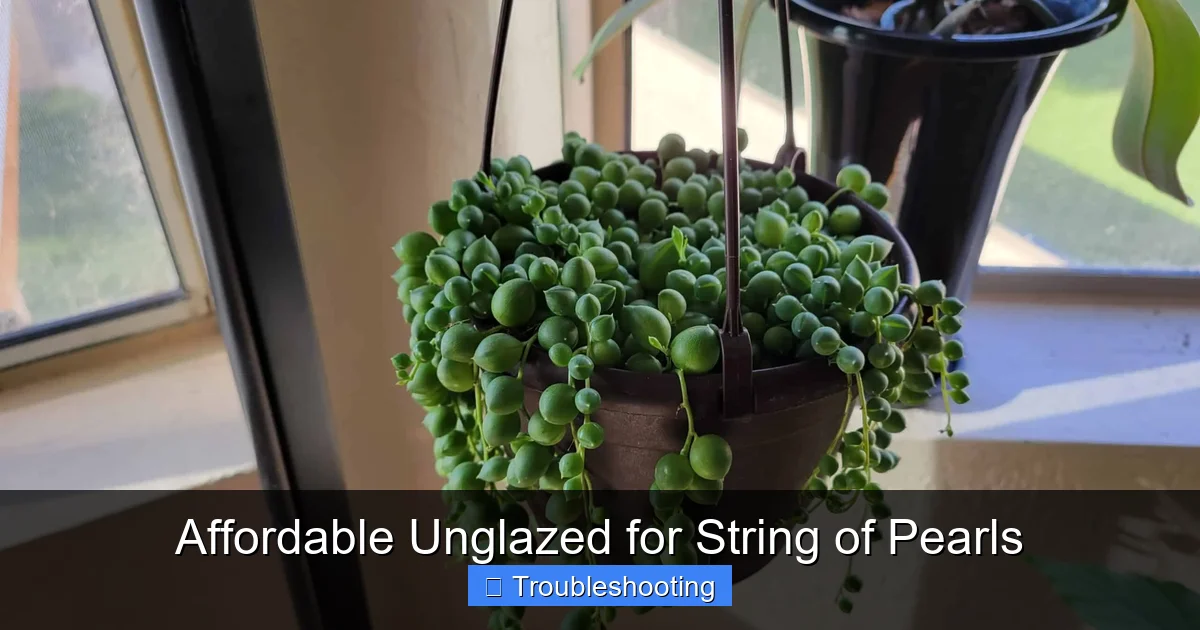
Visual guide about Affordable Unglazed for String of Pearls
Image source: justhouseplants.com
The Danger of Glazed and Plastic Pots
Glazed ceramics and plastic pots are essentially sealed containers. They trap moisture. The only escape route for water is the drainage hole at the bottom and the very top surface of the soil. In a deep pot, the bottom stays wet for days. For a plant with shallow, delicate roots like String of Pearls, this is a death sentence. The “perched water table” — that layer of saturated soil at the bottom of the pot — sits right where the roots live. An affordable unglazed for string of pearls pot eliminates this perched water table much faster because the entire sidewall of the pot acts as a drainage surface.
Temperature Regulation Benefits
There is a bonus benefit to clay: thermal mass. Thick terracotta walls buffer the roots against sudden temperature swings. On a hot afternoon, the clay absorbs heat, keeping the root zone cooler. On a chilly night, it releases stored warmth. Plastic pots offer zero insulation. They heat up fast and cool down fast, stressing the roots. This stability is especially helpful if you keep your plants near a drafty window or a heating vent.
Shopping Smart: Where to Find the Best Deals
Big Box Hardware Stores
Do not overlook the garden centers at Home Depot, Lowe’s, or Menards. They carry standard terracotta pots in massive volumes. You can often find a classic 6-inch or 8-inch clay pot for under five dollars. These are the workhorses of the plant world. They are not pretty — they usually have a rim lip and a single drainage hole — but they function perfectly. Look for the “Aztec” or “Standard” lines. Avoid the “premium” labeled ones which are often the exact same clay at double the price.
Local Nurseries and Garden Centers
Independent nurseries frequently have a “pot yard” or a section of basic terracotta. Prices are competitive, and the staff usually knows which pots have the best drainage hole placement. Supporting local business is a win-win. Ask if they have “seconds” — pots with minor cosmetic chips or discoloration sold at a steep discount. Since String of Pearls covers the pot quickly anyway, a small chip on the rim is irrelevant.
Online Bulk Buying
If you have a growing collection or plan to propagate, buying in bulk online saves serious money. Sites like Amazon, Uline, or specialty pottery suppliers sell cases of 4-inch, 6-inch, or 8-inch pots. The per-unit cost drops dramatically. Just check reviews for shipping breakage rates. A case of twelve 6-inch pots often costs roughly the same as three individual pots at a boutique shop.
Thrift Stores and Estate Sales
This is the treasure hunt method. Thrift stores, Goodwill, Salvation Army, and estate sales are goldmines for vintage terracotta. Older pots were often fired at higher temperatures, making them more durable and less prone to cracking in freeze-thaw cycles (if you garden outdoors). You can find unique shapes — wider bowls, lower profiles — that are actually better for String of Pearls than standard deep pots. Prices are often fifty cents to a dollar. Scrub them well with a diluted bleach solution (1 part bleach to 9 parts water) before use to kill any lingering pathogens.
Discount and Dollar Stores
Stores like Dollar Tree, Five Below, or the seasonal section at Target often carry small terracotta pots in spring and summer. They are usually tiny (2-4 inches), perfect for rooting cuttings or starting pups. Quality varies; check the bottom for a drainage hole before you leave the aisle. Some decorative “pots” are actually cachepots with no hole. Those are useless for direct planting unless you drill them.
Critical Features: What to Look For (And Avoid)
Drainage Holes: Quantity and Placement
One hole is the minimum. Two or three are better. A single central hole can easily get clogged by a piece of soil or a root mat. Multiple holes distributed across the bottom ensure water exits even if one gets blocked. Some wider, bowl-shaped pots have a ring of holes around the perimeter. This is ideal. It promotes even drying across the entire bottom surface. If you find a perfect pot with only one hole, you can carefully drill more using a masonry bit and a steady hand. Wear safety glasses and keep the bit lubricated with water to prevent cracking the clay.
Shape Matters: Wide and Shallow Wins
String of Pearls has a shallow root system. It spreads horizontally, not vertically. A deep, narrow “standard” pot shape holds a column of soil that stays wet at the bottom long after the top is dry. A wide, shallow “azalea” pot or a bulb pan is vastly superior. The soil volume is spread out, increasing the surface area for evaporation. The roots can colonize the whole width without ever sitting in a swamp. When browsing for an affordable unglazed for string of pearls container, prioritize width over depth. A 10-inch wide by 4-inch deep bowl is better than a 6-inch wide by 8-inch deep cylinder.
Wall Thickness: The Goldilocks Zone
Thin-walled pots dry out too fast, especially in hot, dry climates or indoors with heating running. You will water constantly. Thick-walled pots hold a reservoir of moisture in the clay itself, buffering the soil. They also insulate better. However, extremely thick, heavy pots are expensive and hard to move. Aim for a medium wall thickness — roughly 3/8 to 1/2 inch. Tap the pot with a knuckle. A clear, high-pitched “ring” usually indicates a solid, well-fired, medium-thickness wall. A dull “thud” suggests either very thick, dense clay or potential internal cracks/under-firing.
The Rim Lip: Functional, Not Just Decorative
That rolled rim on a standard terracotta pot? It serves a purpose. It stiffens the top edge, preventing chips and cracks from handling. It also gives you a grip to lift the pot. Smooth, straight-cut rims on cheaper imported pots chip instantly. A chipped rim compromises the structural integrity of the whole pot. Spend the extra fifty cents for the rolled rim. Your back and your floors will thank you when you move a heavy, wet pot.
Avoid Saucers Attached to the Pot
Some cheap terracotta pots come with a permanently attached saucer. Do not buy these. The saucer traps the water that the porous clay just worked hard to evaporate. It creates a humid microclimate right at the drainage holes, encouraging salt buildup and root rot. If the pot has a matching separate saucer, buy that instead. You can dump the water out. Better yet, use pot feet or risers inside a larger decorative tray so the pot never sits in runoff.
Prepping Your New Pot: The Steps You Cannot Skip
The Overnight Soak
Brand new terracotta is bone dry. It is thirsty. If you put damp soil into a dry pot, the clay will instantly wick moisture away from the roots, leaving the root ball desiccated before the plant can establish. Submerge the entire pot in a bucket or tub of clean water. Let it soak for at least one hour, preferably overnight. You will see bubbles rising as air escapes the pores. When the bubbles stop, the pores are saturated. The pot is now “neutral” — it won’t steal water from the soil, but it will still wick excess moisture away. This single step dramatically improves transplant success rates.
Sanitizing Used or Thrifted Pots
If you scored a deal at a thrift store or are reusing a pot from a deceased plant, sanitation is mandatory. Old soil harbors fungus gnats, fungal spores, bacteria, and salt crust. Scrub the pot inside and out with a stiff brush and hot, soapy water. Rinse thoroughly. Then soak in a 10% bleach solution (1 part household bleach to 9 parts water) for 30 minutes. Rinse again until the bleach smell is gone. Finally, do the overnight water soak described above. This resets the pot to a clean, safe state.
Sealing the Outside (Optional but Useful)
Some growers dislike the white mineral deposits (efflorescence) that bloom on the outside of terracotta. It is harmless — just salts from water and fertilizer being pulled through the clay. If you want to prevent it, you can seal the exterior only with a breathable masonry sealer or even a couple of coats of clear matte acrylic spray. Never seal the inside. That defeats the entire purpose of buying unglazed. Sealing the outside slows evaporation slightly but keeps the pot looking clean. It also reduces staining on shelves or floors.
Adding Pot Feet or Risers
Airflow underneath the pot is just as important as airflow through the walls. A pot sitting flat on a tray or shelf creates a stagnant, humid pocket at the drainage holes. Buy a set of terracotta pot feet (often sold as “pot toes”), use three wine corks, or flip three small plastic bottle caps upside down. Elevate the pot 1/4 to 1/2 inch. This allows the bottom to dry completely and prevents roots from growing out the holes into the saucer. It also protects your furniture from moisture rings.
The Perfect Soil Mix for Unglazed Pots
Why Standard Potting Soil Fails
Bagged “potting mix” or “potting soil” is designed to retain moisture for thirsty tropicals. It contains peat moss, coconut coir, and often water-retention crystals. In an unglazed pot, this mix will still stay too wet for too long. The clay helps, but it cannot overcome a fundamentally waterlogged medium. You need a mix that is mostly air space when wet. The particles must be large and inorganic.
The DIY Gritty Mix Recipe
This is the gold standard for String of Pearls in terracotta. Mix equal parts by volume:
1 part Pumice (or Perlite, but Pumice is heavier and doesn’t float)
1 part Coarse Sand (Builder’s sand, sharp sand, or poultry grit — NOT play sand or beach sand)
1 part Pine Bark Fines (screened to 1/4 inch or smaller, often sold as “orchid bark” or “soil conditioner”)
That’s it. No peat. No compost. No topsoil. This mix drains in seconds. It dries in hours in a terracotta pot. It mimics the rocky, gritty slopes where these plants grow wild. You can buy the ingredients in bulk at landscape supply yards for a fraction of the cost of bagged succulent mix.
Pre-Mixed Options That Work
If mixing feels overwhelming, look for bags labeled “Gritty Mix,” “Bonsai Jack,” “Superfly Bonsai,” or “Cactus/Succulent Mix with Pumice.” Avoid anything with “Moisture Control” or “Feeds for 6 Months” on the bag. Read the ingredient list. The first three ingredients should be inorganic (pumice, perlite, sand, expanded shale, calcined clay). Organic matter (bark, coir, peat) should be a minor component, ideally third or less of the volume.
Top Dressing: Pretty and Practical
After planting, cover the soil surface with a 1/2 inch layer of horticultural grit, chicken grit, aquarium gravel, or small decorative stones. This does three things: it keeps the lightweight pine bark from blowing away, it prevents the “crust” from forming on the soil surface which repels water, and it looks finished. It also creates a dry barrier between the damp soil and the pearls resting on the rim, reducing rot at the contact point.
Watering Strategy: Working With the Clay, Not Against It
The “Weight Test” Method
Forget calendar schedules. Forget moisture meters (they are notoriously inaccurate in gritty mixes). Learn the weight of your pot. Lift it immediately after a thorough watering. Feel the heft. Lift it again in two days. Three days. When it feels startlingly light — like the pot is empty — the mix is dry. The clay walls will also feel warm and dry to the touch, not cool and damp. That is your signal to water. In summer, this might be every 5-7 days. In winter, every 3-4 weeks. The affordable unglazed for string of pearls pot makes this weight change obvious because the clay itself loses significant water weight.
Bottom Watering vs. Top Watering
Top watering is fine if you use a narrow spout and avoid wetting the pearls. Wet pearls in a humid spot rot fast. Bottom watering is excellent for terracotta. Place the pot in a tray of water for 10-15 minutes. The dry clay and soil will wick water up from the bottom until the top layer is moist. Remove and let drain fully. This ensures even saturation without disturbing the top dressing or splashing the leaves. It also encourages roots to grow downward. Do not leave the pot sitting in water longer than 20 minutes.
Seasonal Adjustments
String of Pearls goes semi-dormant in low light/cool temps (winter). Growth stops. Water needs plummet. The terracotta will stay dry for weeks. Resist the urge to water “because it’s Tuesday.” Only water when the pot is light and the pearls show slight wrinkling/softness — the “raison test.” In spring, as light increases, the pot will dry faster. Ramp up frequency gradually. The clay pot is your best visual and tactile indicator of this cycle.
Troubleshooting Common Unglazed Pot Issues
White Crust (Efflorescence)
That fuzzy white powder on the outside? It is mineral salts — calcium, magnesium, fertilizer residue — pulled from the water as it evaporates through the pores. It is harmless to the plant. It actually proves the pot is working! If you hate the look, scrub the dry pot with a wire brush and vinegar water (1:4 ratio). Rinse well. Sealing the exterior (as mentioned earlier) prevents it from returning.
Mold or Algae on the Exterior
Green or black fuzzy growth on the outside means the pot is staying too wet, the air is stagnant, or the light is too low. Increase airflow (fan), move to brighter light, or ensure pot feet are used. Scrub with the vinegar solution. If it persists, the mix may be too organic/retentive. Repot into a grittier mix.
Cracking in Winter
Terracotta absorbs water. Water expands when it freezes. If you leave a wet terracotta pot outdoors in freezing temps, it will crack or flake (spall). If you are in a freeze zone, bring pots indoors or into a garage for winter. Empty them if possible. If they must stay out, ensure they are bone dry and elevated off the frozen ground. High-fired “frost-proof” terracotta exists but costs more. Standard affordable pots are rarely rated for hard freezes.
Soil Falling Out Drainage Holes
Large holes in cheap pots let the gritty mix escape. Place a piece of drywall mesh tape (self-adhesive fiberglass tape for drywall joints) over the holes inside the pot before adding soil. It lets water out, keeps mix in, never clogs, and costs pennies. A coffee filter works temporarily but rots. Rocks or shards at the bottom create a perched water table — avoid the “drainage layer” myth.
Pot Dries Too Fast
In extreme heat, low humidity, or high wind, a small terracotta pot can dry in 24 hours. Options: group pots together to create a humid microclimate, move to a shadier afternoon spot, use a slightly larger pot (more soil volume), or add a bit more pine bark to the mix to hold slightly more water. You can also partially bury the pot in a larger cachepot with moist peat moss around the sides (double potting) for vacations.
Creative Display Ideas That Maximize Plant Health
Hanging Baskets: The Classic Look
String of Pearls is a trailer. It wants to hang. Standard terracotta pots have a rim lip. You can buy wire hangers that clamp onto this lip (often sold as “pot hangers” or “macrame hangers with clips”). Ensure the hanger supports the weight — wet clay + wet soil is heavy. Use a swivel hook so you can rotate the plant for even light. Hang where the pearls get bright, indirect light but the pot itself gets some airflow. A corner with a ceiling fan is perfect.
Wall Mounted Planters
Shallow terracotta bowls or “wall pockets” (half-moon shapes with a flat back) are stunning mounted on a fence or interior wall. They dry incredibly fast because the back is exposed to air too. Drill mounting holes in the flat back (carefully, with a masonry bit) before planting. Use heavy-duty anchors. This is a great way to display a collection vertically.
Tiered Plant Stands
A metal or wood tiered stand lets you group multiple pots. Place the String of Pearls on the top tier where it can cascade freely without touching the shelf below. Lower tiers can hold upright succulents that enjoy the same conditions. The stand elevates everything for airflow. Look for stands with open wire shelves, not solid wood, to maximize the clay’s breathing ability.
Cachepot Style (With a Twist)
If you love the look of a decorative glazed pot but need the function of clay, use the “pot-in-pot” method. Plant in a plain terracotta pot that fits inside your pretty cachepot. Crucial: Put a layer of pebbles or pot feet at the bottom of the cachepot so the terracotta pot does not sit in drainage water. Remove the inner pot to water, let it drain in the sink, then place it back. You get aesthetics and healthy roots.
Propagation Station: Cheap Pots for Free Plants
Why Unglazed Wins for Cuttings
Propagating String of Pearls is easy — lay strands on soil, pin them down, keep slightly damp. But “slightly damp” in a plastic tray becomes “swamp” in hours. Tiny 2-inch or 3-inch terracotta pots (often sold as “seedling pots” or “bonsai starter pots”) are perfect. They dry fast, preventing the fungal damping-off that kills delicate new roots. You can fit dozens on a boot tray. They cost cents each.
The “Community Pot” Method
Take a wide, shallow 10-inch terracotta bulb pan. Fill with gritty mix. Lay 10-15 cuttings in a spiral pattern. Pin with floral pins or bent paperclips. One pot, many plants. The wide clay surface keeps the surface evenly moist but not wet. Once rooted (4-6 weeks), you have a full, sellable or giftable plant in one container. Much easier than managing 15 tiny pots.
Water Propagation Transition
If you root in water (popular for seeing roots), the transition to soil is the danger zone. Water roots are fragile and used to 100% humidity. Planting directly into a terracotta pot with gritty mix and bottom-watering for the first two weeks eases the shock. The clay maintains high humidity right at the root zone without sogginess. Mist the pearls daily. This method has a much higher success rate than planting water roots into plastic pots.
Long-Term Care: Keeping Your Pots Alive for Decades
Annual Deep Clean
Once a year, ideally in early spring before the growth spurt, unpot the plant (gently, keep the root ball intact). Scrub the empty pot inside and out with hot water and a stiff brush. Soak in the 10% bleach solution for 30 minutes. Rinse. Soak in clean water overnight. Repot with fresh gritty mix. This removes salt buildup inside the pores that eventually slows evaporation. It also lets you inspect roots for rot or pests. A well-cared-for terracotta pot lasts 20+ years.
Handling Salt Buildup Inside
If you see a hard white crust on the inside rim or upper walls, that is fertilizer salt. It can burn roots that touch it. Scrub it off during the annual clean. To prevent it, flush the pot monthly during growing season: water heavily from top until water runs freely out the bottom for a minute. This pushes salts down and out. Use fertilizer at 1/4 strength. String of Pearls is a light feeder.
Repairing Chips and Cracks
A chip on the rim is cosmetic. A crack running from the drainage hole up the side is structural. Hairline cracks can be stabilized with clear silicone aquarium sealant applied inside and out. Let cure 24 hours before soaking. Large cracks mean the pot is compromised. It will fail when the soil expands (wet) or freezes. Retire it to a non-structural use (tool holder, citronella candle base) and replace it. They are affordable enough that safety beats sentimentality.
Storing Empty Pots
Stack terracotta pots upside down on a shelf in a garage or shed. Place a sheet of newspaper or cardboard between each pot. They stick together via suction and mineral crust if stacked naked. The paper prevents the “terracotta weld.” Store them dry. If they are damp when stacked, mold grows between them. A dry stack survives winter freezing fine; a wet stack cracks.
Conclusion: Simple Clay, Spectacular Results
You do not need a green thumb or a fat wallet to grow a lush, trailing String of Pearls. You need the right environment. An affordable unglazed for string of pearls pot provides that environment passively, 24/7, without electricity or timers. It is the single most impactful tool in your kit. The porous walls forgive your heavy hand with the watering can. The wide, shallow shape respects the plant’s biology. The low cost lets you experiment, propagate, and expand your collection without fear.
Start with one standard 6-inch azalea pot from the hardware store. Soak it. Fill it with gritty mix. Plant your pearls. Water by weight. Watch what happens. The pearls firm up. The stems thicken. New growth shoots out from the crown. The trail lengthens. That is the terracotta effect. It is not magic. It is just physics and biology working together in a humble clay pot. Happy planting.
Frequently Asked Questions
What is the best soil mix for String of Pearls in a terracotta pot?
A gritty mix of 1 part pumice, 1 part coarse sharp sand, and 1 part pine bark fines is ideal. It drains instantly and dries quickly in porous clay, preventing root rot. Avoid standard potting soil with peat moss or moisture-retention crystals.
Why does my terracotta pot have white powder on the outside?
The white crust is efflorescence — mineral salts from water and fertilizer pulled through the clay pores as moisture evaporates. It is harmless and indicates the pot is working. Scrub it off with a wire brush and vinegar water if desired.
Can String of Pearls survive winter in a terracotta pot outdoors?
Only in frost-free zones (USDA 10+). In freezing temperatures, water inside the clay expands and cracks the pot. Bring pots indoors or into a garage for winter. Ensure soil is dry before storage to prevent cracking.
How do I stop soil from falling out of large drainage holes?
Place a piece of fiberglass drywall mesh tape (self-adhesive) over the holes inside the pot before adding soil. It allows water to exit but keeps the gritty mix in place permanently without clogging.
Is bottom watering better than top watering for terracotta pots?
Bottom watering is excellent for terracotta. It ensures even saturation of the gritty mix without disturbing the top dressing or wetting the pearls, which can cause rot. Soak for 10-15 minutes, then drain fully.
How long do cheap terracotta pots last?
With annual cleaning (scrubbing and bleach soak) and careful handling, a basic terracotta pot lasts 20+ years. They break from impact or freezing when wet, not from age. The low cost makes replacement easy if damaged.